The Top Mitsubishi Galant VR-4 Resource

Join the best E39A 1991-1992 Mitsubishi Galant VR-4 community and document your GVR4 journey.

  • Software Upgraded - Reset Your Password to Login
    In order to log in after the forum software change, you need to reset your password. If you don't have access to the email address you used to register your GVR4.org account, you won't be able to reset your password. In that case, follow the instructions here to regain access to the forum.

139/1000 Rebuild

gtluke

Well-known member
Joined
Sep 16, 2001
Messages
4,210
Location
dirty jersey
whoa you are replacing the ball joints on those control arms? you know new control arms with new ball joints in there are only $150 shipped for the pair right?
 

NateCrisman

Well-known member
Joined
Nov 22, 2008
Messages
2,054
Location
Blairstown, NJ
You know two new ball joints from NAPA are $36/pair right? They came out EASY once you take off the snap ring. I don't know how everyone complains about bending the arm or making it weaker, both of mine came out with a 2 taps from a ball peen hammer. Not even enough force to put a ding on the threads. Seriously, I didn't even scratch the paint on the arm to take the joints out.

I suspect some people trying to get them out don't take off the rubber boot and the snap ring underneith then bend the arm beating the sh*t out of it till the snapring breaks. /ubbthreads/images/graemlins/rofl.gif


Anyway...off to the garage to ship some boxes and paint the rest. (raining like crazy, stuff will dry nearly instantly)
 
Last edited:

Redlinegvr4

Well-known member
Joined
Feb 24, 2003
Messages
1,791
Location
Tampa Bay
im a lil late commenting on this but wow! your doing an amazing job i cant wait to see this car when its done!
 

NateCrisman

Well-known member
Joined
Nov 22, 2008
Messages
2,054
Location
Blairstown, NJ
Im starting to receive all the parts I ordered to start actually putting #139 back together:

Summit Racing: $136
$25 russel -6 fuel filter
$30 prothane Tbelt side motor mount insert (had the other 3 laying around)
$52 15ft of -6 Aeroquip sockettless fuel line
$29 worth of -6 hose ends and fittings for fuel lines

My oem feed line was all mangled directly under the original fuel filter (that needed to be replaced for sure). Im planning to cut the oem line down by the steering rack and use a -6 tube nut & flare the stock line. Then run -6 sockettless hose to the aftermarket filter, to the rail, and to an Aeromotive fpr I kept from a previous parts car.


EnergySuspensionParts.com: $135 set of ES poly suspension bushings

JayRacing.com: $125 alternator relocation kit (oem alt, will fix typical alt death. My lower ic pipe is a bastard to get on with the alt in the way too)

Ebay: $4 skateboard bearings for the shifter cable/trans connection.

Rock Auto: $60
$17 steering rack boots
$16 front ball joints
$13 outer tie rod ends
$14 inner tie rod ends
Hopefully all these things show up by the end of this week so the assembly can really kick into high gear.

Still need to get the head to the machine shop for a deck, clean, and valve cut. Still need to do the port work on the head before I can take it. /ubbthreads/images/graemlins/banghead.gif
 

NateCrisman

Well-known member
Joined
Nov 22, 2008
Messages
2,054
Location
Blairstown, NJ
More pics tomorrow:
So this week was a little slow on progress, but I promise I will kick this cars ass next two weeks!

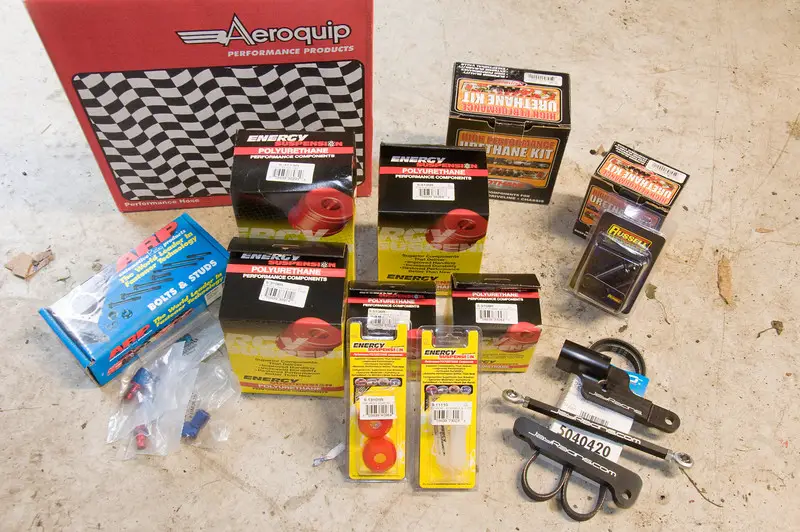
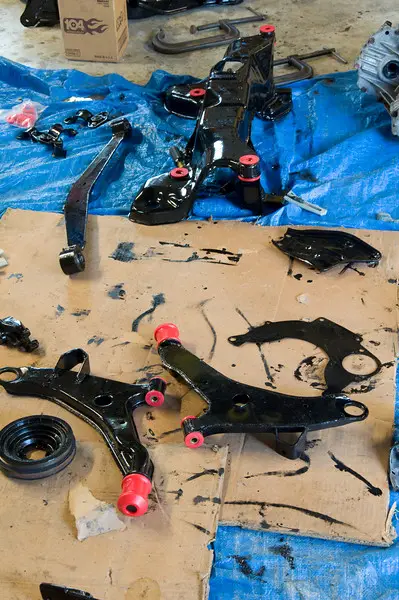
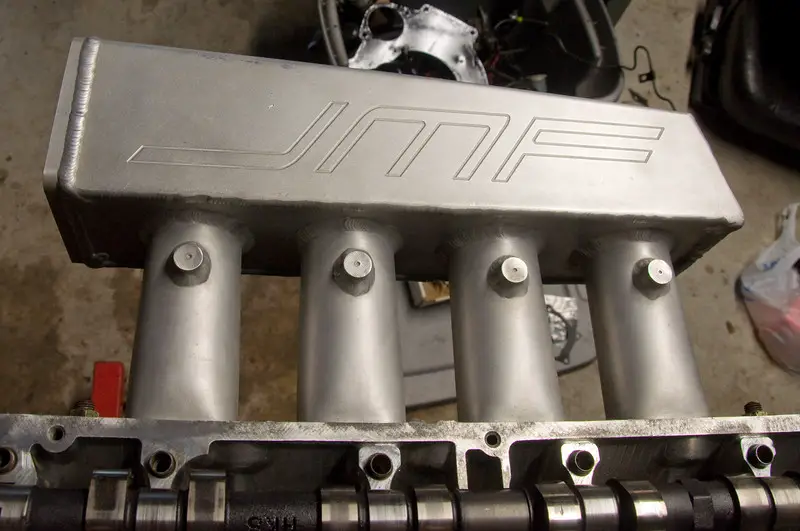
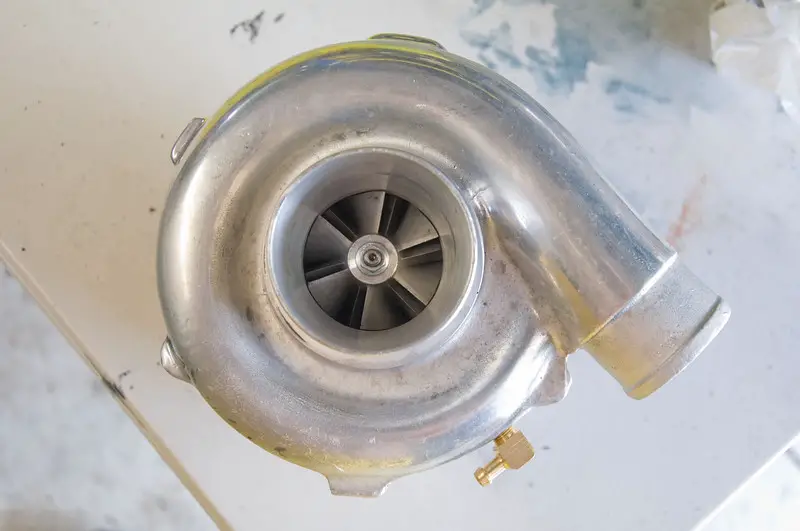
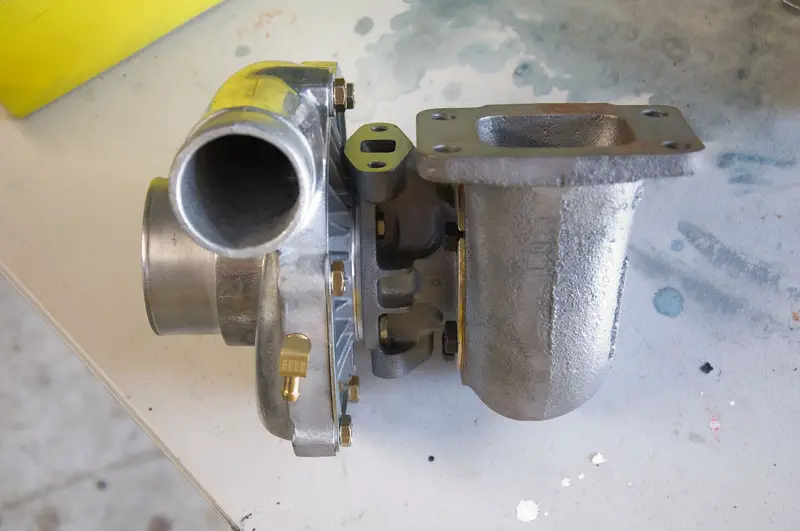
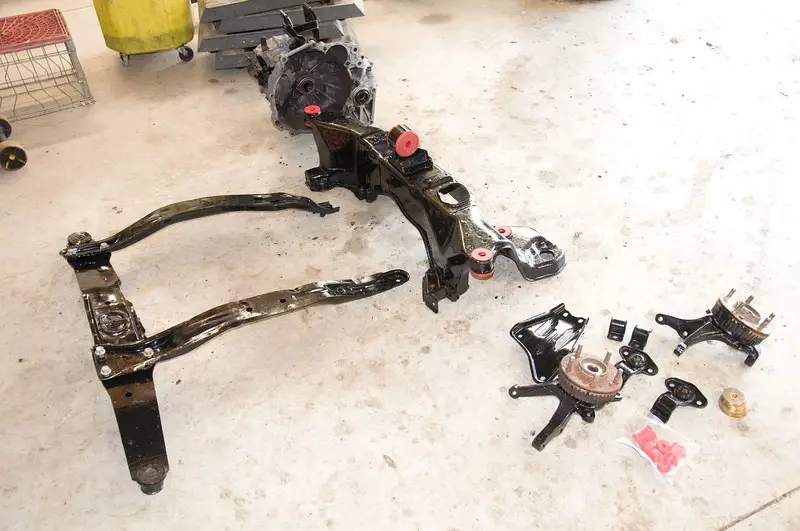
Pretty much all the parts I ordered are here (rock auto stuff not shown)
574842782_Joacv-L.jpg


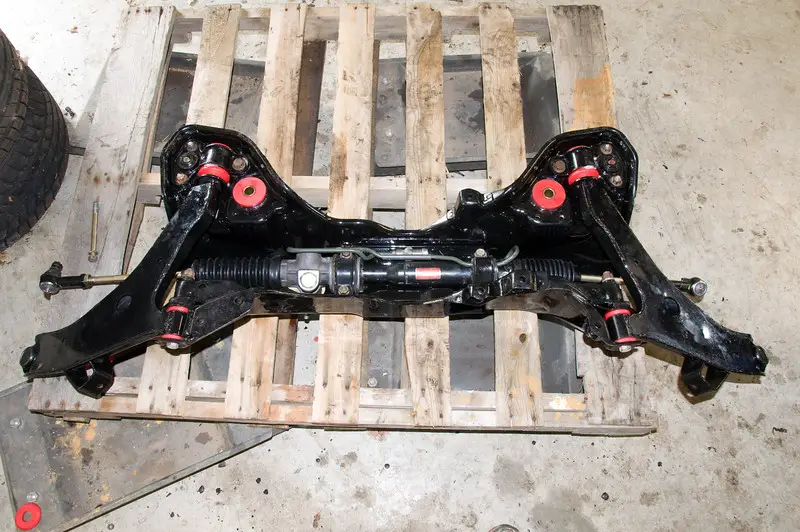
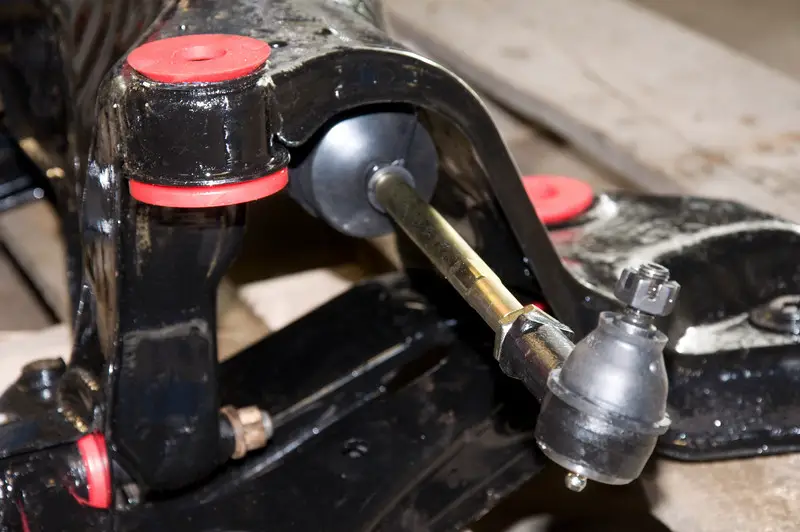
I did all the ES bushings this morning. Man, that sucked pressing the old bushings out, even with a real hydraulic press (from about 1920). ES mispackaged the lower rear control arm bushings, and Im missing one half as there were only 3 instead of 4. hopefully they'll just send me one. Also got the motor mount bushings all removed and ready for prothane, but they need to be cleaned and por painted first.
574845390_8q673-L.jpg


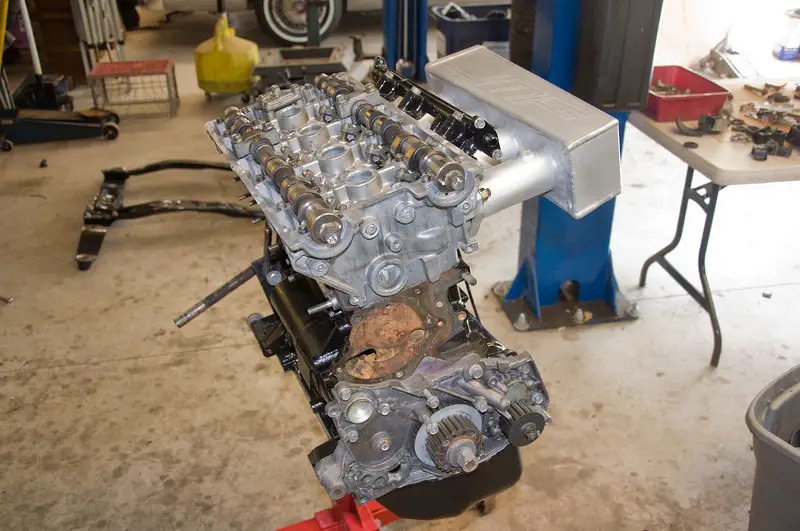
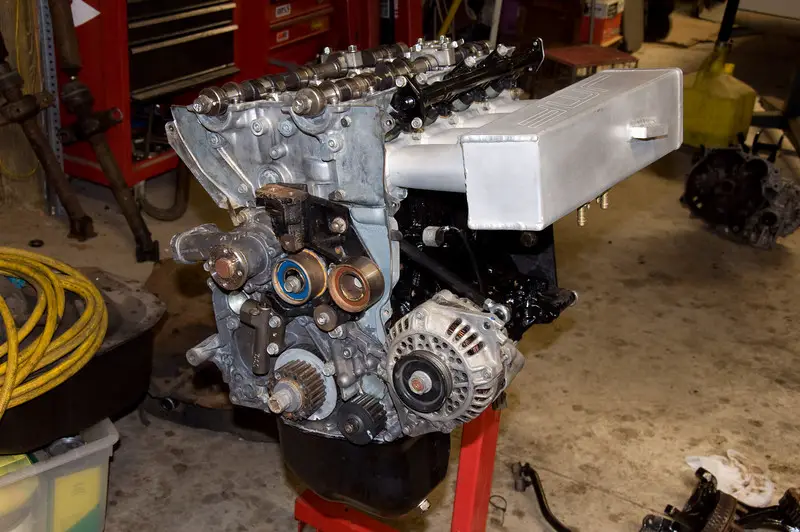
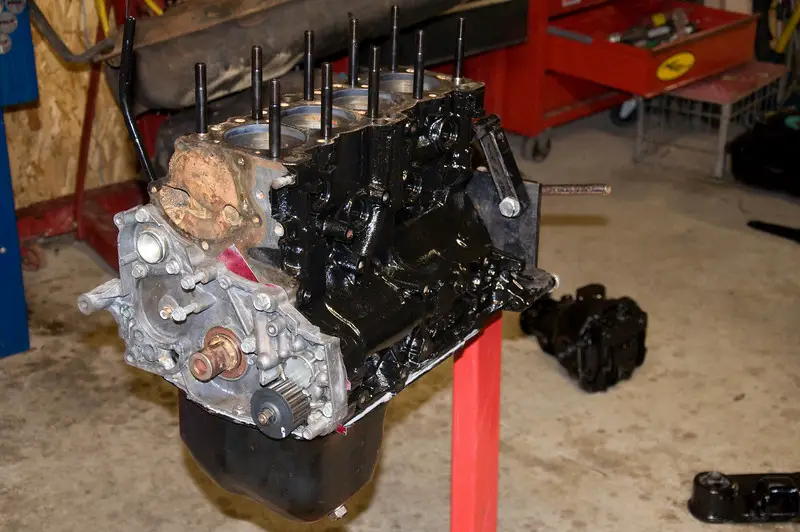
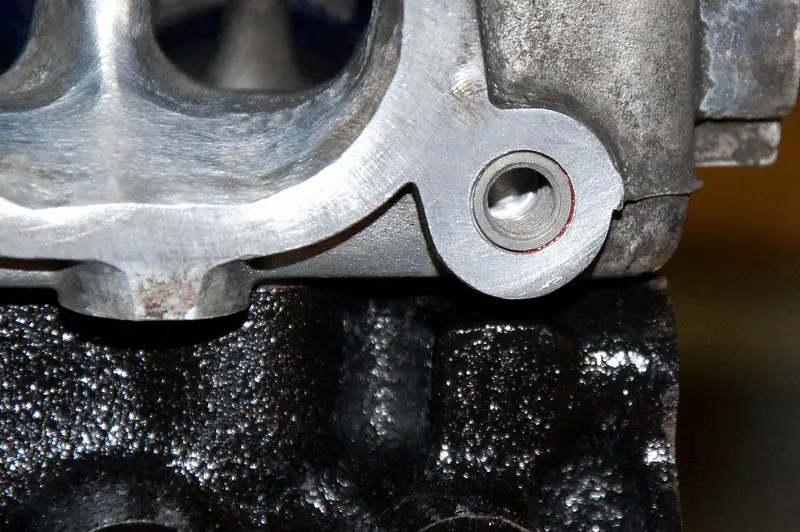
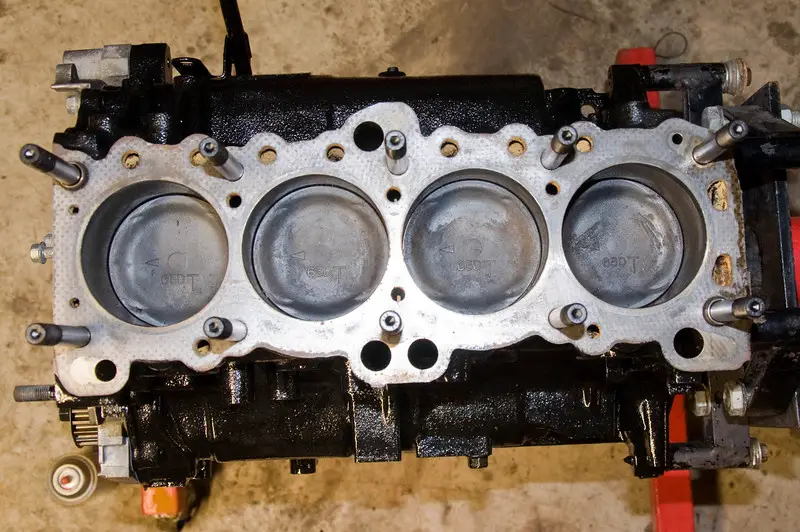
The shortblock got some work too: BSE done dirt cheap (flipped the bearings, $0.92 freeze plug from Napa, stub shaft donated from #828). front case installed, oil pan on, ARP's on.
575006822_dHmZh-L.jpg


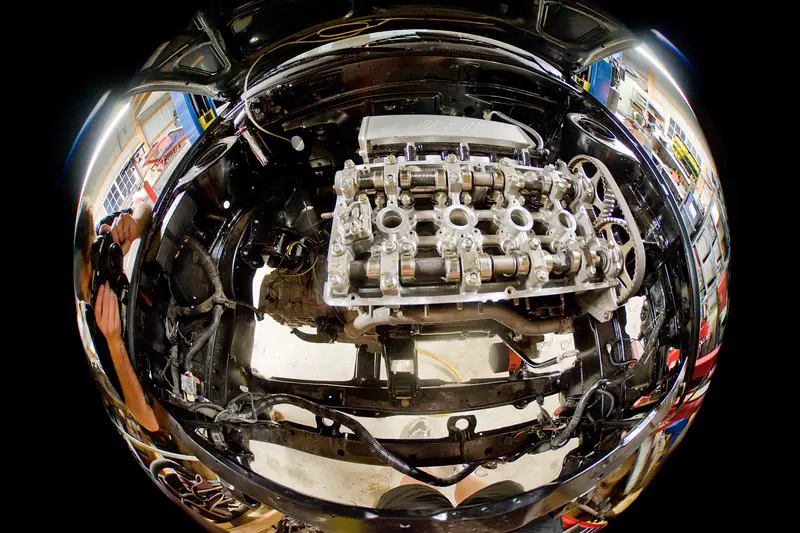
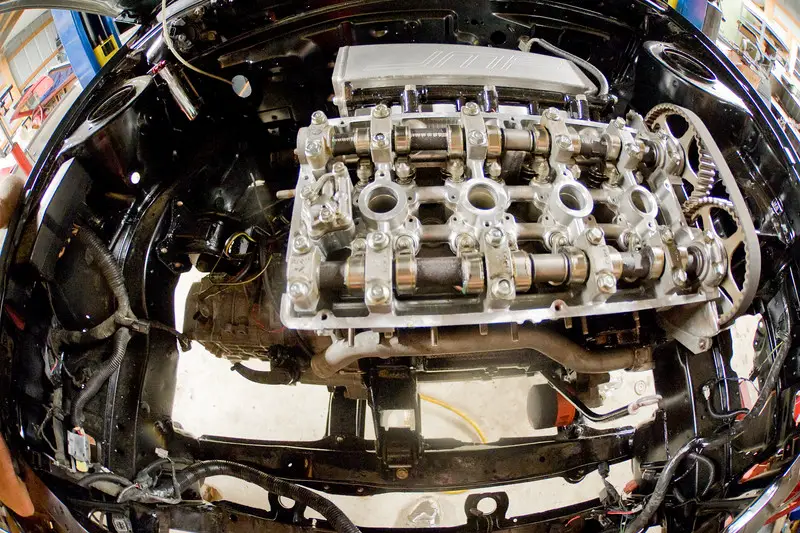
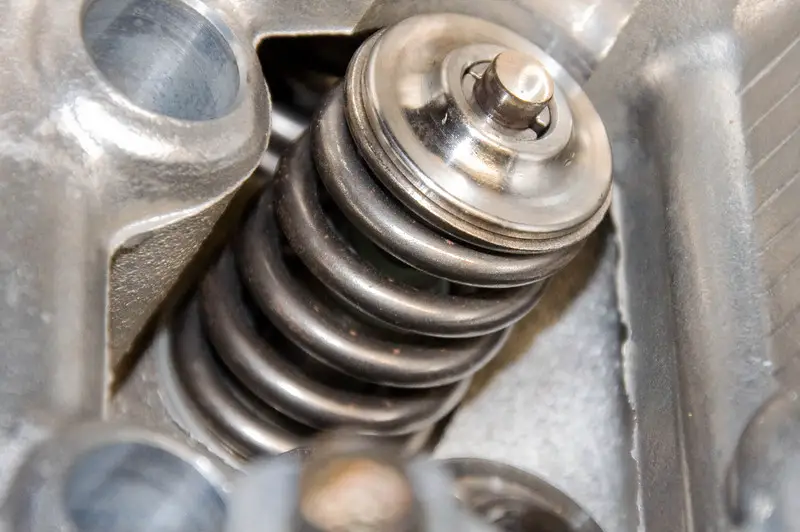
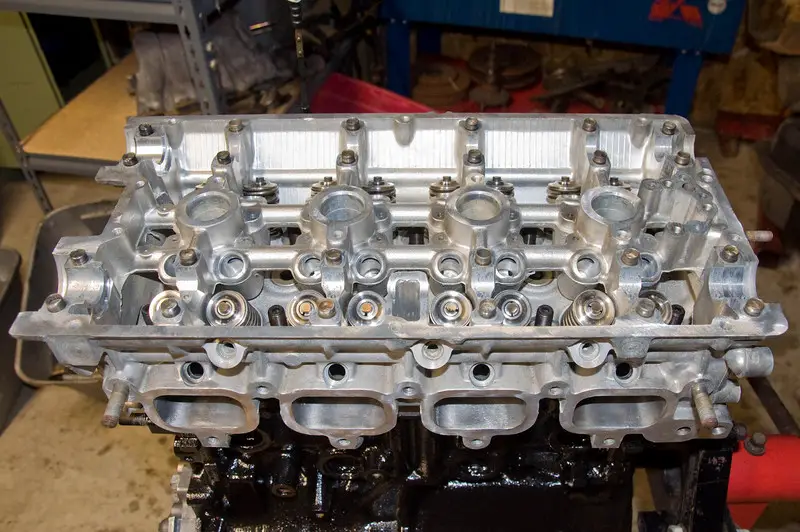
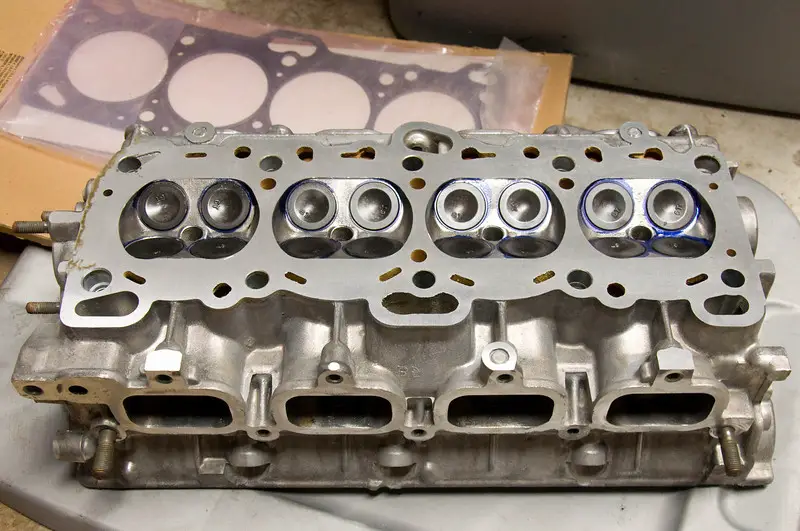
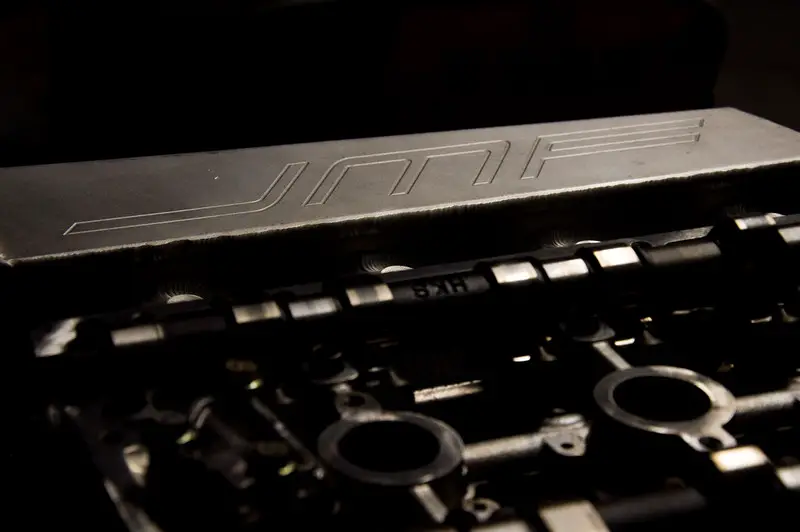
My head is done at the machine shop, picking that up monday. Basic valve job, clean, & deck. I did a light pocket port and gasket matched the exhaust ports. New valve stem seals. Ti retainers and a set of springs that tested at 10lb more seat pressure (minor upgrade). HKS 264I/272E cams are going in with stock gears. Stock valves, rockers, lifters.

Tuesday Im planning to get a good chunk done:
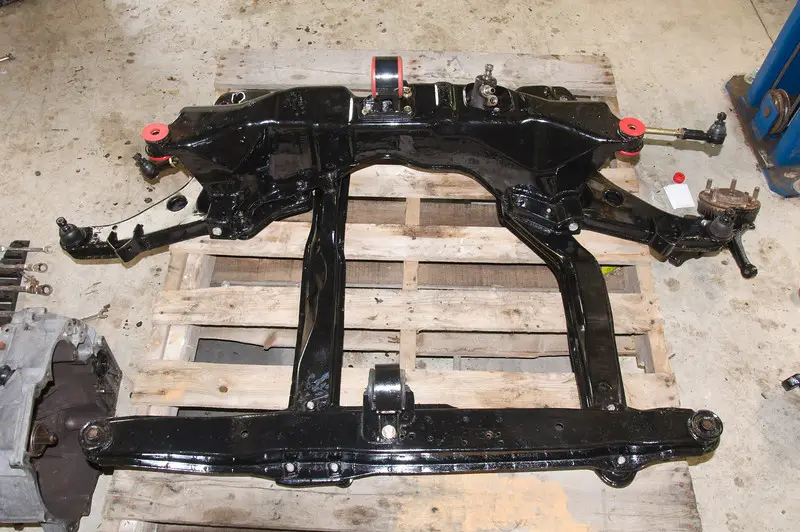
#1 r&r the steering rack with new wear parts.
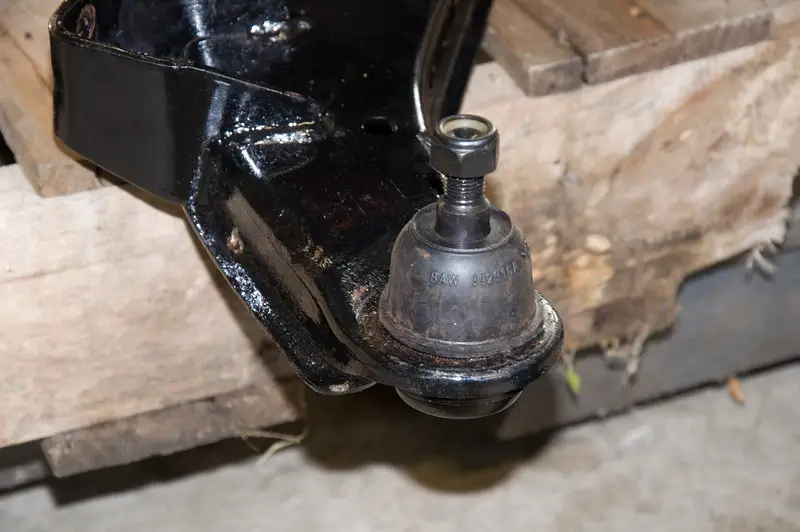
#2 put the rack, swaybar, and control arms on the front subframe. Put the front cradle together on a rolling pallet
#3 finish up the engine assembly (assembled head on, ofh, water pump, Tbelt parts, pulleys, and relocated alternator)
#4 get the trans and engine together and mounted to the front cradle.
 

NateCrisman

Well-known member
Joined
Nov 22, 2008
Messages
2,054
Location
Blairstown, NJ
Some pics:
New valvetrain parts. Should be good for a solid bump in rpm, then again I don't think I ever had float issues at 8000 with stock stuff anyway.
577839900_VovYb-L.jpg


Nice clean head:
577840622_ivbgE-L.jpg

577838072_SnvQQ-L.jpg


Fixed exh manifold threads: Time insert? im sure that's not spelled right. solid steel, likely better than original threads anyway.
577839728_jbffp-L.jpg


577838528_UxtVT-L.jpg


Bolted the head down..then find my torque wrench is gone...lent out to father in law I think./ubbthreads/images/graemlins/nono.gif

Slipped in the lifters and rockers, then went to install cams: no cam seals. /ubbthreads/images/graemlins/banghead.gif I thought I had a set, turns out they are Xcase output seals or something. They look just like cam seals and I swear I checked them like 2 months ago, thus didin't order a set.

So Im held up now on putting the motor back together until I can bolt the cams down.

On a good note, I got the JMF manifold really nice looking. All it took was a dish cleaning brillo pad w/ the blue soap. It took off the top layer of paint and made the whole thing semi-polished looking:
578747350_bHNg3-L.jpg


578747214_R4JRq-L.jpg


#139 will get new shoes off the last parts can I picked up (91 GSX) on tuesday:
576679513_aLsNM-L.jpg

17x7 wheels and Kumho tires. The wheels are Exel brand, and are pretty inexpensive so I might unmount one just to check weight and make sure it's not a 23lb lead wheel. /ubbthreads/images/graemlins/wink.gif

Tomorrow Im planning to put the front subframe together, then put the motor and trans together on the front subframe. Id' like to bolt the fuel/brake lines on, install the fuel tank, and get started on rear suspension assembly onto the car.
 

NateCrisman

Well-known member
Joined
Nov 22, 2008
Messages
2,054
Location
Blairstown, NJ
Some progress pics:

My new turbo showed up. $355 rebuilt from PTE. (remanufactured, sold on ebay). It's a PTE SC5031E. Pretty much the generic 50trim. Just need to order the 4bolt o2 housing flange and go visit Brent for fab work. Polished compressor housing as well, nice freebie.
582772816_vQ325-L.jpg

582772790_hzr3z-L.jpg

582772685_DwsaY-L.jpg


Here's what the rear end looks like. The hanging control arm is missing one half of the ES bushing, and I need to either clean up the ball joint threads or replace the joint. (sux). Axles and swaybar will go on once the control arm is in place.
582772959_KSJi7-L.jpg


Here's where Im at on the front end. F-ing steering rack is holding me up. I'm being indecisive, but really just should get off my but and get ahold of a 1g rack. The rack has to go in first before any other assembly starts so that's the hold up.
582772520_8FNNK-L.jpg


Motor: gotta drill out a broken water pump bolt, and when cam seals show up I can finish the assembly. Also want to order up a JNZfinishing PC'd valvecover to top it off cleanly. Indecisive on color too.;)
582772590_nE8LU-L.jpg


Im seriously getting itchy to finish and drive this car. Im going away on vacation for the last 2 weeks of August and Id really hate to not have it done before hand. Otherwise Im going to be walking around Disney World with "what do I have left to do" on my mind instead of just hanging out with my kids.
 
Last edited:

Quoting turbowop:
Quote:
I think when I'm done, this is going to end up to nice to daily drive or take out in the snow/salt.


Exactly the reason I quit driving mine on anything but nice sunny days.


From the looks of that stuff...it seems that POR15 stuff is exactly what you SHOULD do in order to daily drive it or drive it in SNOW/Salt haha!
/ubbthreads/images/graemlins/rofl.gif(
 

NateCrisman

Well-known member
Joined
Nov 22, 2008
Messages
2,054
Location
Blairstown, NJ
Quoting ihatefall:

If I can get around to it! I am going to do my car too!

I wonder if it comes in say a grey so that you can see oil drips and such more easily?


POR15 makes top coats in colors, but the first coat is only black unfortunately.
 

TWEAKD4

Well-known member
Joined
Mar 24, 2002
Messages
605
Location
Fort Wayne, IN
Great work. Can't wait to see the finished product. You should be a POR salesman after coating everything in it. /ubbthreads/images/graemlins/smile.gif
 

NateCrisman

Well-known member
Joined
Nov 22, 2008
Messages
2,054
Location
Blairstown, NJ
Today:

Figured I might as well quit worrying and just put the new parts onto the steering rack that came out of #931. I wish I had ordered a fresh DSM rack a few weeks ago, but it's just too late now to wait and hold up assembly work.
585148712_V9ckq-L.jpg


Put together the front subframes and control arms, sans swaybar. Bolted the engine mounts down. Set the whole thing onto a wood pallet on wheels.
585147529_u3sUg-L.jpg


New ball joints in front. easy to swap. WTF does everyone complain about?
585146010_RaHyc-L.jpg


Closeup pic of the new steering parts: inner & outer tie rod ends and new boots.
585146699_Wz4q7-L.jpg


Was waiting for a guy to pick up the engine out of that blue 1gawd, so I farted around with some minor engine block assembly. extracted a broken water pump bolt, installed the pump and some pulleys and shields. Test fitted that Jay Racing alternator relocation kit. It's super nicely made and fit well. Just hope I have no interference between the alt pulley and the unibody frame.
585145702_r6d47-L.jpg


Crossing my fingers for some cam seals to show up from JNZ so I can finish up the engine assembly, set it into the subframe, and get the clutch & trans bolted up. Going to the beach with my kids for wed/thur so friday could be a fun day if cams seals and that missing ES bushing show up the next few days.

Also bought a 5bolt T3 turbine housing today for a good price, so I can start bolting up the turbo system when that shows up. Things are looking good, although Im sure once the engine is in the car Ill find 40 other little annoyances to deal with in wiring/vac lines/ic pipes/sensors ect that will take me a long ass time to finish.
 

Terrance362

Well-known member
Joined
Aug 14, 2006
Messages
386
Location
Winston-Salem, NC
hey man I am lovin every bit of your build. keep the updates coming /ubbthreads/images/graemlins/grin.gif /ubbthreads/images/graemlins/worthy.gif /ubbthreads/images/graemlins/rofl.gif
 

NateCrisman

Well-known member
Joined
Nov 22, 2008
Messages
2,054
Location
Blairstown, NJ
Ok, Just got home from a mini vacation at the beach. Cams seals were in the mailbox. /ubbthreads/images/graemlins/applause.gif

So tomorrow Im going to finish the engine assembly (other than valve cover that I still haven't bought) and get it in the front subframe along with the clutch and trans. GTLuke is coming over on saturday night to help me stick the whole front assembly into the car. WOOOOOO HOOOOO
 

NateCrisman

Well-known member
Joined
Nov 22, 2008
Messages
2,054
Location
Blairstown, NJ
GTluke was awesome tonight. He drove out to help me put the engine in and pretty much everything went as planned:

Bolted on the flywheel, act clutch, transmission, starter motor, axles. Then we go to out the front assembly into the car. Ran into some dumb problems with getting the steering shaft knuckle lined up as well as the lift arms hitting the wood pallet. no biggie adjustments and we were in business. Put the trans mount on while luke played with the steering part.

So the engine, trans, and front subframes are bolted in. There was clearance enough for the alternator pully with the Jay Racing relocation kit without hammering in the frame rail. maybe 5mm of space?

A few pics. (I was using a 10.5mm DX fisheye lens that I cut the lens hoods off of on a full frame camera. It's a complete 180* view, pretty crazy)

588465329_UaMhu-L.jpg


588465014_rnA4L-L.jpg


588464304_ScF3J-L.jpg


Here's the same RAW file cropped as it would be on a DX nikon camera, you can see how there is significant additional view angle cut off compared to the FX sensor D3. (I'm a camera dork)
588464550_7nKVZ-L.jpg


Looks like next week Im going to keep cranking away on assembling the car a bit each day. I don't think it's unrealistic for it to be running by the end of the month/ubbthreads/images/graemlins/rock.gif
 

"Here's the same RAW file cropped as it would be on a DX nikon camera, you can see how there is significant additional view angle cut off compared to the FX sensor D3. (I'm a camera dork)"


dude your camera cost more than most of the car's I have owned! WTF! you are a camera dork! But then again, I almost bought a D90 in January during the sales week in Tokyo. Decided against it last min!
 

NateCrisman

Well-known member
Joined
Nov 22, 2008
Messages
2,054
Location
Blairstown, NJ
Yes it's expensive, but I'm a photographer for my job. It has some features that I really take advantage off: dual card slots for duplication, "all day" battery, 9fps speed, insane ISO and dynamic range (blows away film), 300k click shutter life. I could make due with just about anything, but camera bodies that last more than a year are worth having when I use it this much. And obviously when Im relying on the camera for very important event coverage, reliability is of utmost importance. The D3 is more than robust in build quality. My D90 by comparason is a plastic toy that won't survive much abuse. My D3 has shot for hours in pouring rain at motocross races, covered in dust and mud. I have heard of a wedding photog that fell in a hottub at a wedding hotel and a D3/70-200 went under and survived to shoot the rest of the event.

Anyway, yes Im a camera dork, but I don't have a $5000 camera body for shooting pictures of my dog in the backyard. I make my living with this thing, as meager as it is.
406876335_8RRsk-S.jpg
325067180_BZRU6-S-1.jpg
564613957_aTdpN-S.jpg
 
Last edited:
Support Vendors who Support the GVR-4 Community
Boosted Fabrication ECM Tuning ExtremePSI Fuel Injector Clinic Jacks Transmissions JNZ Tuning Kiggly Racing Morrison Fabrications RixRacing RockAuto RTM Racing STM Tuned
Top