The Top Mitsubishi Galant VR-4 Resource

Join the best E39A 1991-1992 Mitsubishi Galant VR-4 community and document your GVR4 journey.

  • Software Upgraded - Reset Your Password to Login
    In order to log in after the forum software change, you need to reset your password. If you don't have access to the email address you used to register your GVR4.org account, you won't be able to reset your password. In that case, follow the instructions here to regain access to the forum.

The never ending build of 1062.

Galantvr41062

Well-known member
Joined
Aug 20, 2007
Messages
410
Location
plymouth, MN
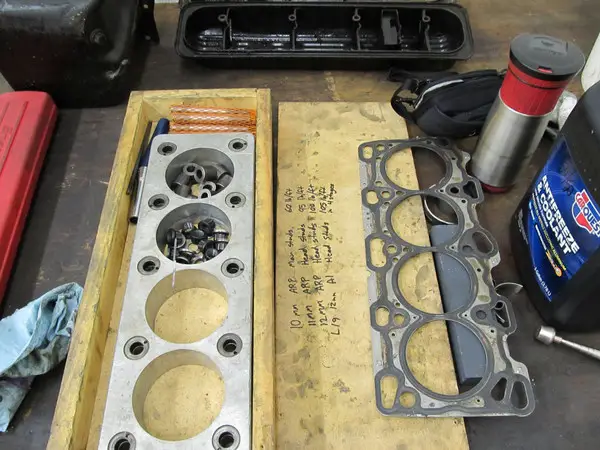
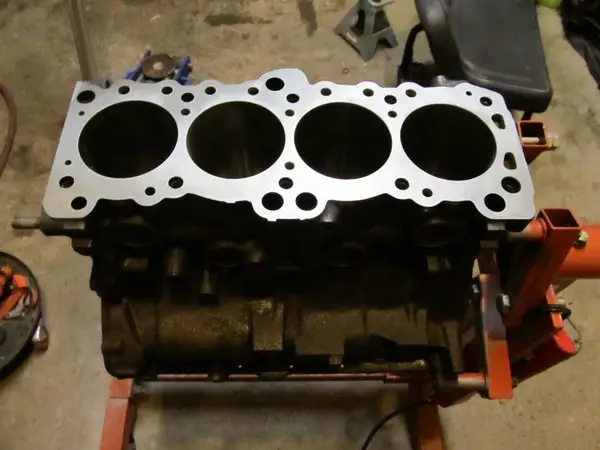
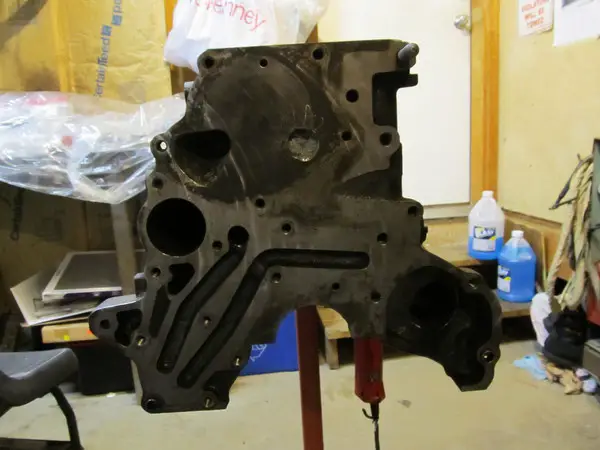
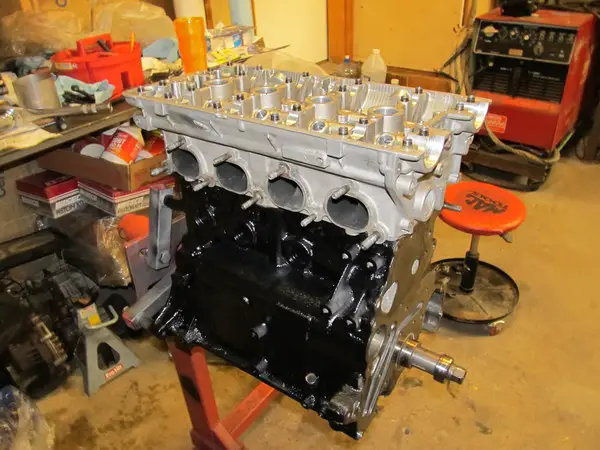
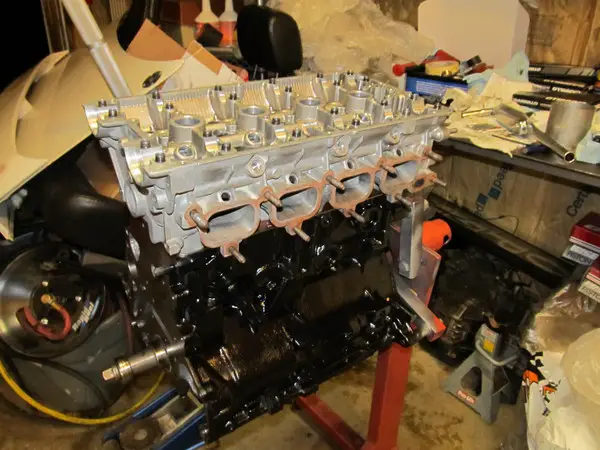
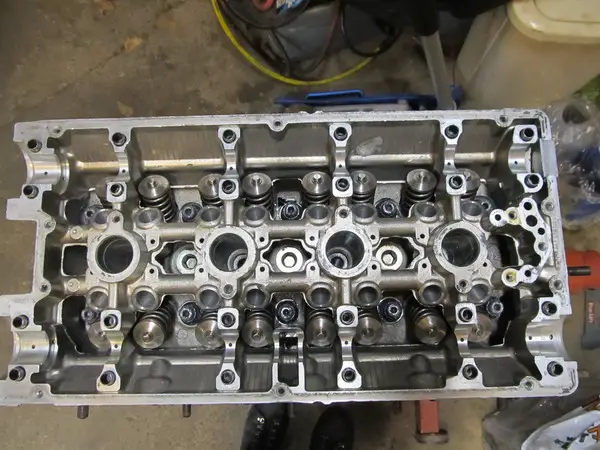
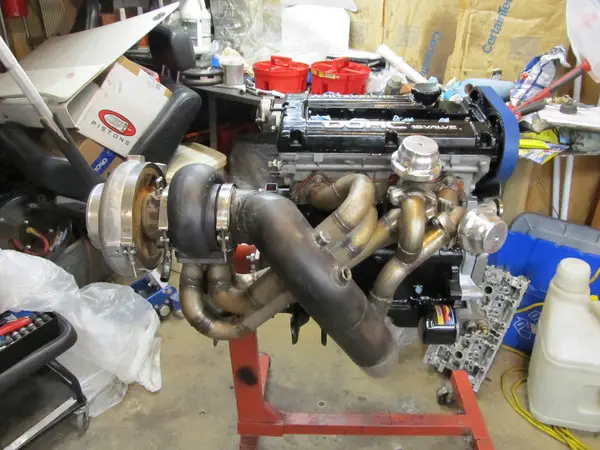
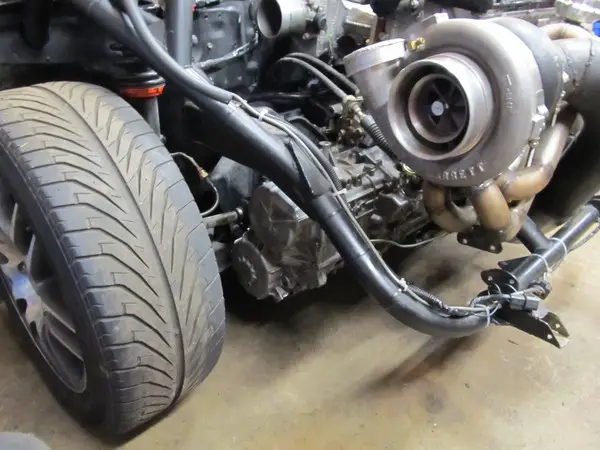
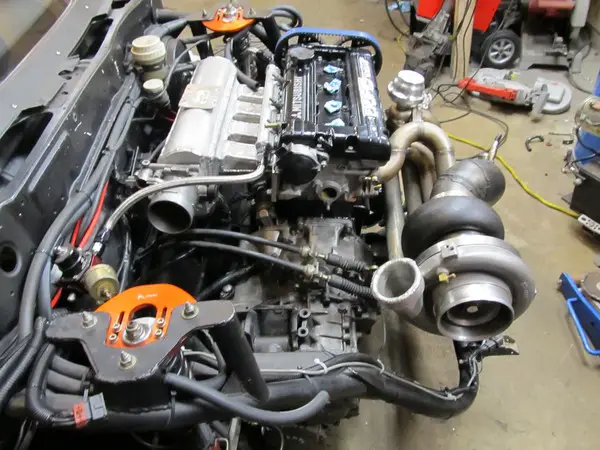
A few updates on the never ending build. I have 2 blocks for the car for next year, one will be the new race motor, and the other will be the backup motor.

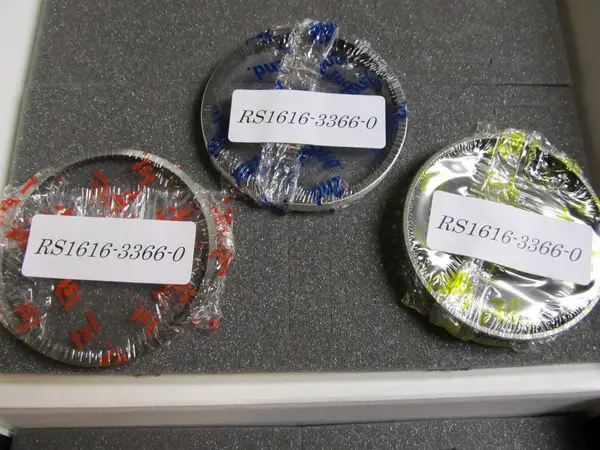
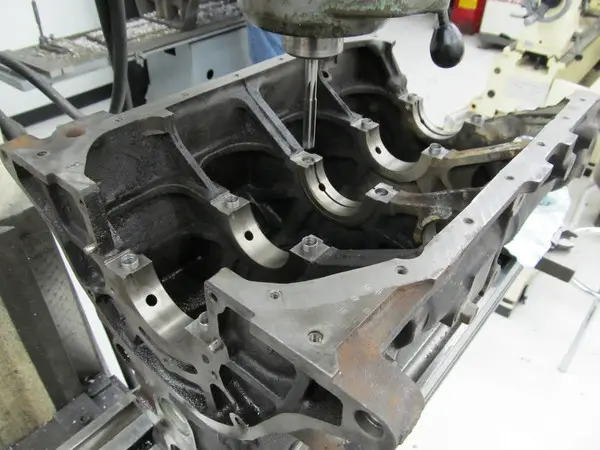
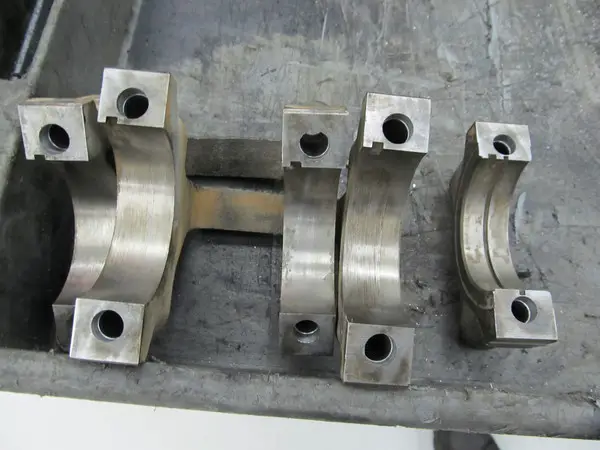
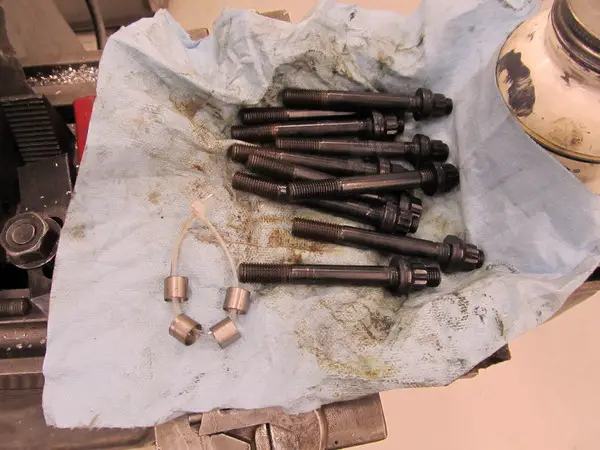
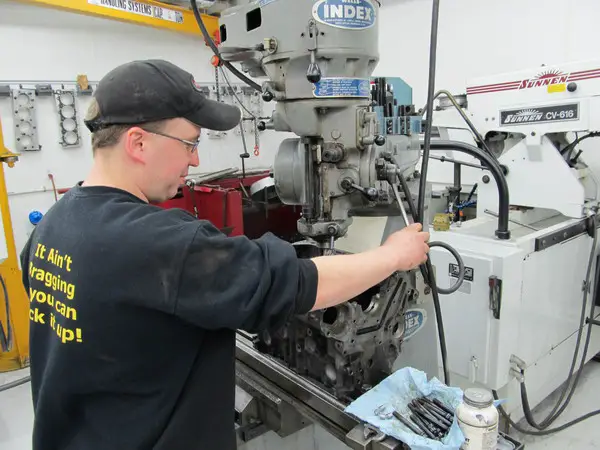
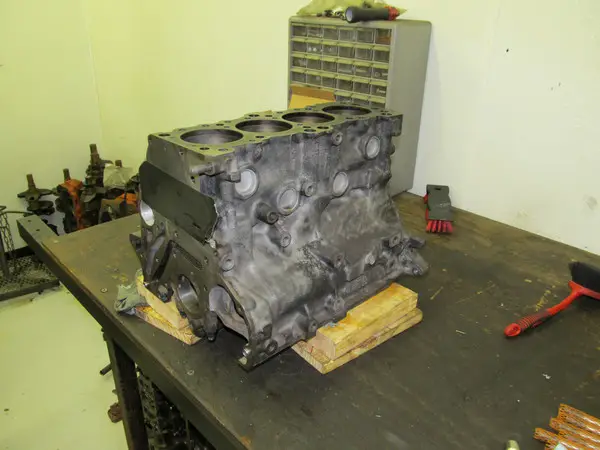
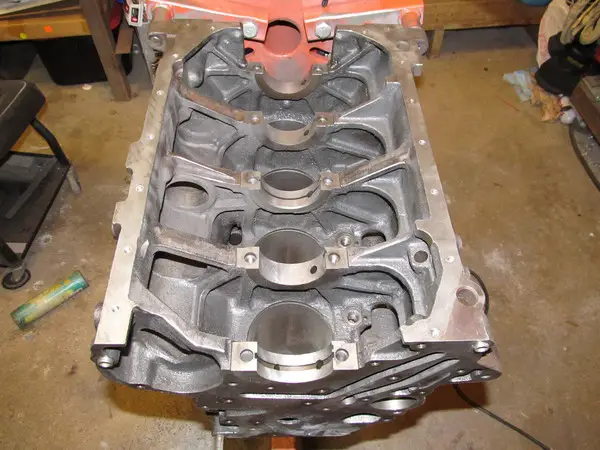
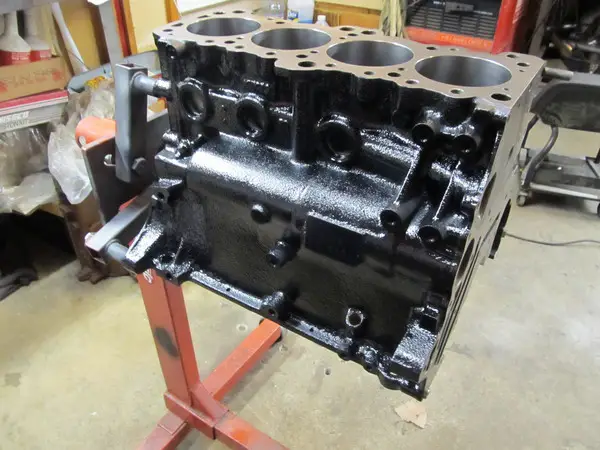
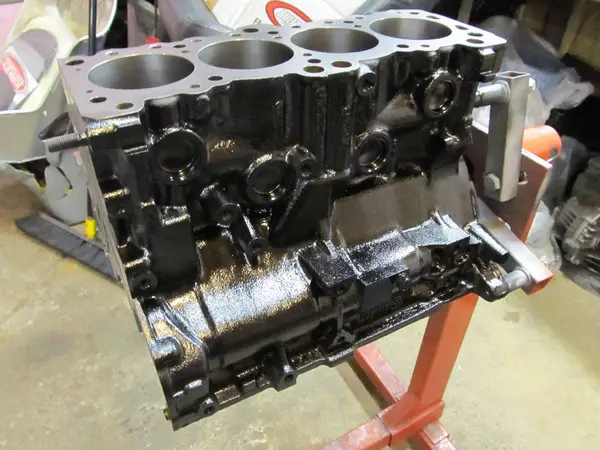
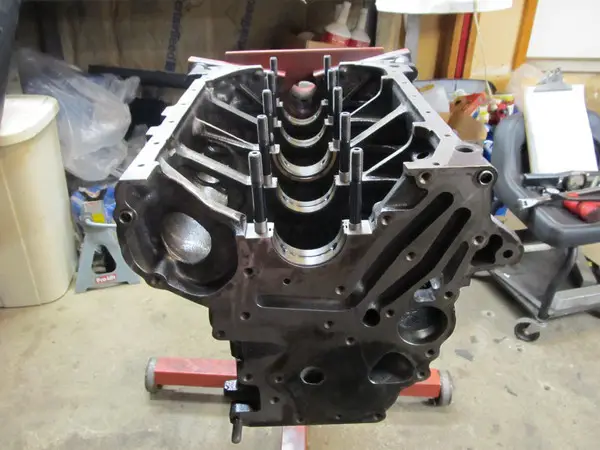
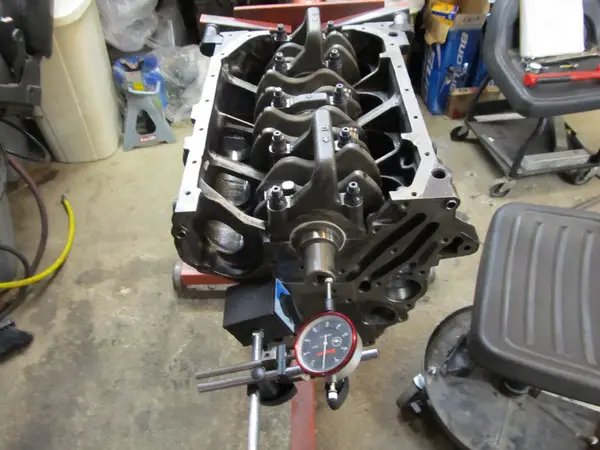
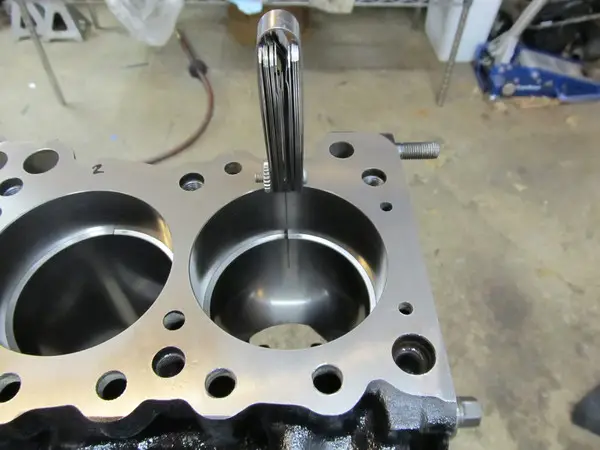
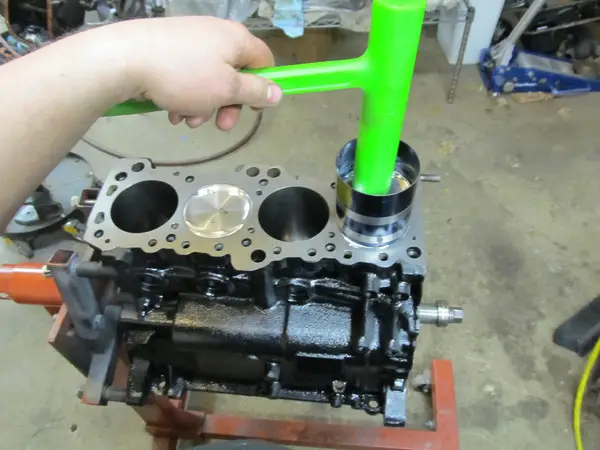
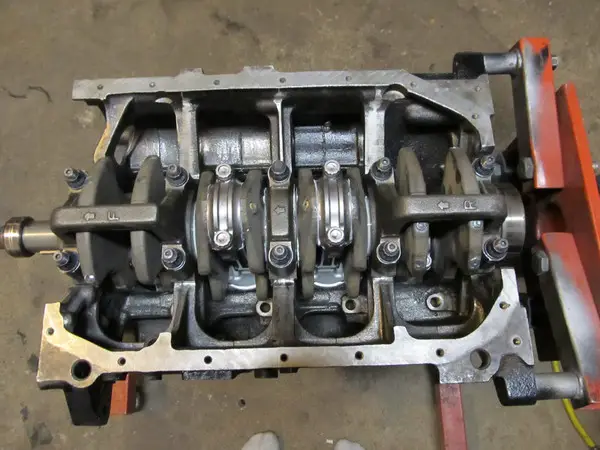
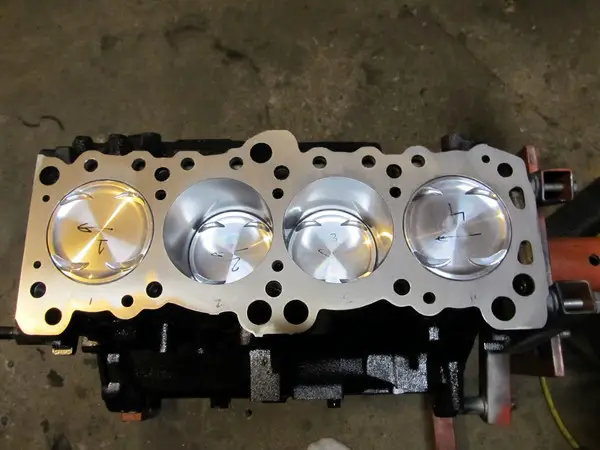
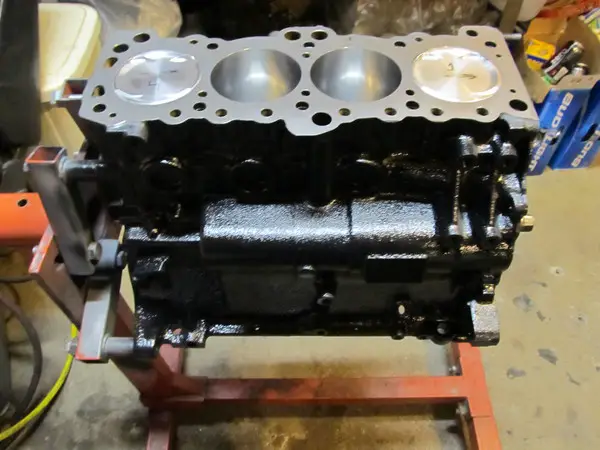
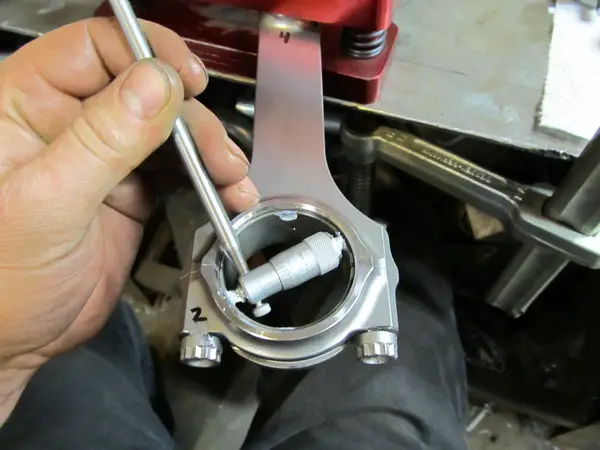
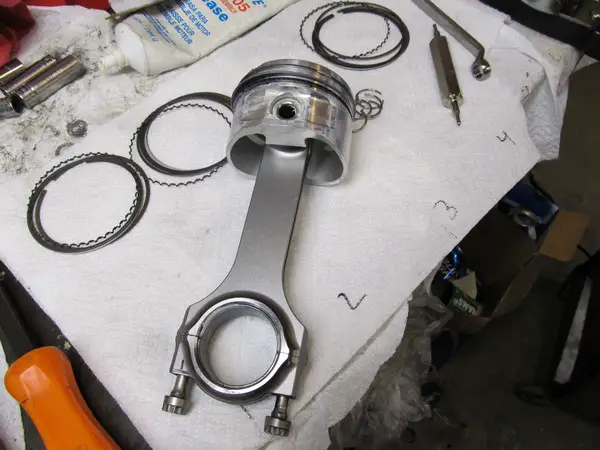
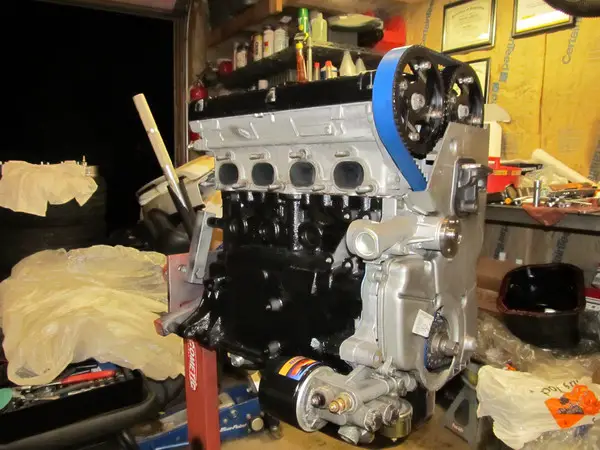
We just finished doing a partial fill on a block and machine work for the Crower rods and Wiseco pistons to go into. I just need rings and clean/paint the block and that motor is ready for assembly.

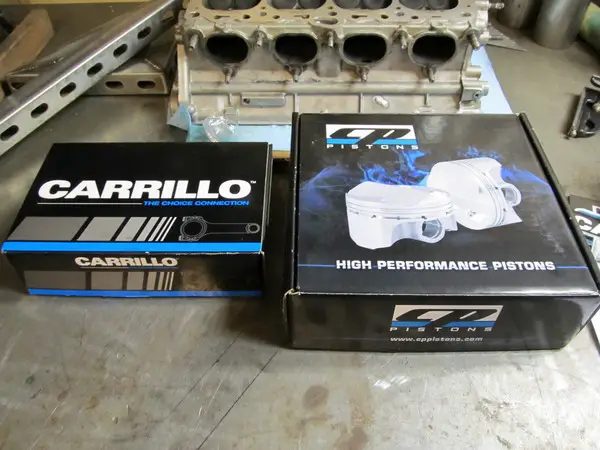
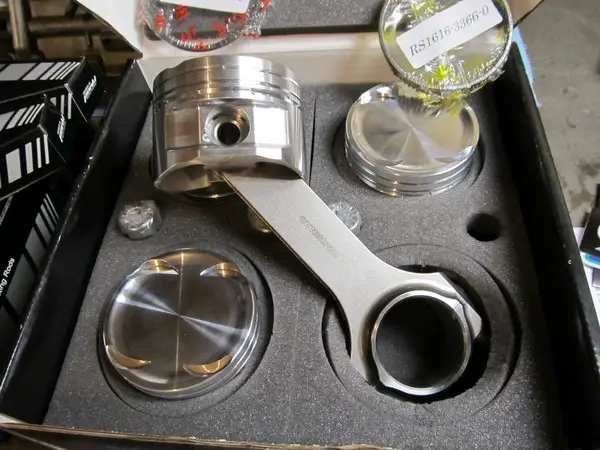
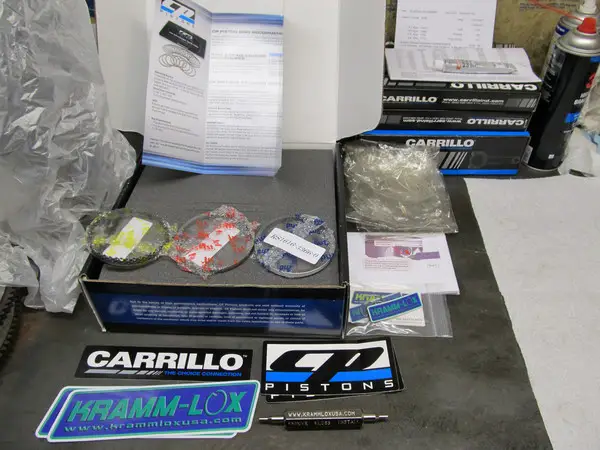
Then the good news, I am getting custom CP pistons, and custom Carillo rods for the new race motor. Which will have a lot more hard block then the back up motor.

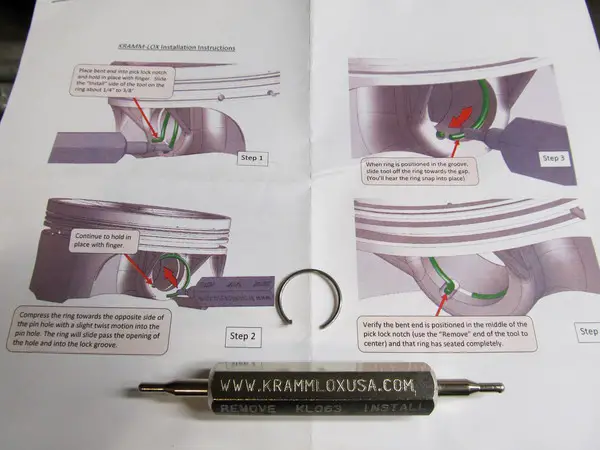
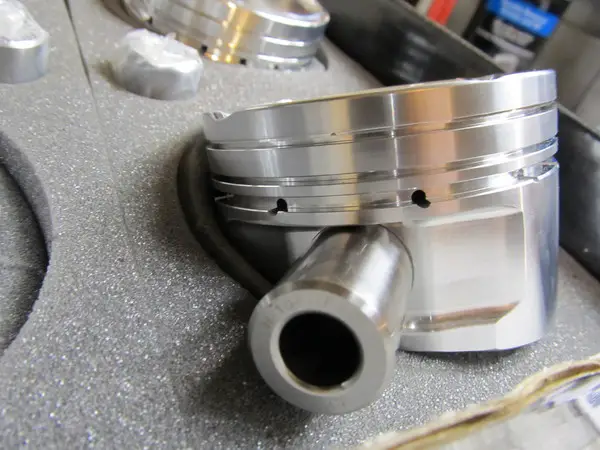
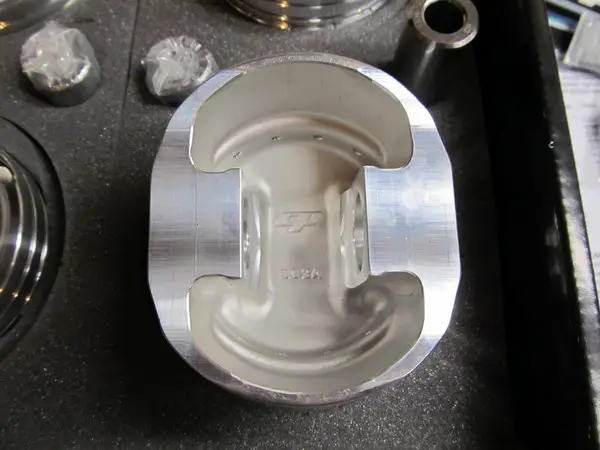
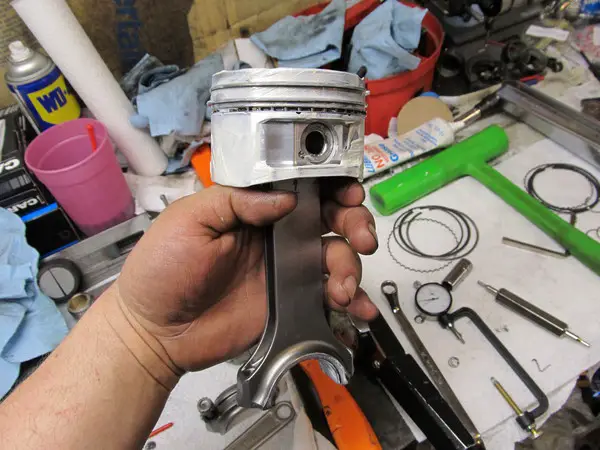
The pistons are custom designed for this setup, the piston is more like a clover shape in the bore for better piston stability, It will have a 22mm HD wrist pin, and added strength from the shelf part to handle the high boost, high hp, and high rpm I plan for this setup. It will also have a new wrist pin lock and tool that is supposed to be easy to install and take apart.

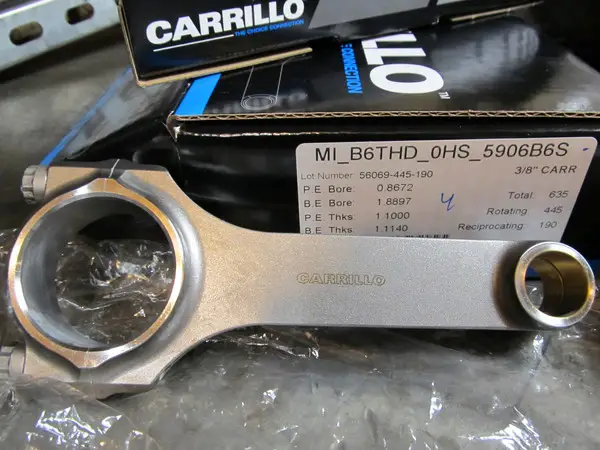
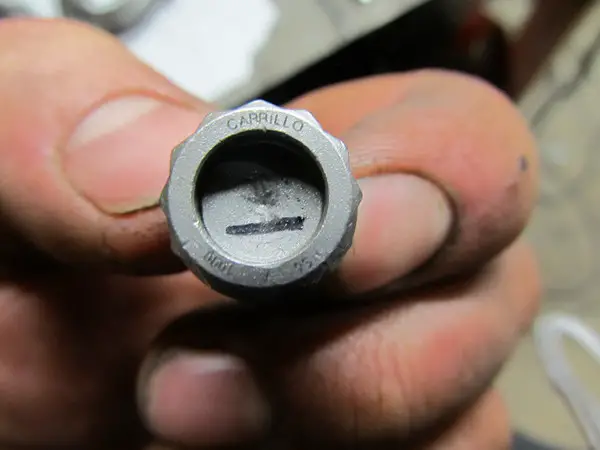
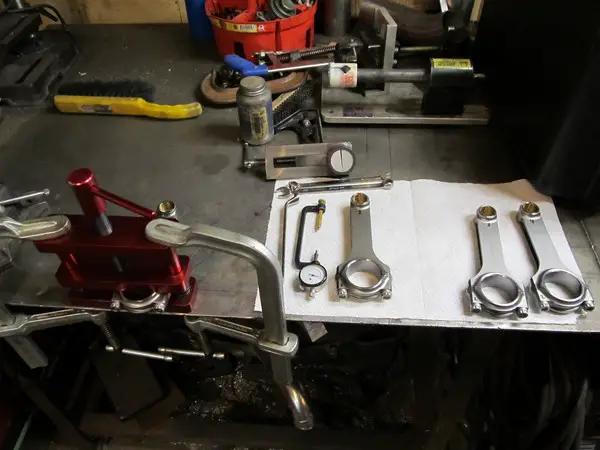
The rods will be a straight H beem and have FPO (force feed oiling) to the wrist pin, a 22mm pin bore on the small end, and be the right width on the big end to fit the 6 bolt crank shaft. They will have the oil shed coating and the top of the line rod bolts, Multiphase TM (285,000 UTS).

I will post some pics tomorrow, and let you know when the shinny new parts show up.

~John
 

Galantvr41062

Well-known member
Joined
Aug 20, 2007
Messages
410
Location
plymouth, MN
Canon_photos_021.jpg


The parts are here.

Canon_photos_024.jpg

Canon_photos_007.jpg

Canon_photos_008.jpg

Canon_photos_009.jpg

Canon_photos_011.jpg

Canon_photos_018.jpg


Here are the rods and pistons up close. The pistons have a grove at the top of the compression ring and 4 gas ports to let cylinder pressure to the back side of the compression ring. They have the 22mm HD wrist pin, and the new SS wire lock with install tool that holds the wrist pin and is really easy to install/remove the locks. The rods are a straight H beam design and use 3/8" CARR rod bolts, this should hold the rod cap even at 10,000 rpm, or more.

Canon_photos_039.jpg

Canon_photos_040.jpg

Canon_photos_041.jpg

Canon_photos_042.jpg

Canon_photos_043.jpg

Canon_photos_046.jpg


This is the new block in the first stages of machining. The new CP pistons are .020 over, I am going to fill most of the water jacket with hardblock Monday after work. The block and caps are reamed out for the cap pins. After the hard block is in, I put the torque plate on then its into the V30 for decking, and boring of the cylinders. Then line hone and finish hone with diamond brushes. Then I will spend a few hours with a die grinder cleaning up the inside of the block. Then I want to make a crank scraper, and windage tray if there is room in the stock oil pan.

I will be ordering the few parts I need later this week to get the car up and running. I should be starting assembly of the motor in the next few weeks. Then its off to the dyno on E98 to make about the same power as last year, then to the track to get a good 60 foot time going.

The new parts:
Aeromotive Eliminator fuel pump
FIC Blue max 2150 injectors
felpro perma torque head gasket
new oil pump
misc gaskets for the engine

~John
 
Last edited:

2of9

Well-known member
Joined
Aug 29, 2007
Messages
869
Location
IGH, MN
looks amazing man. /ubbthreads/images/graemlins/applause.gif
 

Galantvr41062

Well-known member
Joined
Aug 20, 2007
Messages
410
Location
plymouth, MN
Canon_photos_003.jpg

Canon_photos_004.jpg

Canon_photos_006.jpg

Canon_photos_0181.jpg

Canon_photos_0192.jpg

Canon_photos_002.jpg


I will have bearings tomorrow, then its final cleaning, polish the crank, check the rod bearing specs, file rings, then start assembling. I should have some update pics early next week.

I just need to order a few oil pumps and a hand full of gaskets so when the head is done I can finish the motor.

~John
 

SleepinGVR4

Well-known member
Joined
Feb 12, 2003
Messages
2,483
Location
Danville, Pennsylvania
Quoting GalantVR41062:
I will have bearings tomorrow, then its final cleaning, polish the crank, check the rod bearing specs, file rings, then start assembling. I should have some update pics early next week.


John I'm sure you know more about this than me, but my machine shop says you have to be really careful when polishing the crank because he says it extremely easy to "hour glass" the crank journals.

I'm sure your machine shops knows what they're doing just thought I'd throw it out there.
 

Galantvr41062

Well-known member
Joined
Aug 20, 2007
Messages
410
Location
plymouth, MN
Yes keeping the journal straight and true can be an issue. I have 3 cranks to choose from, so I will polish each one and measure the journals then balance the best one and start assembly.

~John
 

Galantvr41062

Well-known member
Joined
Aug 20, 2007
Messages
410
Location
plymouth, MN
After a polish the race motor crank has less then .0002" difference in journal sizes in any direction.

I am happy with all the specs on the bearings, rings, piston to wall, crank end play, etc. I just have a few things to touch up on the head and I am waiting on a few other parts, oil pump, water pump stuff that should be here the end of this week. All in all I had 10 hours into the short block for final spec and assembly. Not bad but I wanted to make sure everything was as good as it could be.

Then when the car is up and running I will start to work on the back up motor. If everything works out I could be at the DB spring dyno day in mid May, then its off to Grove Creek for 60' testing.

Canon_photos_028.jpg

Canon_photos_027.jpg


After a fun threw the parts washer at work, then hot water and dawn dish soap wash, then brake clean and brushes threw the oil galleys and cylinder walls. A fresh coat of primer, then black engine paint and clear coat to finish it off.

Canon_photos_029.jpg

Canon_photos_030.jpg

Canon_photos_031.jpg


Here are most of the tools and parts needed to assemble the short block, thanks to CP pistons and Carrillo rods for the great parts, and the Kramm Lox just make the piston and rod assembly so easy.

Canon_photos_0411.jpg

Canon_photos_052.jpg


Here are the ARP main studs installed with the custom main cap dowel pins that are 1/2 in the block and 1/2 in the main cap. I am using STD sized ACL race series main bearings, and ACL race series rod bearings with the added .001" oil clearance.

Canon_photos_0241.jpg

Canon_photos_034.jpg


Here I take the custom Carrillo rod and check the rod bolt length before I un-torque the bolt, this lets me know how much rod bolt stretch there was when they did the hone on the big end of the rod. I measured an average .0035" of rod bolt stretch, a common number for a 4g63 rod bolt right out of the box. I then measure the bolts free length, this will let me know over time if the bolt stretches and does not go back to its original length. Then I install the rod bearing shells and check the ID of the bearing. I torqued the rod bolts to 58 fl/lbs and the rod bolt stretch was about .0055" so just above the bottom end of the spec, which is .004"-.007".

Canon_photos_064.jpg

Canon_photos_074.jpg

Canon_photos_078.jpg

Canon_photos_001.jpg

Canon_photos_0021.jpg

Canon_photos_0041.jpg

Canon_photos_036.jpg

Canon_photos_069.jpg


Then I install the Kramm Lox for the wrist pin, and after file fitting the rings I install each rod/piston combo into the block and properly torquing the rod bolts 1 last time. I torqued them all to 58 ft/lbs again and only had to put a little more on 1 rod bolt to get in the .006" rod bolt stretch, right in the middle of the spec.


~John
 
Last edited:

Galantvr41062

Well-known member
Joined
Aug 20, 2007
Messages
410
Location
plymouth, MN
Canon_photos_044.jpg


A few light coats of copper spray to help hold in 45+ psi and 8xxawhp.

Canon_photos_0471.jpg

Canon_photos_0461.jpg

Canon_photos_050.jpg

Canon_photos_0521.jpg


A1 Technology L19 head studs torqued to 105lf/lbs with a lot of ARP moly lube.

Canon_photos_054.jpg


Now with my FIC blue max 2150 injectors I have enough fuel system for 1000ahwp.

Canon_photos_060.jpg

Canon_photos_061.jpg


Now the car looks the part on the inside, I bought a 2nd race seat last year, but did not have time to install it. Then I just need to install the passanger side door bar, and the window net and the inside is done and ready for the track.

I am waiting on the last few items to finish up the motor then its time to install this bad boy.

~John
 

Galantvr41062

Well-known member
Joined
Aug 20, 2007
Messages
410
Location
plymouth, MN
Canon_photos_0571.jpg


Canon_photos_059.jpg


Canon_photos_0641.jpg


Canon_photos_0741.jpg


Canon_photos_0781.jpg


There is a local dyno day this saturday, We are trying to have the car there, and with what was done this saturday it may be possible.

~John
 
Last edited:

Galantvr41062

Well-known member
Joined
Aug 20, 2007
Messages
410
Location
plymouth, MN
1 Step closer.

Canon_photos_093.jpg


Tranny and most of the under side is done.

Canon_photos_094.jpg


Just a few more things under the car to finish.

Canon_photos_096.jpg


Inter cooler, hear exchanger, radiator, and a few other items to finish this up.

Canon_photos_097.jpg


FIC Blue Max 2150 Injectors installed, I just shortened the fuel rail mounts and removed the plastic spacers, then added studs to bold the rail down.

Canon_photos_110.jpg


So after the car makes 850 some AWHP and takes the fastest Galant VR4 record I plan to enjoy this with the friends and family that helped make this car possible.


So just a few more things to finish up, I hope to start the car up tomorrow.

~John
 
Last edited:

Galantvr41062

Well-known member
Joined
Aug 20, 2007
Messages
410
Location
plymouth, MN
The car started last night, now I just need to do an oil change and go do some vacuum pulls to break in the motor.

~John
 

JB

Well-known member
Joined
Aug 15, 2004
Messages
5,836
Location
MA
Siqqq. /ubbthreads/images/graemlins/worthy.gif /ubbthreads/images/graemlins/applause.gif
 
Support Vendors who Support the GVR-4 Community
Boosted Fabrication ECM Tuning ExtremePSI Fuel Injector Clinic Jacks Transmissions JNZ Tuning Kiggly Racing Morrison Fabrications RixRacing RockAuto RTM Racing STM Tuned
Top