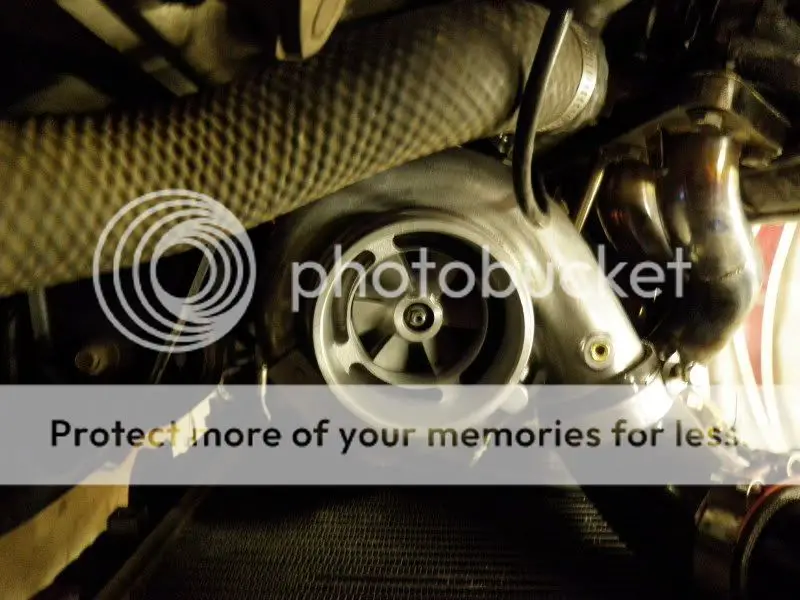
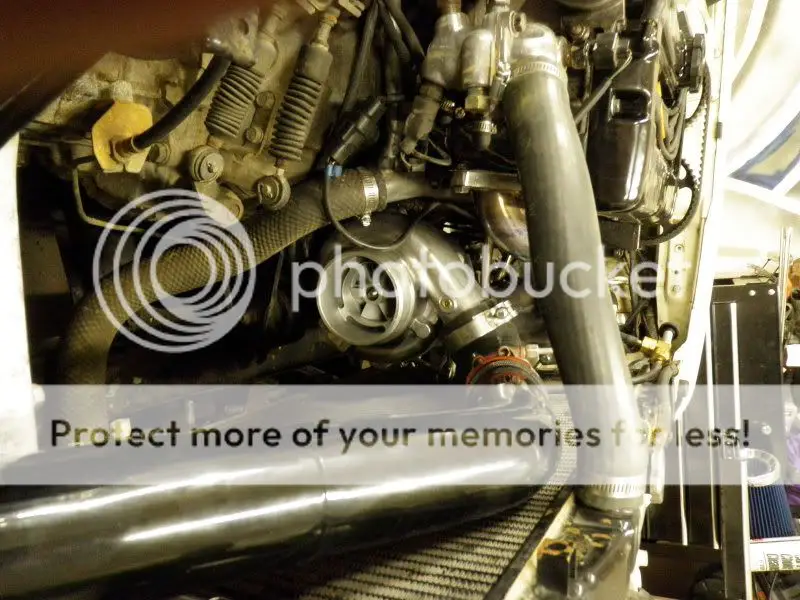
The Top Mitsubishi Galant VR-4 Resource

Join the best E39A 1991-1992 Mitsubishi Galant VR-4 community and document your GVR4 journey.

  • Software Upgraded - Reset Your Password to Login
    In order to log in after the forum software change, you need to reset your password. If you don't have access to the email address you used to register your GVR4.org account, you won't be able to reset your password. In that case, follow the instructions here to regain access to the forum.

#1900 - 'GOLFBALL' build - 2.4-AUTO-NITROUS.... Street car?

BluFalcon

Well-known member
Joined
Jan 20, 2002
Messages
1,312
Location
Wichita, KS
You might want to reclock the CHRA on the turbo so that the drain is facing directly down. The oil isn't under any pressure when it leaves the bearing housing, so you want the drain flange to be pretty much oriented as straight down as you can get it.
 
Last edited:

1990ggsxnj

Well-known member
Joined
Nov 21, 2008
Messages
525
Location
Blackwood, NJ
Quoting 1badgvr4:
Paint the door trim ASAP.


I concur. Cars always look a bit more updated and cleaner with the trim painted the same color as the car IMO.
 
Last edited:

GolfBall

Well-known member
Joined
Aug 28, 2009
Messages
125
Location
Edmond, OK
Quoting BluFalcon:
You might want to reclock the CHRA on the turbo so that the drain is facing directly down. The oil isn't under any pressure when it leaves the bearing housing, so you want the drain flange to be pretty much oriented as straight down as you can get it.


hahah not wanting to be rude.... but i find it really funny how people keep telling me that.... like i clocked it like that on purpose....


anyways yeah thats as straight as it possibly will go cause the motor mount is in the way.... just a stupid combo of that turbo with that manifold just causes bad interference with the front motor mount....
 

GolfBall

Well-known member
Joined
Aug 28, 2009
Messages
125
Location
Edmond, OK
Quoting 1badgvr4:
Paint the door trim ASAP.


if your talking a out the trim around the windows then HELL YES.... thats the first thing up cosmetically after i get it running decent. /ubbthreads/images/graemlins/smile.gif
 

1990ggsxnj

Well-known member
Joined
Nov 21, 2008
Messages
525
Location
Blackwood, NJ
It seems like there's room for it to point more towards the oil pan by the persepective of the photo (which may not be in all actuality). If that's the case, I would do that before pointing somewhat away from the pan first.
 

The drain might be OK but you really want it pointing as straight down as you possibly can. Yes th mount is in the way & just because of where the mount is located. Most of us running a larger turbo simply cut a notch in the mount to clear the drain line. It's something that's been done many times over the past 19 years without any drawbacks. I think Terry has some pictures posted, I'll try to find them.

EDIT: Found the picture
 
Last edited by a moderator:

GolfBall

Well-known member
Joined
Aug 28, 2009
Messages
125
Location
Edmond, OK
Quoting Garfield Wright:
The drain might be OK but you really want it pointing as straight down as you possibly can. Yes th mount is in the way & just because of where the mount is located. Most of us running a larger turbo simply cut a notch in the mount to clear the drain line. It's something that's been done many times over the past 19 years without any drawbacks. I think Terry has some pictures posted, I'll try to find them.

EDIT: Found the picture


yeah must turbo and manifold combo just must be weird caues i chopped a TON off that motor mound.... like the whole right side is gone and it still wont fit.

i basically will have to make a new motor mount or find a way to move it over.... im out of town otherwise i would take better pics to show you.

which the head it leaking (valve stem seals) anyways and smoking like crazy so im prolly gonna get the head rebuilt so while the head is off is a perfect time to mess with that mount.
 

BluFalcon

Well-known member
Joined
Jan 20, 2002
Messages
1,312
Location
Wichita, KS
I had a PTE turbo on my Talon and ran into the same issue you did. Rather than notch the mount, or reclock the CHRA, I used a 45 degree fitting off the drain flange to a 45 fitting going into the line. The line then went straight into the oil pan. I know that the motor brackets are different between the 1G AWD DSM's and GVR4's, but with the mount notched already it should clear with the CHRA in the proper position.

Does the car smoke @ idle or WOT? If it's WOT, then it might be the turbo causing some of your smoking issues. The first drain line I made was made using -8 line/fittings. The line wasn't large enough and couldn't handle the amount of oil going into the bearing housing @ WOT. Oil blew past the turbo seal rings and out the exhaust making a very large smokescreen. Thought I had blown the turbo, or something in the motor. Resized the line with -10 hose/fittings and no issues afterwards. With your turbo clocked like it is, and some of the fittings you're using on your return line, it's possible you may have oil backing up in the housing causing the smoke. Just something to think about if it is smoking under boost.
 
Last edited:

chucklesas

Well-known member
Joined
Feb 14, 2003
Messages
1,895
Location
Dayton, OH
I think the issue probably stems from having to go from the flange, then a male-male fitting to a big-ass 90. I think if you had a flange with the male fitting on it and a 45 degree it might clear. I just happen to have an extra turbo oil outlet flange here. I'm heading out of town, but when I get back maybe we can figure that part out.
 

1badgvr4

Well-known member
Joined
Jul 2, 2006
Messages
1,242
Location
georgia
Quoting 1990ggsxnj:
Quoting 1badgvr4:
Paint the door trim ASAP.


I concur. Cars always look a bit more updated and cleaner with the trim painted the same color as the car IMO.

Uh /ubbthreads/images/graemlins/idea.gif I meant paint them back black.
 

Adorsey

Well-known member
Joined
Apr 22, 2009
Messages
355
Location
mass
^ yeah paint them black, lol.
then take off you door handles and paint those white /ubbthreads/images/graemlins/grin.gif thats something I might be doing that sooner er later.
 

GolfBall

Well-known member
Joined
Aug 28, 2009
Messages
125
Location
Edmond, OK
well been a while since i updated... went wit a diff turbo and wastegate and have been waiting on parts and stuff...

so this was the old setup...

securedownload-8-1.jpg


manifold sucked balls and was nothing but headaches from day one.... so i ordered a cheap tubular manifold....

it also didn't fit worth a crap so i said f it... chop that sucka up....

securedownload-6-1.jpg


cut the flange off it...

securedownload-5-2.jpg


then since it was a cheap mani it didn't have a external waste-gate port so i made one....

started by cuttin a whole in the collector...

securedownload-2-3.jpg


then welded on a pipe and a flange i made for the wastegate....

securedownload-1-3.jpg


also figured why not so i added some support bars to keep the welds from cracking from the weight.

securedownload-10.jpg


also re-did my down pipe for the third time to work wit this new manifold....

got the windows tinted too which made it look was better... gotta take some pics.
 
Last edited by a moderator:

GolfBall

Well-known member
Joined
Aug 28, 2009
Messages
125
Location
Edmond, OK
I haven't posted in forever and a bunch has been going on.... MOSTLY life sucking and turbo blowing up...

to try and keep from blowing up turbo's got an inline oil filter...

P3290193.jpg


P3290194.jpg


here are some pics of it all back together....

P3290195.jpg


P3290196.jpg


P3290197.jpg


here is where i think most of it came from, i talked to a tech at FP who knew a ton and he asked if i had my valve cover powder coated i said hes and he said to check the baffle under it for crap.... well mine had crap /ubbthreads/images/graemlins/smile.gif

IMG_0396.jpg


IMG_0395.jpg


IMG_0397.jpg


IMG_0398.jpg


finally all cleaned up...
IMG_0399.jpg


the brakes were awefull so to fix it...

4 - remanufactured calipers
4 - SS brake lines
4 - ceramic brake pads
resurfaced my calipers

P4060201.jpg


the fittings and lines on the back brakes were trash so i cut em off, re-flared the lines and put new fitings on with the ss lines.

P4060205.jpg


P4070206.jpg


checked my oil filter again.... still gettin junk but its gettin less and less...
P4020200.jpg


lastly... put in a new aluminum radiator with slim fan and had a hell'of'a time wiring it all up for some reason my car wasn't happy using the wiring from the old fan and i had to re-wire all of it and move the temp sensor to the thermostat housing...

P4080209.jpg


put in a new clutch and lightweight flywheel (dont have any pics of that one)
 

GolfBall

Well-known member
Joined
Aug 28, 2009
Messages
125
Location
Edmond, OK
So quick recap:
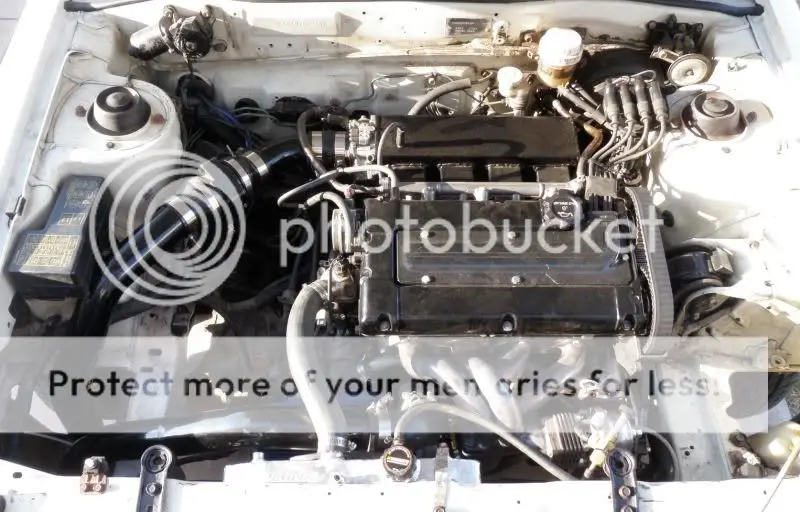
-kept blowing up turbos (even with the inline oil filter)
-got sick of it and decided to go big with a diff motor

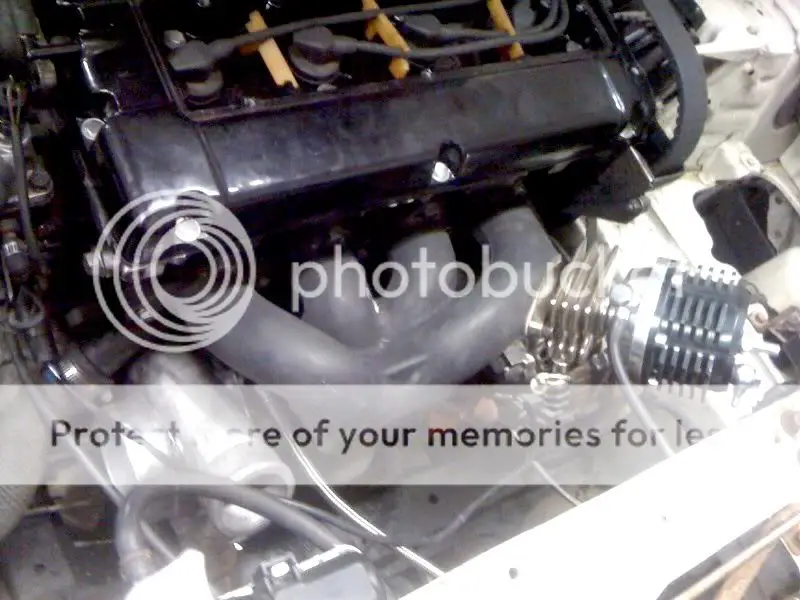
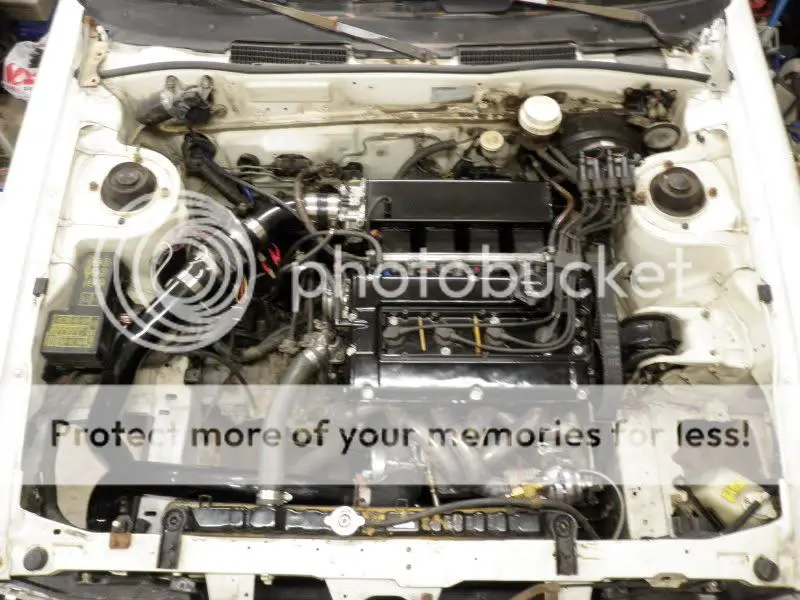
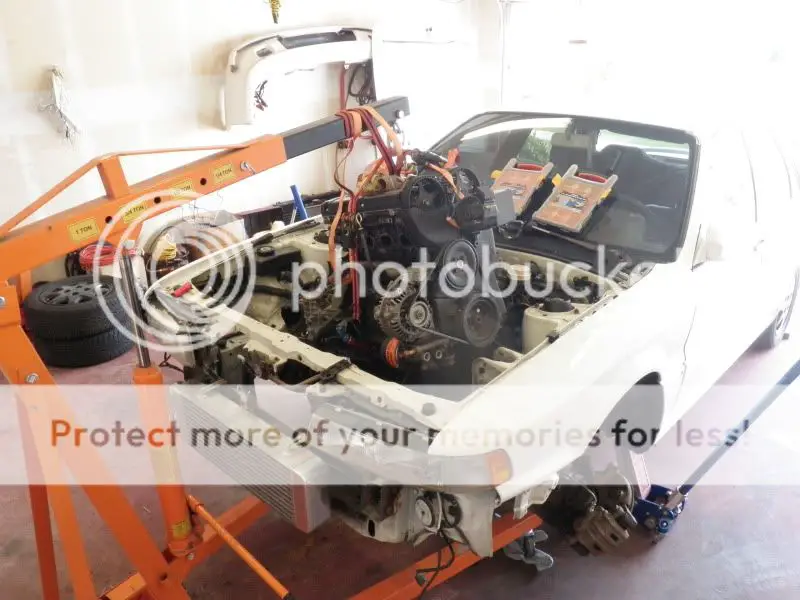
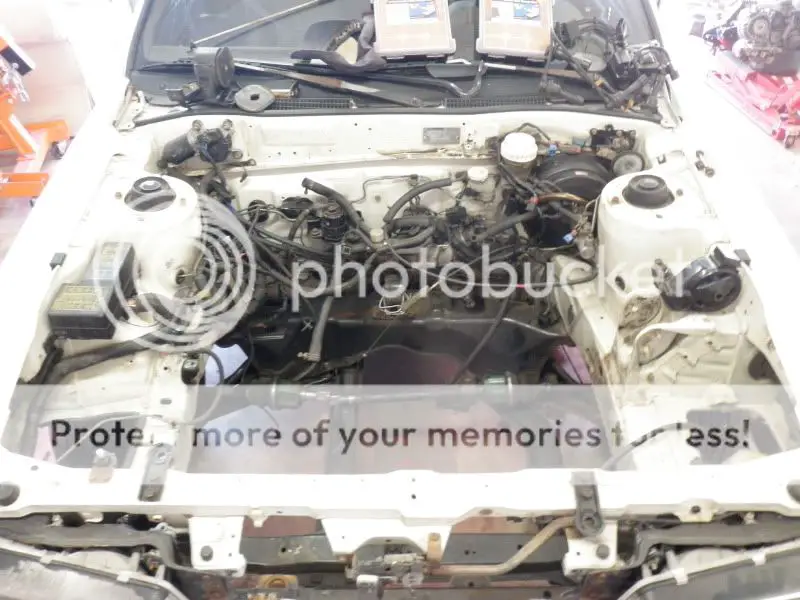
yanked the stock motor and trans out...
P5270606.jpg


yikes what a mess hun? dont worry it will get tucked/shaved/sprayed and look awesome
P5270630.jpg


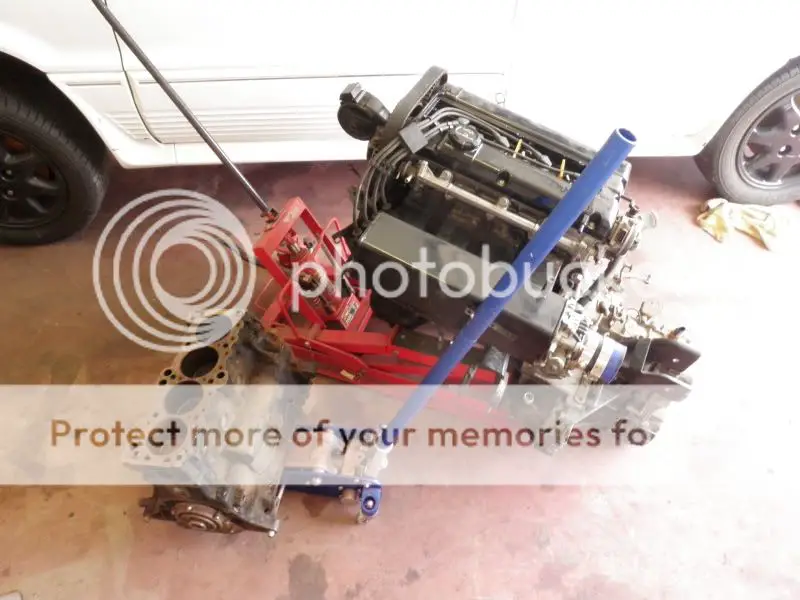
new motor getting some advice from my old one...
P5270607.jpg


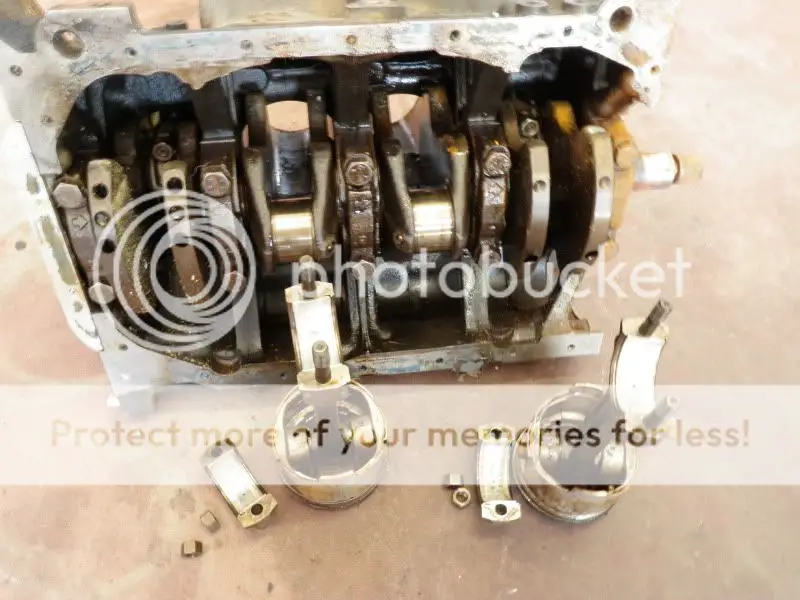
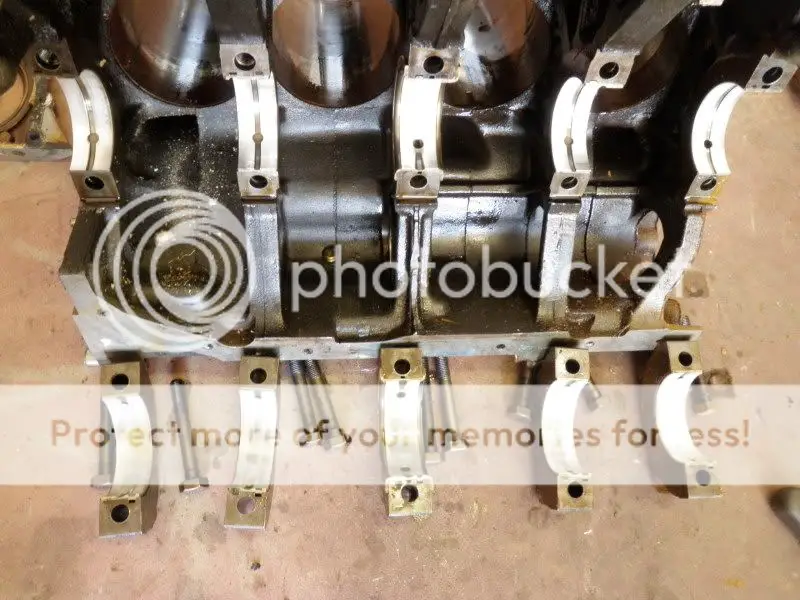
tore the new 2.4 block apart to check it all out... (only things i will be using is the block and crank)
P5270608.jpg


P5270618.jpg


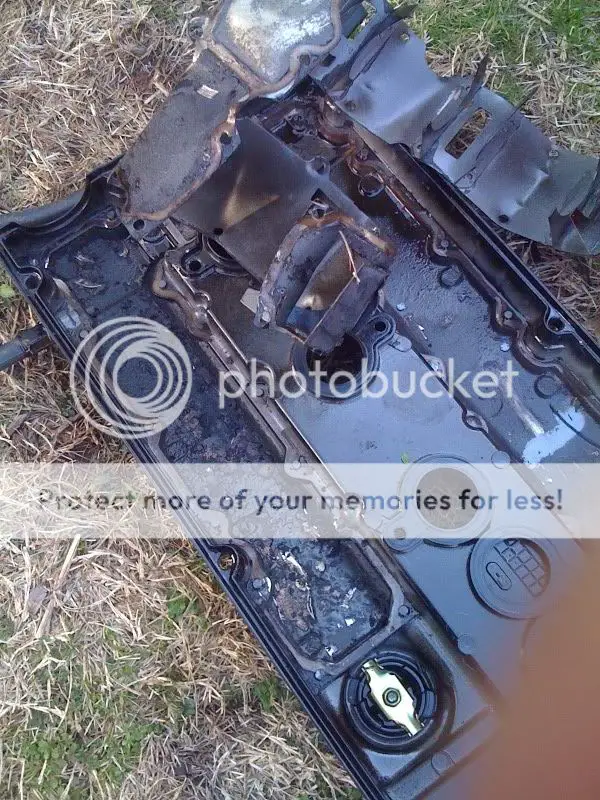
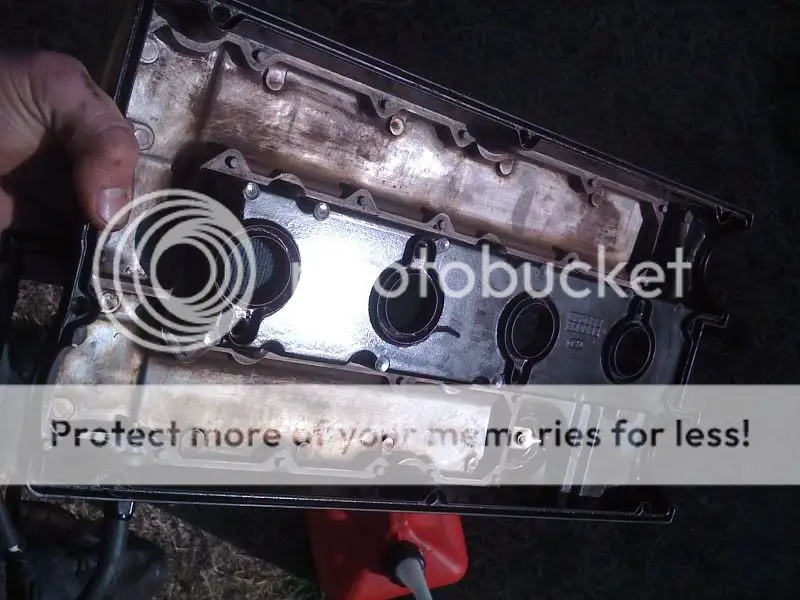
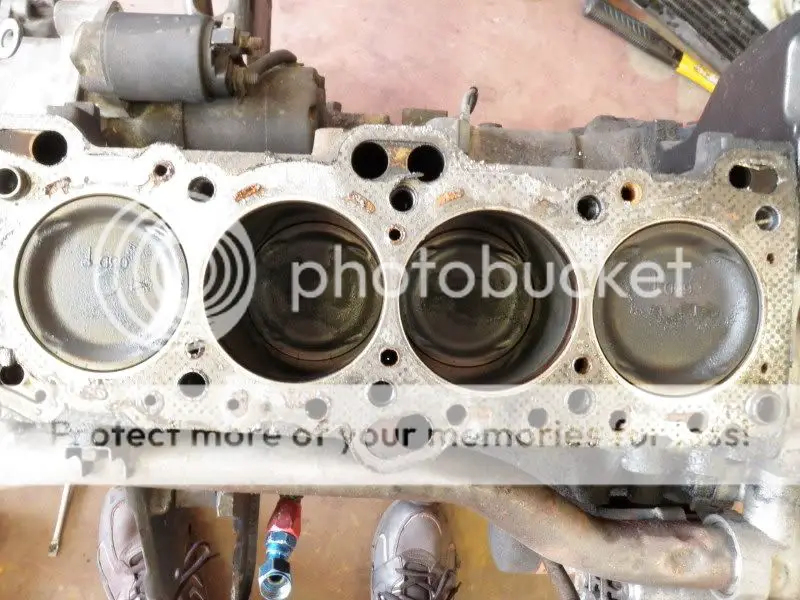
then tore into the old motor to get the parts off im going to be using and see what condition it was in...
P5270627.jpg


P5270622.jpg


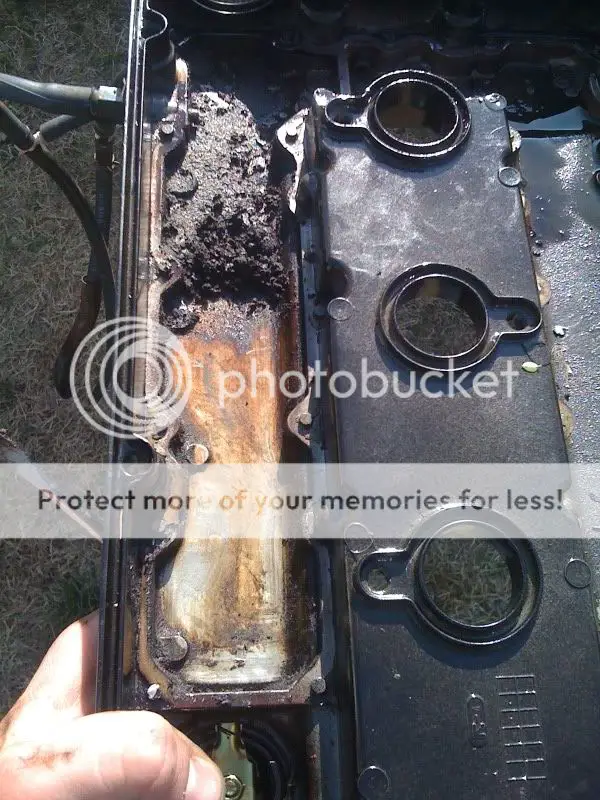
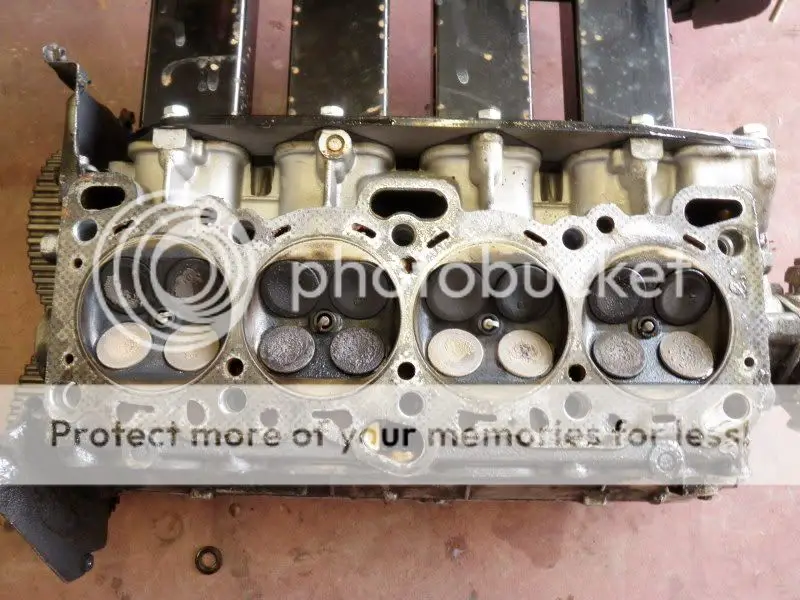
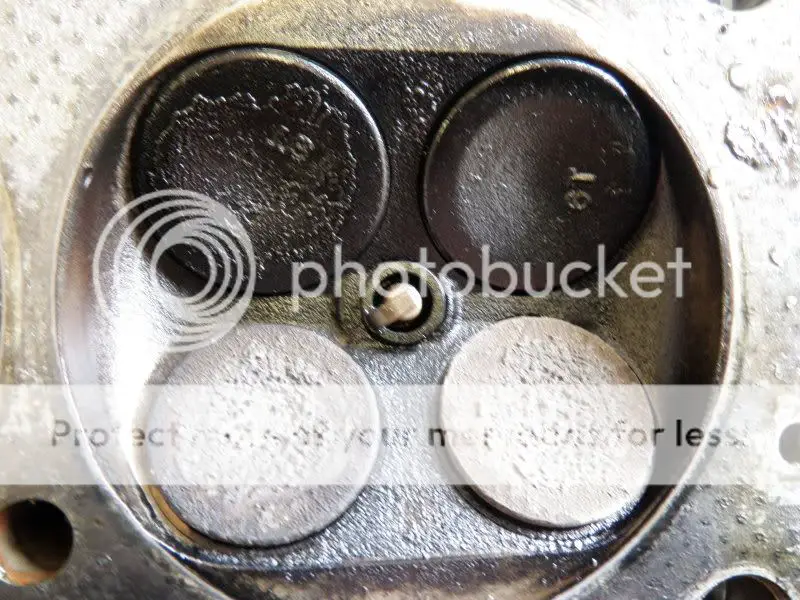
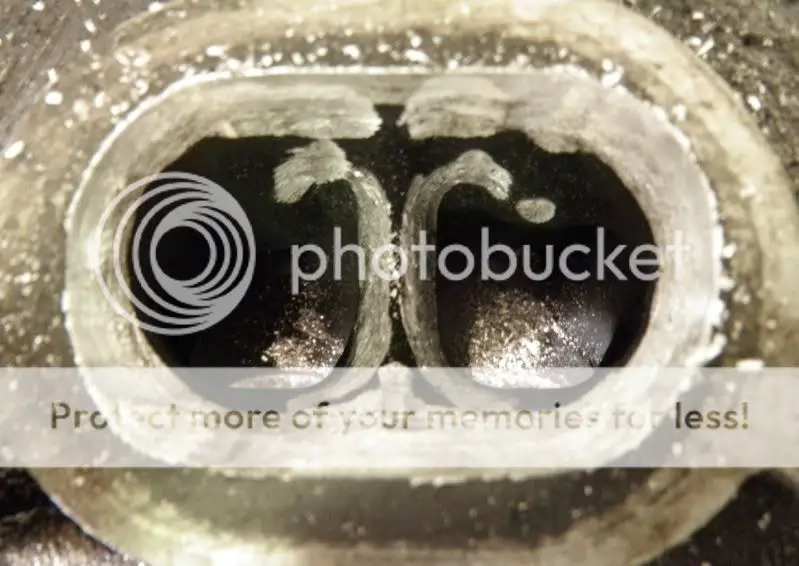
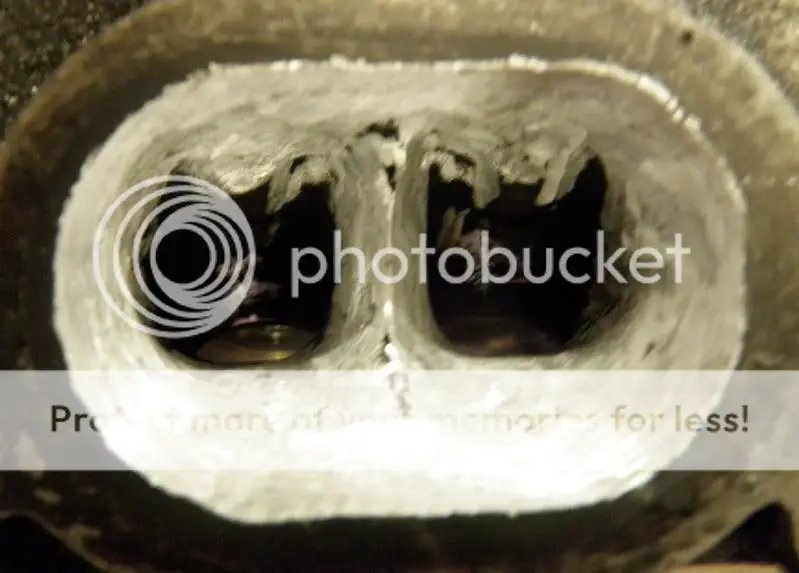
burnt valves anyone...
P5270623.jpg


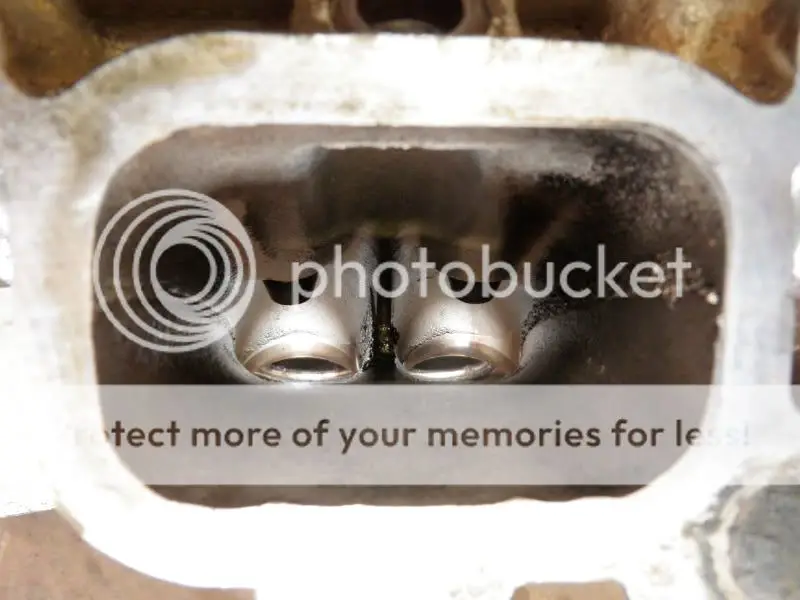
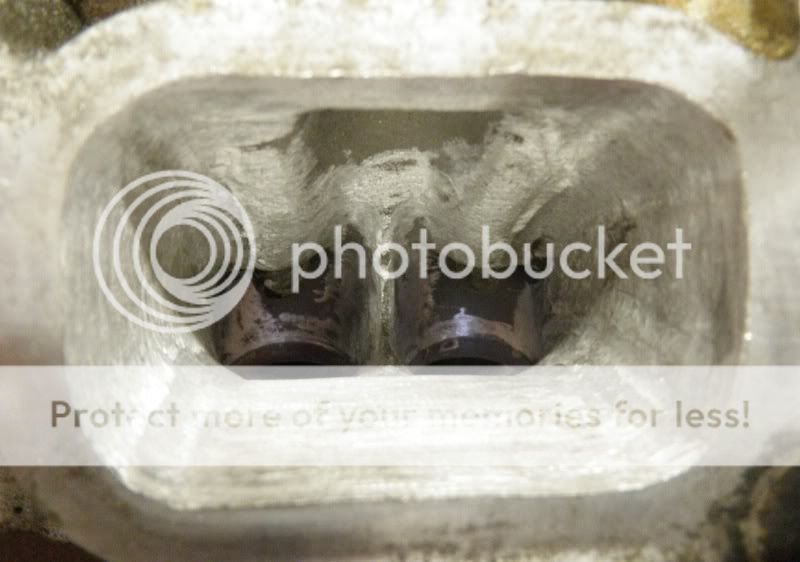
looking down these intake runners i cant wait to start porting and polishing...
P5270638.jpg


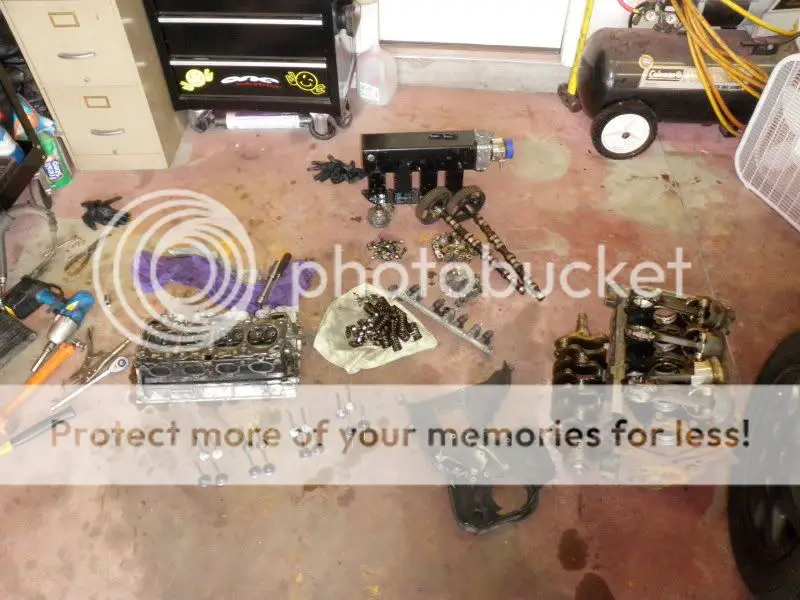
now there's just parts everywhere...
P5270629.jpg


just need all my new stuff to come in so i can get this beast back on the road...

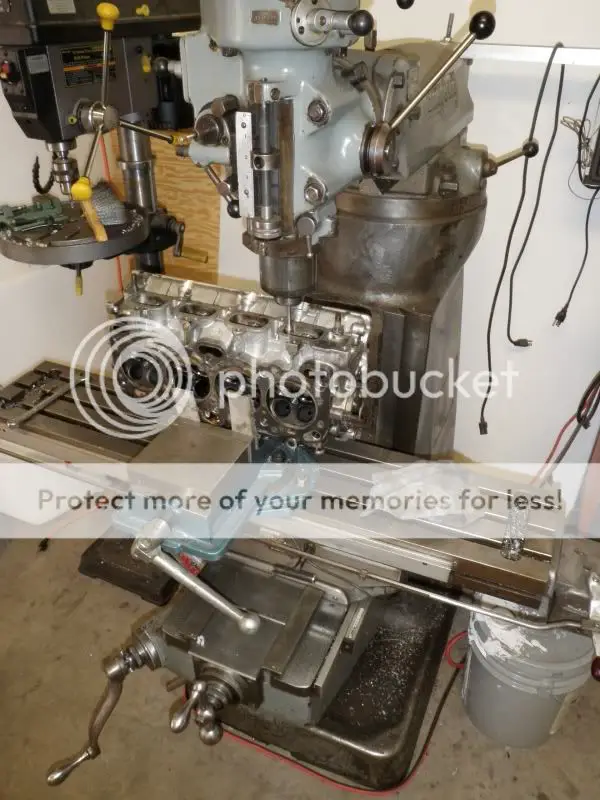
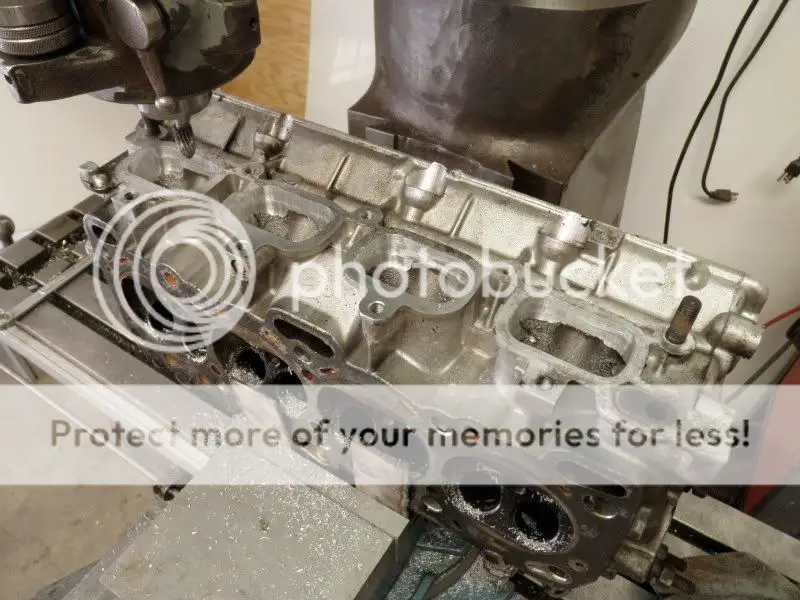
got some more done today....

threw my head on the ol' bridgeport mill for some port work
P5280644.jpg


P5280645.jpg


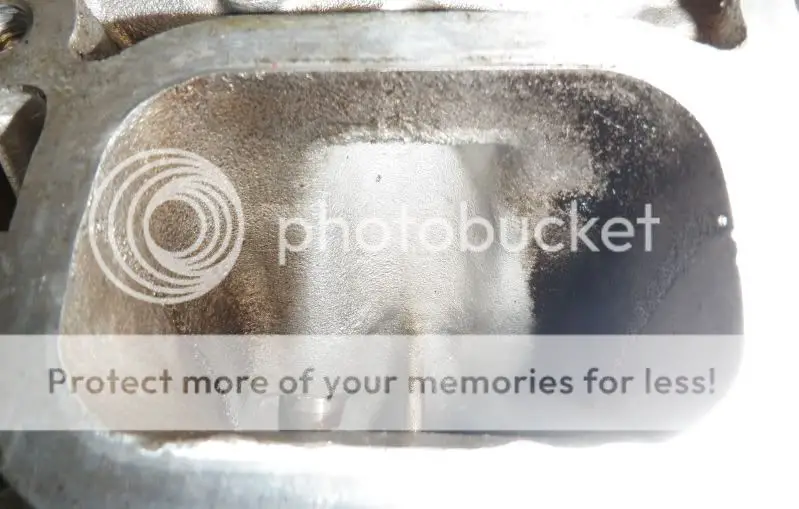
here is a fun befor picture (not the super clean part where the E85 was sprayed through my injectors /ubbthreads/images/graemlins/smile.gif
P5280643.jpg


P5280655.jpg


exhaust port
P5280646.jpg


P5280647.jpg


P5280656.jpg


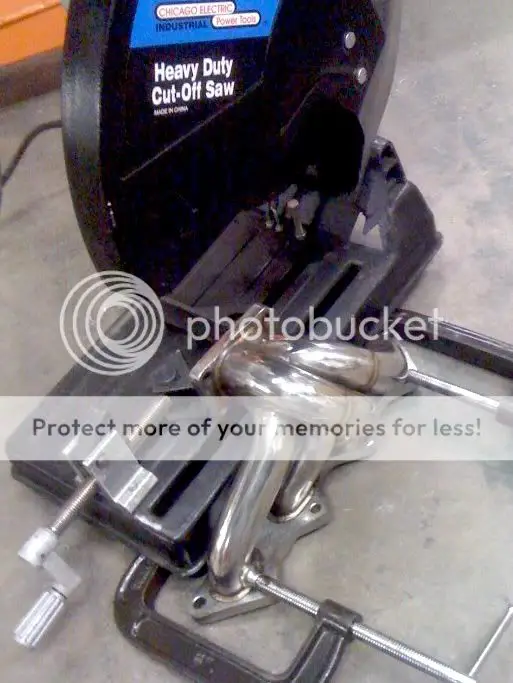
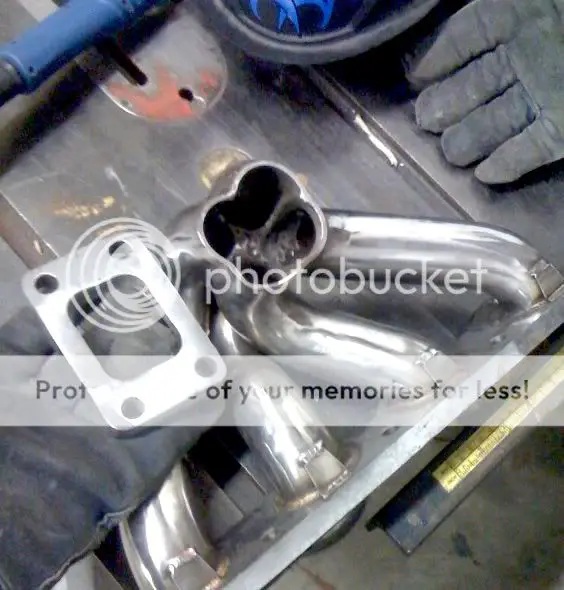
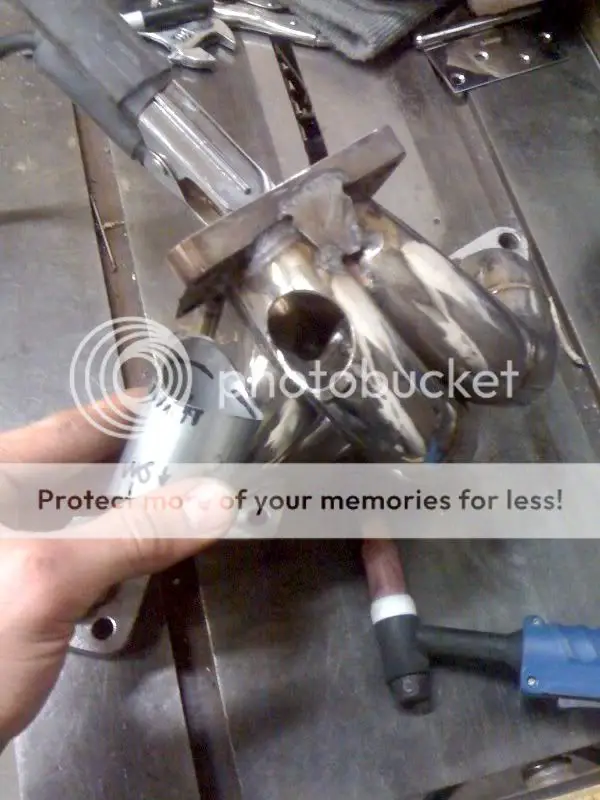
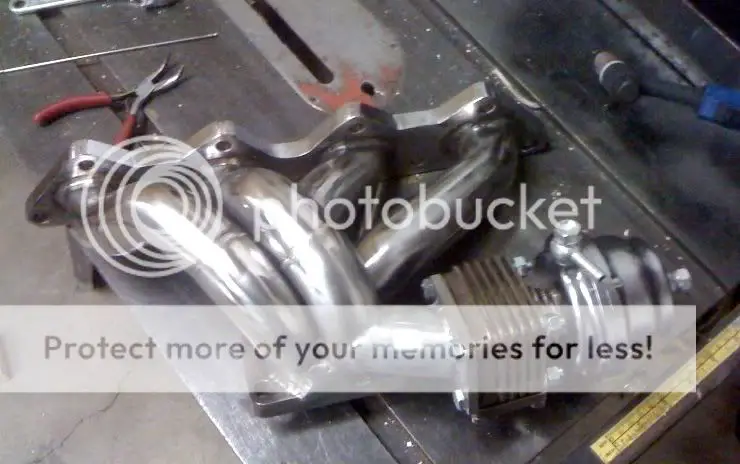
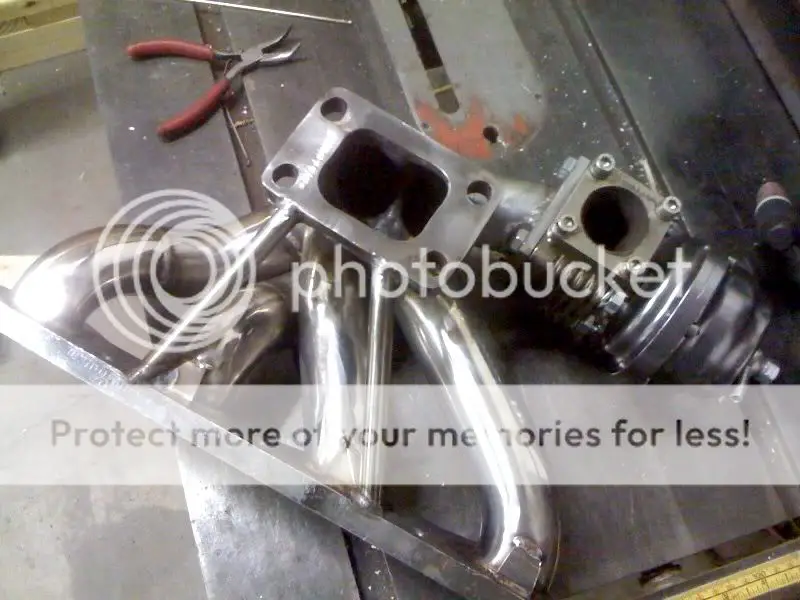
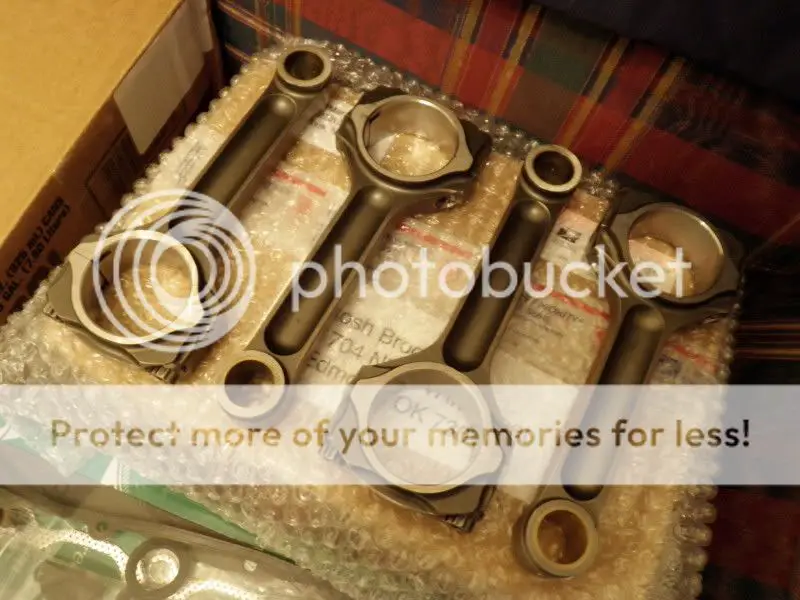
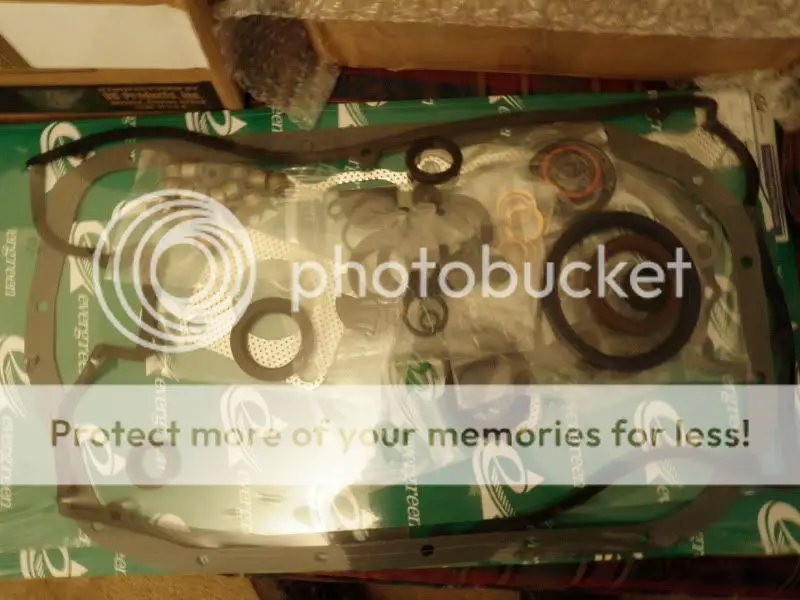
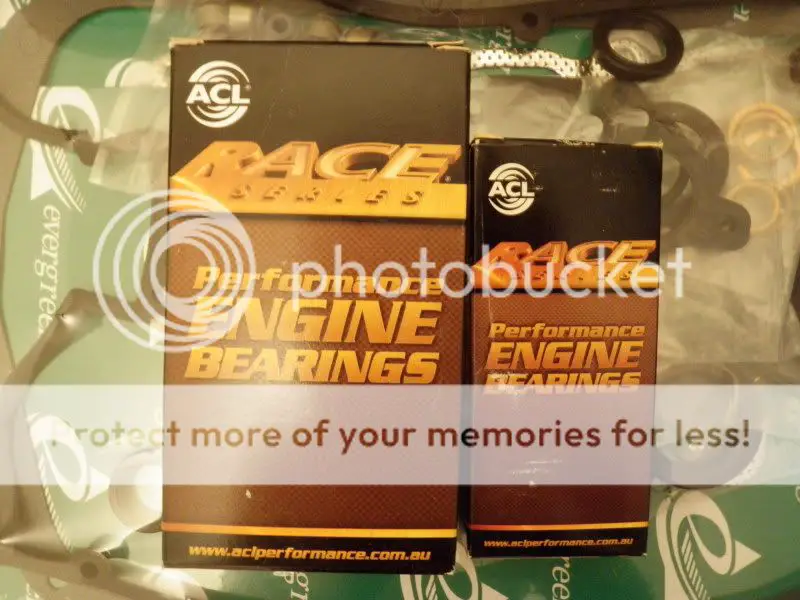
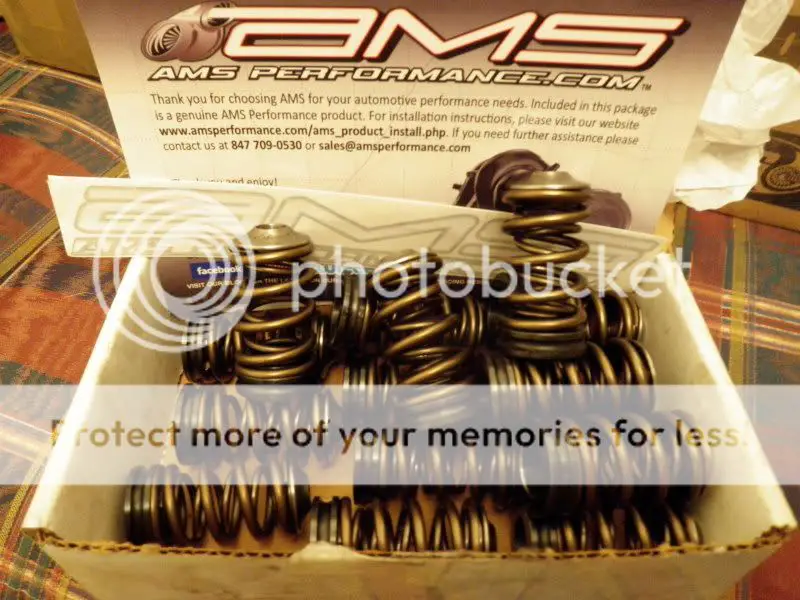
then got some parts in... FINALLY... /ubbthreads/images/graemlins/smile.gif

some sweet oliver I-beams
P5280650.jpg


gasket set
P5280651.jpg


acl race main and rod bearings
P5280652.jpg


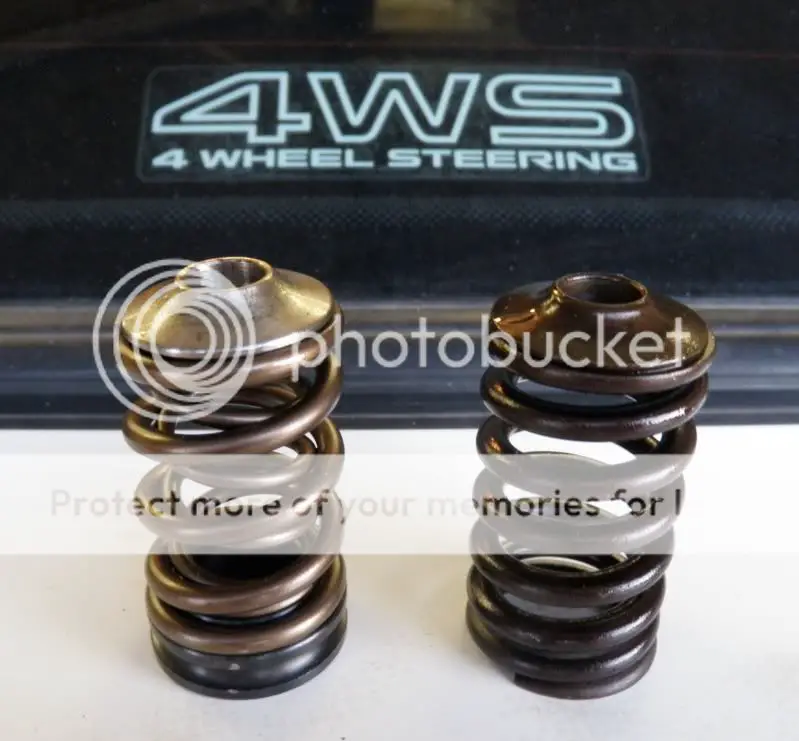
ferrea dual valve springs wit retainers
P5280653.jpg


compared to the stock springs
P5280649.jpg
 
Last edited by a moderator:

TurboTrader

Well-known member
Joined
Jan 30, 2009
Messages
161
Location
Pemberton, NJ
I'm curious. All that crap in the valve cover, is it powder coating, or is it from sandblasting, or both? Did the powder coater or sandblaster not take proper precautions to keep the crud out of the inside?

Also, I was wondering if you plan to put the inner panel back in (or fab a new one), or if it would be unnecessary to do so. Just curious and trying to learn something new. Thanks!

Looking good so far either way. I can't wait to get mine back up and running, though I'm a long ways out.
 

fuel

Well-known member
Joined
Feb 23, 2009
Messages
2,165
Location
Toronto, ON, Canada
^^ caked on oil residue.
 

GolfBall

Well-known member
Joined
Aug 28, 2009
Messages
125
Location
Edmond, OK
Quoting MadBeachDSM:
I'm curious. All that crap in the valve cover, is it powder coating, or is it from sandblasting, or both? Did the powder coater or sandblaster not take proper precautions to keep the crud out of the inside?

Also, I was wondering if you plan to put the inner panel back in (or fab a new one), or if it would be unnecessary to do so. Just curious and trying to learn something new. Thanks!

Looking good so far either way. I can't wait to get mine back up and running, though I'm a long ways out.


yeah combo of old burned caked in oil and sand from the sand blasters. maybe some powder coat in there too.... im not putting mine back in and no one "needs one" but if you do take it out you need to have a proper catch can because it will increase blow by out of the valve cover breathers.
 
Support Vendors who Support the GVR-4 Community
Boosted Fabrication ECM Tuning ExtremePSI Fuel Injector Clinic Jacks Transmissions JNZ Tuning Kiggly Racing Morrison Fabrications RixRacing RockAuto RTM Racing STM Tuned
Top