The Top Mitsubishi Galant VR-4 Resource

Join the best E39A 1991-1992 Mitsubishi Galant VR-4 community and document your GVR4 journey.

  • Software Upgraded - Reset Your Password to Login
    In order to log in after the forum software change, you need to reset your password. If you don't have access to the email address you used to register your GVR4.org account, you won't be able to reset your password. In that case, follow the instructions here to regain access to the forum.

The never ending build of 1062.

Galantvr41062

Well-known member
Joined
Aug 20, 2007
Messages
410
Location
plymouth, MN
I now have a mock up motor back in place. This is to finish up the loose ends for the engine and turbo setup before I bring the real deal back home from work. I did put it back up on the scales again with almost everything to make it run. I will just say the 2400lb race weight will be no problem.

~John
 

Galantvr41062

Well-known member
Joined
Aug 20, 2007
Messages
410
Location
plymouth, MN
Picture_13329.jpg

Picture_13328.jpg

Picture_13330.jpg

Picture_13331.jpg


Here is what it looks like for the basic spark plug changes, timing check, water to air intercooler work or filling with ice, etc.


Picture_13332.jpg

Picture_13335.jpg

Picture_13336.jpg

Picture_13337.jpg


Anything more and the 4 pins are removed the front end come off to make working on stuff a lot easier. I will be making slide in bolt trays for the front and fire wall mounts.

Picture_13343.jpg

Picture_13341.jpg


Let me get in there and just pull the tranny real quick like. There should be more to come in the next few days. I have compiled a list of parts needed to make this the record breaking car that it should be. Thanks for looking.

~John
 

Terrance362

Well-known member
Joined
Aug 14, 2006
Messages
387
Location
Winston-Salem, NC
sweet!!!!!!!!Who made your liquid/air cool???? Looks to be a good setup /ubbthreads/images/graemlins/rofl.gif /ubbthreads/images/graemlins/rofl.gif
 

Galantvr41062

Well-known member
Joined
Aug 20, 2007
Messages
410
Location
plymouth, MN
I bought the intercooler part from PTE years ago. It had cast end tanks with 3" in and out. I cut the end tanks off and fabricated the ones you see with 3.5" in and outs. I used a big side mount intercooler core from Bell and welded up the heat exchanger my self. I am happy with the setup. With 4 gallons of water and water wetter in the system intake air temp were only 15deg above ambient air at 47psi.

~John
 
Last edited:

Galantvr41062

Well-known member
Joined
Aug 20, 2007
Messages
410
Location
plymouth, MN
Picture_14001.jpg

Picture_14005.jpg

Picture_14004.jpg


The 4 pins for the trunk lid and installed and the heights set. The 2 in the back fit nice under the wing and its easy to slide on and off for filling up, battery or fuel pump service or filling the nitrous bottle.

Picture_14006.jpg

Picture_14009.jpg

Picture_14013.jpg


Now with the trunk lid off the break lights and license plate area are mounted to the chassis and just the trunk lid and wing come off. I have a little more lining up and finish work back here.

Picture_14017.jpg

Picture_14018.jpg


Here is the trunk lid down to the basics. I also added 2 braces on the rear deck lid. Also the front hood pin locations are fabricated, now I just need a hood to install.

link

Here are the tires I want to run on all 4 corners. Now I just need to find a wheel to fit a 4 x 114.3 bolt patter and be 15" x 8" wide. Enkei RPF1 or similar.

~John
 

Nartanian

Well-known member
Joined
Jan 14, 2009
Messages
611
Location
Richfield, MN
Simply Stunning work. /ubbthreads/images/graemlins/worthy.gif
 

Galantvr41062

Well-known member
Joined
Aug 20, 2007
Messages
410
Location
plymouth, MN
Picture_15003.jpg

Picture_15002.jpg

Picture_15005.jpg

Picture_15004.jpg


I now have the 4 hood pins mounted, then I just set the height when I have a hood to install. And the hood can be removed for easy work or can be pulled off with the front clip for bigger jobs.

Picture_15010.jpg

Picture_15011.jpg


I boxed in the upper frame rail to the unibody structure, this will help make the front end as strong as possible. Just a little more clean up and a few more welds, then its onto painting before the motor goes back in for finish assembly.

Picture_15008.jpg


This strip of aluminum replaces the 2lb stock blob of metal, and this does the same job but is a 1/4 of the weight. This is the rear subframe front mount to the body.

Picture_15006.jpg

Picture_15007.jpg


The rear bumber cover is back on, I have some tabs on the top underside lip, then the plate in the middle that holds the bottom up. Now just a few more rivits and brackets in the wheel well area and the back of the car is done minus the rear window.

It is getting closer, we will be painting this weekend, then build the dash and start to lay out the wiring.

~John
 

Galantvr41062

Well-known member
Joined
Aug 20, 2007
Messages
410
Location
plymouth, MN
We have decided to paint all the high traffic areas mat black, and the interior a grey color, the exterior will remain summit white. The idea is to keep the engine bay and trunk looking cleaner.

Picture_16006.jpg

Picture_16004.jpg

Picture_16005.jpg


This will match the block and valve cover that are black also.

~John
 

Galantvr41062

Well-known member
Joined
Aug 20, 2007
Messages
410
Location
plymouth, MN
I guess I have not posted any of that info here, sorry. The main goal for the car is for drag racing. I have revised a few of the major parts of the head and turbo setup so everything will work a little better. The car has made some ok power last time it was running, 610awhp at 36psi. The goal is to get the chassis sorted out on E85 and somewhere around 30-35psi. Then turn it up as needed, ending in the 50-55psi range on E98 or C/Q-16 and 100 shot of nitrous. I have focused on weight reduction and making it easy to work on, thus the removable front end. Here is a run down of the mod list.

Engine:
2.0 block bored and honed .040 over
wiseco 9.25:1 pistons
Crower rods
stock 2.0 crank, balanced and polished
King std sized rod and main bearins
ARP main studs, line bored and honed with pins in the main caps
removed balance shaft
Cometic HP head gasket
A1 L19 head studs
major head port work
1mm over ss valves
shimmed crower valve springs and shaved down chrome moly retainers
Crower 288 cams
Crower cam gears
Greddy blue timing belt

Turbo setup:
Garrett standard bearing GT4202 with 1.01 divided housing (I will up grade to the Billet 4202 and Tial exhaust housing later)
custom divided top mount T4 exhaust manifold
custom REEF drag SMIM with 3 injectors per cylinder
PTE WTA intercooler core with custom end tanks 3.5" in and out
custom wta intercooler heat exchanger, 4 gallon system with ability to add 1.5 gallons of ice
twin tial 38mm waist gates
4" tube style exhaust
10lb NOS bottle, will be a 75/100 shot dry in the TB or 100 shot direct port dry

Fuel:
8 1600cc injectors (2 per cylinder) as secondary injectors
4 450 or similar injectors(factory location) for low throttle
fuel pump/s will be aeromotive A1000, aeromotive eliminator pump, or 4 Ford GT fuel pumps(330lph)
-10 aeromotive AFPR
1/2" aluminum hard line, feed and return, -10 SS braided line from pump/s to hard line and hard line to fuel rails and AFPR
pump gas fuel E-85 3x psi
race gas E98 or C/Q-16 5x psi
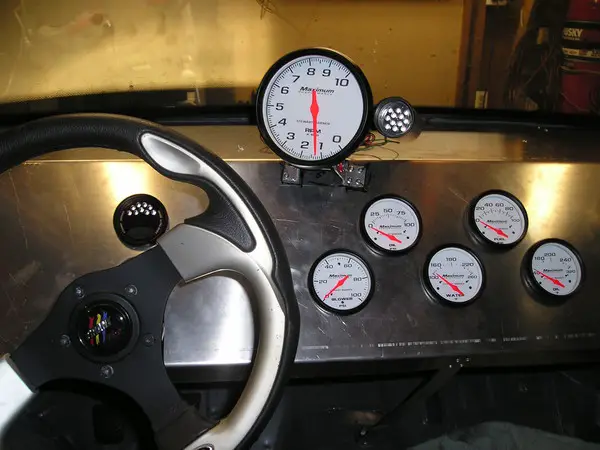
AEM EMS, 5bar map, GM IAT, secondary injectors ran from a injector driver box to split the secondary injector signals(4) to run the 8 1600's.

Drive train:
shep stage 4 or similar tranny
twin disk clutch or equal
stock tcase
stock 3 bolt ring and pinion
4 bolt LSD diff
stock 4 bolt rear axels
stock front axels
solid mounts on just about everything
Tire option 1 click
Tire option 2 click
tire option 3 BFG drag radials 275/50/15
Rim will be a Enkei RPF1 or similar 15x8 4x114.3

chassis:
8 point 1 5/8" .083" wall DOM chrome moly roll cage
tied in front tubular frame structure retaining factor strut location and engine mounts
1 5/8" .083 dom chrome moly dash bar
added 2" x 3" .125" wall mild steel frame rail for main hoop and D bar mounts
Kirkey race seat w/ custom mounts and 5 point G force safty harness
I will buy a Hans device when things start to get fast
K sport coil overs for a 1g
lexan rear window
removable front clip
removable trunk lid
stock breaks
EBC red pads all around
slotted rotors up front
SS break lines
new ball joints and tie rod ends
custom fabricated strut bars
The rolling chassis weighs in at 1500lbs
Total race weight with drive should check in at around 2400lbs
The fastest this car has gone is 11.66@122, as posted on DSM Times. This was 3100lb race weight and about 440awhp.


~John
Any other questions or if you want to see more/different pics of something let me know, thanks for looking.
 
Last edited:

Galantvr41062

Well-known member
Joined
Aug 20, 2007
Messages
410
Location
plymouth, MN
Picture_057.jpg

Picture_066.jpg

Picture_061.jpg

Picture_064.jpg


The interior and trunk are all painted now. The interior is satin granite, and most everything else in side will be black to offset the gray.

Picture_18067.jpg

Picture_18070.jpg

Picture_18068.jpg


Here is the dash all fabricated and mounted with the gauges set in place. The dash will be painted flat black to reduce sun glare. The gauge layout is simple: behind the steering wheel is a tach/shift light, the 5" monster tach mounted to the dash with oil light attached, then the blower gauge, oil pressure, water temp, fuel pressure, and oil temp, are centered in the dash.

~John
 

first off great job. i wish i had the time and i just money to do something like that. Second, i just have a qurock, stupid question. Not that im doubting you or anything but how are you going to go about routing the upper rad hose? it looks like the thremostate housing sits right next to the hot side of that gigantic turbo lol.
 

Galantvr41062

Well-known member
Joined
Aug 20, 2007
Messages
410
Location
plymouth, MN
I have a picture in the Mitsustyle thread, click Its on page 3 of my upper radiator hose I used with a full sized DSM radiator. It is a 1.5" ss tube with hoses hooking it onto the thermostat housing and radiator. I am going with a honda half sized radiator placed off to the driver or passanger side of the engine bay, so this upper and lower radiator hose will change. The weight balance will determine this location more then anything. Here is the picture, and thanks for looking and the comments/questions.

Picture_108.jpg


~John
 
Last edited:

Galantvr41062

Well-known member
Joined
Aug 20, 2007
Messages
410
Location
plymouth, MN
Here is the update, also I will be storing the car for a few months, just until I have the cash to finish the project, then it will be reassemble with some minor touch up here and there.

Picture_19005.jpg


Here is the flat black dash.

Picture_19006.jpg


I added a 1/4" thick aluminum washer to the rear cross member mount plates.

Picture_19001.jpg


Here is the down pipe and twin tial 38mm waist gates plumed back into the exhaust, the other one will be mounted over the alternator.

Picture_19004.jpg


Here is the almost completed engine bay shot.

Picture_19002.jpg

Picture_19003.jpg


I added aluminum hold down/together straps for the water to air intercooler.

~John
 

Your fabrication skills are amazing. Wow! Not to mention it's summit white /ubbthreads/images/graemlins/grin.gif
 
Support Vendors who Support the GVR-4 Community
Boosted Fabrication ECM Tuning ExtremePSI Fuel Injector Clinic Jacks Transmissions JNZ Tuning Kiggly Racing Morrison Fabrications RixRacing RockAuto RTM Racing STM Tuned

Recent Forum Posts

Top