The Top Mitsubishi Galant VR-4 Resource

Join the best E39A 1991-1992 Mitsubishi Galant VR-4 community and document your GVR4 journey.

  • Software Upgraded - Reset Your Password to Login
    In order to log in after the forum software change, you need to reset your password. If you don't have access to the email address you used to register your GVR4.org account, you won't be able to reset your password. In that case, follow the instructions here to regain access to the forum.

1865 track day and DD

Noobsauce

Well-known member
Joined
Apr 7, 2012
Messages
159
Location
Beaverton, Oregon
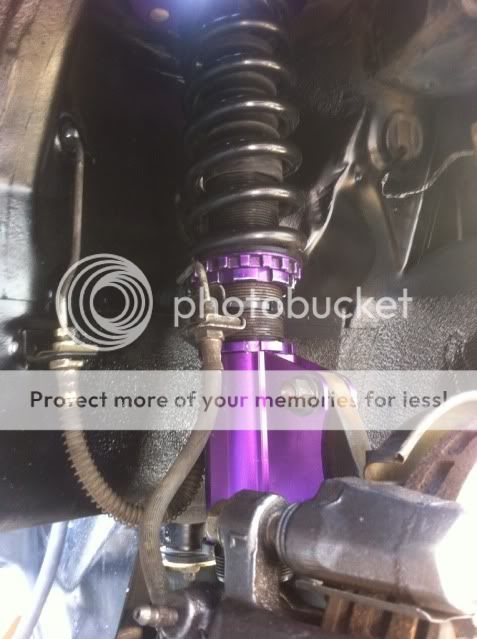
Well I got ahead of myself today and forgot to take pics of the cleaned up coilovers. Tomorow I will take some installed on the car.
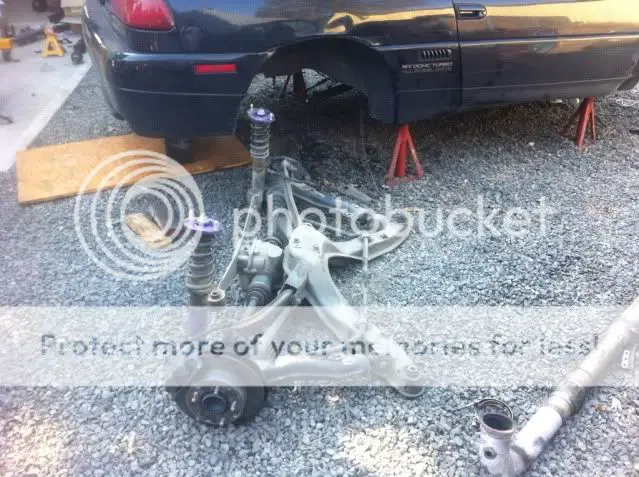
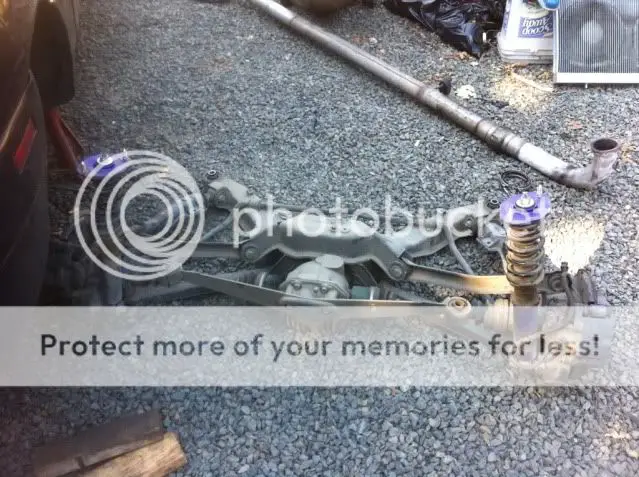
Today I swapped the ABS delete,front 5 lug hubs,front coilovers,talon PS rack, poly swaybar bushings and talon PS res with lines.
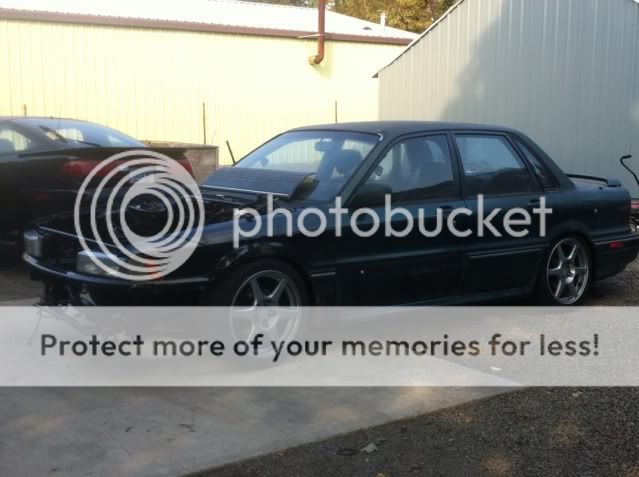
B7D3A60E-5DF2-4C9A-BD85-BB1BAB77DB0C-11076-00000E8E18E958AF.jpg

91F9346E-F726-4425-914A-890541FDA857-11076-00000E8E1D2E0F06.jpg

8C366832-08C5-4BFD-94E3-383B87A71245-11076-00000E8E20FDA283.jpg
 

Noobsauce

Well-known member
Joined
Apr 7, 2012
Messages
159
Location
Beaverton, Oregon
Here's a pic of the front. I haven't cleaned the calipers Or rotors because I will be swapping them out for brembo rotors and race calipers.
I also removed the rear subframe from the talon. Ready for cleaning tomorrow.

064A8A30-E052-40AE-B22B-C9DBBCFA4DC0-12200-0000101A5F1234F3_zpsf517fce1.jpg

AF6A7972-D36C-4CF5-A6FD-F3E428161891-12200-0000101A5A62AA1E_zps523558c1.jpg

B87A487E-0D35-4A19-B5E4-AF040B6F2342-12200-0000101A561BD642_zpsdee6f4e2.jpg

DC0AFD1A-CF99-4CF7-AEDC-423A7A8B6109-12200-0000101A51D0E43C_zps3e35aa64.jpg
 

Noobsauce

Well-known member
Joined
Apr 7, 2012
Messages
159
Location
Beaverton, Oregon
Completed alot today. Welded the washers onto the subframe,installed subframe,blead the brakes,put the wheels on and dropped the car off the stands.

6FD45A5F-3E61-4737-B34E-F1CC40DA45EA-13680-000011AD2DDC4526_zps3878b447.jpg

9DB77401-A8B8-4CF5-B30E-3FA368F00027-13680-000011AD31A9519A_zps5b77965f.jpg

ABB65B9D-C1DE-49A7-997B-42D055914A9E-13680-000011AD3407DFF8_zps366abaa8.jpg

2091DE68-F977-435D-ABE3-2B40D77E6D12-13680-000011AD3708F459_zps98c52ff7.jpg

D213FB8A-41BA-4E15-9EFD-1627C3906976-13680-000011AD443BA96C_zps60936796.jpg

A006673B-2AC1-4F7C-B39E-1A442468EF57-13680-000011AD4FB78B52_zpsbe40c855.jpg

A6DDB1DB-7246-4C1A-B731-C3CB36209214-13680-000011AD52679950_zps180c0b2d.jpg

1B416F45-0D4E-4DE8-B6CC-3585116C50DA-13680-000011AD5858831B_zpsbfb06da0.jpg

And I do plan to raise the rear. Im shooting for more race and less rice haha
 

Noobsauce

Well-known member
Joined
Apr 7, 2012
Messages
159
Location
Beaverton, Oregon
Ready to install the Walbro 255 and found this sh*t!
AD5E0F5D-9442-4138-A998-FD35ED8C7496-14359-0000133E5BCAA3B4_zps3adca787.jpg

The hanger is to rusted to use so I broke the fitting to hopfully save the hose. I then bead blasted the fitting and soaked it in PB blaster.
Looks like the hose will be ok.
Since the FP is toast I figured I would modify a 1g dsm hanger.
E4CD1027-A229-4566-83AC-DC65838DF137-14359-0000133E58ACA874_zps22e6762d.jpg

B06F5AD0-D849-43EA-9CFC-353A2844890C-14359-0000133E552D6B81_zpsad8d6501.jpg

53ECB230-1C1A-4425-877F-E17F9B19C34E-14359-0000133E5242F394_zps0ef4e4c2.jpg

F89B3A02-4B44-4F2C-8FF1-1439232C3F78-14359-0000133E4E8C3D8E_zps286c8e73.jpg

D7A7DE9D-2989-46AA-8928-BDB31C8F9252-14359-0000133E4B9C0EF8_zpsb902599c.jpg

E6350F7C-DA3E-466A-BF90-DB5C1609893F-14359-0000133E47E1EDAF_zps7b4f41c7.jpg

I had to cut and weld the hanger from the 1g to make it fit properly. Took 1 1/4" to match the stock hanger.
 

Armitage

Well-known member
Joined
Oct 16, 2003
Messages
715
Location
Herndon, VA
Nice work so far. Good to see a VR4 restored instead of scrapped!
 

Noobsauce

Well-known member
Joined
Apr 7, 2012
Messages
159
Location
Beaverton, Oregon
Adjusted the front and rear coilovers so the car sits higher. Was able to weld in the lower radiator mounts and dropped the engine in place.
E8180785-855F-4051-A748-A82AA28A2876-16011-000014D658D7C8FA_zps0f09845a.jpg

FB94964B-4FDF-47F1-BD4D-22D71C71B48D-16011-000014D652D4997E_zpsbe2c72cd.jpg

866C0010-F181-4CCC-9002-44346F749FD7-16011-000014D66019F139_zps17ec3f6e.jpg
 

boosted_85

Well-known member
Joined
Apr 2, 2009
Messages
198
Location
milwaukee, wi
looks really good, do you have any close up pics of how you mounted up the headlights? I want to do the same thing to 1320.
 

EHmotorsports

Well-known member
Joined
Sep 25, 2012
Messages
1,278
Location
Beaverton
First thing I did was bend a peice of sheet. Drilled the holes and welded nuts to the backside.
6DA283E9-AE8C-4EEC-A2D4-303141B4252F-135-0000000BC04D721B.jpg

Then I welded the brackets to the front bars.
FB944467-AA5B-4DAD-9C9D-D937B9B6F616-135-0000000BBA675FF7.jpg

1CEA07C9-0883-4AA0-A10B-721C937A67E6-135-0000000BBD960911.jpg
 

turbowop

Well-known member
Joined
Apr 29, 2001
Messages
11,972
Location
Yakima, WA
Because he pulled those coilovers out of a DSM. The bolt pattern for the top plate is different and they will only fit if turned 90 degrees. I had to use new Tein e39a plates on my JIC coilovers since they came off a DSM as well. Otherwise mine would have looked the same way.
 
Last edited:

EHmotorsports

Well-known member
Joined
Sep 25, 2012
Messages
1,278
Location
Beaverton
Exactly what Turbowop said. I'm shooting for 2-2.5 degs of negative camber but also 4-4.5 degs of caster. So far I very roughly have -1.8 camber and close to 4 of caster.
 

EHmotorsports

Well-known member
Joined
Sep 25, 2012
Messages
1,278
Location
Beaverton
Decided it was time to install the hood latches. I started by masking a centerline. Then traced the pattern provided with the latches.
0071DB12-ED41-4BE2-B587-D792AA322FEB-709-0000013FFEB1B0D8.jpg

D2449164-E732-448E-AC56-31E7A8577833-709-0000013FFA974B1F.jpg

74B7FA2E-86BF-41F5-B0F6-7045546A6AA0-709-0000013FF2781A0B.jpg

7AA16E02-1328-4612-9A38-1AFE3619CFE5-709-0000013FEF964E48.jpg

Used a die grinder to clean up the sharp edges. Then drilled the holes for the fasteners.
04E99D0E-ED9E-401F-83F6-DCC85E94D423-709-0000013FE2F97CBB.jpg

D4474978-08B8-4045-8E75-66753F7B0991-709-0000013FE601E3B3.jpg

4E775F3A-245D-4357-8D73-8439D325BDBD-709-0000013FD9D49A93.jpg
 

JamesFoster

Well-known member
Joined
Oct 14, 2008
Messages
583
Location
ALL
Looks great! What did you paint the engine bay with? Going to do the same soon.
 

EHmotorsports

Well-known member
Joined
Sep 25, 2012
Messages
1,278
Location
Beaverton
I used rustolium black primer and gloss black for finish. If you have a sprayer you can get the 1gal gloss black at home depot.
 

EHmotorsports

Well-known member
Joined
Sep 25, 2012
Messages
1,278
Location
Beaverton
Installed heater hoses,intercooler pipes. Also wired the map and intake temp sensors.
I'm so close to firing this thing. If everything works out it should be running by Sunday.
 

EHmotorsports

Well-known member
Joined
Sep 25, 2012
Messages
1,278
Location
Beaverton
update time
Had an injector O ring leaking pretty bad when cranking the engine over. Replaced all the injector seals.
Found that the fuel supply line going to the fuel filter was bottoming out on the threads causing a major leak. Took one thread off the end. tested again with no leaks.
also found i wasn't getting power to half of the MPI relay. tested power going in and out. found the BR wire coming from the fuseable link #8 had no power. traced and found a bad fuse at the engine fuse panel.
Now that all the issues (for now) are fixed i am able to connect to Dsmlink. the car starts and runs great!!
I just need to make a bracket for the coolant overflow tank,wire the cooling fan relay and weld the 3" exhaust up.
more pics will come.
 
Support Vendors who Support the GVR-4 Community
Boosted Fabrication ECM Tuning ExtremePSI Fuel Injector Clinic Jacks Transmissions JNZ Tuning Kiggly Racing Morrison Fabrications RixRacing RockAuto RTM Racing STM Tuned
Top