The Top Mitsubishi Galant VR-4 Resource

Join the best E39A 1991-1992 Mitsubishi Galant VR-4 community and document your GVR4 journey.

  • Software Upgraded - Reset Your Password to Login
    In order to log in after the forum software change, you need to reset your password. If you don't have access to the email address you used to register your GVR4.org account, you won't be able to reset your password. In that case, follow the instructions here to regain access to the forum.

1722/2000 burn victim rescue

GSXftw

Well-known member
Joined
Dec 22, 2014
Messages
111
Location
medford, OR
Happy valentines day! Starting to really get charged about this thing. I went to my first race of the year, got to meet farmtruck and azn from street outlaws, they were there for the tracks season opener. Super nice guys, stayed there all weekend, did the winners circle and a few arm drop races, as well as run the farmtruck for a quick blast down the track.


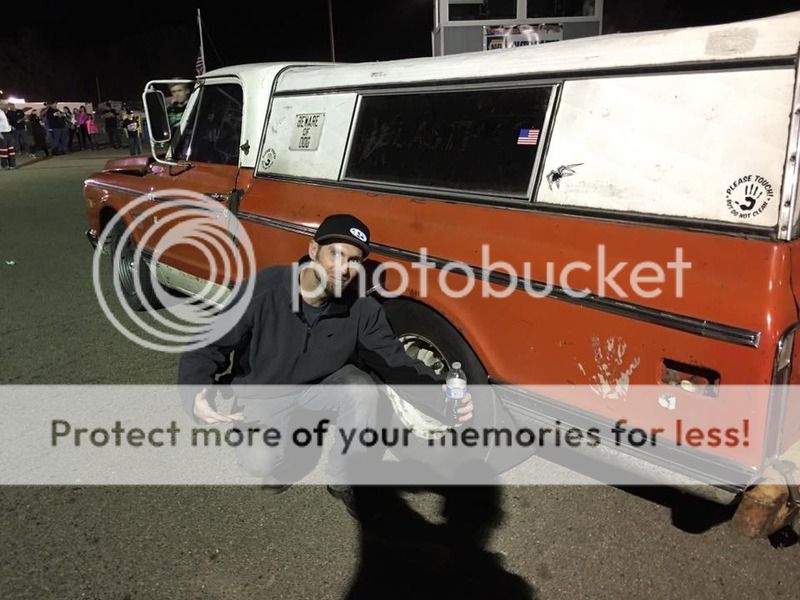
I got to spend some time with my valentines date /ubbthreads/images/graemlins/smile.gif


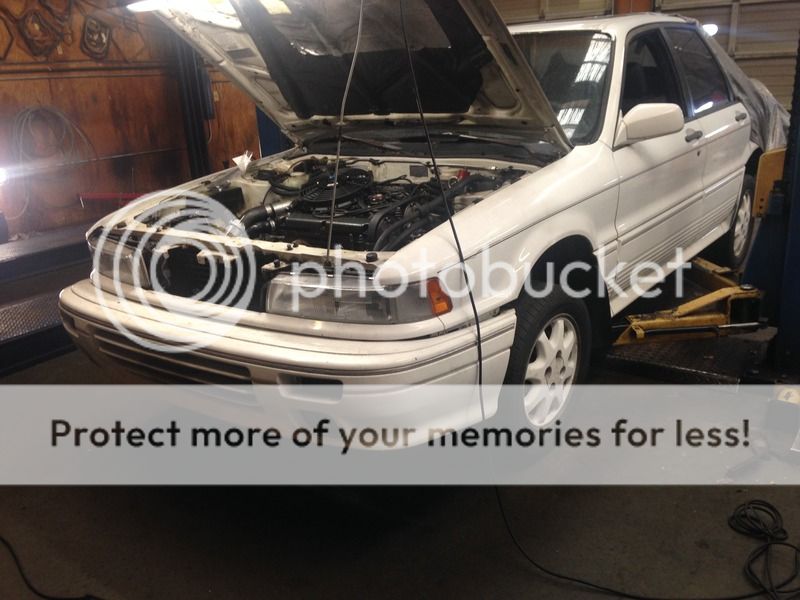
I did a little bit of wiring, got a pusher fan hooked up, waiting on the other, gonna have two 10"s. Then I filled the radiator up with water, saw my water pipe where it meets the pump is seeping water a bit, with a brand new O-ring...SMH... little stopleak will fix it.

Then I worked on finishing up the bumper/intercooler install. The intercooler wasnt wanting to sit vertical for some reason with the bumper in, kept wanting to sit forward. Then I saw the bumper needed a small trim. I tried to be gentle.


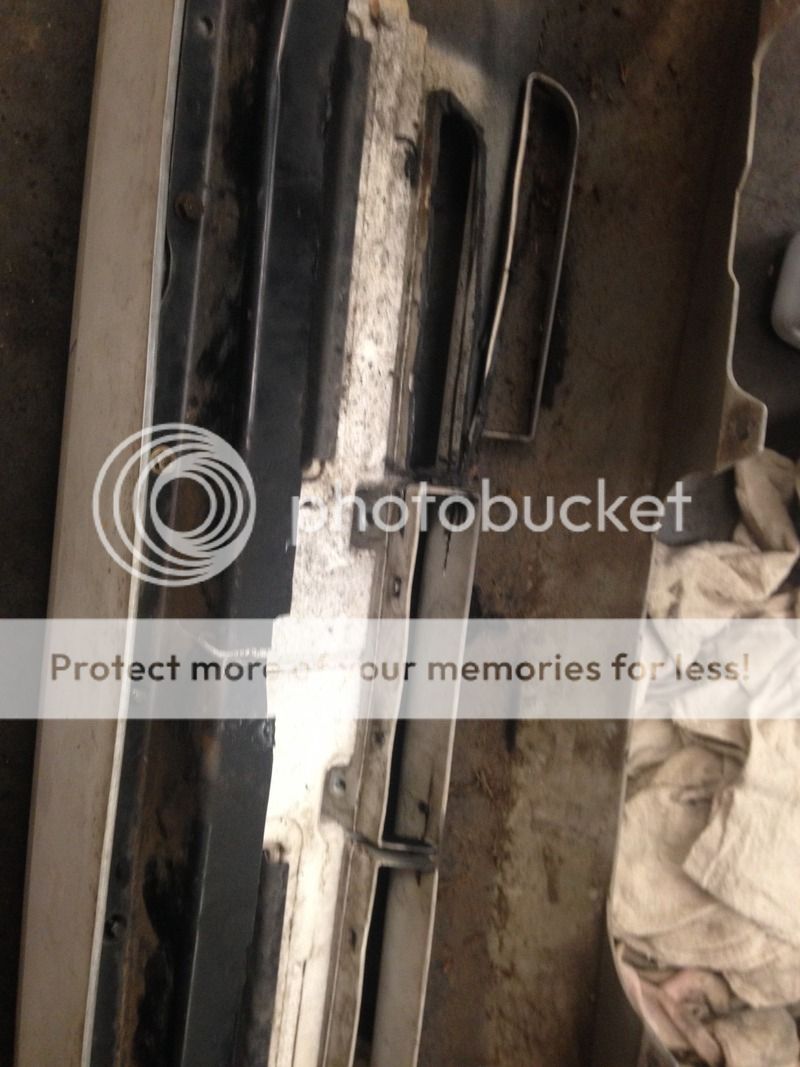
Then I went a little deep and trimmed the lower bumper from the supporting verticals, which I was trying to keep so I wouldnt have a saggy bumper /ubbthreads/images/graemlins/smile.gif


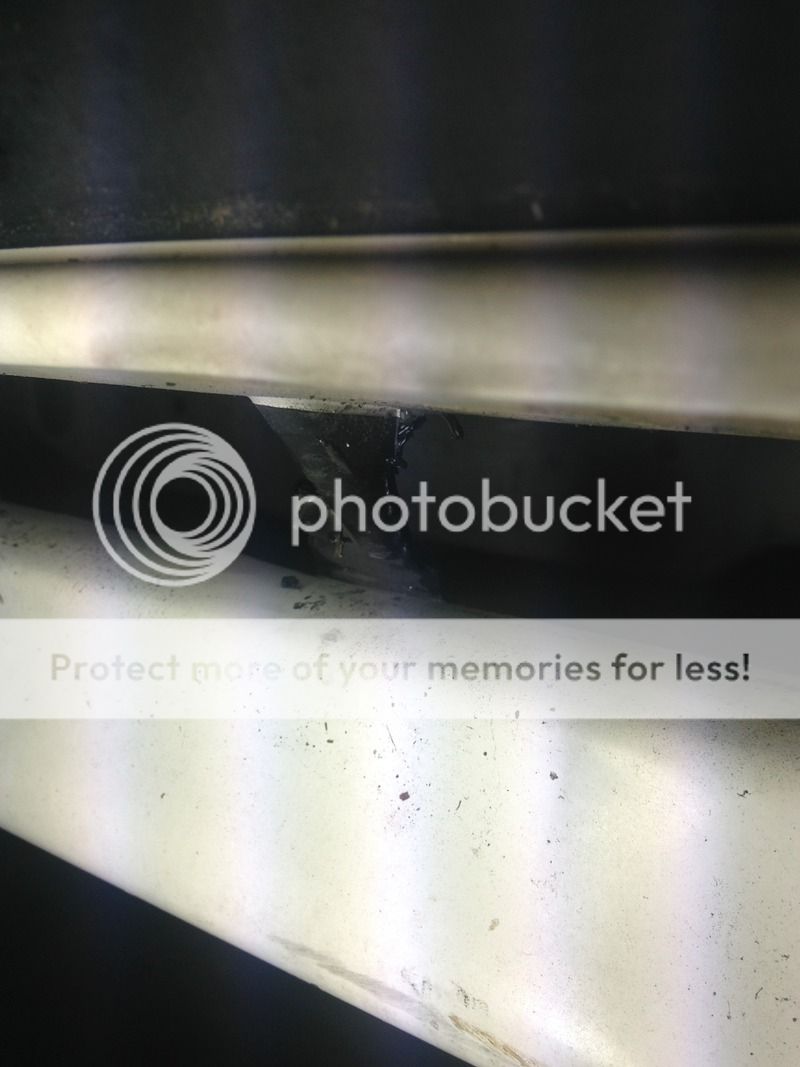
So I JB welded some plastic to hold these two back together, then plastic welded it a bit. I trimmed it after this and it looks pretty good. Best of all its flat and will clear my intercooler on the backside.


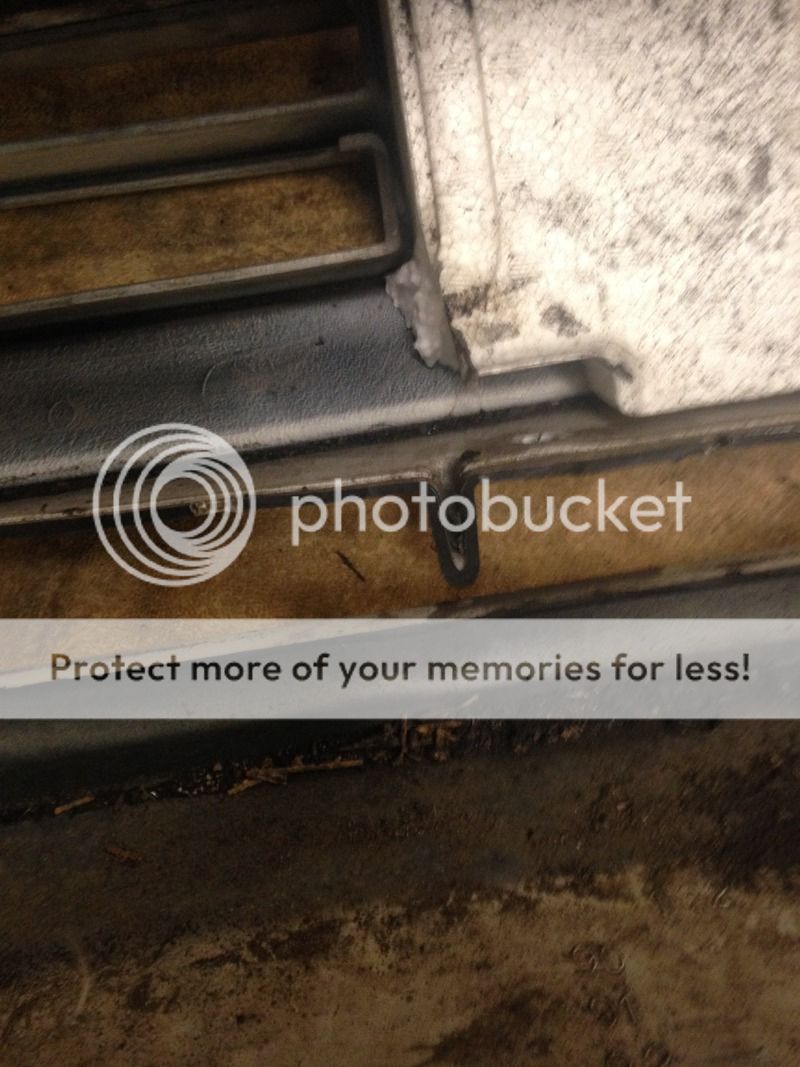
Thats all I trimmed for now, Im gonna take a look at what that junkyard had in the way of front bumpers for me, and thatll let me decide if I wanna open up this bumper a little more, or call this good and cut up a spare. Either way I plan on having as much of this intercooler exposed as I can in the summer time. Ive got the intercooler off so I can get the mounting threads welded on, so I can install this thing a final time. Thats all for now /ubbthreads/images/graemlins/smile.gif
 

GSXftw

Well-known member
Joined
Dec 22, 2014
Messages
111
Location
medford, OR
Did some AC things tonight... Pulled off the drier, got a new one, replaced seals there


Then did the seals at the compressor, it already had the PAG oil in it (I was thinking ahead /ubbthreads/images/graemlins/smile.gif Did a flush, and got as near as I could to the 8.75 oz of oil it called for.


I got a R134 retrofit kit, but the low side fitting wouldnt fit, so Ill have to get the right one before I can vacuum test

Then I mounted my catch can all tucked away


Thats about all for now, Im actually getting down to running out of things to do before the bodywork, which is an awesome feeling, one thing I wanna be sure and do is delete ABS, and hook up the ARC2 box in its place. I got the prop valve from a non ABS 92 DSM, but still waiting on the lines. Thanks for reading thats all for now /ubbthreads/images/graemlins/smile.gif
 

GSXftw

Well-known member
Joined
Dec 22, 2014
Messages
111
Location
medford, OR
Did a few more random things... Air filter, coolant overflow, upper timing cover, and the biggest bonus, the AC system holds vacuum! should be good to charge.


Got a cheap little portable blaster, air chuck, gun, aluminum oxide, self etching primer, ect.


Should be able to bring the thing home, blast/prime it, and finish things up to get it on the road in April like I am planning.
 
Last edited:

GSXftw

Well-known member
Joined
Dec 22, 2014
Messages
111
Location
medford, OR
Hello everyone! Been a while I know. Been doing school full time, had some side-jobs come up, and just waiting for the weather to come around before I sandblast the back of the car. I slacked a little too far behind on the car and missed the opening track day at the drags, but there were about 5 casualties, 3 of which were oil downs, so I'm not too worried about it. The time will come. So on side-job news but still Mitsu related, I decided to make one of those overhead spring compressors for doing heads. Cost about $15 and works great!


So on the car, the whole reason we are here, I got my intercooler back from the welders from him welding little thread bosses for doing mounting brackets. I went ahead and painted the thing black too


It is now mounted for good, with the bumper going on permanently as well! This was an exciting step for me. Can just barely see an intercooler poking through.


My OCD sees that it doesnt sit perfectly square, but the hotrodder in me says its just fine


It was at this point I got to the left side, and thought, "well I'll be wasting time if I attach the bumper and splash guards, just to take them off for the ABS delete." So I jumped onto that.


Stock vs braided


Happy to see this sh*t going away, its amazing how must stuff you're able to ditch


How much you ask? This much!


And that uncluttered after pic I was working so hard for. Had to form the master to prop valve lines by had, that was a pain. Valve is from a 92 awd 1G.


Pulled radiator to do the hotside pipe plumbing, got that done.


However there is a serious space issue. The coolant temp switch for the fans was supposed to go in this plug


So I drilled/tapped the end tank, put the sensor there with some JB weld for added security. The plug with the original location will just get a pipe plug and then cut off flush.


Also at a neighboring junkyard there was a 93 Galant, so I nabbed up those headlights with the quickness. Excited to see these in and lighting up


Im working on a few future upgrades for this as well, always looking at the next step. My buddy picked up a 1G with an EVO 1 GSR powertrain, and needed trans work, so I was able to score the 2.67 first gear in exchange for rebuilding it for him. Super stoked about that one. I already have the EVO III 3/4, so this will complete my better ratio trans Ive been waiting to do.


Then the junkyard had a Hyundai 1.6


so I stole the head off of it one afternoon. I'm wanting to build the hyundai head and bump up compression a little if I need any help hitting my 600 WHP goal this year. The head thats on here now is bone stock, with evo 8 springs. I was hoping for a 2G intake port so I can use my JMF intake, but its a 1G port. So I guess the cyclone will have to do for now, or maybe do a Honda GSR intake. This may be a good thing so I wont be tempted to wind up the stock bottom end past 8k, but still its depressing seeing that sexy intake mani just sitting there.
Thats all for now. Still have to do the SS brake lines in the rear, but will probably wait until I do the 5 lug swap for all that. In my personal health class, I made this car my personal goal for the term, with the short term goal being to run at the stoplight drags on June 18th and trap 130. I know this is just dragging on and you guys wanna see a driving video, I do too, but be glad to know the good weather is here. I need to finish painting my Talon so I can sandblast this guy and hit the road already!
 

iceman69510

Turn Right Racing
Staff member
Joined
Mar 5, 2001
Messages
10,964
Location
Michigan
You are making great progress. Nice scores on the headlights and the cylinder head.

Like the valve spring compressor. Your idea or see it somewhere else?
 

GSXftw

Well-known member
Joined
Dec 22, 2014
Messages
111
Location
medford, OR
Thanks man! Was beginning to wonder if anyone read these updates still! The spring compressor was actually something I saw on Jafromobile. click
My buddy is having me do his supra head and I always wanted to have one like this, figured it was a great time.
 

transparentdsm

Well-known member
Joined
Jul 27, 2011
Messages
3,690
Location
Cherry Hill, NJ
I'm always reading updates. I like following this. On a side note. We will possibly be neighbors soon. Looking in Medford/Ashland area and possibly out in klath falls. Pretty excited to move up there and my favorite part is I won't be all to far from tahoe.
 

GSXftw

Well-known member
Joined
Dec 22, 2014
Messages
111
Location
medford, OR
haha nice. Ashland is cool but a little hippy filled, but theres clubs/comedy shows. I wouldnt recommend K falls cause there isnt a lot to do and a lot of people seem to go to drugs. Medford is ok if youre in a good neighborhood, just dont live in the ghetto lol
 

GSXftw

Well-known member
Joined
Dec 22, 2014
Messages
111
Location
medford, OR
Hello! So todays update. I did the plug where the temp sensor was going to go, and installed the radiator in for good this time.


Theres my new location for the temp switch


Then I got onto some exhaust work


The stock stuff had to go


I cut off the mounting brackets, and took the tips off, hoping to use them for the sleeper aspect. I sort of changed gears on my original plan for this exhaust. My original plan was 3" dp, followed by a 60mm EWG cutout in the cat area, followed by tying into the stock catback. Little work, and quiet as hell when not open. Well after seeing the SuperStreet GVR4 pick up like 15hp on a bone stock car from changing the catback out, I began to see that the stock catback isnt even good enough for a stock car! As luck would have it, Ive had a 3" vibrant stealth series muffler sitting I planned on using on my 1G, but went side exit instead, along with a resonator from said side exit. So my new plan, Im going to build a very quiet, good flowing full exhaust, then if I dont hear enough engine tone I will add the cutout to this. With a main collector EWG it may be loud enough as is, we will see.
So, off came the 12" vibrant resonator


Tacked up


At this point Im a little stuck, since I ordered a longer resonator to go in after this, and I cant put in the muffler and the rest until the back is blasted/painted. For now though the neighbors will definitely appreciate the single resonator when moving the car in/out. Having heard it just on that I think this thing will be quiet as hell once its all in


So, its got a coolant system again, Im waiting to do my other cooling fan, then the grill can go on, but really Im ready to trailer this thing to the house for the bodywork stage once I finish painting my talon. I've hit just about every "bookmark point" mechanically until the bodywork gets finished. Basically, once the talon is all sprayed out, I can pull it out and cut/buff and finish it all up later. To be honest Im way more excited to get this galant done and on the road than I am to make my talon pretty so I can sell it, but thats the way its going. Ive already attended 2 drag races, and a cars & coffee, and its killing me not having this car going! Stay tuned.
 

GSXftw

Well-known member
Joined
Dec 22, 2014
Messages
111
Location
medford, OR
So first off, todays update is a small one because 80% of it was painting on the talon!
Thing is almost done being sprayed though.


I didnt have a rack open at the shop, but what I did manage to do was I went ahead and painted the expanded metal to the front grill.
BEFORE


and I brought my laptop just to update the tune with the sensors and such that are now working. I noticed the flex sensor was reading zero sometimes, turns out I went through the gallon I put in months ago just from moving the thing in/out the shop haha. I had some E45 kicking around so just put that in, it'll be easier to tune with a little added E /ubbthreads/images/graemlins/smile.gif
Now tell me this car didn't get a little lucky here...


This gas tank was totally full when the fire happened, it couldn't of had much longer to go. I took a datalog of some idle stuff, but other than that a pretty uneventful night for the GVR4. Stay tuned though!
 

GSXftw

Well-known member
Joined
Dec 22, 2014
Messages
111
Location
medford, OR
So here is the moment you've all been waiting for! I title this thread update, **THAT ASS**
So, I drove it out the shop, across the street, and onto the trailer. It actually almost got to operating temp the first time through all this. The temp gauge works so thats good.


Trailered the thing home, unloaded, and set up for work.


First thing was unload all of the spare parts, and put up my dexter kill room plastic in the interior.


So funny story, I had a couple screws and bolts to take out, many of which had melted plastic and whatever covering them. I kept wire brushing this one, and wasnt understanding why it wasnt going away, then I realized it was solder from the ABS computer that was here! haha


I chiseled away all of the burnt tar on the left wheel well. The left side got majority of the heat.


Funny enough...All of this damage tells a story. Here is what I gather: House was on fire, which caught a few things on fire on the galant. Tail lights, bumper, all of those easily combustible things. The rest of the damage is just all of the radiant heat from the house fire. Fire department (or whoever was extinguishing the car) pulled the trunk release, it broke since cables were melted, so they pried the back open with a crowbar to put the car out. So I straightened out the trunk latch area


Heres a few shots of what Im starting with


My plan of attack here is to mediablast all the hard to reach spots, the easy flat surfaces will get wire wheeled and rough sanded. Ill give a quick blast of rust fix to a couple trouble areas, self etching primer, then in the non conspicuous areas I'll just rattle can white. The exposed areas will get a dual stage factory type paint.


And then after some paint


And thats where I ended up on day 1 of restorin that ass. I had a buddy helping through a lot of it which was cool, but I still have a ways to go as you can see. Thanks for reading.
 
Last edited:

iceman69510

Turn Right Racing
Staff member
Joined
Mar 5, 2001
Messages
10,964
Location
Michigan
looking so much better already.
 

GSXftw

Well-known member
Joined
Dec 22, 2014
Messages
111
Location
medford, OR
Todays offering to *THAT ASS*
I painted the top of the deck area, so naturally the underside came next. This was more of a chore as you can imagine. Heat goes up so a lot of this stuff is rusty and full of soot. I just had to dive in and make it happen.


Then I got tired of that ass (lol) so I worked on the battery tray area


Unfortunately it looks 10X better where I painted, so the rest may need some touch up as well


Then the right tail light area


Thats all for today. Should get more done on it tomorrow.
 

GSXftw

Well-known member
Joined
Dec 22, 2014
Messages
111
Location
medford, OR
Thanks for the encouragement everyone, it really helps get me fired up to get this thing moving! Spring is already here and I need to get my ass in gear. Car has sat long enough I say!

So today was finish up the inside of the car and do the last of the rattlecan action. Anything with any soot got wire wheeled and painted, I'm not gonna deal with any lingering smells coming about showing itself later, and figured paint would be the most efficient way to mask any smells. I just need to be more thorough than the fire was and get to all the hard to reach spots! LOL Yeah right huh?


And on that note, I was officially done with working the inside over. That doesn't mean stop though... Onto the outside


There are officially 3 dents I will be fixing throughout this... All are pretty easy to reach from the back and aren't creased.


Is this how sunroof drains are supposed to look? Yeah didnt think so


So the left quarter got the most heat, that I knew. I figured there would be a slight amount of warpage, but wasn't nearly as bad as all the naysayers were saying. A few love taps, a skim coat of bondo, done deal. Im also working over where the seam sealer was on the area below the tails, theres a ridge to fill


Etching primer


Surfacer


I called that a good stopping point, urethane surfacer is a moisture barrier after its sprayed (when you sand it opens up) so its gonna be no worries to leave overnight like this. Im beat, my eyes hurt from 12+hrs of dust. This concludes day 3 of bodywork. What many said would be the toughest part of the project not worth doing, is actually go right as planned like I envisioned it would. Ive got a buddy making me a "work in progress" sticker, Ill be going to a local customs for kids show in a few weeks. Ill be getting as far as I can until then, but it definitely wont be done! Are they ever? /ubbthreads/images/graemlins/smile.gif
 

GSXftw

Well-known member
Joined
Dec 22, 2014
Messages
111
Location
medford, OR
So...I kind of hit a roadblock on the car. I had in primer surfacer, which would be a water barrier, but I couldn't sand into it until I was ready for primer sealer, and after sealer I only have a 2 day window before painting, which I couldn't afford paint yet. So I jumped onto my 2G Talon and getting that finished. Finally, after months and months, it is done!


Why am I mentioning this in my GVR4 thread? Because now I can concentrate more on the Galant, and selling this car will be funding a lot of the finishing touches for the fire car, such as getting the back window installed, rear speakers, an EWG cutout, plate transfer, insurance, etc. You see folks, I am a broke college student/single dad. The money I do get comes from either sidejobs, or selling cars/parts, so getting this car is big news since it will work as my "summer stimulus package"...
So here is the paint I will be using

So I sanded down the surfacer, saw where I needed more


The right I hadn't sanded all the way yet, so I got through on all the problem areas


Then I can't tell if my hands/eyes are playing tricks on me, but it seemed the area by the gas cap was a little low. So I took it down for some bondo.


I did a thinner coat of primer surfacer that was cut down. Should be its last coat before sealer/base/clear


Support Vendors who Support the GVR-4 Community
Boosted Fabrication ECM Tuning ExtremePSI Fuel Injector Clinic Jacks Transmissions JNZ Tuning Kiggly Racing Morrison Fabrications RixRacing RockAuto RTM Racing STM Tuned
Top