You are using an out of date browser. It may not display this or other websites correctly.
You should upgrade or use an alternative browser.
You should upgrade or use an alternative browser.
New life for 381! 4yr anniversary, Teins done, Simulated 430hp on Evo ECU
- Thread starter 381gvr4
- Start date
381gvr4
Well-known member
^^^LOL!!!! /ubbthreads/images/graemlins/rofl.gif
Thought this was funny.... from wheel well painting.... now a nightmare that never ends!!!!!!
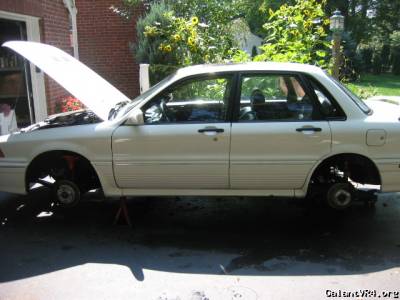
Thought this was funny.... from wheel well painting.... now a nightmare that never ends!!!!!!
Last edited:
381gvr4
Well-known member
Weekend update.....
Put her back together to go thru emissions tomorrow. Couldn't get the tranny parts I needed on a Saturday with such late notice.
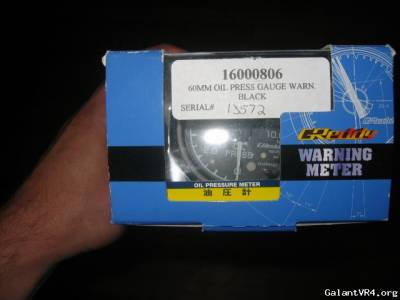
Got some more parts in and got to work. In my half done tranny removal, I found the PS axle ripped so I bought a new one. Also got a DS A-pillar and tailight from POT, interior tabs from kjwillia and NIB greddy oil pressure gauge. I took some pics of stuff I did while I waited for parts to come together over the winter.
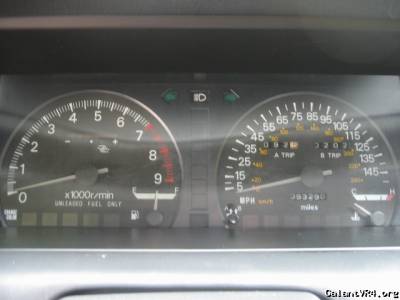
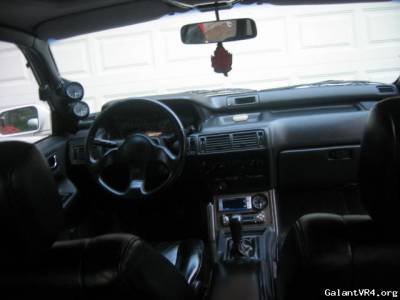
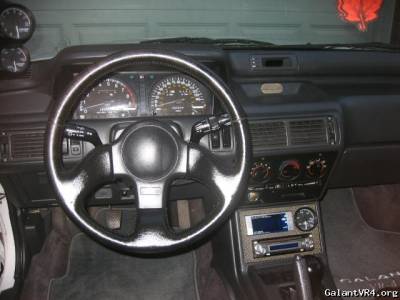
Removed paint from needles and hit them with a 600grit to give them a "frosted" finish. 1st went with a red transparent paint, but couldn't see well at night. Also redid the red on tach and gas gauge with transparent red.
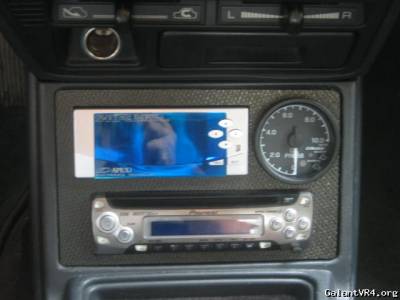
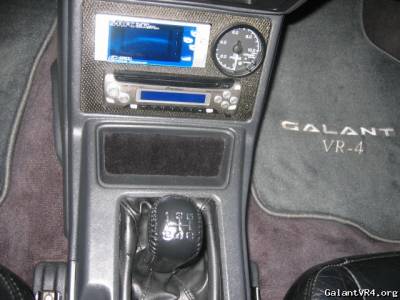
Center console with Carbon Fiber plate I made for radio/afc/oil pressure gauge.
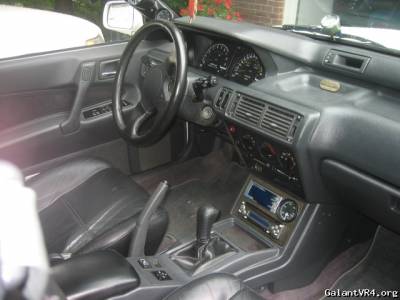
Interior teaser. Still haven't had a chance to shampoo, but I did hit the leather a couple of times. DSM wheel I took out of a shell I had and NIB 2g shift knob. You can see the old oil pressure gauge in its "original" location until I found the Greddy.
Replacement much beefier.
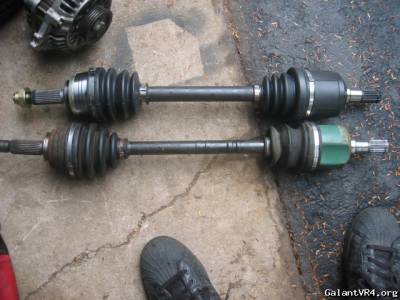
Searched since January for this.
Back to driving. 215 miles so far........ Whats next??!?!?!?!?? /ubbthreads/images/graemlins/uhh.gif
Put her back together to go thru emissions tomorrow. Couldn't get the tranny parts I needed on a Saturday with such late notice.
Got some more parts in and got to work. In my half done tranny removal, I found the PS axle ripped so I bought a new one. Also got a DS A-pillar and tailight from POT, interior tabs from kjwillia and NIB greddy oil pressure gauge. I took some pics of stuff I did while I waited for parts to come together over the winter.
Removed paint from needles and hit them with a 600grit to give them a "frosted" finish. 1st went with a red transparent paint, but couldn't see well at night. Also redid the red on tach and gas gauge with transparent red.
Center console with Carbon Fiber plate I made for radio/afc/oil pressure gauge.
Interior teaser. Still haven't had a chance to shampoo, but I did hit the leather a couple of times. DSM wheel I took out of a shell I had and NIB 2g shift knob. You can see the old oil pressure gauge in its "original" location until I found the Greddy.
Replacement much beefier.
Searched since January for this.
Back to driving. 215 miles so far........ Whats next??!?!?!?!?? /ubbthreads/images/graemlins/uhh.gif
Last edited:
381gvr4
Well-known member
End of w/e update....
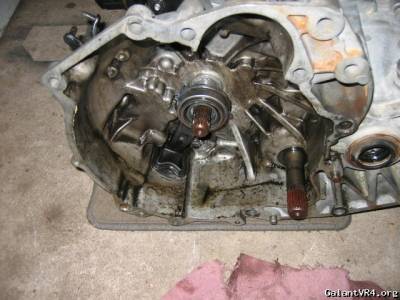
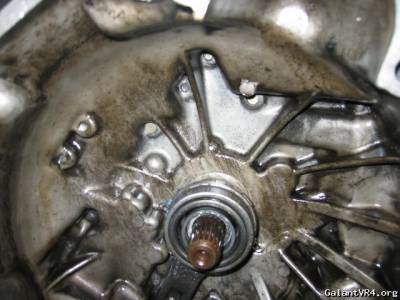
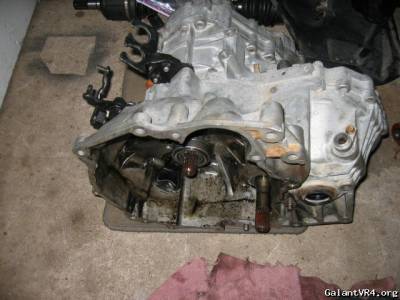
Pulled the tranny and found excessive play from the input shaft. Have some parts coming this week- snap rings, roll pins, end nuts and input/output seals BUT I'll have to find out whats causing the play and order a few more!!! No biggy but a pain in the a$$. First time taking it out with car assembled. DAMN is she tight(not in a good way). Took about 2 hours!!!
She's a leaker!
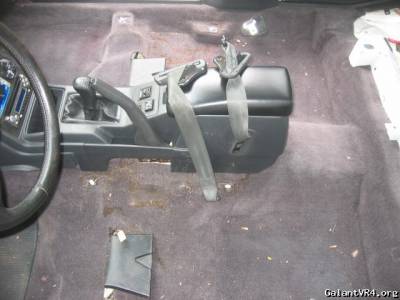
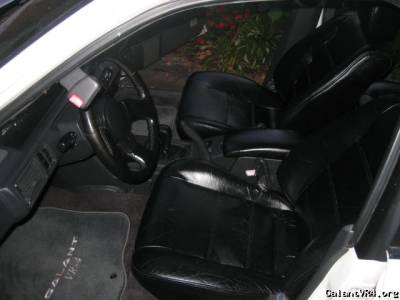
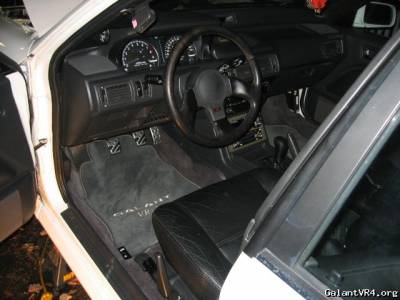
FINALLY cleaned the interior up. Pulled the seats out and conditioned leather once again. Shampoo'd the carpet, cleaned all the buttons and little crevasses on the dash, armorall'd/cleaned the center console and side of seats. Come out real nice. Also cleaned and redid the coin tray infront of radio. Got some original looking fabric from Walmart for a wooping $.66. I know I'm crazy, but all the little stuff makes it worth it in the end /ubbthreads/images/graemlins/smile.gif
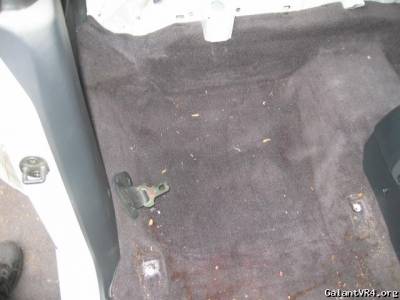
Enough pot/bud/weed next to center console to roll a joint(NOT mine)......

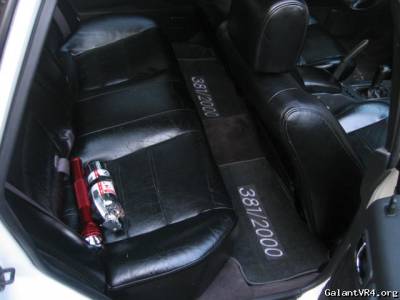
New build safety kit!!! Need a bigger extinguisher for the trunk when I start DD...
New fabric in coin tray. I'd seen someone asking what fabric it is. I used (I think its called) synthetic crushed velvet?!?!
More to come.....
Pulled the tranny and found excessive play from the input shaft. Have some parts coming this week- snap rings, roll pins, end nuts and input/output seals BUT I'll have to find out whats causing the play and order a few more!!! No biggy but a pain in the a$$. First time taking it out with car assembled. DAMN is she tight(not in a good way). Took about 2 hours!!!
She's a leaker!
FINALLY cleaned the interior up. Pulled the seats out and conditioned leather once again. Shampoo'd the carpet, cleaned all the buttons and little crevasses on the dash, armorall'd/cleaned the center console and side of seats. Come out real nice. Also cleaned and redid the coin tray infront of radio. Got some original looking fabric from Walmart for a wooping $.66. I know I'm crazy, but all the little stuff makes it worth it in the end /ubbthreads/images/graemlins/smile.gif
Enough pot/bud/weed next to center console to roll a joint(NOT mine)......
New build safety kit!!! Need a bigger extinguisher for the trunk when I start DD...
New fabric in coin tray. I'd seen someone asking what fabric it is. I used (I think its called) synthetic crushed velvet?!?!
More to come.....
Last edited:
rez
Well-known member
Looking good...
Those rear floormats w/the car's number are the hotness!! /ubbthreads/images/graemlins/grin.gif
Those rear floormats w/the car's number are the hotness!! /ubbthreads/images/graemlins/grin.gif
Yeah they are!!!
Who makes those? I forgot.
G-
Who makes those? I forgot.
G-
Quote:
Who makes those? I forgot
turboflanagan
Who makes those? I forgot
turboflanagan
381gvr4
Well-known member
Because this has been asked so many times, I contacted the 2nd owner to find info on the ALUMINUM RADIATOR. Here's what he said....
hey Ryan. Quick ?- What brand of aluminum radiator is that in the car. Thats got to be the most common ? I get. Thanks in advance, Russ
--------------------------------------------------------------------------------
From: meshwork
Made by IndyRaceCores for the GVR4. I was going to modify one for a DSM, but RRE had this one sitting on the shelf collecting dust, so no fabrication needed. Not made anymore, because I think the guy running IndyRaceCores went corrupt.
Quote:
Last edited:
Car is looking good. Glad it finally made it back into someone's hands that can appreciate it. I would like to see it in person again sometime.
381gvr4
Well-known member
HOME STRETCH!!!!
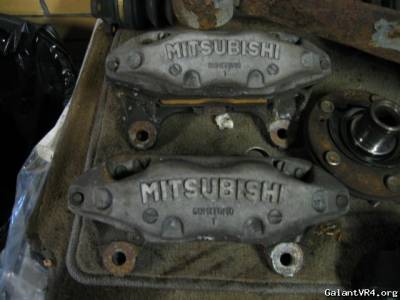
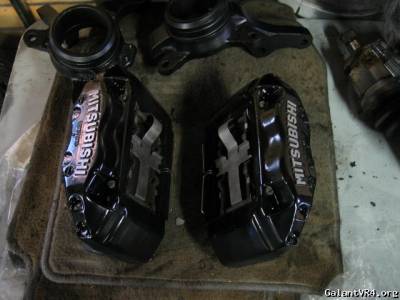
Almost done with all that I wanted to accomplish for 381. Fixed tranny issue last week and got side tracked with some great deals. Started with Stealth calipers that I picked up for $60 BUT since I'm critical I traded the same kid for $80 to get 3kgt calipers. THEN decided I was going to go forward with Evo wheels(which I've been watching daily for several months) and 5 lug conversion. Found a 5 lug and 4bolt from a 93 Lazer w/ 90K.
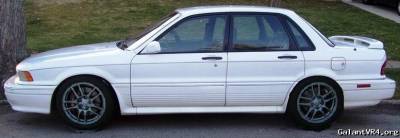
Found Evo 9 Enkei's in San Francisco and swindled them out of the seller with tires shipped here to CT cheap!!!!!
Also found and installed evo pedals.
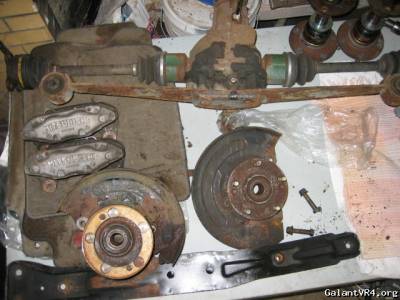
Started cleaning up the parts in prep for the wheels which will be here the end of next week. Need to order frt brake dust shields, bearings and seals then press them all together. Also have to get caliper brackets(waiting for steel). Have to pull rear subframe out of 381 to prep and paint and swap rear lsd in AWS rear. Removing ABS but keeping AWS.
HOW DO YOU DROP REAR SUBFRAME WITHOUT REMOVING REAR POWER STEERING LINES??? DON'T WANT TO TRY TO BLEED REAR. Pump will come out but rear rack unbolt and keep with car???
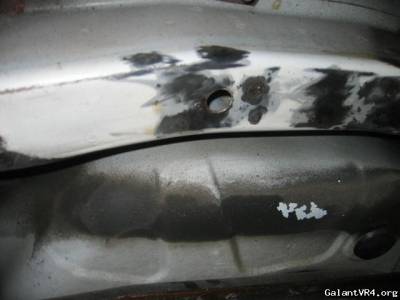
Before....
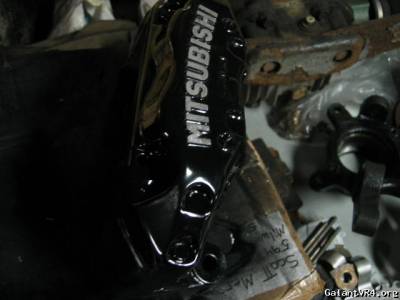
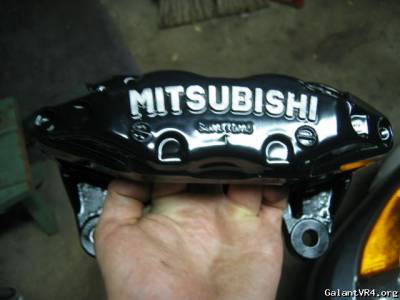
Hard to get pic of the gloss.....after... ALSO can see cleaned and painted knuckles in backround.
More to come...... Need to remove then prep/paint rear sub and front a-arms, swap LSD, undercoat bottom, press front hubs together, swap 5-lug, install tranny, put on 3kgt brakes and wheels. Then ALMOST done with 381!!!
Wheel teaser I made months ago...
/ubbthreads/images/graemlins/hsugh.gif
Almost done with all that I wanted to accomplish for 381. Fixed tranny issue last week and got side tracked with some great deals. Started with Stealth calipers that I picked up for $60 BUT since I'm critical I traded the same kid for $80 to get 3kgt calipers. THEN decided I was going to go forward with Evo wheels(which I've been watching daily for several months) and 5 lug conversion. Found a 5 lug and 4bolt from a 93 Lazer w/ 90K.
Found Evo 9 Enkei's in San Francisco and swindled them out of the seller with tires shipped here to CT cheap!!!!!
Also found and installed evo pedals.
Started cleaning up the parts in prep for the wheels which will be here the end of next week. Need to order frt brake dust shields, bearings and seals then press them all together. Also have to get caliper brackets(waiting for steel). Have to pull rear subframe out of 381 to prep and paint and swap rear lsd in AWS rear. Removing ABS but keeping AWS.
HOW DO YOU DROP REAR SUBFRAME WITHOUT REMOVING REAR POWER STEERING LINES??? DON'T WANT TO TRY TO BLEED REAR. Pump will come out but rear rack unbolt and keep with car???
Before....
Hard to get pic of the gloss.....after... ALSO can see cleaned and painted knuckles in backround.
More to come...... Need to remove then prep/paint rear sub and front a-arms, swap LSD, undercoat bottom, press front hubs together, swap 5-lug, install tranny, put on 3kgt brakes and wheels. Then ALMOST done with 381!!!
Wheel teaser I made months ago...
/ubbthreads/images/graemlins/hsugh.gif
Last edited:
ApexHunter
Well-known member
/ubbthreads/images/graemlins/ooo.gif Wow man. Right on. Looks phenomenal. I'm really stoked where you are going with the whole rust prevention thing, dismantling everything so you can clean and coat, RUST PROTECTION FTMFW!!!
381gvr4
Well-known member
I know it may not seem this way because the car has spent more time sitting then driving(my future DD that hasn't been daily driven) BUT I plan to put miles on this setup and winters can be tough in N.E. You can see the condition of the 5lug/4bolt/subframe from Mass. and how deteriorated that stuff is. Better prevention than replacement. Once its done I will be driving on sand and salt with little guilt. PLUS clean will allow me to wash off the $hit with ease. Thanks for the kind words!- Russ
Last edited:
ApexHunter
Well-known member
Yeah man I hear you on the deterioration thing...#1951 is from CO and i've got my work cut out for me as far as cleaning/rust removal/re-coating goes, and they don't even salt the roads there, from what i've heard. What were you planning on using for undercoating?
Last edited:
381gvr4
Well-known member
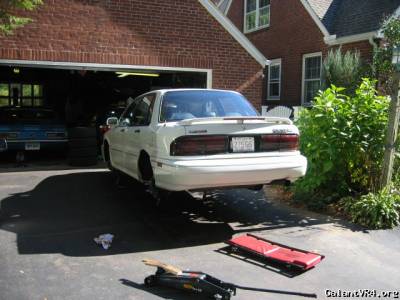
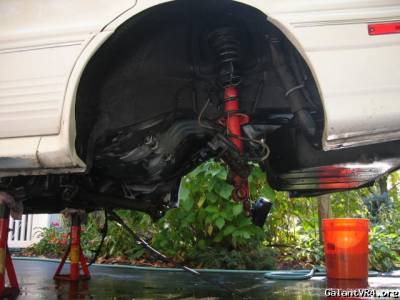
Work underway. Put her back up in the ari. I think I'm a JACK STAND BALLER??? /ubbthreads/images/graemlins/dunno.gif Someone confirm! Put calipers back together with pads that came w/ due to alot of material left. Took a look at rear sub which is in good shape with spots of rust here and there. The line are rusted in some spots but overal its good. Trying to figure out which way to go with removal, pulling pump and rack and not disconnecting lines or diconnecting lines from hardlines. I can see myself going completely mental pulling pump and rack off on car due to tight area and RUST. Tons of bleeders but I'm not one for laying under a running car while in gear on JACKSTANDS!!!!! Called Mitsu parts.com to see if they still list rear pump and rack NOS for haha's.......
Here she is face down, A$$ up..... again(whore)!!!!!

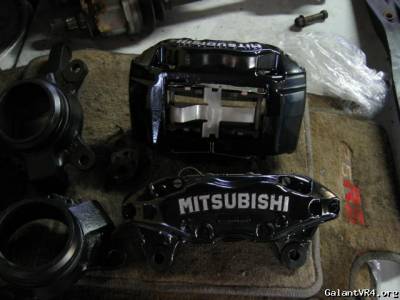
Calipers all back together.....
More later.... back to work!
Here she is face down, A$$ up..... again(whore)!!!!!
Calipers all back together.....
More later.... back to work!
381gvr4
Well-known member
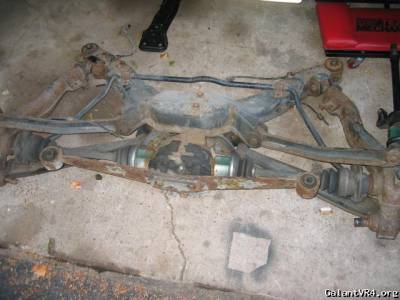
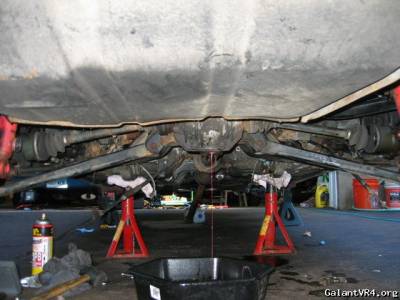
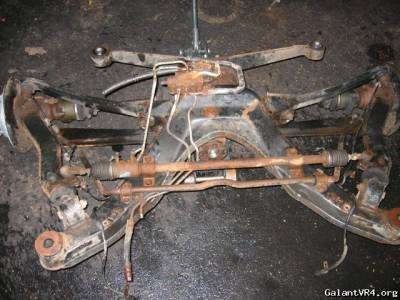
She's out. Paint on sub isn't bad, but the AWS stuff has some rust on it. Diconnected hardlines to make job easier. Now the only tough part is bleeding it out. There are enough bleeders to make that happen with a push style system. All is weel but you can see where problems would form. Tomorrow= undercoating. More to come.....
Pepto for your rear end..... /ubbthreads/images/graemlins/smile.gif
Pepto for your rear end..... /ubbthreads/images/graemlins/smile.gif
curtis
Well-known member
/ubbthreads/images/graemlins/applause.gif
Awesome job man.
Awesome job man.
381gvr4
Well-known member
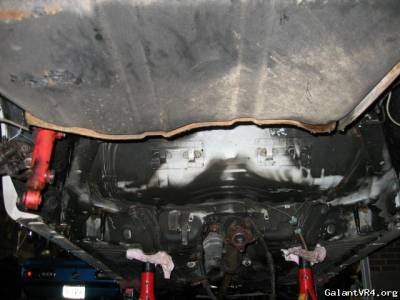
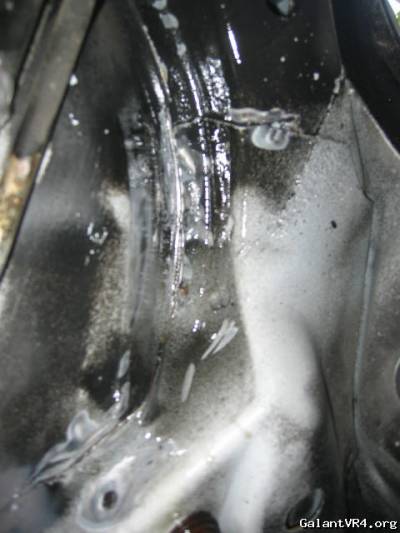
About half done.
Penitrating oil was slingin' all afternoon on the rear subframe.
Cleaned the under side from rear jack locations back with fire HOT water and soap. Did that twice and blew off and let dry. Then I went to work with scotch brite cookie on small rust spots and sprayed on some rust converter afterwards. Will take 24hrs to cure before I can spray with undercoating.
Bought my calipers brackets from GW today. Only had alum., so thats whats coming. Was able to track down some stock EVO lug nuts also.
Shine you see is the rust treatment.....
Subframe is pretty much naked! Steering stuff I took off all in one piece until I decide what angle I'm going to go about tackling that. A call to EASTWOOD is instore for tomorrow to get more rust converter and gloss ceramic chassis paint. Also to MITSU PARTS.COM to see what can be bought for rear and what I'll have to remake/clean and get front bearings/shields/seals/etc.

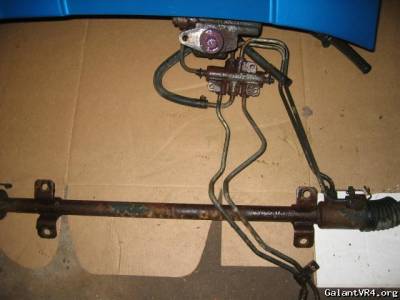
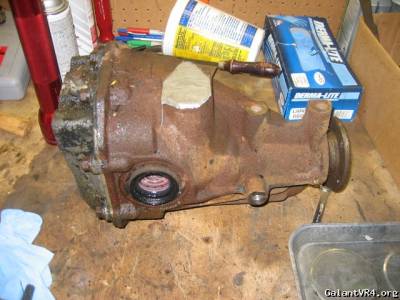
All thats left on sub is dust shields and ABS sensors as they are stuck. Handle that tomorrow. Have to mark camber/toe bolts to realign them to drive to alignment shop when back together before I strip it any further. The PUMPKIN is the part I'm NOT looking forward to cleaning and preping for paint. Will take a night by itself to be ready to spray.
/ubbthreads/images/graemlins/uhh.gif
MoRe To CoMe!i!i!i! /ubbthreads/images/graemlins/crazy.gif
Penitrating oil was slingin' all afternoon on the rear subframe.
Cleaned the under side from rear jack locations back with fire HOT water and soap. Did that twice and blew off and let dry. Then I went to work with scotch brite cookie on small rust spots and sprayed on some rust converter afterwards. Will take 24hrs to cure before I can spray with undercoating.
Bought my calipers brackets from GW today. Only had alum., so thats whats coming. Was able to track down some stock EVO lug nuts also.
Shine you see is the rust treatment.....
Subframe is pretty much naked! Steering stuff I took off all in one piece until I decide what angle I'm going to go about tackling that. A call to EASTWOOD is instore for tomorrow to get more rust converter and gloss ceramic chassis paint. Also to MITSU PARTS.COM to see what can be bought for rear and what I'll have to remake/clean and get front bearings/shields/seals/etc.
All thats left on sub is dust shields and ABS sensors as they are stuck. Handle that tomorrow. Have to mark camber/toe bolts to realign them to drive to alignment shop when back together before I strip it any further. The PUMPKIN is the part I'm NOT looking forward to cleaning and preping for paint. Will take a night by itself to be ready to spray.
/ubbthreads/images/graemlins/uhh.gif
MoRe To CoMe!i!i!i! /ubbthreads/images/graemlins/crazy.gif
Last edited:
Hertz
Staff member
Wow, you deserve an award!
324vr4
Well-known member
I think the word ambition came from this build-up....damn dude...GREAT job! I think most people reading this are now jealous /ubbthreads/images/graemlins/smile.gif
