The Top Mitsubishi Galant VR-4 Resource

Join the best E39A 1991-1992 Mitsubishi Galant VR-4 community and document your GVR4 journey.

  • Software Upgraded - Reset Your Password to Login
    In order to log in after the forum software change, you need to reset your password. If you don't have access to the email address you used to register your GVR4.org account, you won't be able to reset your password. In that case, follow the instructions here to regain access to the forum.

New engine for 1951 --> build thread Updated 12/12

Do her proud!


Have you thought of doing any crank coatings or bearing treatments?
 

ApexHunter

Well-known member
Joined
Apr 25, 2007
Messages
1,992
Location
Marysville, WA
^Thought about having the crank re-nitrided after the micro polish, but leaving it stock otherwise. As far as bearings, i'm going to use oem. Haven't really looked into bearing treatments...Anything you suggest? I'll be using Torco assembly lube. /ubbthreads/images/graemlins/dunno.gif
 

ApexHunter

Well-known member
Joined
Apr 25, 2007
Messages
1,992
Location
Marysville, WA
No update for last thursday, didn't make it to class. Long story short, did rear wheel bearings, rotors and pads on 1951 in the AM, hoping to be done in time for class @ 1. There were some complications however. Passenger side rear caliper took a sh*t, then got sent the wrong caliper etc etc.
 

slugsgomoo

Well-known member
Joined
Oct 16, 2003
Messages
3,776
Location
Tacoma, WA
Quoting Brianawd:
Quote:
wow, that engine is ugly- raw water cooling shouldn't do that, since seawater actually never comes in direct contact with the engine itself. Traditionally they use a heat exchanger much the same as an air/water intercooler setup, just water/water, naturally. One of the keys is to make sure you change the zincs in your exchanger though, even the good ones will corrode and mix the fluids eventually if you're stupid.


Not true. Raw water cooling systems draw water from outside the boat (seawater or lake water). Water is pumped from the source to the engine block then the engine circulation pump forces the raw water thru the engine block and the water is expelled thru the exhaust.

What you are thinking of is the Fresh water cooling systems, also known as a closed cooling systems. The most common type utilizes a Heat Exchanger which functions similarly to the radiator in your car. Coolant (antifreeze) is circulated through one side of the heat exchanger where it is cooled by raw water that passes through the other side of the heat exchanger. The engine coolant is then circulated back into the engine. The raw water is expelled out of the boat thru the exhaust


I forgot there were setups where the actual raw water goes through the motor, but then again, I don't think you really see that on boats that are a bit larger and predominantly saltwater based. Putting seawater through an engine block seems like a less than brilliant idea, though I can see where a boat that runs on a freshwater lake wouldn't be too big a deal, especially if you drain it and such when it comes out on a trailer. /ubbthreads/images/graemlins/dunno.gif
 

I would at the very least get the crank re-nitrided. There are some cool coatings out there too.

There are a number of DSM guys out there that say re-nitriding the crank is a necesity if you polish off the original nitriding.
 

ApexHunter

Well-known member
Joined
Apr 25, 2007
Messages
1,992
Location
Marysville, WA
Last week i was sick, didn't get a whole lot done aside from going to the hardware store and getting better acquainted with the sonic tester. The sonic tester is a finicky little device. Operation seems simple in theory, but it is so sensitive that it takes a little practice and finesse, at least for me. Overall i think i've spent the better part of 3 hours sonic testing this block. /ubbthreads/images/graemlins/banghead.gif Oh well it's good experience, and this way i'm not pouring money and time into a jacked up block.

The good news is i'm finally done with sonic testing, and the results seem satisfactory. I still need to run them by my teacher, but i think block #2 will get a good bill of health in this area. Note that i spent a while hunting around in the bores for the thinnest spots. The idea was to find the thinnest spot in 8 positions per bore. 12 o'clock, 3 o'clock, 6 o'clock, 9 o'clock, around the areas where the piston would be @ TDC, and BDC.

4054381721_47327044fd_b.jpg


4054381723_b11644419b_b.jpg


Sonic testing vids.....WARNING extremely exciting content within. Please check with your doctor before viewing if you have a heart condition or are prone to seizures from excessive mental stimulation.
Part One
Part Two
Part Three

The beginning of class tuesday we had a lecture and video on honing. After lunch i went up to EPWI to drop off my crank for micro polishing. Then went to L&B con rod service to drop off my 1g rods for machining for compatibility with 2g pistons. I was expecting to pay around $25 per rod for this service alone. He offered $100 out the door for that machining, plus resizing the big ends and installing ARP bolts, and polishing and shotpeening. I'll pick them up next week and update on how that turns out.

Class tomorrow i predict i'll be magnafluxing, and then measuring main bearing and cylinder bore diameters (in many locations per), and probably check for deck warpage.
 

ApexHunter

Well-known member
Joined
Apr 25, 2007
Messages
1,992
Location
Marysville, WA
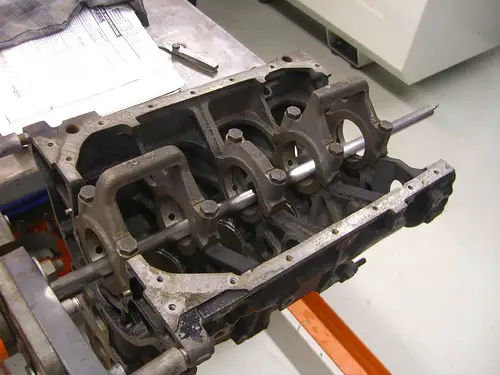
Good news and bad news. If you remember, block #1 got set aside when i found it was a NT block, and i did not feel confident enough to drill/tap for the oil squirters, as a slight error could cause major problems. Besides, i had another block as a backup, which was from a turbo car. The only downside to the spare being that it had already been bored/honed 0.50mm over before I bought it so I would not get to do that in class.

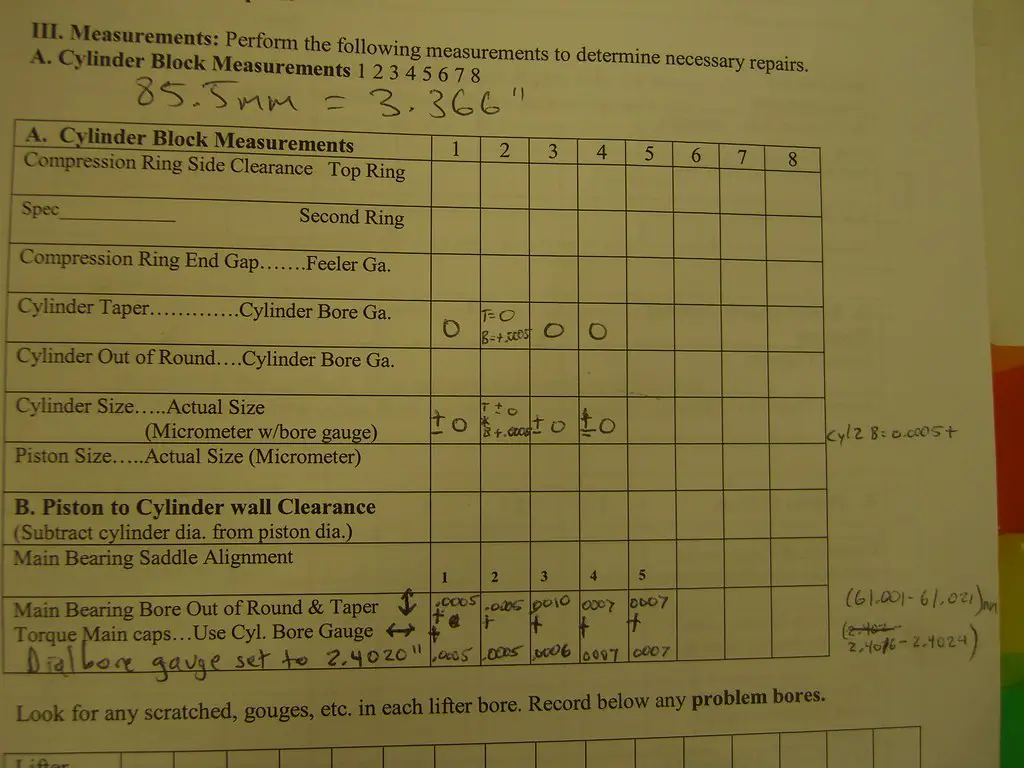
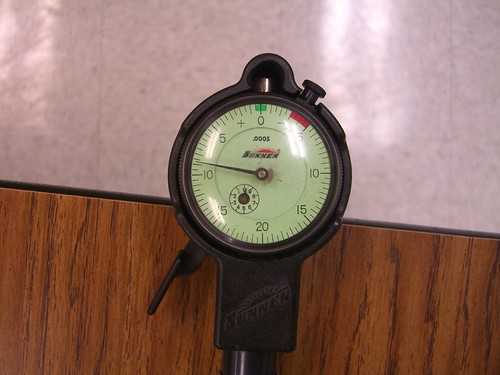
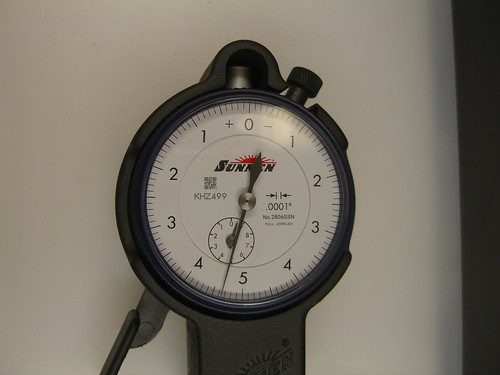
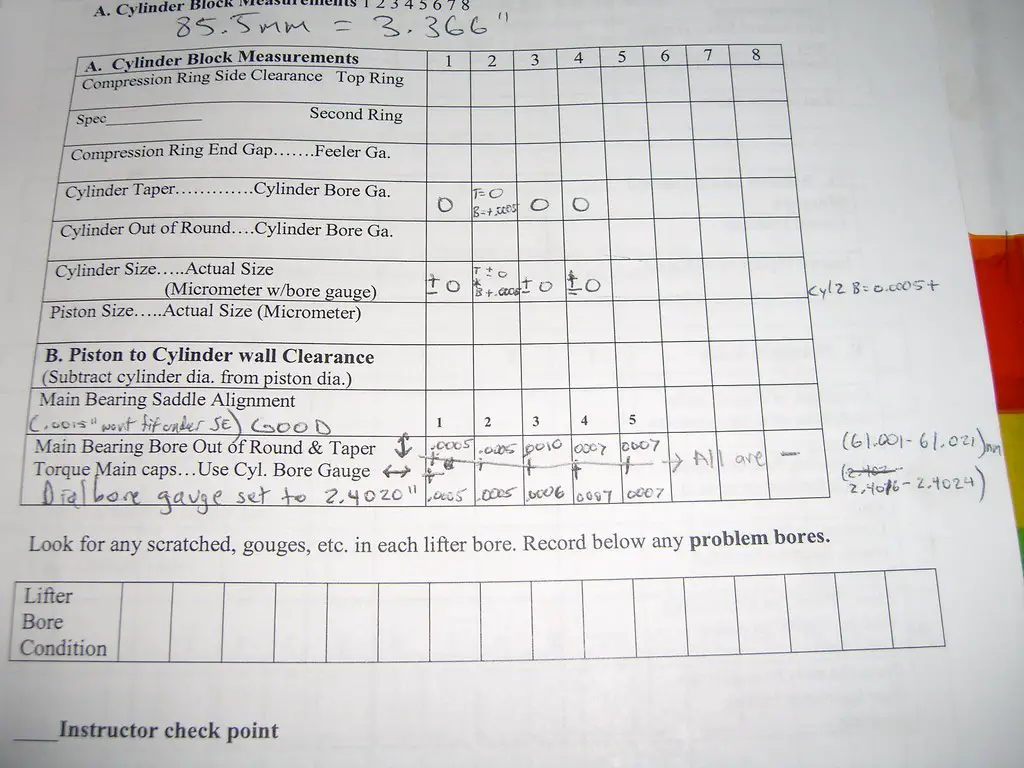
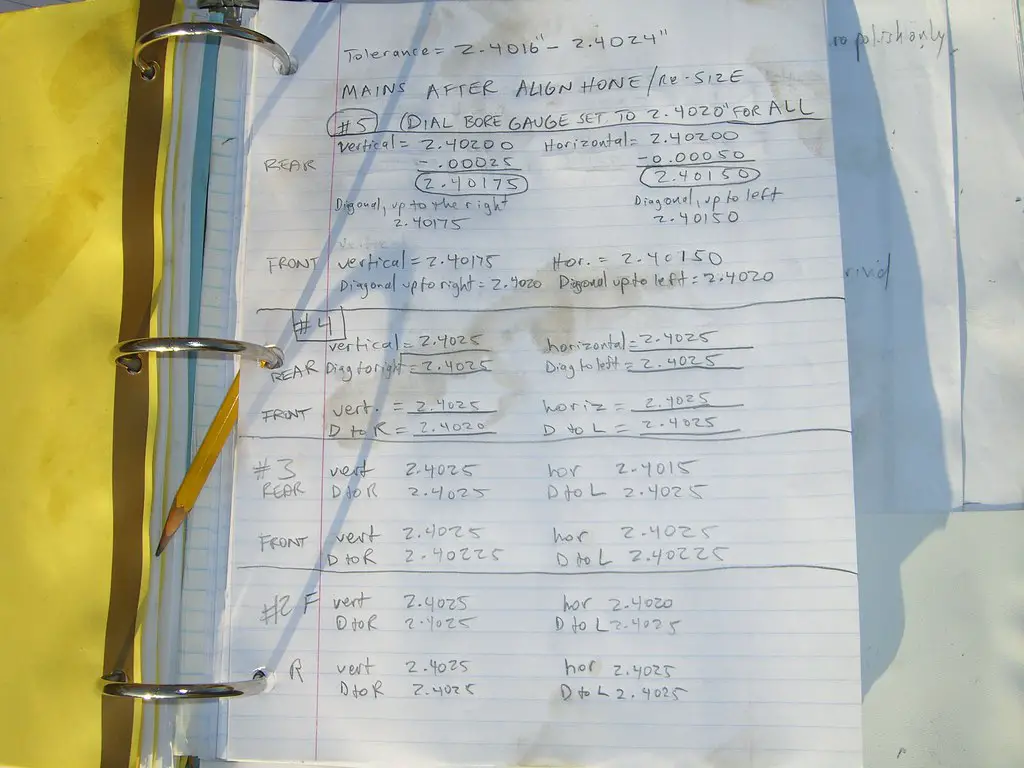
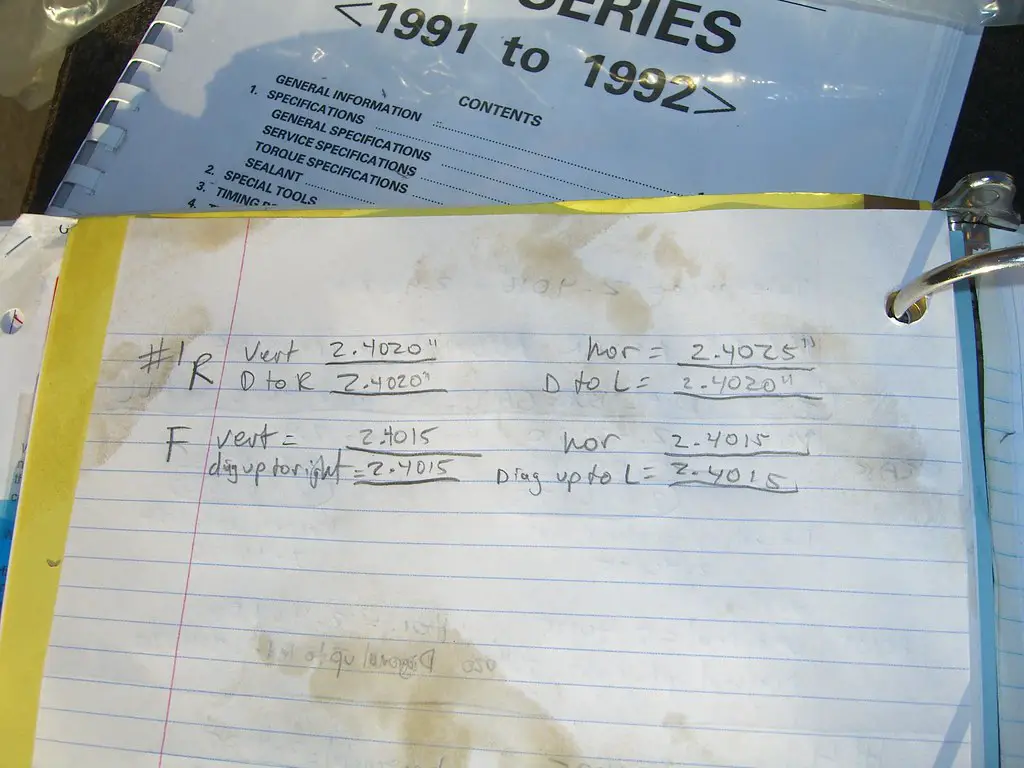
So here's the bad news. I measured the main bearing bores....and i'm out of range a little. Tolerance is 61.001-61.021mm, or 2.4016 or 2.4024". I set the dial bore gauge right in the middle, to 2.4020". Note that i used the .0005" dial bore gauge for this round of measurements, so everything between 0.0005" and 0.0010" i sort of guesstimated.
On Tuesday I’m gonna re measure the mains, this time using the ten thousandths dial bore gauge.

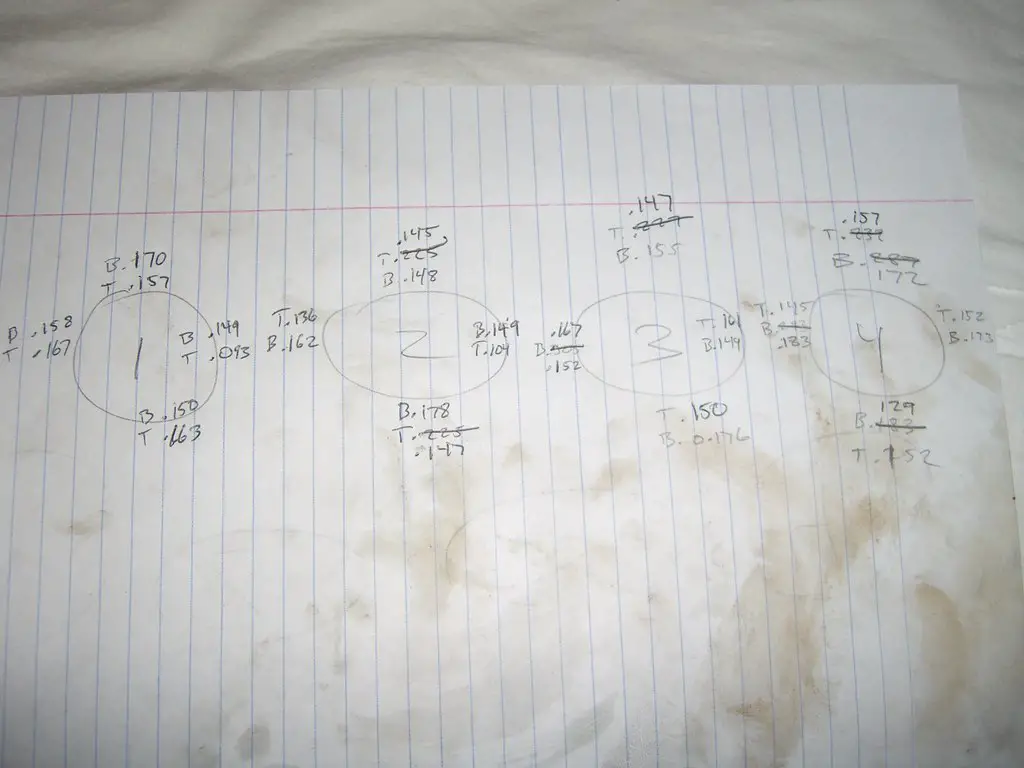
B= Bottom, T= Top (of bore).

4074816961_2514cde834_b.jpg


4074816977_17a2480f8b.jpg


4080026748_38257374e3.jpg


Fortunately there is more good news than bad news.

The sonic testing results got the OK from the teacher, although the 0.093" on the back-top of cylinder 1 is marginal...he said it shouldn't be an issue, mainly due to the location.

I took the crank to EPWI for micropolishing...cost me $25 with the school's discount. /ubbthreads/images/graemlins/cool.gif I didn't get it re nitrided, because the "Building Max-Performance 4g63's" book says the factory nitriding goes ~0.020" deep, and EPWI confirmed this.

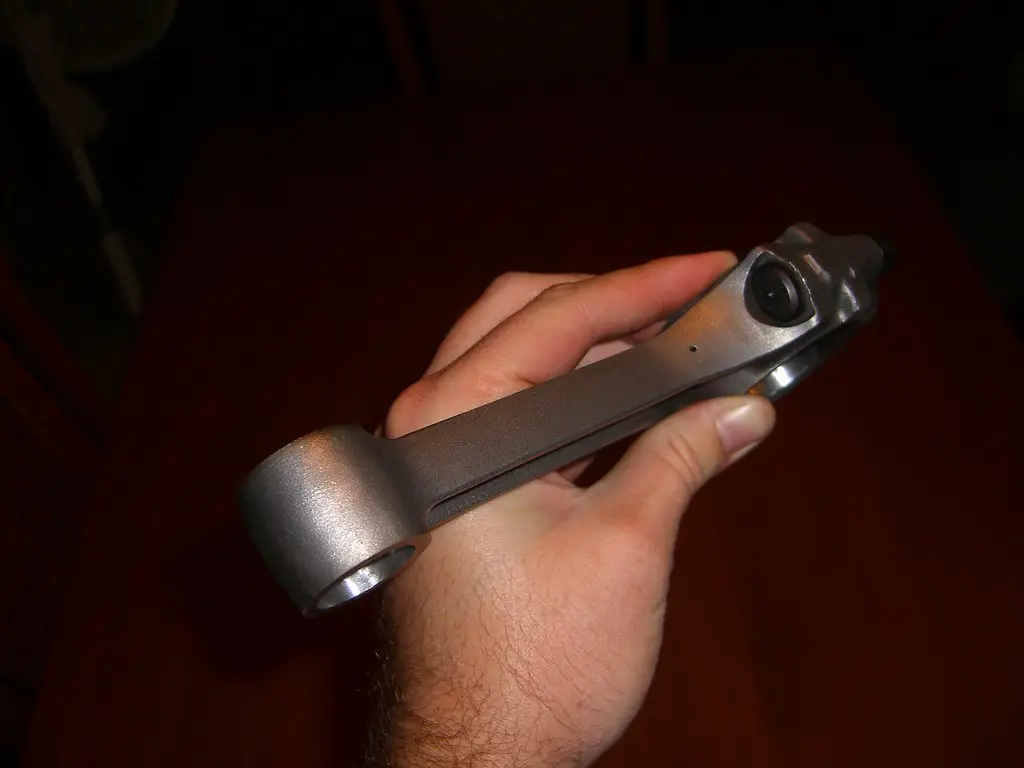
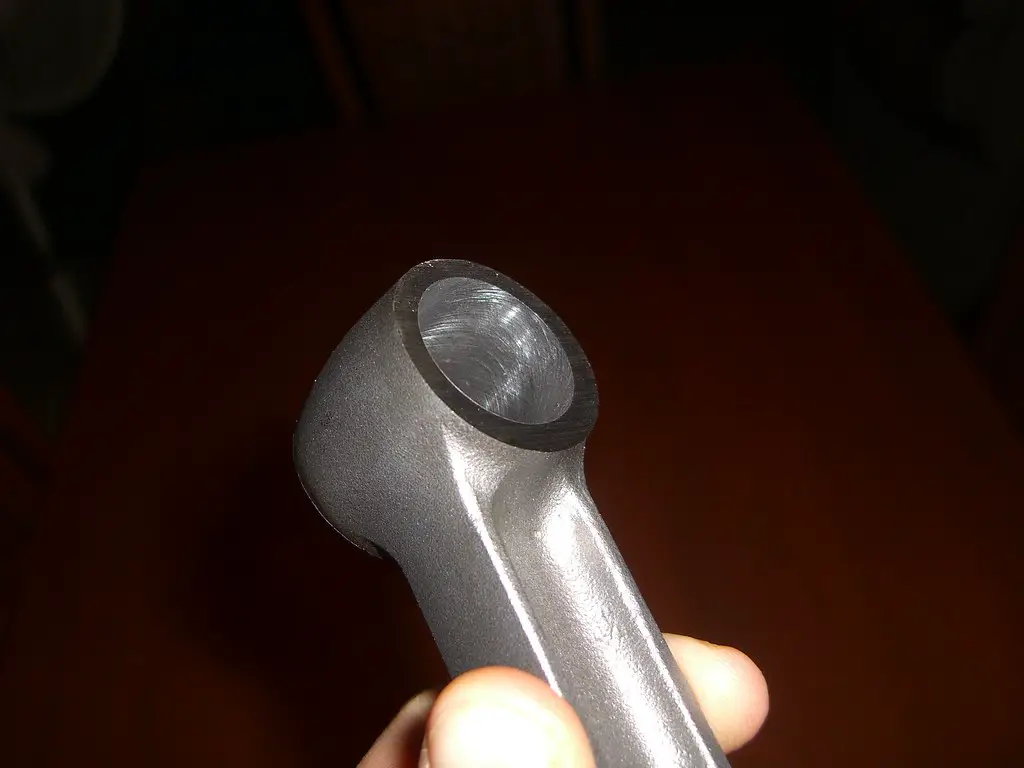
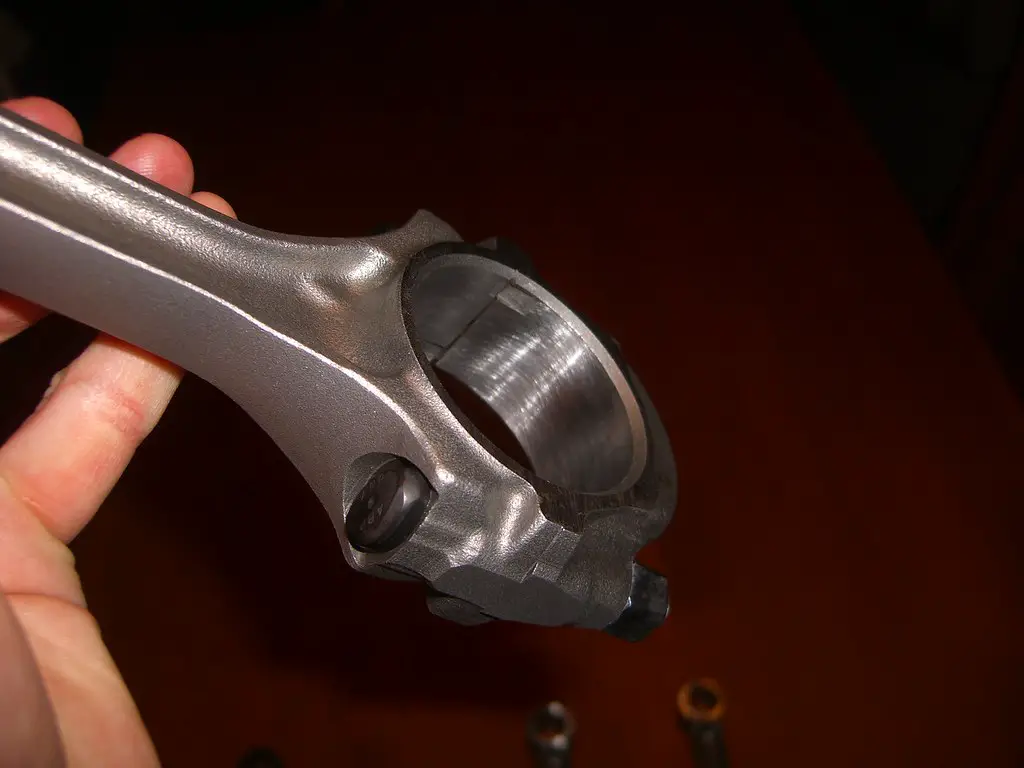
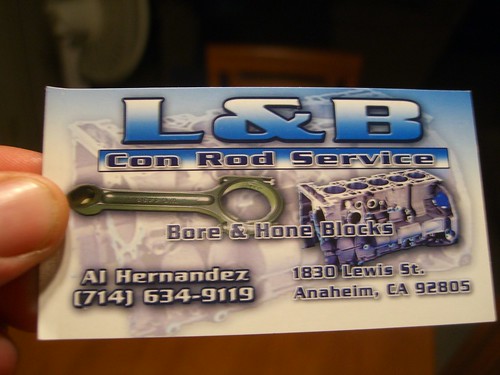
I might be getting a deal on some JE pistons through my boss. Will have to wait til SEMA is over to find out. My rods are currently still at L&B con rod service...they are all done, but i'm not gonna pick them up until i figure out what's going on with the JE's. L&B will be modifying them for use with full floating wrist pins if all goes well.

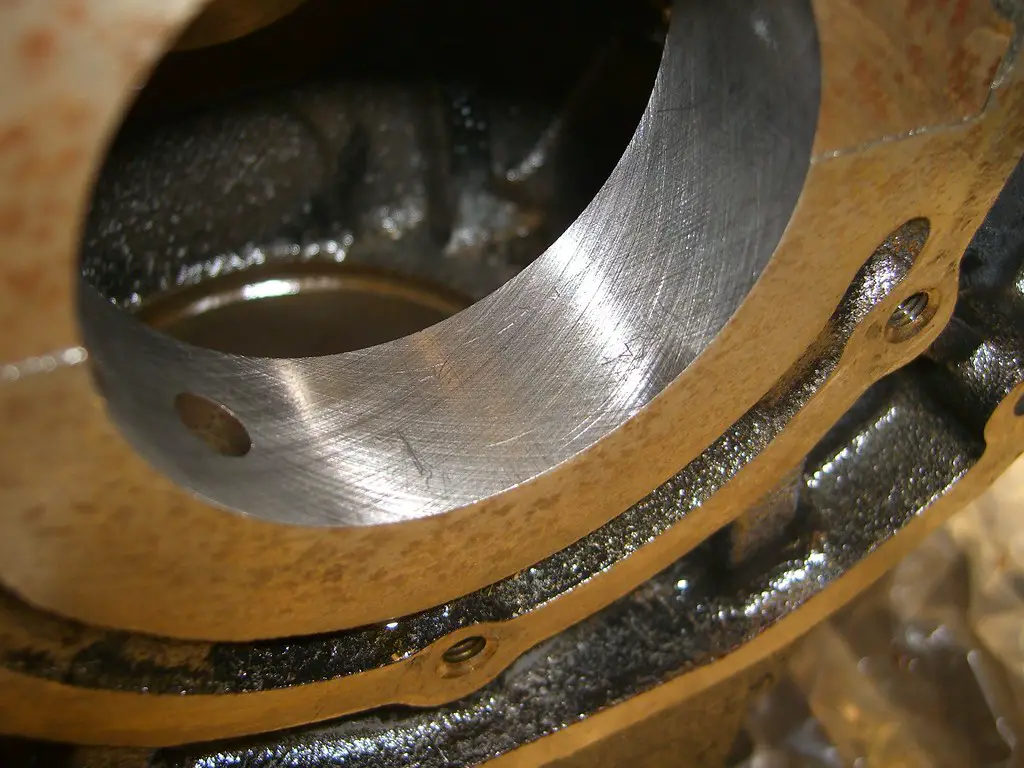
I was referred to a good shop to resize the mains.

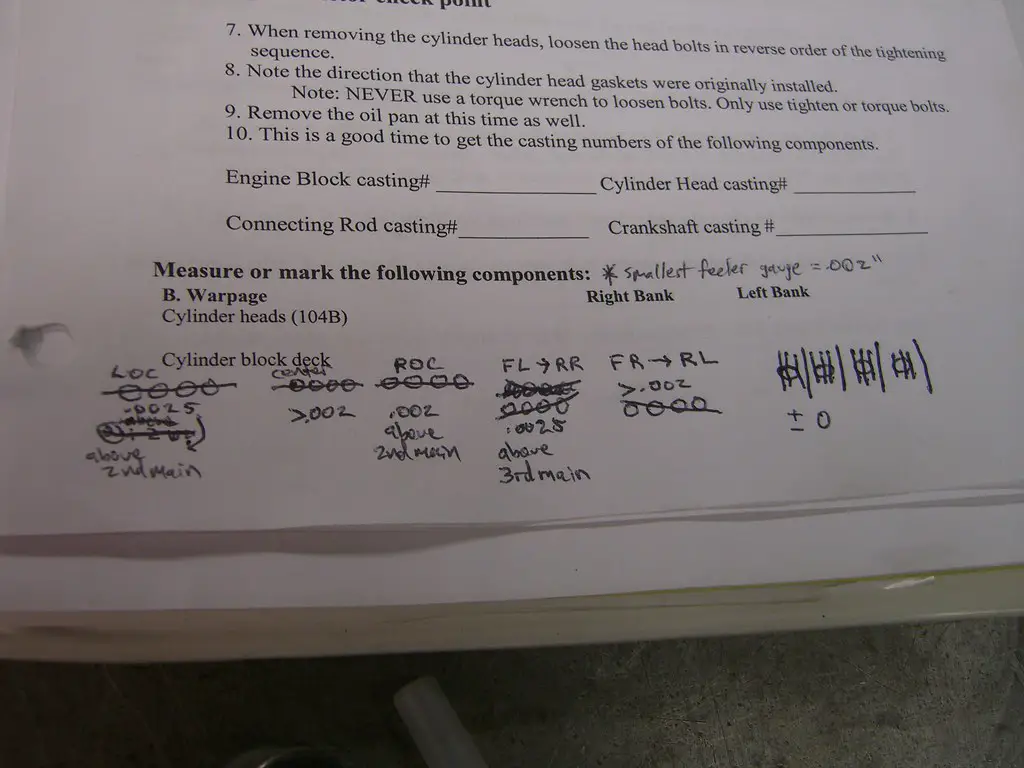
The main saddles are in good alignment. I checked them with a straightedge today. I used a 0.0015" feeler gauge and a flashlight (looking for light under the straight edge).

4080026754_6dfd66c97a.jpg


The deck only has slight warpage. Not an issue, i was planning on decking it slightly anyway to get a nice smooth surface for the MLS HG.

LOC= left of center, ROC= right of center. I also went straight down the middle lenghthwise on the block, diagonally both ways, and widthwise a bunch of times.

4080026760_1898b802f3_b.jpg


I feel like i'm forgetting something. It's late though so this is it. I have to work early.
 

ApexHunter

Well-known member
Joined
Apr 25, 2007
Messages
1,992
Location
Marysville, WA
Ok so let me begin by saying i'm an idiot. However this time it actually worked in my favor....

When i measured the main bearing bores for some reason i was thinking that, on the dial bore gauge, right of zero meant "plus" and left of zero "minus". Long story short, my measurements that i posted above were all actually on the lower side of 2.4020". Here is a "corrected" sheet.

4104125163_862d126a33_b.jpg


As far as being .0001-.0006" too tight, my instructor wants me to install the bearings and crank and check all clearances, and go from there. I hope to do that next week.

Other things that were accomplished last week:

Magnafluxed the block. No cracks! /ubbthreads/images/graemlins/smile.gif (How-to magnaflux video is located in one of the earlier posts in this thread.)

Started cleaning all the threads with a tap. So far I cleaned all those for the oil pan and the mains. I'll do the rest Tuesday and then pressure wash and hot tank the block before i put in the bearings and crank.
 

Brianawd

Well-known member
Joined
Apr 18, 2005
Messages
2,117
Location
Portland OR,
If you do end up getting the JE pistons save your money and get a set of rods to. Its a waste of a good piston to put them on stock rods.
 

ApexHunter

Well-known member
Joined
Apr 25, 2007
Messages
1,992
Location
Marysville, WA
^Yeah you are right. I decided that i'm just gonna stick with the original plan. Otherwise, it's like one thing leads to another and before i know it my stock rebuild is gonna be far from that. The goal for this engine was to build a relatively inexpensive, reliable engine that wouldn't see much more than 300whp. I didn't want to put a lot of money into it because i didn't know what to expect in terms of my own skills at machining/assembly and from the school's program.


So Tuesday, I finished cleaning up all the threads in the block's various orifices. Then i pressure washed it with hot water/detergent, then hot tanked it. Then it was off to L&B con rod service to pick up my rods, and take the block down to Millennium Motorsports for an align hone since i would be using ARP main studs. We are unable to align hone 6 bolt 4g63's at my school as of right now, because of the main cap design (suitcase handles). We don't have a fixture that will work with it.

I have to say, L&B did a nice job on the rods, and for a good price. For $100 Al resized and installed ARP rod bolts, honed out small end 1mm, narrowed 0.100", polished, shotpeened. Here's a few pics.

4118677897_9df11c67cd_b.jpg


4119448342_518e835978_b.jpg


4118677831_1297e69541_b.jpg


4118677683_3183d1bff3_b.jpg


4119448380_c49512ffdb.jpg


After i picked up the rods i made the trek from L&B in Anaheim to Millennium in Temecula. I'm sure that i could have found a capable shop closer to me, but i decided it would be best to go to the place i had been referred to. They did all the machine work on the 2.3 in my buddy's evo which constantly sees heavy abuse to the tune of 487whp/473lbft at boost levels in the neighborhood of 26psi. Anyway, i dropped off the block at Millenium late Tuesday afternoon with the hopes of picking it up Thursday morning.

Thursday morning came, and i made the trek back down to Temecula. I picked up the block and turned right back around to head to school. When i got to school i re measured all the main bearing bores just to make sure things were looking good. And they were....according to my instructor. While these numbers aren't as perfect as i would have liked, i guess for an align hone job they are pretty damn good. With line boring on the other hand, it is easier to get really good precision and accuracy but it is considerably more expensive, as first you line bore it, then you align hone it. Plus, line boring is not really necessary when you are really close to begin with. Anyway for $160 bucks, they did a good job, and they installed the ARP mains which buys me more time in class as we have less than a month before the end of the semester!!! Here are the results. I know they might be a little hard to follow. Any questions feel free to ask. As for the pics, any little scratches in the main bearing bores were caused by me, cruising around in there with the dial bore gauge.

4119449128_551b8823b4_b.jpg


4119449074_134d9afa35_b.jpg


4118678141_ae42606085_b.jpg


4119448736_077366cc7e_b.jpg


Doing all that measuring sapped most of the time from Thursday's class. Next week i'll be measuring the pistons (size and weight) weighing/balancing the rods. Then hopefully installing the pistons on the rods. Should be interesting using the rod heater to get the wrist pins in there. I'll try to get a vid of that.
 

ApexHunter

Well-known member
Joined
Apr 25, 2007
Messages
1,992
Location
Marysville, WA
Well it's been a while so i figured i should probably update. Not a lot of exciting stuff to report. I was sick for a week at the end of november/ early december, which sucked as i am pretty behind. The bottom end was supposed to be basically done last week, and i have a ways to go. Kind of a bummer, but it's been a learning experience in time management and preparation.

So like i said not a lot of exciting stuff lately...i measured the pistons, all are within a couple ten thousandths. I've been trying to figure out ring material and specs for ring gap, as the pistons didn't come with any info on this, like many high performance aftermarket offerings usually do. However, these are simply OE replacement (2g NPR pisonts and rings). I have a hunch that since they are OE replacement, they are supposed to be gapped to OE specs. I posted a thread recently on the matter and received a suggestion, which was cool. I am still trying to figure out the material for the 2nd compression ring. It is either cast iron or nitrided steel, based off info on NPR's website. If anyone has any info on this matter it would be greatly appreciated, as i need to know the material as it will determine the finish of the cylinder wall. If anyone has any info on this matter it would be greatly appreciated. It would also be helpful to determine ring gap.

I have been working on the written part of the engine build lately too. I've also been doing more cleaning of the block. When you are talking about clearances in the thousandth - ten thousandth range, a tiny piece of grit is like boulder. So this is not the first and not the last time i'll be cleaning it before it's done.

Hopefully i'll have some extra time over the break so i can order the rest of the parts i need like gaskets, seals, front cover etc. I've got a lits of part numbers going i just haven't had time to finish it. Thing is, since i'm gonna be out of school for the break i'll be working more, so i'm really not sure how much time i'll have. I'll make it happen though one way or another.
 
Support Vendors who Support the GVR-4 Community
Boosted Fabrication ECM Tuning ExtremePSI Fuel Injector Clinic Jacks Transmissions JNZ Tuning Kiggly Racing Morrison Fabrications RixRacing RockAuto RTM Racing STM Tuned
Top