I mounted that relay near the same place you did, but on the inside of the panel (faces the outside of the car, so between the support and the quarter panel) so it is out of harm's way.
You are using an out of date browser. It may not display this or other websites correctly.
You should upgrade or use an alternative browser.
You should upgrade or use an alternative browser.
#83/2000 Project Cluster To Capable (12/1/09) 56K Beware
- Thread starter CarRacer
- Start date
CarRacer
Well-known member
Took the car out for it's maiden voyage. It ran fine and survived the trip. There were a few issues though.
I just ran up to the local gas station to fill the tank and get the exhaust hot so I can tighten everything again. I pulled up to the pump and noticed a little smoke from the hood. I figured it was the residual oil that was spilled on themotor burning off. Nope, it was the "ceramic powder coating" burning off exactly like spray paint would. /ubbthreads/images/graemlins/banghead.gif
There was a speed sensitive rubbing noise coming from the RR that I need to check out. It went away on the return trip, but while it's on the lift I want to check it out.
The dipstick popped out, which is frustrating because I'm running a catch can. PCV off the back of the manifold might be bad. I'm going to squeeze the tube with a pliers for now and hope for worn out rubber.
The clutch did slip on the way back. I wanted to run WOT and see what happened, as I babied it on the way there. In fourth it started slipping above 5500 at 12 psi. I upshifted and it slipped there at 5k, so it's well past used. I'm not sure when I'll get a chance to get to that.
All I'm all I'm happy nothing major fell off and the fixes won't be terrible hard to accomplish. I'm also glad I'm carrying two cars on my insurance for a month as well. /ubbthreads/images/graemlins/hsugh.gif
CarRacer
Well-known member
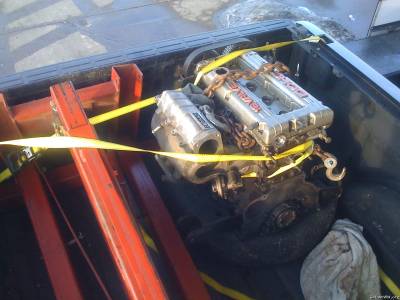
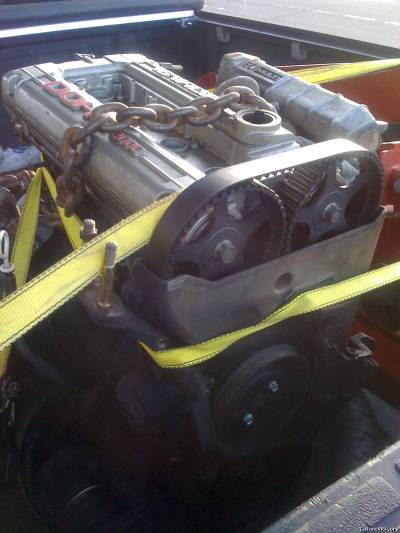
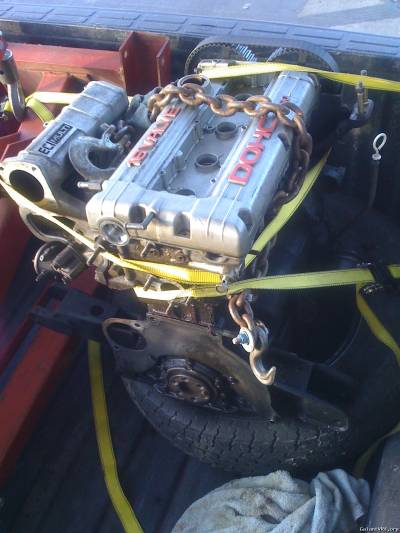
Picked up the new motor today. 6 bolt that has low compression numbers. Supposedly had 140k on it with compression numbers of 120. I'll be rebuilding it before it goes in the car. I picked it up for $250, so a good deal for a long block in my opinion.
CarRacer
Well-known member
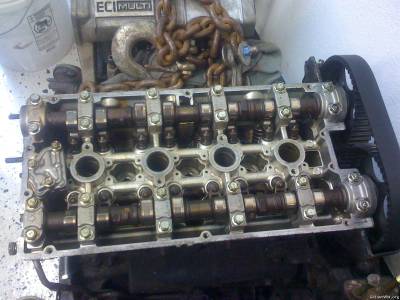
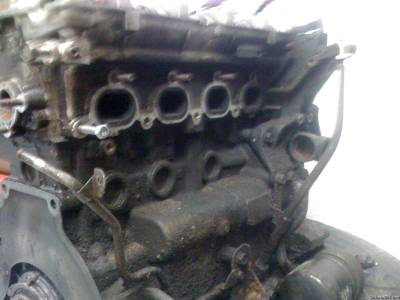
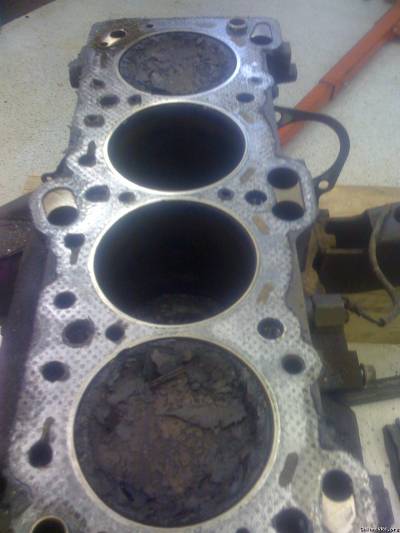
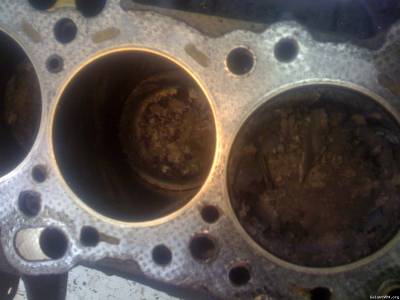
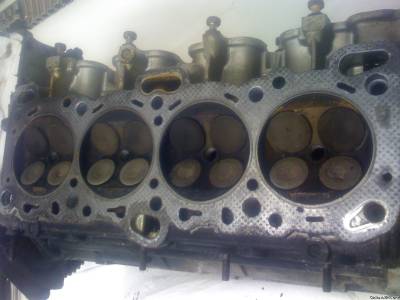
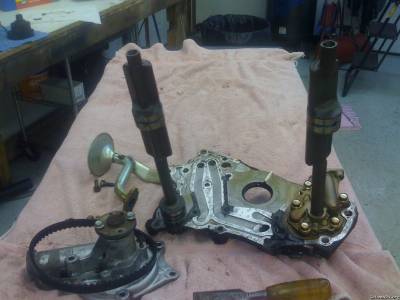
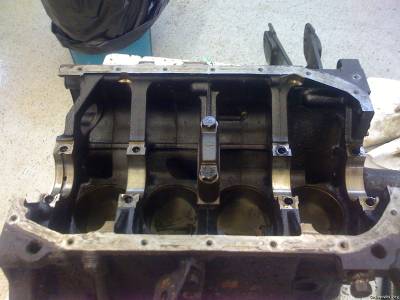
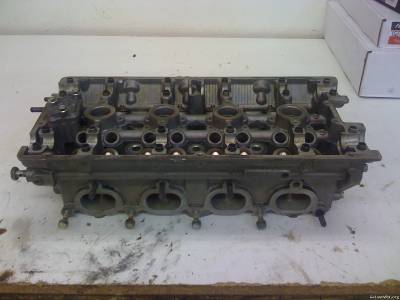
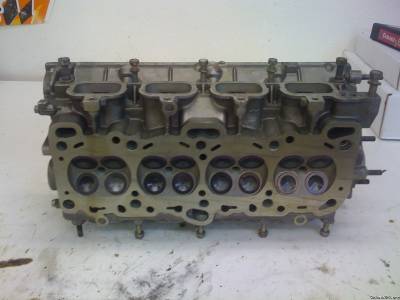
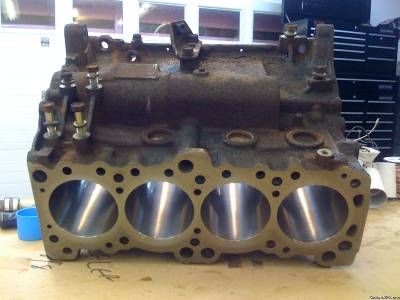
Started tearing into the motor today to see what it needs. It was also a learning experience, as I've never had one of these motors apart.
It went pretty easy, although I did have to call VRausch4 with a few questions. I stopped after getting the head off, I wanted plenty of time to disassemble the rotating assembly. No sense in rushing anything and doing something incorrectly. Also, I'm sure Pops would have frowned upon leaving a mess in his shop.
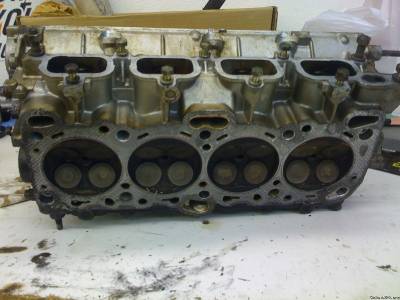
The motor seemed fine to me using my untrained eye to look at the pistons and head. The pistons had quite a bit of carbon "flakes" on top, but no marks from valve contact.
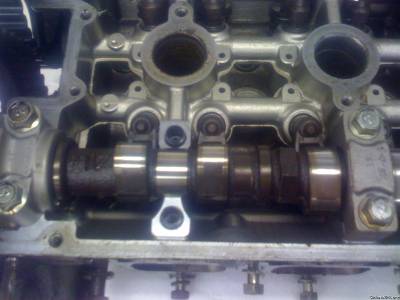
The head looked pretty good as well, no major discoloring and the one cam journal I popped off didn't have any scoring.
Feel free to comment if you notice something I missed. I'll be taking apart the rotating assembly soon and start the process of installing new rings and bearings.
It went pretty easy, although I did have to call VRausch4 with a few questions. I stopped after getting the head off, I wanted plenty of time to disassemble the rotating assembly. No sense in rushing anything and doing something incorrectly. Also, I'm sure Pops would have frowned upon leaving a mess in his shop.
The motor seemed fine to me using my untrained eye to look at the pistons and head. The pistons had quite a bit of carbon "flakes" on top, but no marks from valve contact.
The head looked pretty good as well, no major discoloring and the one cam journal I popped off didn't have any scoring.
Feel free to comment if you notice something I missed. I'll be taking apart the rotating assembly soon and start the process of installing new rings and bearings.
Last edited:
that build is lookin GREAT man. do you think you might have it running in the next "possible" meet? very nice! did you pick up the motor from someone local? i've been trying to find a motor like that for a couple of months just to rebuild and put it into mine...but for $250, that one hell of a deal! lol. pistons look usable. lol. /ubbthreads/images/graemlins/wink.gif
CarRacer
Well-known member
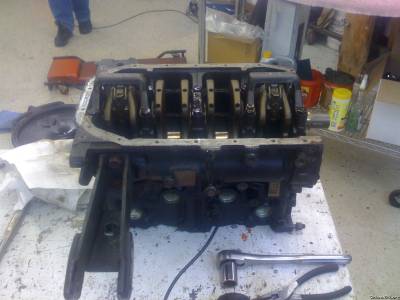
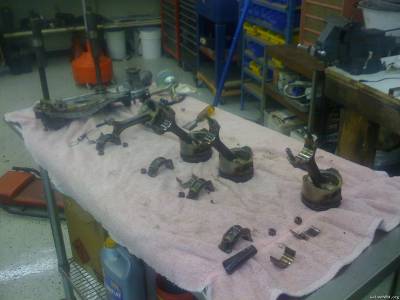
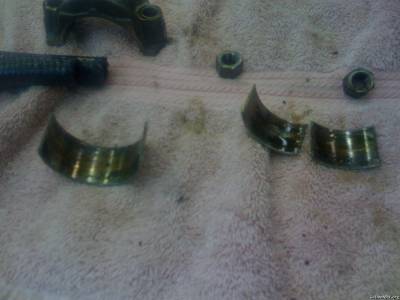
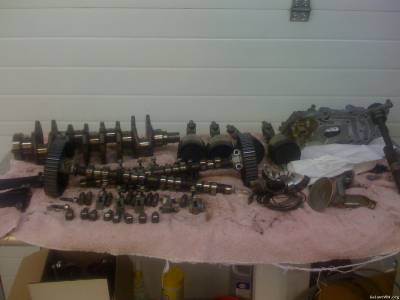
Started to take the rotating assembly apart this weekend. Everything looked pretty good until I got to the rod bearings. The number one bearing was cracked in half on one shell and the rod journals on a few had some black "stains" I can only assume are from the motor getting hot.
All in all it went well, aside from a motor mount and dipstick I couldn't break loose.
All in all it went well, aside from a motor mount and dipstick I couldn't break loose.
CarRacer
Well-known member
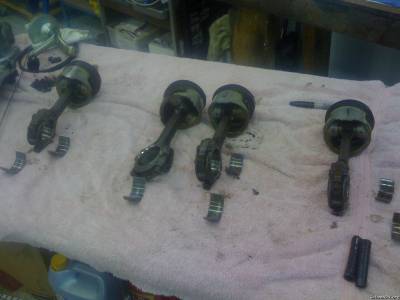
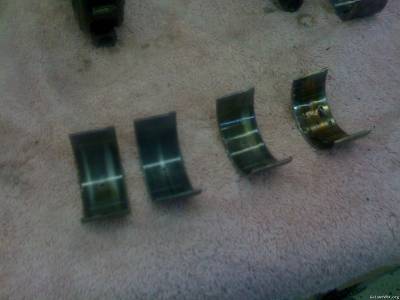
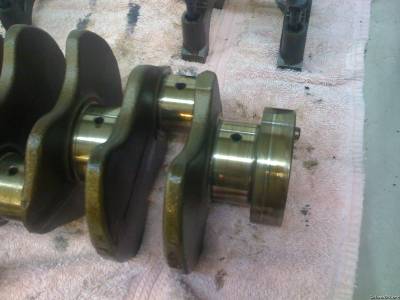
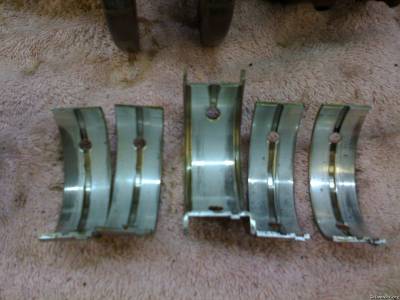
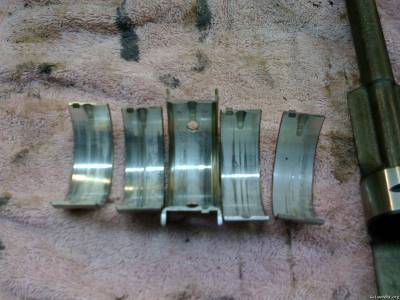
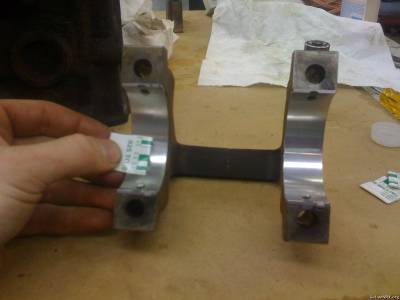
Did some work to the motor that I will be rebuilding soon. Nothing interesting, just cleaning up the gunk and grime and scraping off old gasket material. I also removed the crankshaft, it won't be needed at the machine shop. The only thing I noticed about the crank itself was a small score mark on the flywheel side. I'm not sure if all cranks have that mark from the gasket or not. I also included a picture of the old main bearings. They look fine to me, but I'm not really sure what to look for.

CP
Well-known member
That an old Camaro up on the lift?
CarRacer
Well-known member
Yes, it's my dad's 1967 RS clone. It's not a show car, but he likes driving it too much anyways for him to own a showcar. It has a moser ten bolt rear end, 4 wheel disc brakes, 4 speed, and 358ci small block out of our old racecar. Sadly with the rules that the motor was built to, it only put 340 to the wheels when we dynoed it. I think the untouched iron head are the bottleneck.
If the "score" mark you are seeing on the flywheel end of the crank is the bright circumferential mark, that is normal and is from the rear main seal wiping there.
CarRacer
Well-known member
Thanks for answering my retarded questions iceman. Better to ask then not know and screw something up.
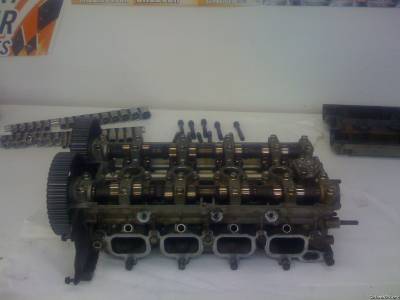
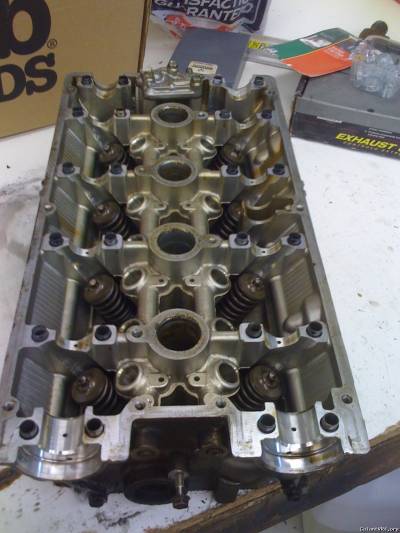
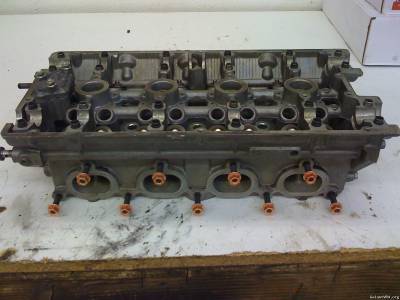
I removed my valvetrain in preparation for sending to the machine shop. All went well and nothing was out of order. Now I just have to remember where all these parts went.

I removed my valvetrain in preparation for sending to the machine shop. All went well and nothing was out of order. Now I just have to remember where all these parts went.
CarRacer
Well-known member
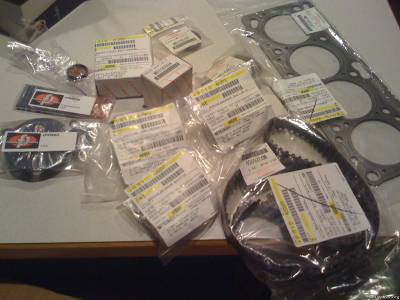
OEM parts arrived this week. Not much else is happening. I dropped off the valve seals I forgot to bring when I originally brought the head and block to the machine shop. The block had been decked and the head was bare and just got hot tanked. I should be able to start assembly next weekend.
CarRacer
Well-known member
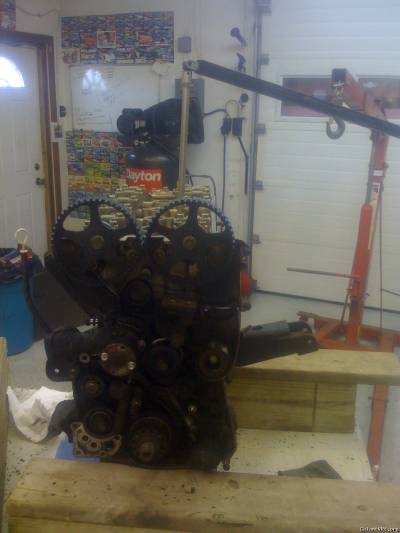
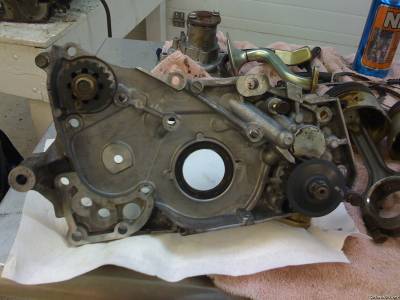
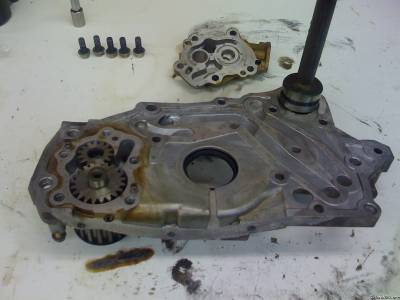
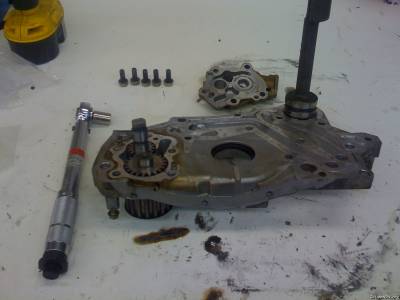
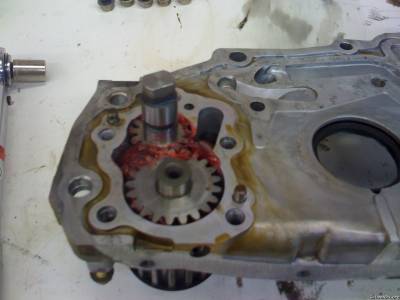
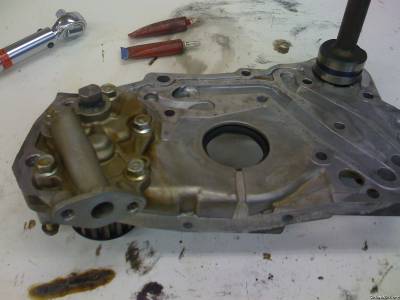
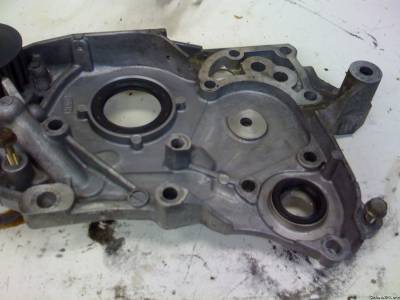
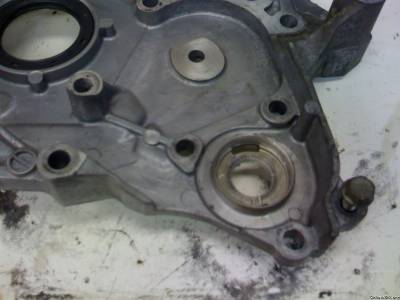
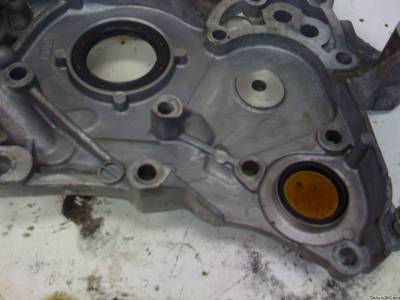
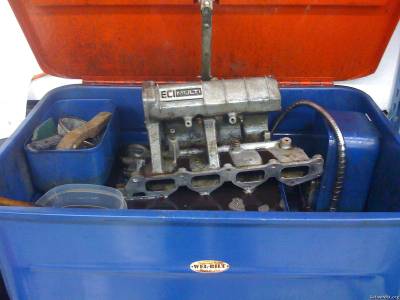
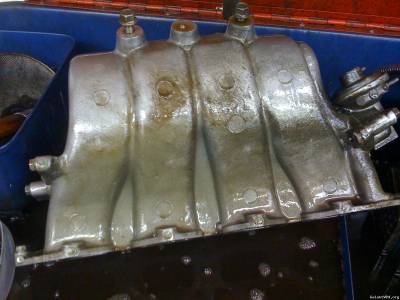
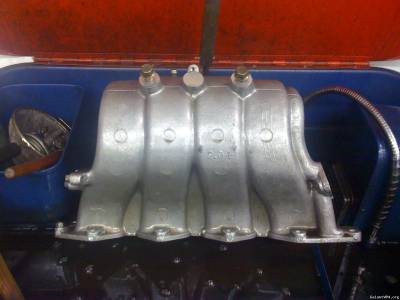
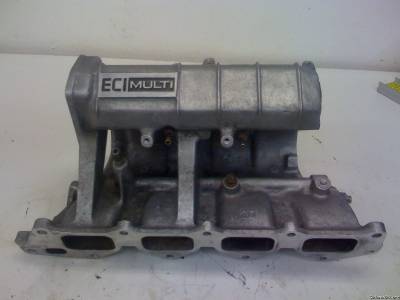
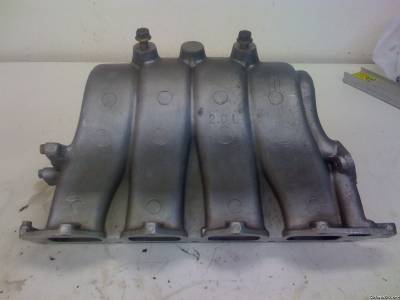
I worked on my balance shaft delete today. I also cleaned up the intake manifold. This 6 bolt must have leaked from every seal on the motor.
I swear I'm going to develop hand cancer from this parts washer. It's been the dumping ground for every caustic chemical in the shop for the last two years. I have no idea what's in there.
I swear I'm going to develop hand cancer from this parts washer. It's been the dumping ground for every caustic chemical in the shop for the last two years. I have no idea what's in there.
CarRacer
Well-known member
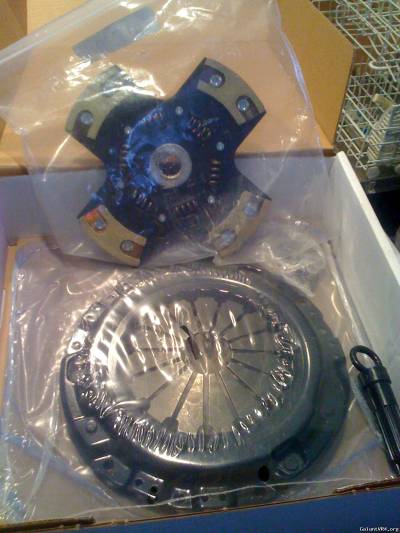
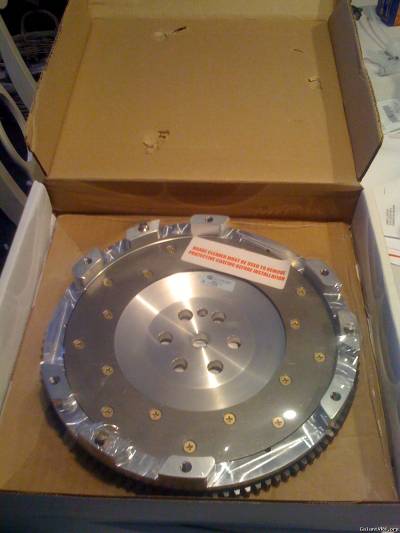
Some toys came in the mail today. I guess I'm just use to seeing V8 clutches, but this thing struck me as small. I guess I was expecting a 10 inch clutch. Should work well for my needs and I can't really complain for $500 shipped for both. Fidanza 3.2 clutch and Fidanza aluminum flywheel.
Nartanian
Well-known member
wow this is amazing! all this work for only a 14b though? /ubbthreads/images/graemlins/hsugh.gif still love it! makes me a proud Minnesotan /ubbthreads/images/graemlins/grin.gif
CarRacer
Well-known member
Yeah, this may all seem like overkill for a 14b powered car. I'm just planning in a lot of overhead for when I do retire this car as a DD and want to upgrade. All of the hard work will be done and it will be very easy to go faster.
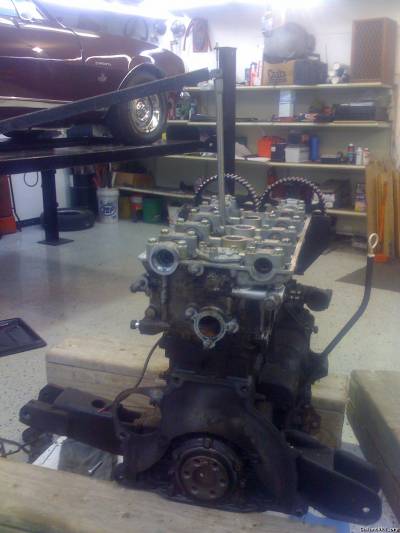
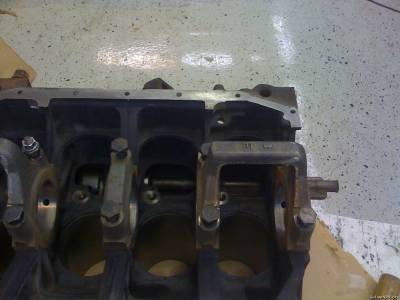
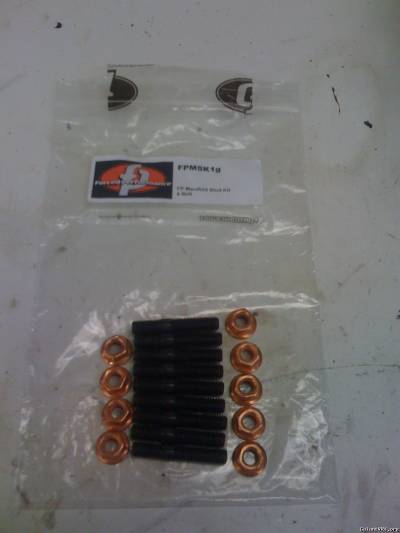
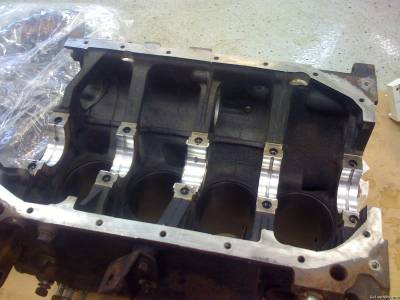
I got my head and block back from the machine shop. I had the deck surface cleaned up in preparation for the MLS headgasket coming. I was planning on putting the crank in tonight, but the piston squirters were removed for the honing process and not reinstalled. I held off and finished up installing the balance shaft bearings and new exhaust studs in the head.
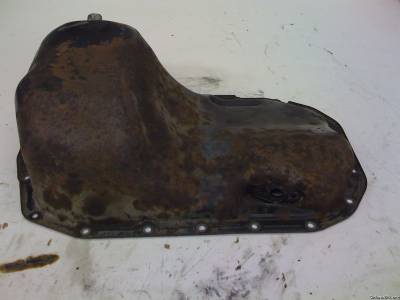
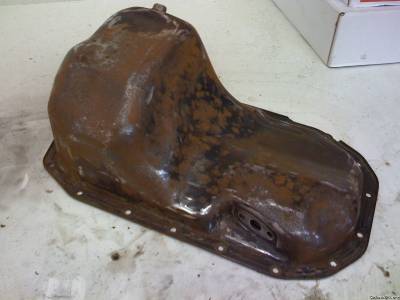
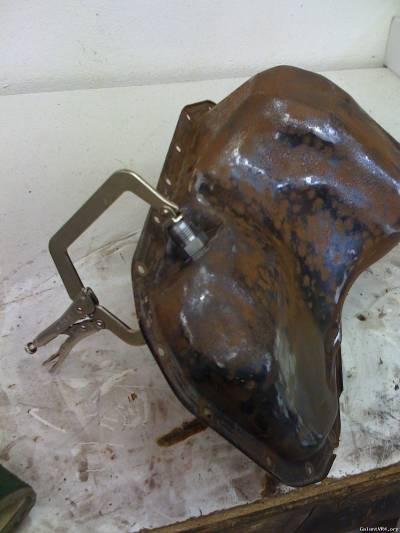
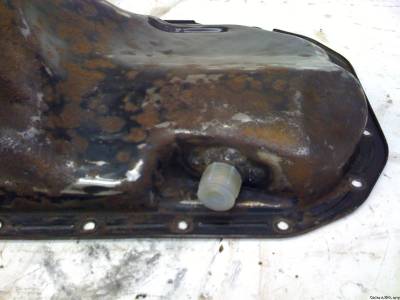
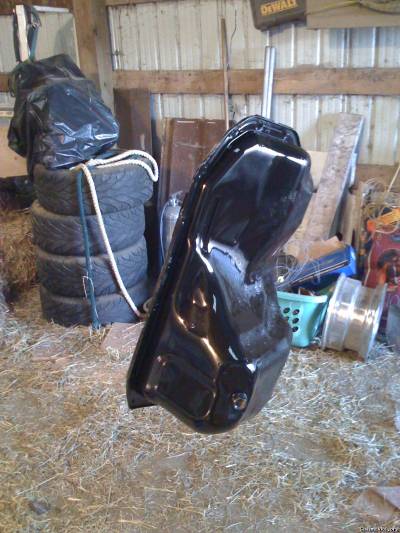
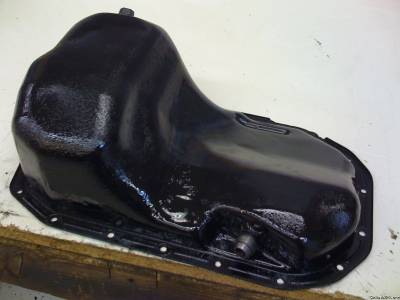
I also welded in the -10 bung for the oil drain that is on the car. The pan was pretty rusty and crappy looking, so I used a right angle grinder and a scuff pad to clean the rust up. A few coats of black paint from a spray bomb can and it looked pretty decent. The last pic of the pan finished were of still wet paint, the pan should dry to a satin finish.
I got my head and block back from the machine shop. I had the deck surface cleaned up in preparation for the MLS headgasket coming. I was planning on putting the crank in tonight, but the piston squirters were removed for the honing process and not reinstalled. I held off and finished up installing the balance shaft bearings and new exhaust studs in the head.
I also welded in the -10 bung for the oil drain that is on the car. The pan was pretty rusty and crappy looking, so I used a right angle grinder and a scuff pad to clean the rust up. A few coats of black paint from a spray bomb can and it looked pretty decent. The last pic of the pan finished were of still wet paint, the pan should dry to a satin finish.
Last edited:
CarRacer
Well-known member
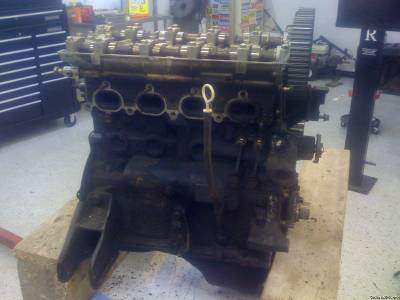
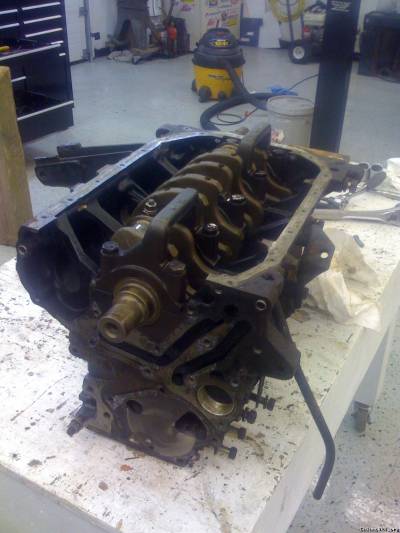
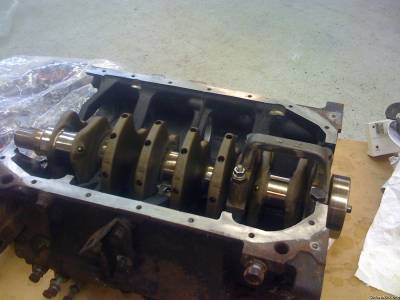
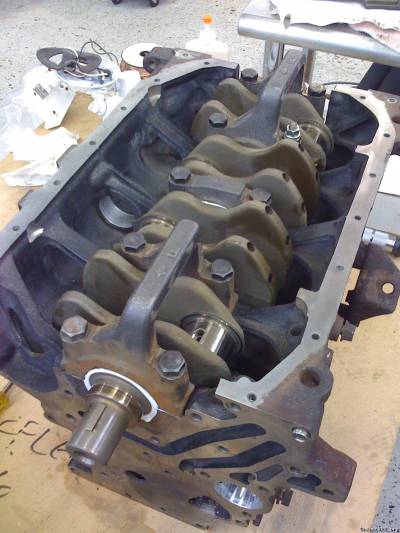
Did some work on the motor tonight. I got the crank installed after checking things over. Bearing clearances were in spec and endplay was good also. VRausch4 was his usual awesome self and answered a few stupid questions I had. All things went well and I should have the rotating assembly together by Saturday night.
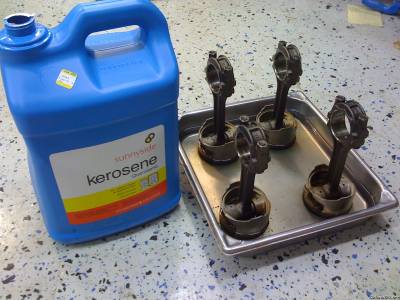
The pistons and lifters are soaking in kerosene until then. The short amount of time I had the pistons soaking already removed a lot of carbon. I'm interested to see what they look like on Saturday morning.
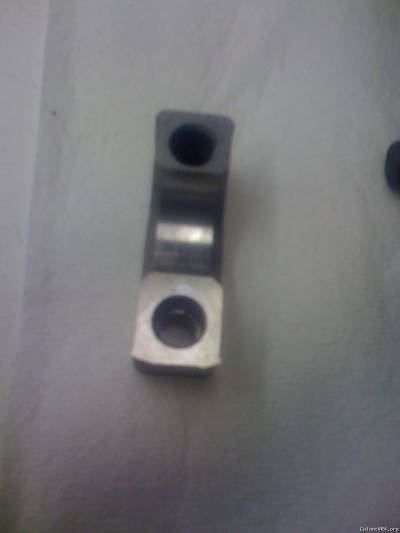
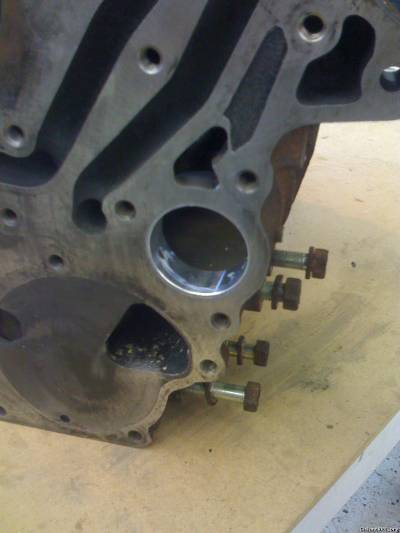
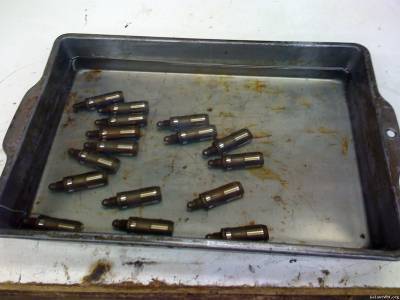
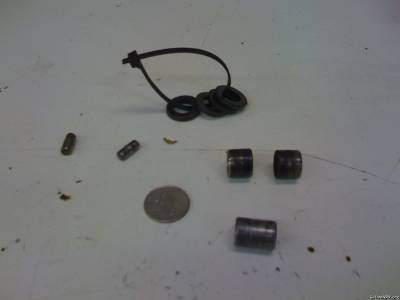
I did have a question on parts identification though. The machinist removed these bits when it was decked and honed. I know the two larger hollow dowels are the block side "head locators". I have no idea what the washers, larger hollow dowel and smaller solid dowels are. Any help is appreciated in everyone's favorite game, Name That Part.
The pistons and lifters are soaking in kerosene until then. The short amount of time I had the pistons soaking already removed a lot of carbon. I'm interested to see what they look like on Saturday morning.
I did have a question on parts identification though. The machinist removed these bits when it was decked and honed. I know the two larger hollow dowels are the block side "head locators". I have no idea what the washers, larger hollow dowel and smaller solid dowels are. Any help is appreciated in everyone's favorite game, Name That Part.
The little dowels look like they are from the cams. The washers are from the head bolts, and the larger dowel looks like the crank to flywheel dowel.
Redlinegvr4
Well-known member
wow..this build is coming along great.. everything looks good man. i want another galant /ubbthreads/images/graemlins/frown.gif
IncorpoRatedX
Well-known member
largest dowel looks like a block to transmission alignment dowel, would be found on either side of the bell housing bolt holes, one in the furthest back, one in the furthest front. neither appear to be in place on your block, but pay attention when you remove your engine that they come out on the old block and not get stuck in the bell housing, ive seen guys get hung up on an engine install because someone left a dowel where they shouldn't have.
build looks to be going along great.
far right side, top and bottom of the pic is where the dowels go.
build looks to be going along great.
far right side, top and bottom of the pic is where the dowels go.
