man great progress... keep up the great work... if i only had the time and the money with a grage like yours....awsome man
You are using an out of date browser. It may not display this or other websites correctly.
You should upgrade or use an alternative browser.
You should upgrade or use an alternative browser.
#83/2000 Project Cluster To Capable (12/1/09) 56K Beware
- Thread starter CarRacer
- Start date
CarRacer
Well-known member
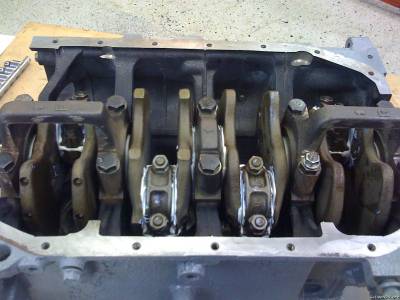
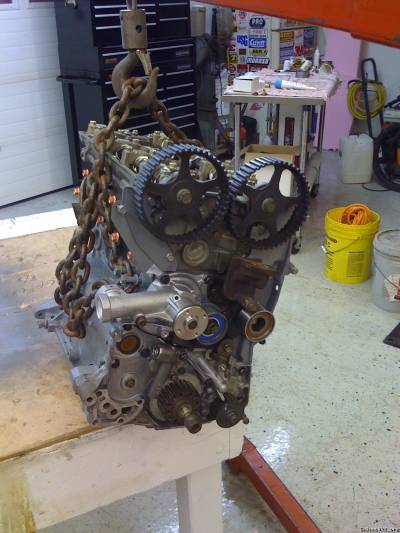
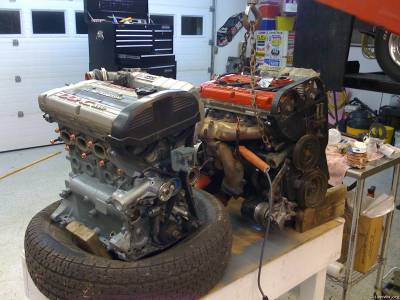
Finished the rotating assembly today and got the head on.
I learned a trick when working with the headstuds. You have to install the washers first, otherwise the springs interfere. Other than that it went well, and I torqued to 90 foot pounds on the Mitsu MLS.
I started putting on the timing components, but I'm far from done.
I learned a trick when working with the headstuds. You have to install the washers first, otherwise the springs interfere. Other than that it went well, and I torqued to 90 foot pounds on the Mitsu MLS.
I started putting on the timing components, but I'm far from done.
I was lucky enough to have to do this same job last week. Too bad not for either of my cars /ubbthreads/images/graemlins/frown.gif
CarRacer
Well-known member
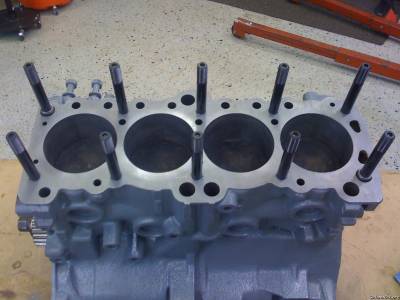
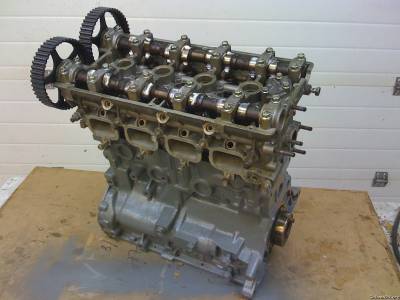
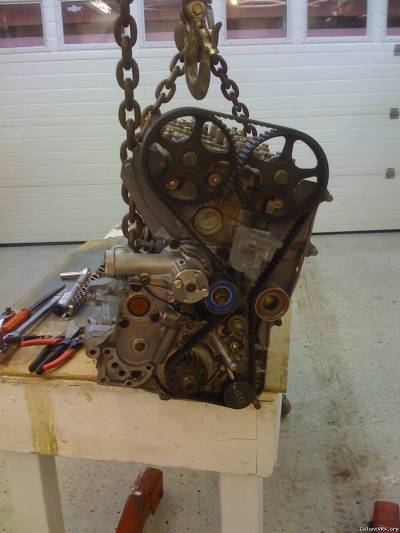
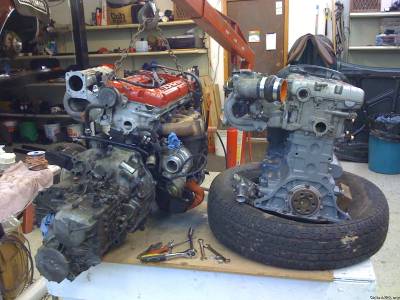
Finished up the main assembly of my engine this weekend.
I learned quite a bit about the tricks on a timing belt. I only had to redo it 6 times.
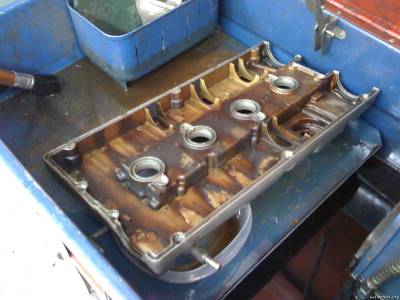
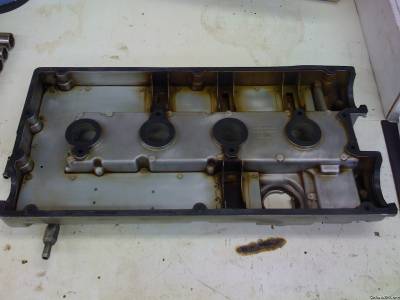
I also went a little "Type A" on the valve cover and cleaned the sludge from the underside.
I learned quite a bit about the tricks on a timing belt. I only had to redo it 6 times.
I also went a little "Type A" on the valve cover and cleaned the sludge from the underside.
CarRacer
Well-known member
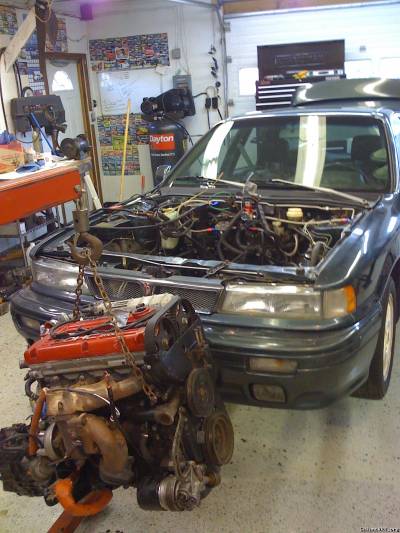
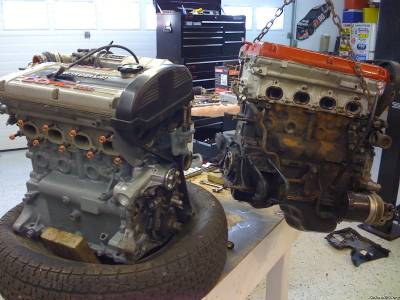
Worked on getting the old motor out. It went pretty well, I used duct tape to mark where all the stuff goes. All that is left is the transfer case, exhaust, and one axle.

The_Big_Weave
Well-known member
Whats up with the copper exhaust nuts?
CarRacer
Well-known member
I bought the FP exhaust stud kit. Those are the nuts they included.
CarRacer
Well-known member
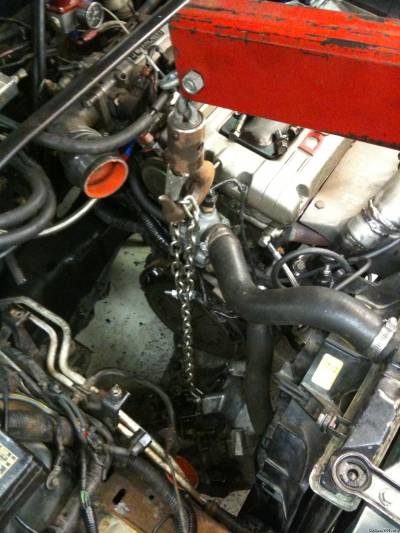
Finished removing the old motor and started transferring the parts to the new motor. Things went well. I'm in a bit of a holding pattern now, as I bought a new shift fork and axle seals for the transmission. It's a little insurance on not removing the transmission soon based on advice from a board member.
I also found the reason for my coolant loss leading to my motor failure. The rubber line from the water pipe to the oil cooler tore under both hose clamps. I'm very glad I'm changing to the 90 style cooler. Speaking of which, my fitting for that came in as well as the stuff for my fuel line.
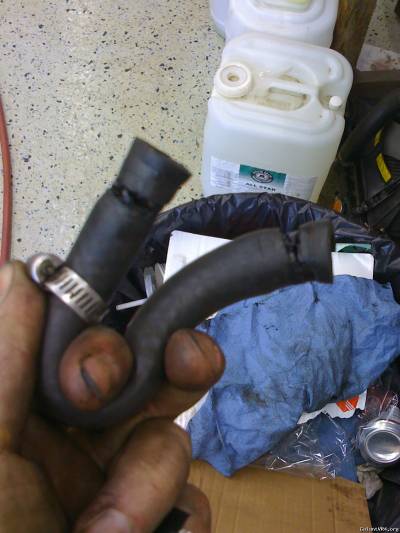
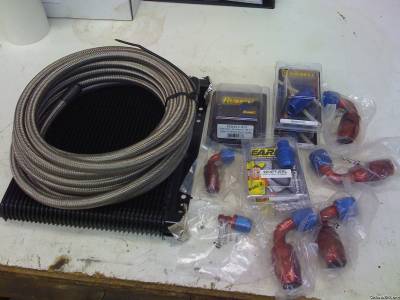
I also found the reason for my coolant loss leading to my motor failure. The rubber line from the water pipe to the oil cooler tore under both hose clamps. I'm very glad I'm changing to the 90 style cooler. Speaking of which, my fitting for that came in as well as the stuff for my fuel line.
CarRacer
Well-known member
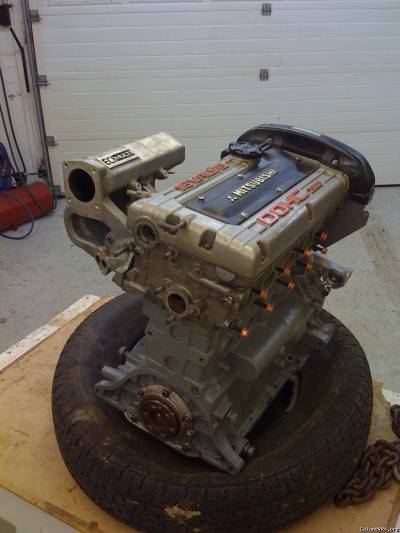
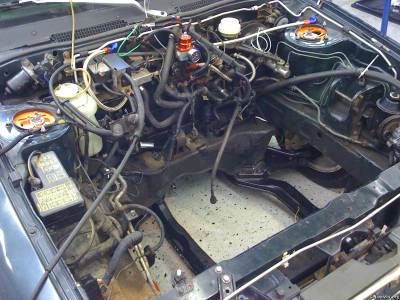
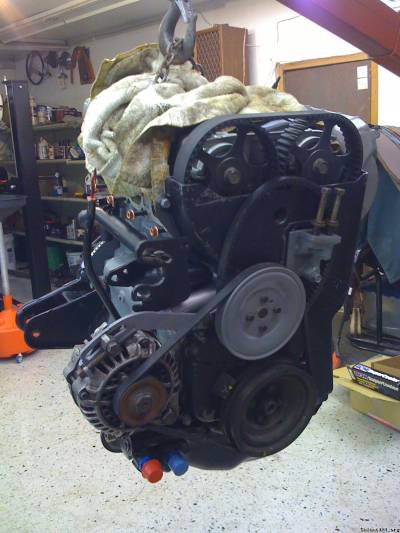
Continued the process on getting the new motor ready. Installed the Fidanza clutch and flywheel. Got the timing side buttoned up.

CarRacer
Well-known member
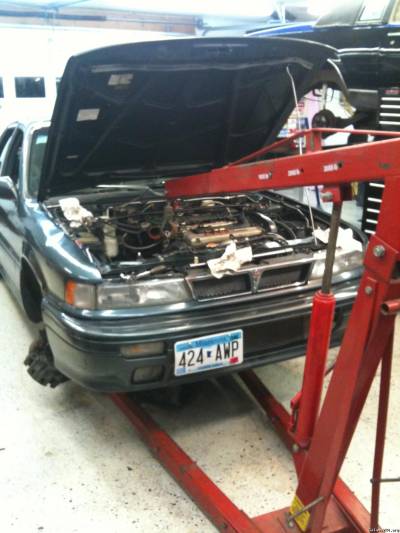
Started the install for the new motor. It took a while to get the engine in, I was by myself. Dad playing baseball and friend getting married ftl. I broke lose the rubber/hardline connection on the clutch slave to gain some room. It was still tight dropping the motor in.
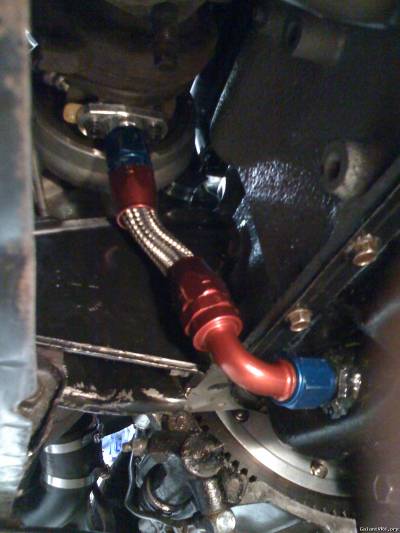
I also ran the -10 lines for the oil cooler. I ordered 4 90* fittings, and that didn't work. You need one 120* to clear the core support. It's still a tight fit and I cut some rubber hose where the line ran next to the core support. I also found a great cheater setup for tightening the axle nut. I used a length of angle iron and a wrench. I didn't have the correct socket, but an 1 1/4" standard fits. I have a long way to go, but today was a good start.
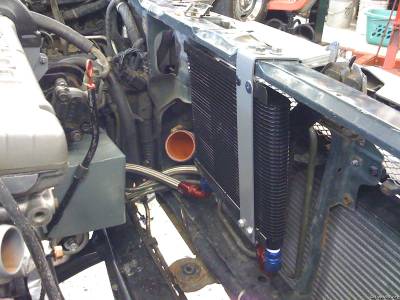
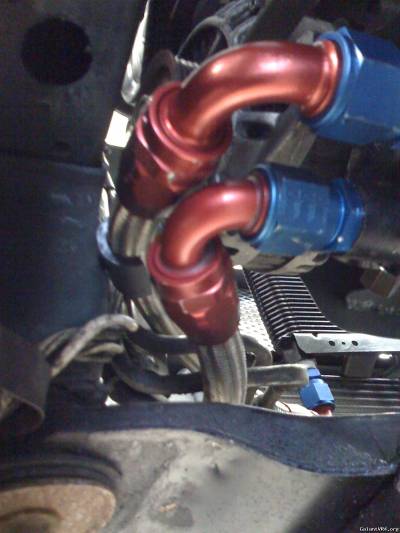
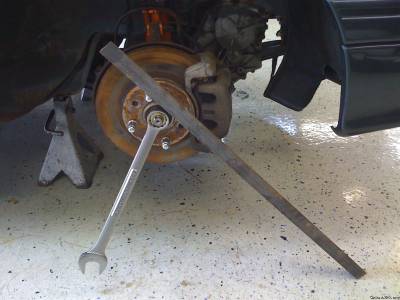
I also ran the -10 lines for the oil cooler. I ordered 4 90* fittings, and that didn't work. You need one 120* to clear the core support. It's still a tight fit and I cut some rubber hose where the line ran next to the core support. I also found a great cheater setup for tightening the axle nut. I used a length of angle iron and a wrench. I didn't have the correct socket, but an 1 1/4" standard fits. I have a long way to go, but today was a good start.
CarRacer
Well-known member
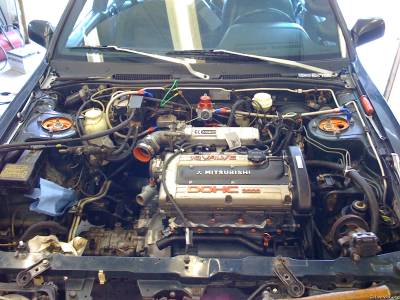
Well after dropping and installing the tranny to fix my clutch stud problem, I fired the car up today. I just got it up to temp and checked for leaks and set the base timing. Everything was great. The base was a little off, but it's at 5* now. Oil pressure was there and no leaks in my oil cooler setup. I may have gotten ambitious on the lower radiator hose clamp on the water pipe, so I'll have to double check for leaks there.
I'm very happy it's actually running now. The race isn't over yet, but I'm on the white flag of this rebuild.
I'm very happy it's actually running now. The race isn't over yet, but I'm on the white flag of this rebuild.
CarRacer
Well-known member
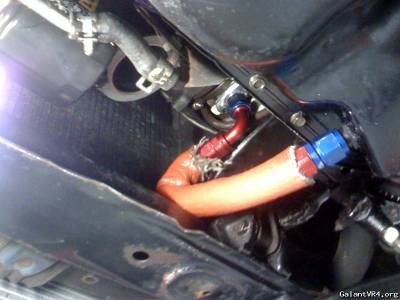
Found my oil leak. My old routing for the drain line was causing the fittings to leak. The car would idle in the shop like a champ and not leak a drop. Once I hit the road and the motor started moving, it flexed the line and caused the fitting to leak. I swapped the fitting location and shortened the line. It didn't leak in the short test drive I made and hopefully it stays that way.
The next problem to address is a coolant leak. The lower radiator hose is weeping at the connection to the water pipe. I'm not sure if it's the hose itself leaking due to an over tightened clamp or the water pipe itself is leaking. I tweaked the small pipe that feeds the heater core to install the pipe and wonder if I didn't stress the pipe and create a crack. I plan on cutting off a 1" section of the hose and reclamping it. If that doesn't fix it, the water pipe is coming out and getting welded up.
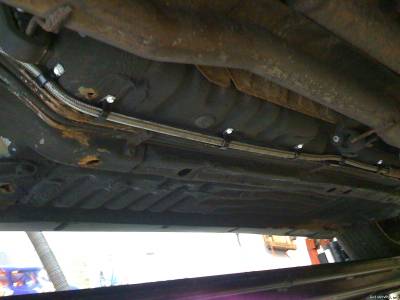
Old Routing
New Routing
The next problem to address is a coolant leak. The lower radiator hose is weeping at the connection to the water pipe. I'm not sure if it's the hose itself leaking due to an over tightened clamp or the water pipe itself is leaking. I tweaked the small pipe that feeds the heater core to install the pipe and wonder if I didn't stress the pipe and create a crack. I plan on cutting off a 1" section of the hose and reclamping it. If that doesn't fix it, the water pipe is coming out and getting welded up.
Old Routing
New Routing
CarRacer
Well-known member
I caught up on some maintenance that the car needed. My PS pump had a stripped out bolt and was squealing and being very annoying. My wideband wiring also caught one of the clamps on the cv boot. The wiring broke and the connector separated and the boot dumped all of its grease on the underbody and engine. I repacked it with grease and installed a new clamp. I also finalized the mount for my SS fuel line. Basically replacing all of the 18 year old parts on the car that are worn out.
CarRacer
Well-known member
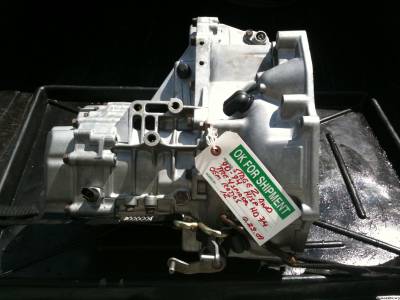
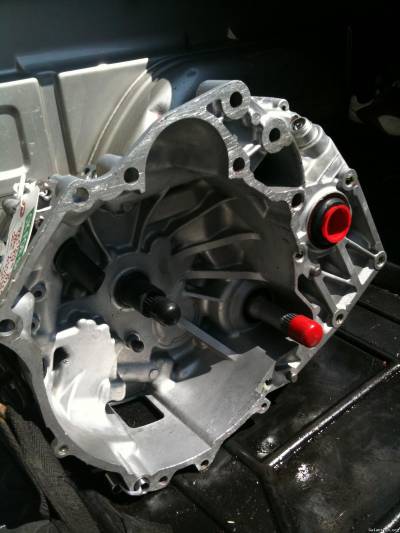
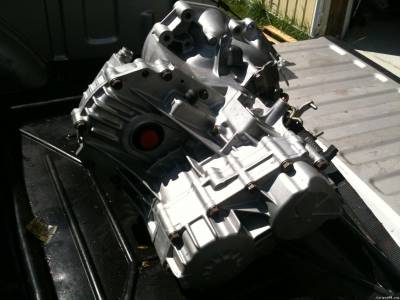
Well, the tranny that was in the car finally died. Car has 200k on it, so the tranny has that on it at most. I heard it might have been rebuilt at one time, but have no verification. Anyways it died and I replaced it with a rebuilt TRE trans this weekend. I installed a stage 2 trans with a 4 spider center differential and a DSM first gear. It shifts nicely and Jon said that it would get better as the gears bed in. They have to "wear off" the shot peening and get their final finish according to him. Overall it was a boatload of money to spend, but I think it was worth it in the end.
turbowop
Well-known member
Damn, that thing looks almost as clean as my transmission. /ubbthreads/images/graemlins/hsugh.gif /ubbthreads/images/graemlins/grin.gif
CarRacer
Well-known member
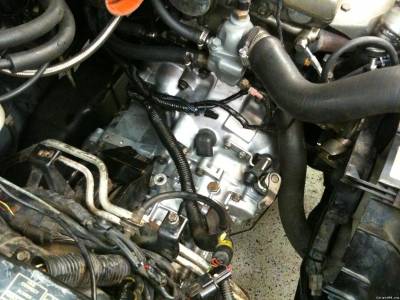
Addressed two issues last night. I fixed my exhaust leak and my oil leak.
The exhaust leak was coming from the cat flanges. They have been on and off so many times that the flanges bent and allowed the gasket to burn out. I figured they are on and off so many times that I would just keep that from happening again and use v band clamps. I also sh*t canned the cat and went to a test pipe when I installed those.
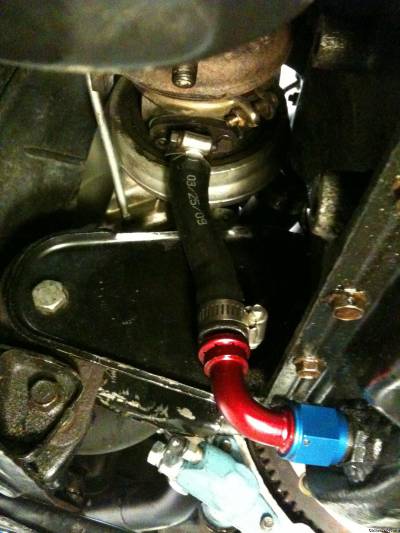
The oil leak was coming from the turbo oil drain. I've tried two previous setups and both leaked. They were both stainless lines and didn't have enough flex to make the curve that I needed. I bought pushloc fittings, figuring that hose was more flexible. I tried to get it to work to no avail and ended up calling tech support again (Rausch) and he put me onto the idea of reusing the regular oil drain at the turbo side instead of an AN fitting. I know many on this board have used that setup with success so I tried it that way and was happy with the results.
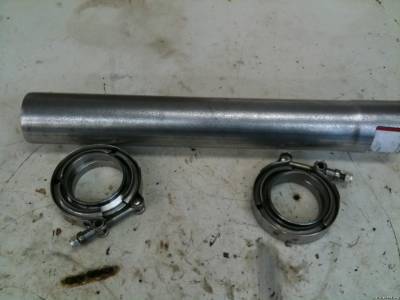
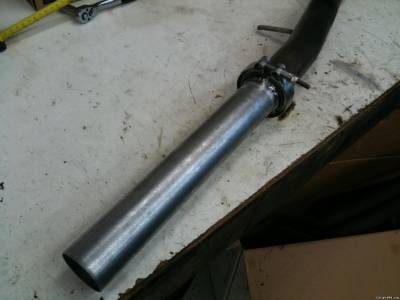
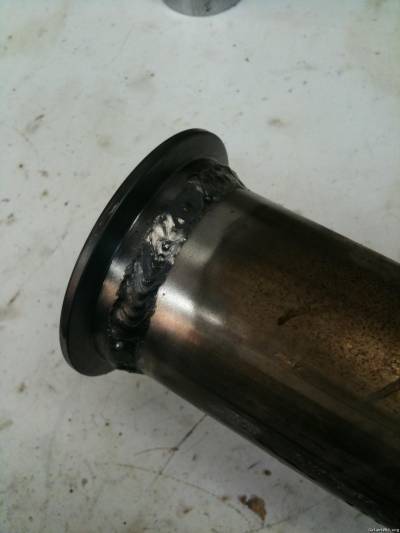
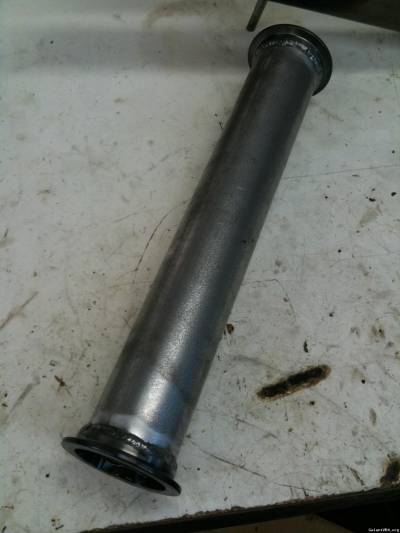
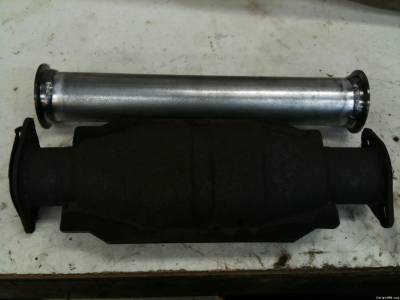
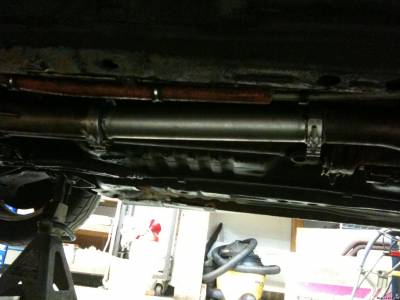
The exhaust leak was coming from the cat flanges. They have been on and off so many times that the flanges bent and allowed the gasket to burn out. I figured they are on and off so many times that I would just keep that from happening again and use v band clamps. I also sh*t canned the cat and went to a test pipe when I installed those.
The oil leak was coming from the turbo oil drain. I've tried two previous setups and both leaked. They were both stainless lines and didn't have enough flex to make the curve that I needed. I bought pushloc fittings, figuring that hose was more flexible. I tried to get it to work to no avail and ended up calling tech support again (Rausch) and he put me onto the idea of reusing the regular oil drain at the turbo side instead of an AN fitting. I know many on this board have used that setup with success so I tried it that way and was happy with the results.
I like the oil drain idea. I'm going to do that on my second VR4.
CarRacer
Well-known member
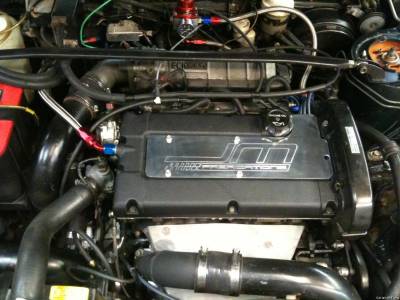
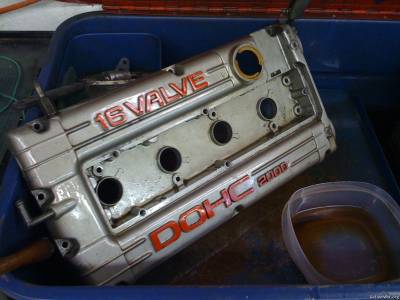
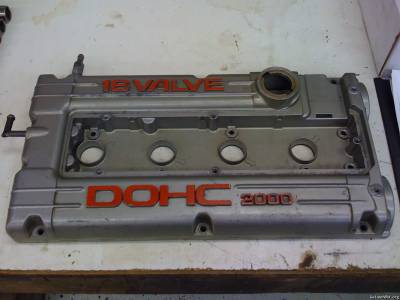
I purchased a shaved valve cover a while ago and had it coated by JNZ Finishing here. They did a nice job and it turned out well, they also added the -8 bung on the vent for me. I think it classes up the engine bay a little bit.