The Top Mitsubishi Galant VR-4 Resource

Join the best E39A 1991-1992 Mitsubishi Galant VR-4 community and document your GVR4 journey.

  • Software Upgraded - Reset Your Password to Login
    In order to log in after the forum software change, you need to reset your password. If you don't have access to the email address you used to register your GVR4.org account, you won't be able to reset your password. In that case, follow the instructions here to regain access to the forum.

#83/2000 Project Cluster To Capable (12/1/09) 56K Beware

CarRacer

Well-known member
Joined
Jun 28, 2007
Messages
4,371
Location
Shakopee, MN
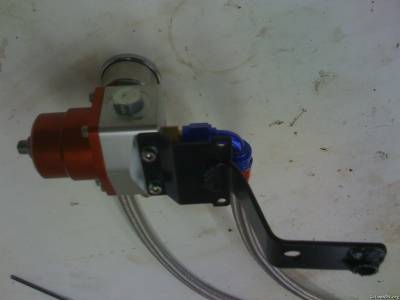
Installed my afpr this weekend.
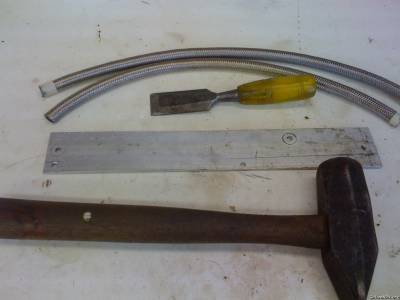
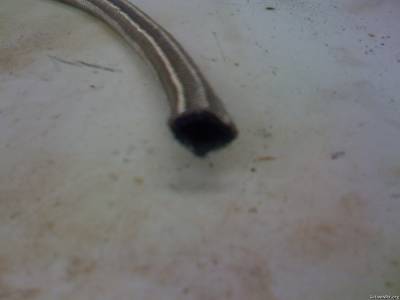
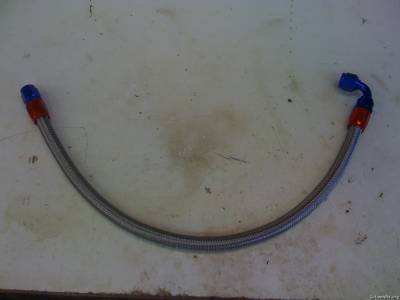
Making the lines was easy after watching the video of it on youtube. I used a chisel to cut the lines, but it could have been sharper. I used a file beforehand, but razor sharp is almost needed. Using the screwdriver the get the braid in the fitting was key as well.

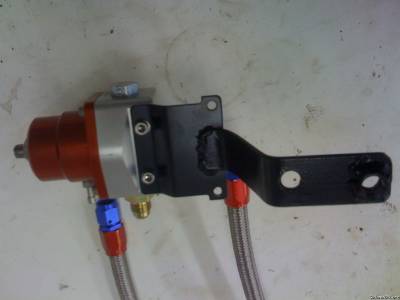
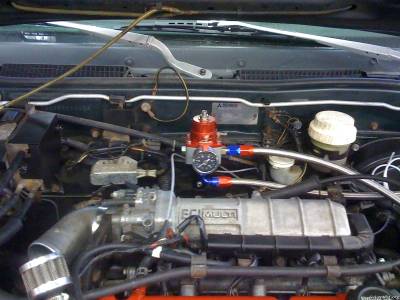
I fabbed up a mount for the firewall. I used the two bolt holes in the firewall for the clutch hardline clamp bracket. I bent it a bit for clearance. I had to use a small spacer to fit securely.
It went well, other than that the fuel rail adapter fitting that came with the kit I bought was for the inlet side. I guess the kid I bought it from neglected to inform me of that. No big deal though, I'll save it for later or sell it.

I also removed the a/c and vacuum line bracket. I also yanked out the fpr solenoid. The PO had it floating around the engine compartment, not mounted.

I learned that the motor had the BS removed as well. Not sure how well it was done, but it was done.

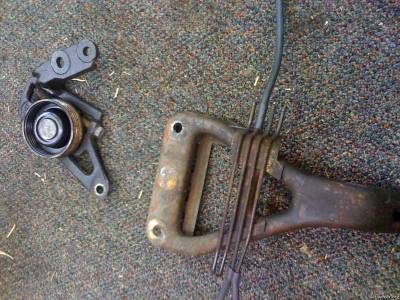
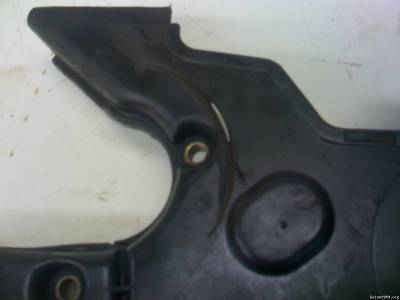
I removed the timing cover for replacement. It was mounted poorly and had a hole from the water pump pulley. I'm sure that's healthy for the bearings.

Is there a difference between dsm covers and ours? There was a gap between the timing cover and the cam gear cover. I might need the upper timing cover, not really sure.

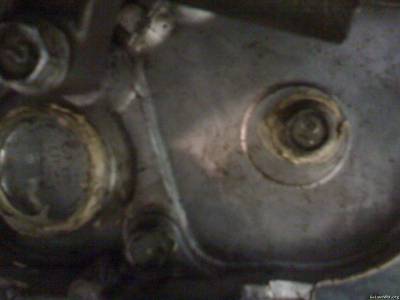
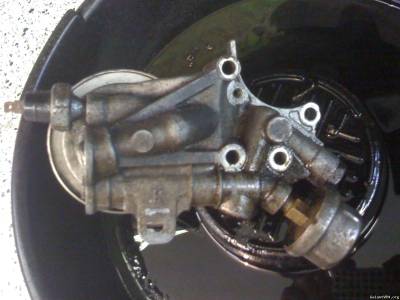
I had a question on the oil filter housing sensors as well. What are the two attached in the picture? I think the small one is the pressure idiot light, correct? What's the big one?


Last edited:

CarRacer

Well-known member
Joined
Jun 28, 2007
Messages
4,371
Location
Shakopee, MN
I think I discovered the problem with my timing cover. I believe that is a 2g timing cover.
 

good luck with the project ive pretty much given up on taking my engine apart and rebuilding it with 180k on the clock and my ideal of the way the engine should be and what my wallet says is two diff things so i think ill get a jdm engine.... if you need any stock parts lemme know /ubbthreads/images/graemlins/smile.gif take care..
 

i like this thread for two reasons: because you trailered it to the meet and because it's a minnesota car. it's good to see you're making good progress on it! i expect it to be driven to next years meet. /ubbthreads/images/graemlins/grin.gif

dan
 

I like how you have the time to take pictures, its awesome. YES!! i love my picture books!
 

CarRacer

Well-known member
Joined
Jun 28, 2007
Messages
4,371
Location
Shakopee, MN
Picked up some Lancer/Evo 3 OZ Rims. They were powder coated white guy I got them from. I cleaned them up with some windex. They're in pretty decent shape, nothing spectacular though. At least I won't worry about screwing up the paint on them and can just drive the car like it's meant to be.


Those wheels look awsome man. I used to have them on my car when it was 4 lug but hey were silver off a 03 Lancer 0Z
 

Yeah the wheels are definitely sweet. They're light too, I had a set of them on mine, and I painted them bronze.

The two pipes coming out of the bottom of your rad are on mine too. If I recall they're for automatics to cool the tranny or something rather.
 

CarRacer

Well-known member
Joined
Jun 28, 2007
Messages
4,371
Location
Shakopee, MN
Worked on mounting my foglights today. I removed the front bumper, and ended up breaking off one of the main bracket bolts.

I ground off the head of a bolt and welded it to the chassis. I removed the ECU before welding on the chassis, just for insurance.


The front bumper has seen better days.


Bumper bracket before I started work.


After painting.


Foglight Bracket. You can see the bracket, but I think once the bumper is right side up it will be harder to see it.


Last edited:

CarRacer

Well-known member
Joined
Jun 28, 2007
Messages
4,371
Location
Shakopee, MN
Started construction of my intercooler assembly today. I'm going to be utilizing a Evo IC and 2.5 mild steel piping. My goal is to retain the stock foglights and not have to chop up the core support. Not easy, but what is on these cars. I thought I could get away with mounting the core right side up, and not alter the inlet/outlet entry angles. The outlet is fine and will work well, but it will be damn near impossible to get the inlet piping worked out. I'm going to see if I can call in a favor and get the inlet altered tomorrow. I got the brackets and whatnot made today to mount the core. Many thanks to the posts describing how it was done on this site. Iceman69510's post in this thread helped out a lot. Basically I plan on copying that. Not original, but it works for him and that's the most important part.

Piping I plan on using. 2 45's, 2 90's, 2 180 degree bends. I might need more straight piping, but that's easy to source at NAPA.


Not only is my car jackstand balling, my intercooler is. /ubbthreads/images/graemlins/rofl.gif


Driver Side Bracket


Passenger Side Bracket


Center Mount


I also set my front bumper on to check clearances while I was mounting the core. Seems to be fine, although it's definitely tight fitting.


CarRacer

Well-known member
Joined
Jun 28, 2007
Messages
4,371
Location
Shakopee, MN
I got my intercooler inlet pipe altered today. I cut out a pie shaped section to angle the inlet more towards the motor. I also rotated it to more easily clear the core support without using multiple couplers. Went well, although I haven't pressure tested it as of yet. The guy who did it for me seemed pretty confident on what he did though.

I got it welded at a local raceshop that fields a few Remax/ARCA cars. It's a nice shop, lots of toys in there. :p


sixsixtwo

Well-known member
Joined
Oct 3, 2007
Messages
164
Location
St. Paul, MN
Nice! So you are able to do all the work on your car at work? Coming along really nicely since I saw it at the summer meet!
 

CarRacer

Well-known member
Joined
Jun 28, 2007
Messages
4,371
Location
Shakopee, MN
^ I work on my car at the old raceshop. It's a barn that has been sheetrocked and whatnot at my parent's house. It's a great place to work on my car that I'm lucky to have.


Made some progress on my intercooler piping tonight. I finished the hot side. The welds aren't the greatest, I burnt through once. Other than that it went together ok. I used a spare hose that came with the car for the J pipe coupler. I'm a little concerned about the dipstick though. My pipe passes directly over it. I'm thinking I'll bend it after I finish. Anyone forsee any problems with that? I figure the dipstick is flexible and it doesn't really matter where the "ring" is placed.


324vr4

Well-known member
Joined
Apr 28, 2006
Messages
1,240
Location
Bozeman, Montana
Looks good man! Very short routed /ubbthreads/images/graemlins/smile.gif I like it...get it running and shoot some vids this way!
 

NYC86ZC

Well-known member
Joined
Dec 5, 2005
Messages
1,002
Location
Long Island, NY
it's coming along very nicely.

i had similar issues with my fog lights. i ended up doing some welding too.
it looks nice.
 

mistaVR4

Well-known member
Joined
Dec 16, 2003
Messages
4,768
Location
Boulder, CO
That really does look great man! Nice work.

As for the dipstick tube, you can just bend it towards the motor until you can easily get to it, that won't effect anything.
 

CarRacer

Well-known member
Joined
Jun 28, 2007
Messages
4,371
Location
Shakopee, MN
Finished my intercooler piping today. Everything went together pretty well. I didn't pressure test the pipes to test my welds, so I used a super technical alternative. I submerged them in the horse trough and looked for air bubbles. None showed, so I should be ok for now. I'll have to do a complete pressure test later. I'm going to have to build a support for the cold side though, it's will fall into the shifter cable without support. Another part that I wasn't terribly happy with was having to cut a small part out of the bottom of the bumper. I didn't have too much leftover piping when all was said and done either.


New Tenative Engine Bay Shot


What Got Cut From Bumper To Clear Pipe


Leftovers


Old Pipes


CarRacer

Well-known member
Joined
Jun 28, 2007
Messages
4,371
Location
Shakopee, MN
Installed the BOV on my intercooler piping today. I used the plasma cutter to make the hole for the BOV adapter pipe. It worked pretty well. I also added a brace to the lower cold side pipe. Part of the pipe wanted to "lean" into the shifter cable assembly. I made a bracket that would hold the pipes higher up. I'm a little concerned about the cold side pipe as it comes out of the intercooler. It hangs pretty low, although it does sit higher than the tranny and oilpan. Also, there was no hardware for attaching the bottom center of the bumper to the core support. What is used? The holes weren't threaded, so I'm assuming it's some coarse threaded bolt. Other than a final coat of paint I think this project is completed. I'm pretty happy with the placement of the BOV, as I think it makes for a cleaner look. What source should I use for the BOV reference line? Would the J pipe nipple work?

Putting a recirculating fitting on the non recirculating intake


Support Vendors who Support the GVR-4 Community
Boosted Fabrication ECM Tuning ExtremePSI Fuel Injector Clinic Jacks Transmissions JNZ Tuning Kiggly Racing Morrison Fabrications RixRacing RockAuto RTM Racing STM Tuned
Top