The Top Mitsubishi Galant VR-4 Resource

Join the best E39A 1991-1992 Mitsubishi Galant VR-4 community and document your GVR4 journey.

  • Software Upgraded - Reset Your Password to Login
    In order to log in after the forum software change, you need to reset your password. If you don't have access to the email address you used to register your GVR4.org account, you won't be able to reset your password. In that case, follow the instructions here to regain access to the forum.

The "I can't make up my mind" build.

citymunky

Well-known member
Joined
Sep 22, 2010
Messages
1,761
Location
Chesapeake, VA
BTW I was able to get this back today

IMG_20120708_170824.jpg
 

citymunky

Well-known member
Joined
Sep 22, 2010
Messages
1,761
Location
Chesapeake, VA
Nice and clear water pipe and t-stat housing, painted with engine enamel fresh out the garage oven.
 

bobdole

Well-known member
Joined
Aug 23, 2007
Messages
866
Location
U.K.
Nice and clean. Keep up the good work.
 

citymunky

Well-known member
Joined
Sep 22, 2010
Messages
1,761
Location
Chesapeake, VA
Thanks.

I was up to 6AM this morning working on the car.

-Cleaned, painted, baked and installed t-Stat housing.
-Copper sprayed T-Stat gasket
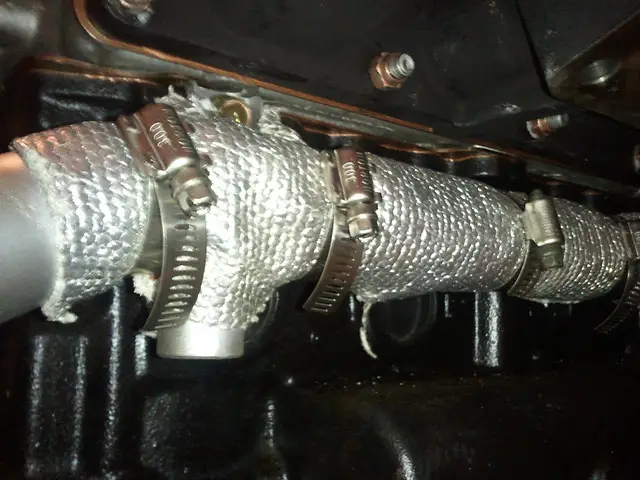
-Cleaned, painted, baked, wrapped, and installed water pipe.
-Installed rocker arms, and HKS 272's,Camshaft seals, Torqued cam caps.
-Installed all cylinder head plugs with thread paste.
-Cleaned exhaust studs thread with tap.
-Installed New OEM Exhaust studs with Anti-seize
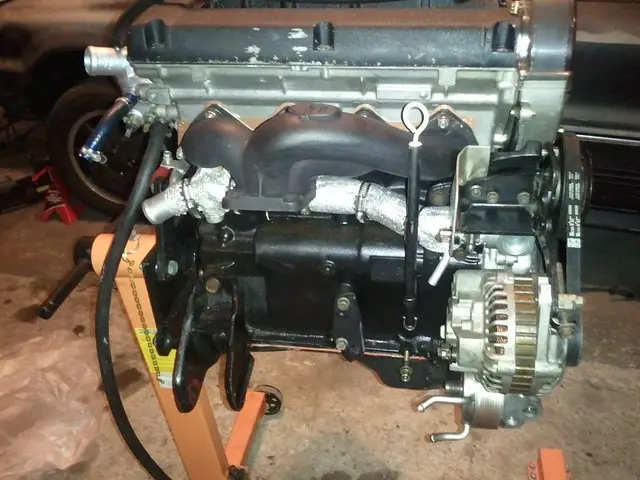
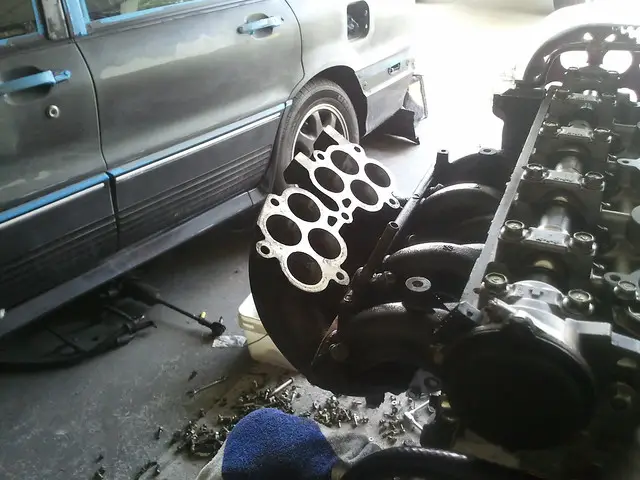
-Copper Sprayed exhaust manifold gasket.
-Installed Coated FP race Manifold with OEM copper nuts, need a 12mm crows foot to Torque them.
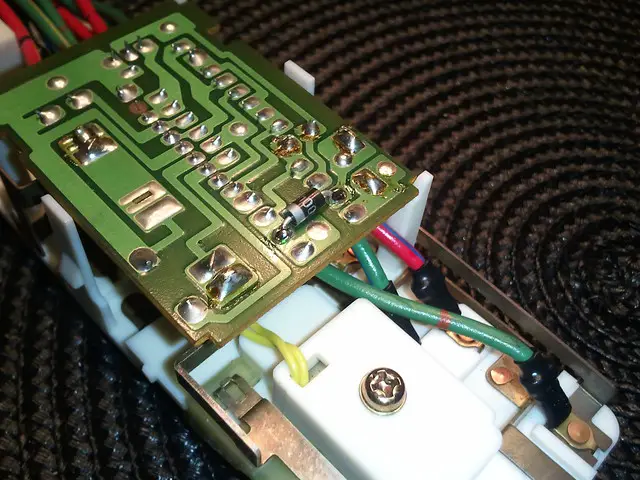
-Cleaned all the grime off the CAS and installed it loosely. (I need a replacement o-ring P/N: MD622021)
-Gap'ed the NKG BPR7ES to 0.028", anti-seize on the tread, torqued them in.
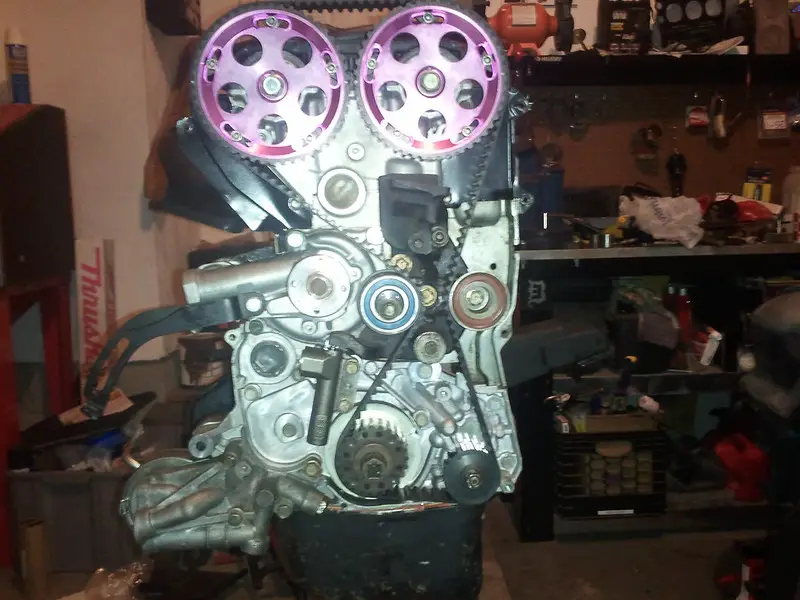
-Cleaned grime from nooks of Unorthodox Racing Cam gears.
 

citymunky

Well-known member
Joined
Sep 22, 2010
Messages
1,761
Location
Chesapeake, VA
My Cyclone Intake off a used JDM 4G63t long block had tons and tons of caked on oil (aka. grime) in the intake runners. So I took apart the manifold and put it in the parts washer for a 30 minute hot wash.

I broke the tiny clip ring for the vacuum actuator, and I saved the gaskets so I could make own out of gasket paper if I can't find replacements.
 

citymunky

Well-known member
Joined
Sep 22, 2010
Messages
1,761
Location
Chesapeake, VA
The cyclone intake runners are still have tons of grime in the runners even after 3 runs in the parts washer. /ubbthreads/images/graemlins/bawling.gif. Looks like I need to clean it the old fashion way, carb cleaner and a ton of rags.

Anyway yesterday night I:

-Installed and torqued the Cam gear bolts
-Did my first timing belt job ever (all my other car had timing chains). This took hours and I rechecked it my 5 times.
-Installed oil filter housing (copper sprayed the gasket)
-Clean and painted timing tins, and notice I was missing the lower one on the AC Compressor side. /ubbthreads/images/graemlins/frown.gif
-Installed lower timing cover
-Installed Crank pulley
 

citymunky

Well-known member
Joined
Sep 22, 2010
Messages
1,761
Location
Chesapeake, VA
Over the week I been cleaning the intake runners inside the Cyclone Manifold. Since replacement gaskets aren't made anymore I had to make gaskets out of gasket paper.

Lately I been thinking about porting the runners in the Cyclone since it's apart. What do you guys think?
 

citymunky

Well-known member
Joined
Sep 22, 2010
Messages
1,761
Location
Chesapeake, VA
I took 3 steps backwards yesterday night, as of last weekend I had the timing chain done along with the timing cover, crank pulley and the power steering and Alt pulleys all installed. I had to remove all of that and the idle and tension pulleys bracket to install my lower timing tin on the A/C Compressor side. I would hate to have the engine installed in the car, and somehow drop a nut or something small and have it to find a way inside the timing belt area because I was too lazy to install the missing timing tin.

7767454608_ed18792785_c.jpg


After reinstalling everything again, I painted and bolted on the A/C Compressor bracket, than the A/C Compressor was next, I could only find one bolt in my bucket O' bolts long enough to bolt on the compressor. Added the added to the shopping list. /ubbthreads/images/graemlins/frown.gif Next I install the A/C drive belt tension pulley, and I noticed the belt was touching the timing cover. I have to shim the bracket with 2 washers per bolt hole, and I was clear the timing cover. By this time it was 3AM and time to call it a night.

Sorry for the bad pic, it didn't look that bad on my phone. /ubbthreads/images/graemlins/blush.gif
7767451984_e01f4b3ba3_c.jpg
 
Last edited:

citymunky

Well-known member
Joined
Sep 22, 2010
Messages
1,761
Location
Chesapeake, VA
I cut and reshaped the Power Steering pump support bracket today. There are a few reasons I did this:
1) It should be easier to remove the Exhaust manifold if the engine is in the car.
2) It should be easier to remove the 02 sensor if need be.
3) Remove the forward facing stud platform for the Driver's side "L" shaped engine mount. I cut and had a fried weld a cap for my "L" shape engine mount to make look like a 2g upper engine mount

Before
img.php

After
Still needs paint.

 
Last edited:

citymunky

Well-known member
Joined
Sep 22, 2010
Messages
1,761
Location
Chesapeake, VA
I had a hour to work on the project tonight I:
-mounted the Power Steering pump bracket to the block
-mounted the dip stick shaft or whatever it's called
-mounted the power steering heat shield
-installed water pipe wrapped with heat warp.
-installed the alternator with belt.

7848145900_71749f60fe_z.jpg

7848144302_4f7efd24c5_z.jpg

7848139226_254c6a45b1_z.jpg
 
Last edited:

citymunky

Well-known member
Joined
Sep 22, 2010
Messages
1,761
Location
Chesapeake, VA
Well I put the car back on jacks last night so I could pull the manual steering rack since its for sale. I installed my black headliner, sun visors, etc. I started on bolting in my EVO 8 seats with Curtis seat brackets until I realized that I needed to drill a hole in the front brackets so a bolt can be installed..
 

citymunky

Well-known member
Joined
Sep 22, 2010
Messages
1,761
Location
Chesapeake, VA
Not much done tonight. I drilled the holes for my driver's EVO seat brackets, and I mounted the seat. The other thing I did was the Driver's Auto-Up window switch mod.

7911055032_f0602bbb68_z.jpg
 

citymunky

Well-known member
Joined
Sep 22, 2010
Messages
1,761
Location
Chesapeake, VA
EVO Seats bolted in /ubbthreads/images/graemlins/grin.gif (Yes I know they need to be cleaned)

7918989780_da2ca5f0a1_z.jpg

7918991426_cb03100948_z.jpg

7918996634_d320e0c9c7_z.jpg

7918994744_3e0ef6f4c9_z.jpg


Black headliner FTW

7918993074_542fe55e0f_z.jpg
 
Last edited:

citymunky

Well-known member
Joined
Sep 22, 2010
Messages
1,761
Location
Chesapeake, VA
Teaser /ubbthreads/images/graemlins/wink.gif


t_22057.jpg
 
Last edited:

citymunky

Well-known member
Joined
Sep 22, 2010
Messages
1,761
Location
Chesapeake, VA
Started out today by installing my Cyclone Intake Manifold. I pieced it on the motor since it was apart for cleaning and mild porting. I also made new gaskets for gasket paper, sprayed with copper spray for a better seal.
7960300730_8efb72a06a_z.jpg


After the Cyclone was mounted and torqued down, I was had to mod the intake support bracket to clear the A/C compressor, after some trail and error I got my finished product. Here is a pic before paint.

7960289890_d920df6949_z.jpg


After that I run my Spark plug wires,and they fit the cyclone intake fine, and not to short as I read for many before.
7960298062_6de57130af_z.jpg


After that I when to mount my bored out fuel rail to feed my 1000cc PTE injectors. They were cleaned and flowed by RC Engineering (but for some reason they removed the stickers). The 1000cc PTE's replaced my 680cc PTE's.
7960295378_c93ac9281e_z.jpg
 
Last edited:

citymunky

Well-known member
Joined
Sep 22, 2010
Messages
1,761
Location
Chesapeake, VA
Installed my freshly rebuilt 1g Non Turbo throttle body, to replace my older one which I'm petty sure was the reason for the run away idle problem I had before. Why a NT TB? Simple these elbows on Turbo TB's are gay.

7966944276_25db1bea5c_z.jpg
7960292634_530a3f2715_z.jpg


Installed fuel rail with STM -8 AN inlet, and a old school rail mounted Charged Air Systems Adjustable Fuel pressure Regulator w/ 100psi JEGS fuild filled fuel pressure gauge. No need to drill hole in the firewall or find a way to mount a upper AFPR, or route -6 hoses. It's small and simple.

7967040120_45f6ec3495_z.jpg
 

citymunky

Well-known member
Joined
Sep 22, 2010
Messages
1,761
Location
Chesapeake, VA
I got my turbo back for balancing this week. They cleaned up the CHRA, TH05H Turbine, and 20g compressor wheel for me. The reason I keep the 20g was because I wanted fast spool and more power than a 16g.


I reinstalled my 7 cm2 ported exhaust housing, and compressor cover.


New OEM hardware to bolt the turbo and O2 housing.


I found the smaller water pipe in my garage, I think its from a 2g, since it didn't find right. I removed all the rust with a wire wheel, give it a fresh coat of high temp paint, and bend it to fit. I also heat wrapped the coolant hose from the large water pipe to the OFH. All new rubber hose of course.


I'm about 90% ready to start bolting the transmission to the engine so I could drop in bay.
 
Last edited:

citymunky

Well-known member
Joined
Sep 22, 2010
Messages
1,761
Location
Chesapeake, VA
Today I got to play with the car a bit. I removed the inner tie rods, dust boots, and clean all the grime off the steering rack. I was happy to see there were no leaks and that I don't have to rebuild the rack. The cleaning part took about a hour, but handling the steering rack without gloves now wouldn't leave your hands filled of tar like grime. New inner tie rods will be here tomorrow, so they can be installed alone with my new other tie rods and dust boots. Now I can installed the rack before I drop the motor in the engine bay this weekend (hopefully).
 

citymunky

Well-known member
Joined
Sep 22, 2010
Messages
1,761
Location
Chesapeake, VA
No camera, so not pic's today.

-Installed new Beck/Arnley inner tie ends, new Moog outer tie rod ends, new Beck/Arnley Bellow boots on my steering rack. Installed rack, and replaced o-rings for the input & output ports.
-Installed Power steering hoses.
-Bent Output A/C hard line to clear Cyclone coil park bracket. Installed output and input A/C hard line to compressor.
-Routed vacuum hoses to control Cyclone butterfly valves via Fuel Pressure Regulator using this diagram.

-Installed new OEM pivot ball
-Installed new OEM fork assy
-Installed new OEM throw out bearing
-Installed new OEM transmission input shaft seal
-Installed new OEM CV axle shaft seals in transmission.
 

citymunky

Well-known member
Joined
Sep 22, 2010
Messages
1,761
Location
Chesapeake, VA
Pic's from this pass weekend, I have to say dropping in a engine/transmission by myself was nerve-racking.


Resurfaced RRE Lighten Flywheel

8028144591_c903279f9c_z.jpg


ACT Pressure Plate 2600 and street disc clutch

8028148399_2104c5e9e4_z.jpg


Engine and tranny in the air.

8028142556_035ae78c24_z.jpg


Engine and tranny in.

8028145763_3c1af4e9a5_z.jpg
 
Last edited:
Support Vendors who Support the GVR-4 Community
Boosted Fabrication ECM Tuning ExtremePSI Fuel Injector Clinic Jacks Transmissions JNZ Tuning Kiggly Racing Morrison Fabrications RixRacing RockAuto RTM Racing STM Tuned
Top