From Mad scientist /ubbthreads/images/graemlins/grin.gif Curtis
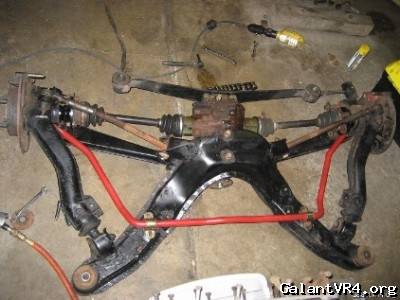
Ok guys I've been helping John with this from the engineering stand point. I called him earlier to give him the final build them verdict. The pictures below takes you through the process and only took 20 minutes or so to do. I recommend doing this off the car. Nothing worst than drilling and cut on your back with hot rubber and metal flying.
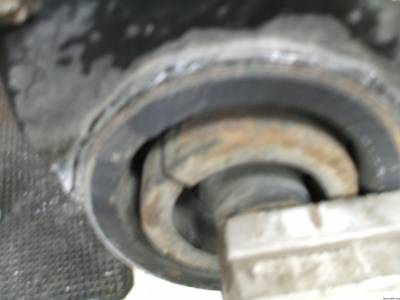
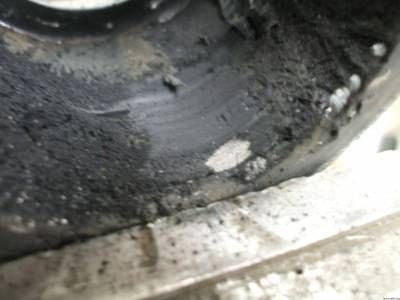
First picture. A good rear bushing in perfect shape....poor car had never been driven the way it was meant to. /ubbthreads/images/graemlins/grin.gif
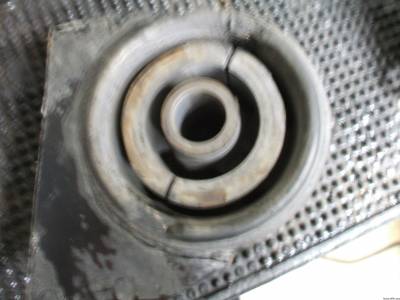
First thing I did was cut the outer most part of rubber from around the edge so to secure this in a vice to show the amount of deflection in the part even when it has no cracks or rips in the rubber.
Now I thought I can slip a piece of pipe in the original subframe but after it was locked in the vice I noticed its super weak in both directions so I used a 10 inch pair of vice grips. As you can see the bushing rolls right over and has no support. The two half moon pieces in the above pictures are steel and give it something to cushion against but only after 30 or more degrees of movement..... I know for a fact mine are totally shot so I'm sure its way worst than this in heavy load conditions.
Now for the business end of the post. The removal of the suck factory rubber bushing. I used no special tools nothing that can't be aquired locally for who ever buys these from John.
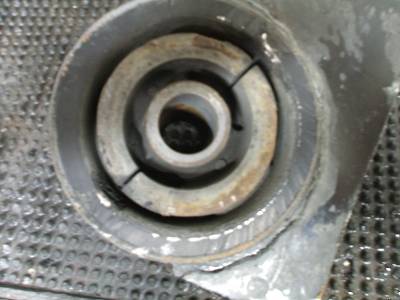
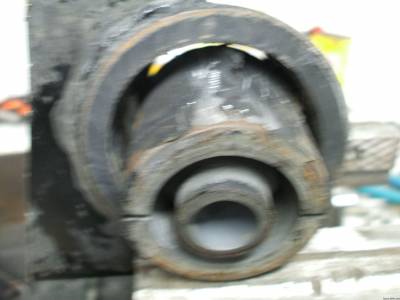
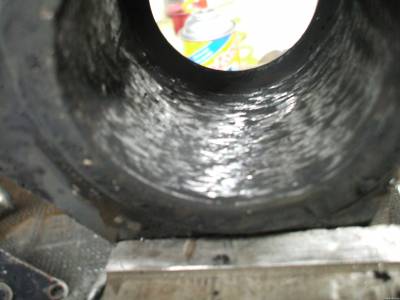
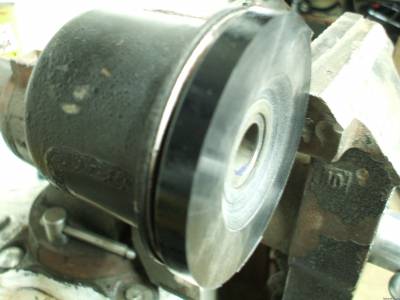
Drill with a 15/64 bit. Just what was laying on the bench. Any bit around this size will work. The rubber isn't all the way around but just in two small radiused areas 180 out from each other they probably take up 45 degrees on each opposing sides total. Insert said bit and get after it. I put it in at and angle and move up and down to rip through the stuff. Total time 3 minutes maybe. Now take out the center piece with the steel bushing. This is what it will look like.
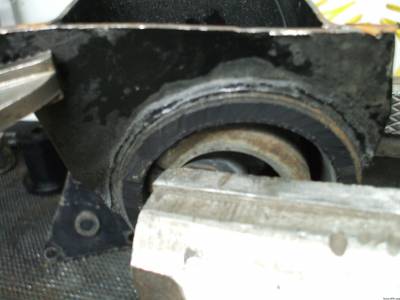
Now with this removed you have a 1/16 to 1/8 inch layer of rubber to deal with. I chucked up a cut of /grinding wheel in a mandrel and started after it. After 30 seconds I said forget this It works ...to expedite the situation I broke out the torch and burnt out the remanding rubber. Took about 5 mins to burn it all off. A large hole saw could also be used to cut away on the inside.
DO NOT USE A TORCH WHILE THE SUBFRAME IS STILL IN THE CAR OR UNDER IT....BEING DEAD WILL SUCK
Remember the torch can ignite fumes from the gas tank and will create one large explosion.
Picture with how the grinding wheel treated the rubber
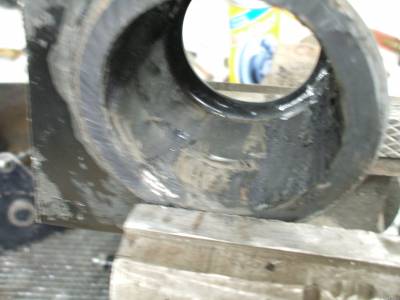
Now after the torch I used these. 90 degree die grinder with a sand pad for the outside edge and inside I used a normal die grinder with a cartridge roll same used for porting heads. You want need all this a dremal with a sanding drum, a drill with a sanding drum or just the grinding wheel will do what this did but I had an auction ending on ebay I was watching so I needed to hurry. This is what it looks like with the rubber gone and ready for install.

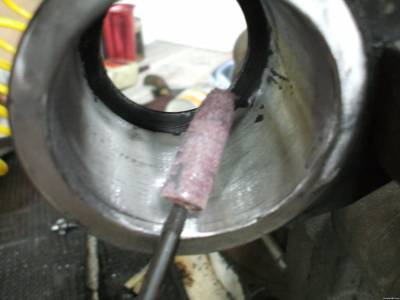
Now if you look at the picture of the cartridge roll ...Look deep inside the hole you'll notice that theres a shadow inside the top of the subframe assembly this is because from the factory they build the subframe then the bushing itself has a metal jacket. The jacket is formed then the rubber is vulcanized to the jacket with the steel bushing placed in the middle. The jacket in this is NOT TO BE REMOVED. Now the jacket has a small rounded leading edge so it aligns and falls into place when the subframe was original built...This is a good think. Me and John discussed this and it actually helped with the installation of the new polyurethane bushings. The poly bushing goes in 80% of the way by hand the last little bit slows down because the metal jacket gets smaller and radius out. This is what holds the poly bushing in place.
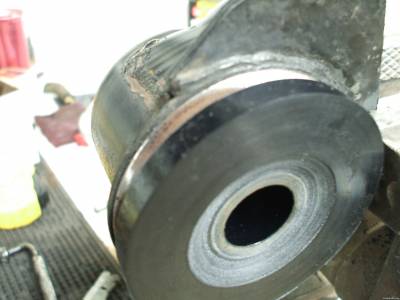
Now I used a bench vice to tighten this into the subframe end. A large bolt and some pieces of steel with an impact would work just as well. An entire subframe is a little to bulky to be taking to the shop across town to press these in.
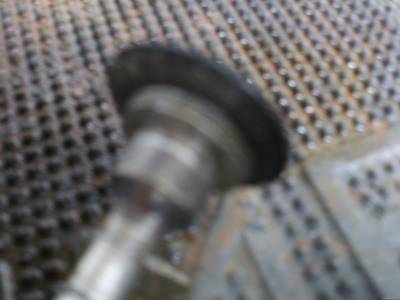
Now the steel bushing. It was cut off the interpiece saved from above. Razor blade and wirewheel works for this. As the bushing goes in it actually pushes out on the polyurethane. This continues to help lock these in the subframe.
So there in all the way this is what it will look like as you put it in. Theres an 1/8 inch or so left between the bushing and the subframe piece ...this is fine. Remember the steel jacket radiuses outward. When the bolt is throught the middle and the nut installed this will help draw it in then when the car is lowered down on the ground it will go into its final home. There would be no way possible to engineer this bushing without this and if it doesn't seat and slide in all the way its not going to hurt a thing. The tolerance on a rubber bushing jacket leading edge is probably not very tight so we could have cut up 10 different subframes and found that everyone is different. We could have made the bushing a little shorter but this would have been detrimental to the tight snug fit what was acheved by having the bushing crushed it tight.
As for removing the jacket and building to fit that. You wouldn't want the hassle of removing the inter jacket remember it was pressed in and has 18 years of rust locking it into position.
Now as for the picture with the final deflection like I started with. Yea right...There is maybe a 1/16 of an inch but thats pulling like I'm tearing the work bench off the wall.
Glad I was able to help John with all of this...Shows what a little research and time can do when you think outside the box. Hope everyone on the list above enjoys the effort and thought that were put into these pieces. Enjoy.
My best guess would be about 3 to 4 hours for the average joe to remove the subframe slide it out and install these. The actual install and removal should only take about an hour. I used a wore out drill bit and a almost gone grinding wheel just to prove it could be done with worn out stuff and nothing special was needed.