moduleunknown
Well-known member
This is a project I started a while back, but just recently finished. The end result looks pretty decent, so I thought I'd share.
It started off with me disassembling a spare Innovate DB Gauge (older style without the Innovate logo). I was curious to find out how big/crowded the PC Board was and if I could in fact figure out a way to make it fit in the plastic gvr4 clock housing.

It's slightly taller than the clock housing, and I didn't see an easy way of shrinking the PC Board or moving the components to something smaller, so I decided to start hacking away at a spare clock housing to see how I might possibly be able to attach the guts of the DB gauge (and hopefully make it fit).
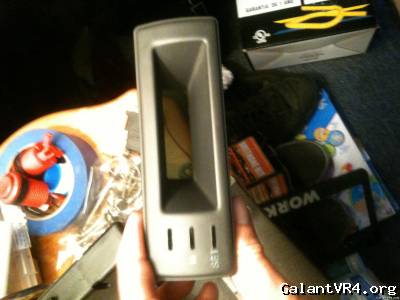
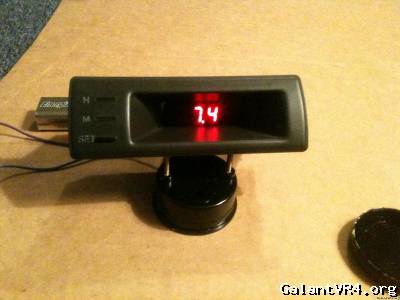
Started with this...
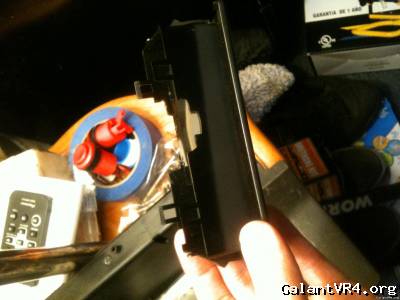
...and ended up notching out the back side like this.
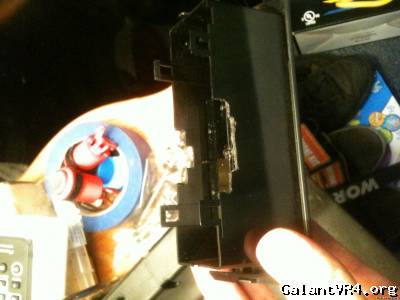
I don't have any measurements as it was all just trial and error with me slowly removing small amounts of material at a time with a dremel. The best way I can describe what I did is this: (use first pic of disassembled guage as a reference)
The bottom part of the housing is notched out to allow the LED "Wideband" display to fit inside the notched out bottom wall, which in turn allows the LED number display to rest against the glass. The top part of the housing was also notched out to allow the eprom chip above the disply to fit with the small capacitor on the top of the PC Board resting just above the top wall of the clock housing.
This is how it ended up resting in place:
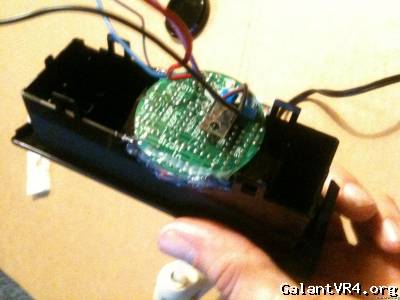
You can see that the top of the PC Board rises slightly above the housing and the bottom of the PC Board extends a fair bit past the bottom of the clock housing - and because of that, it will not be possible to slide it straight back into the dash (more on that later). ...and yes, that is hot glue holding it in place. It works, it won't damage any of the electrical components, and in fact it will even protect them.
What I don't have a picture of is the back of the clock housing re-attached. I did have to notch that out slightly as well, but once done and snapped back on, it sandwiched the PC Board in place nicely (with the help of some hot glue).
Additionally, you can check the position/alignment of the LED display against the window by powering it with a 9V to help get it right where you want it.
I should also note that because the clock components have been removed, there's nothing holding the H/M/SET buttons in place. That will also require some glue. /ubbthreads/images/graemlins/laugh.gif
Anyway, once you have all that together, you'll need to get it back in the dash, somehow... Time for the Dremel again.
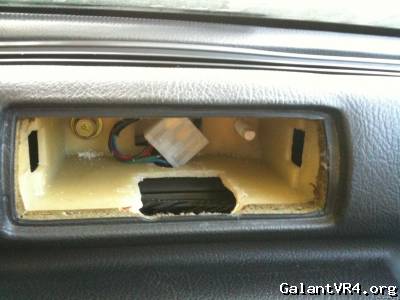
This is the hole that I had to cut in the dash which in turn allowed me to slide the bottom of the modified clock housing into the dash opening first, then angle the top in and slide it straight back in to place (I also ran my wiring through this new hole). The cavity is also deep enough that the clock connector can just be shoved back and forgotten. It will not get in the way. Be careful when cutting though as your AC & Heat ducts run around that area.
Once it's all in, it's just a matter of wiring your gauge up to your LC-1.
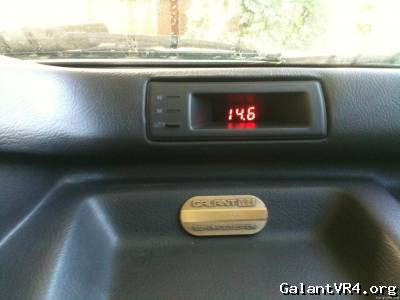
End result:
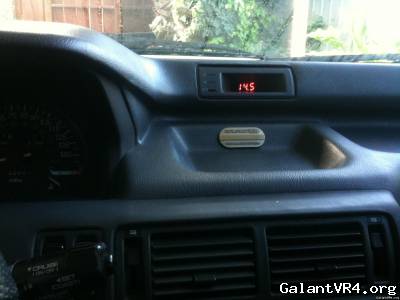
...and on the plus side, if your clock ever used to fly out of the dash when you floored it, it will no longer do so as it will be a snug fit after doing this.
It started off with me disassembling a spare Innovate DB Gauge (older style without the Innovate logo). I was curious to find out how big/crowded the PC Board was and if I could in fact figure out a way to make it fit in the plastic gvr4 clock housing.
It's slightly taller than the clock housing, and I didn't see an easy way of shrinking the PC Board or moving the components to something smaller, so I decided to start hacking away at a spare clock housing to see how I might possibly be able to attach the guts of the DB gauge (and hopefully make it fit).
Started with this...
...and ended up notching out the back side like this.
I don't have any measurements as it was all just trial and error with me slowly removing small amounts of material at a time with a dremel. The best way I can describe what I did is this: (use first pic of disassembled guage as a reference)
The bottom part of the housing is notched out to allow the LED "Wideband" display to fit inside the notched out bottom wall, which in turn allows the LED number display to rest against the glass. The top part of the housing was also notched out to allow the eprom chip above the disply to fit with the small capacitor on the top of the PC Board resting just above the top wall of the clock housing.
This is how it ended up resting in place:
You can see that the top of the PC Board rises slightly above the housing and the bottom of the PC Board extends a fair bit past the bottom of the clock housing - and because of that, it will not be possible to slide it straight back into the dash (more on that later). ...and yes, that is hot glue holding it in place. It works, it won't damage any of the electrical components, and in fact it will even protect them.
What I don't have a picture of is the back of the clock housing re-attached. I did have to notch that out slightly as well, but once done and snapped back on, it sandwiched the PC Board in place nicely (with the help of some hot glue).
Additionally, you can check the position/alignment of the LED display against the window by powering it with a 9V to help get it right where you want it.
I should also note that because the clock components have been removed, there's nothing holding the H/M/SET buttons in place. That will also require some glue. /ubbthreads/images/graemlins/laugh.gif
Anyway, once you have all that together, you'll need to get it back in the dash, somehow... Time for the Dremel again.
This is the hole that I had to cut in the dash which in turn allowed me to slide the bottom of the modified clock housing into the dash opening first, then angle the top in and slide it straight back in to place (I also ran my wiring through this new hole). The cavity is also deep enough that the clock connector can just be shoved back and forgotten. It will not get in the way. Be careful when cutting though as your AC & Heat ducts run around that area.
Once it's all in, it's just a matter of wiring your gauge up to your LC-1.
End result:
...and on the plus side, if your clock ever used to fly out of the dash when you floored it, it will no longer do so as it will be a snug fit after doing this.

