You are using an out of date browser. It may not display this or other websites correctly.
You should upgrade or use an alternative browser.
You should upgrade or use an alternative browser.
Drew84
Well-known member
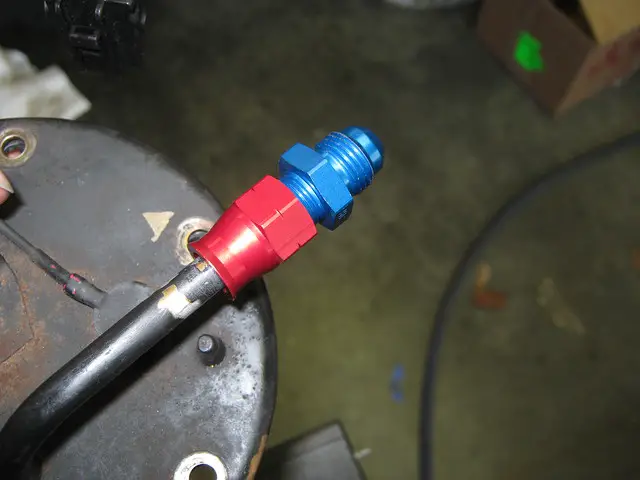
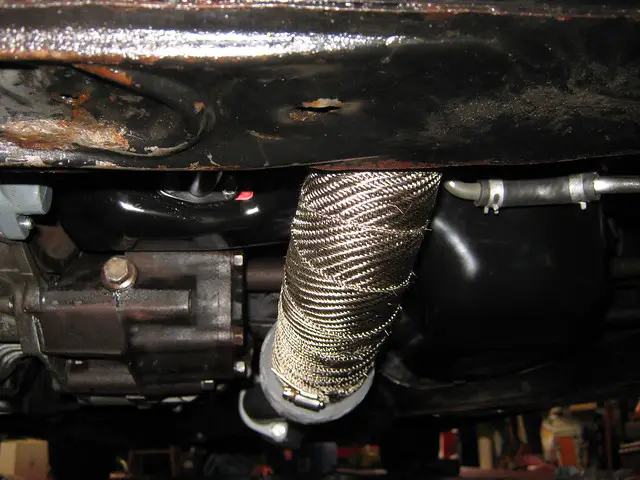
I found some Earl's AN fittings in the Jeg's catalog to solve my problem. These compression fit over the metal line converted it to a -6 an fitting. I this on the sending unit and the line on the body.
IMG_0949 by Drew84(PASCARPHOTO), on Flickr
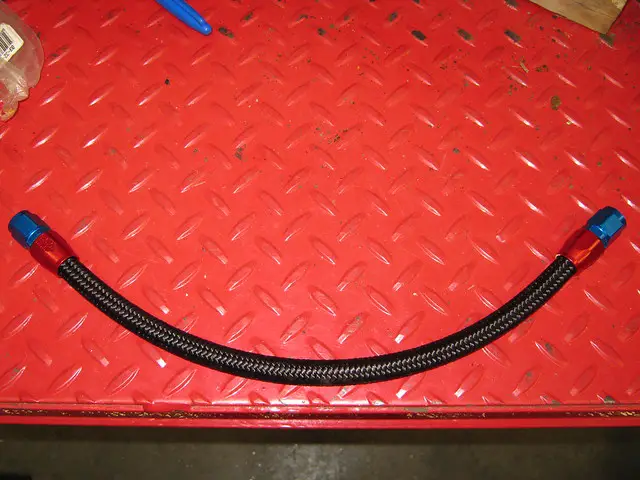
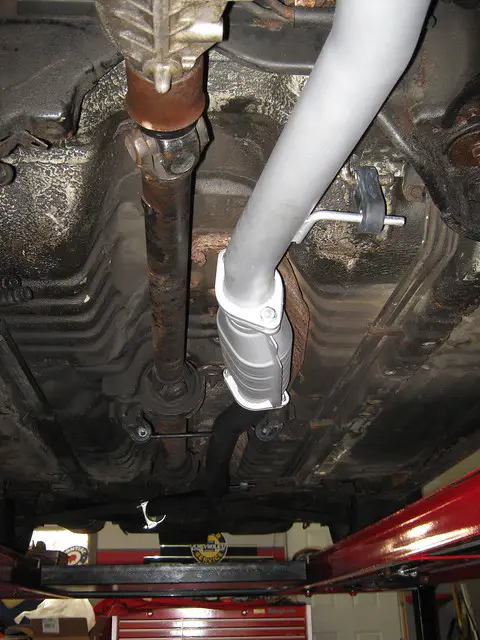
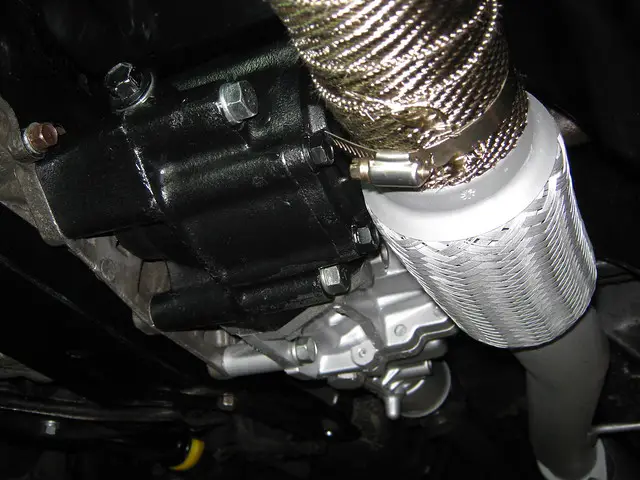
I then used Earl's 360 degree fittings with Pro 350 hose, It has a nylon outer and that make's it easier to use than the braided steel line. Plus this hose is not in an area where it needs a lot of protection from abrasion.
IMG_0951 by Drew84(PASCARPHOTO), on Flickr
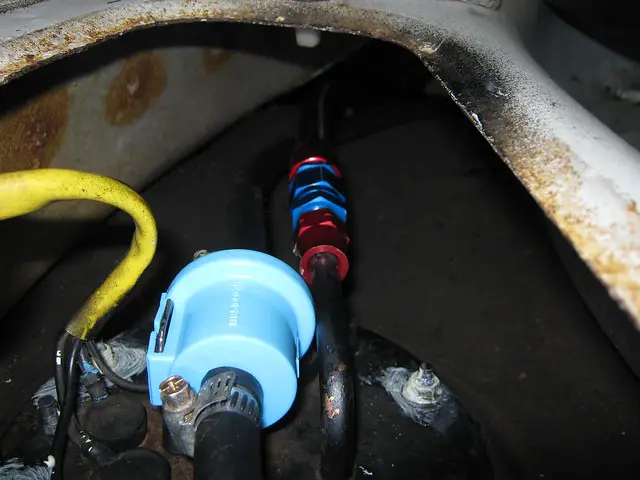
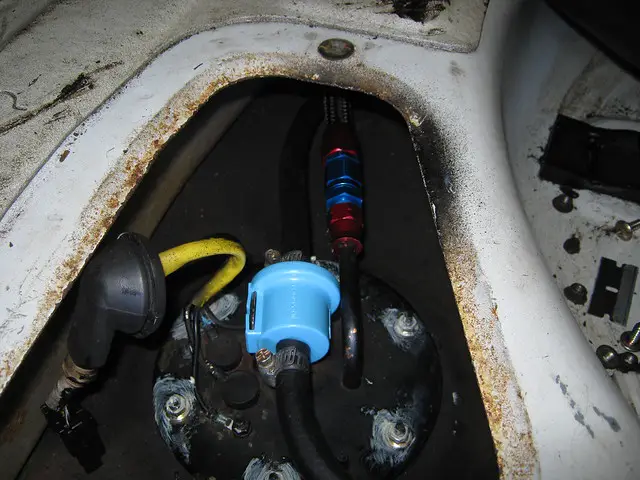
Reinstalled the check valve
IMG_0952 by Drew84(PASCARPHOTO), on Flickr
IMG_0954 by Drew84(PASCARPHOTO), on Flickr
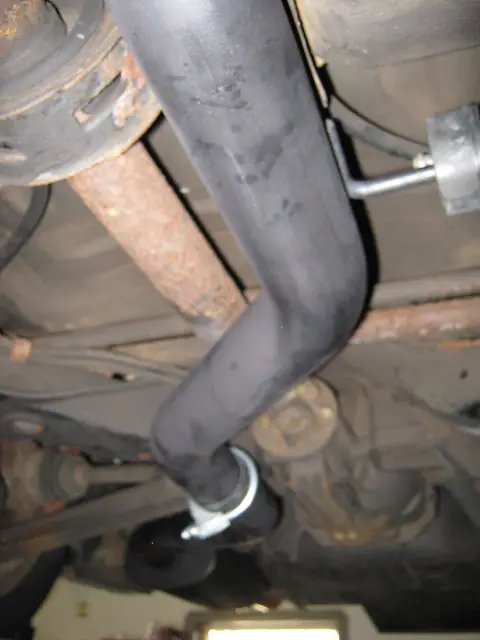
I forgot to take a picture of the rest of the exhaust installed, I will do that later.
IMG_0950 by Drew84(PASCARPHOTO), on Flickr
IMG_0949 by Drew84(PASCARPHOTO), on Flickr
I then used Earl's 360 degree fittings with Pro 350 hose, It has a nylon outer and that make's it easier to use than the braided steel line. Plus this hose is not in an area where it needs a lot of protection from abrasion.
IMG_0951 by Drew84(PASCARPHOTO), on Flickr
Reinstalled the check valve
IMG_0952 by Drew84(PASCARPHOTO), on Flickr
IMG_0954 by Drew84(PASCARPHOTO), on Flickr
I forgot to take a picture of the rest of the exhaust installed, I will do that later.
IMG_0950 by Drew84(PASCARPHOTO), on Flickr
ApexHunter
Well-known member
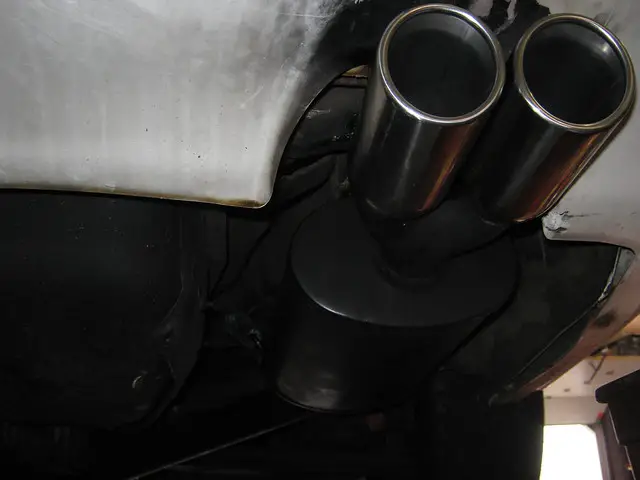
I also painted the muffler black and masked off the tips. I like it a lot better, i'm not much a fan of the big shiny muffler thing for a number of reasons, primarily attracting unwanted attention from LEO's.
I have a 3" CMPE system as well. Mine is old, i got it 2nd hand, and i don't recall if the guy i bought it from got it new. In any event, piping is 3", uses a magnaflow 3" in/out. It uses the Y-Pipe style twin tip. Maybe CMPE only recently started using twin tip mufflers for their 3" systems. /ubbthreads/images/graemlins/dunno.gif
I have a 3" CMPE system as well. Mine is old, i got it 2nd hand, and i don't recall if the guy i bought it from got it new. In any event, piping is 3", uses a magnaflow 3" in/out. It uses the Y-Pipe style twin tip. Maybe CMPE only recently started using twin tip mufflers for their 3" systems. /ubbthreads/images/graemlins/dunno.gif
Drew84
Well-known member
Been busy lately I went on vacation for Christmas, yada, yada, yada. Anyway I got the car running before Thanksgiving.
Some update pictures
Exhaust painted and installed
IMG_0955 by Drew84(PASCARPHOTO), on Flickr
IMG_0956 by Drew84(PASCARPHOTO), on Flickr
IMG_0957 by Drew84(PASCARPHOTO), on Flickr

IMG_0958 by Drew84(PASCARPHOTO), on Flickr
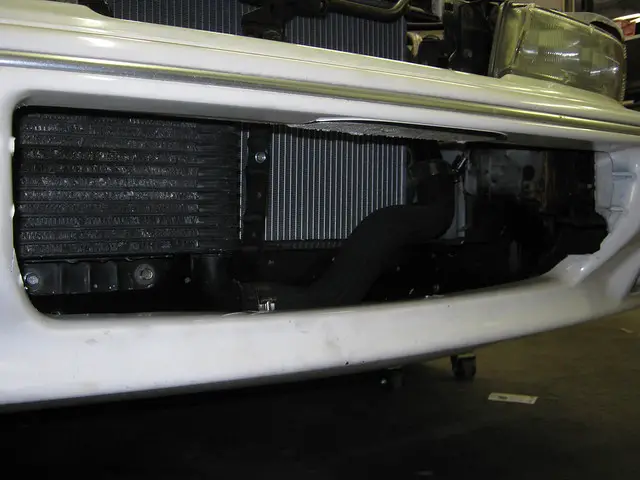
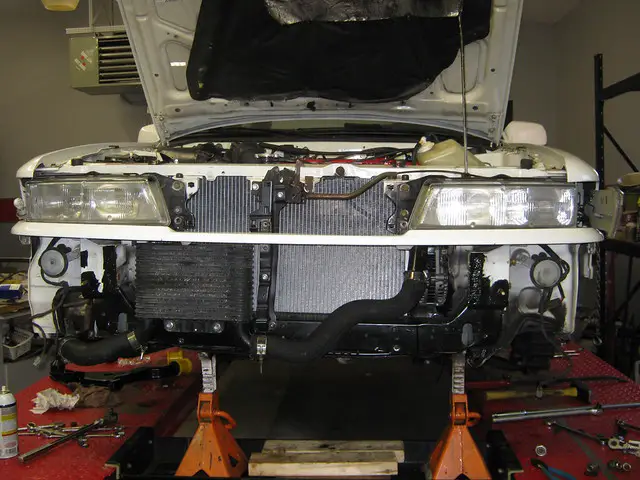
I painted the front radiator support
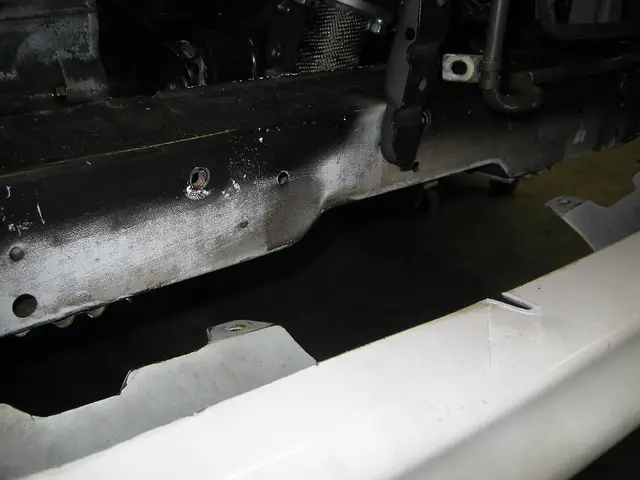
IMG_0959 by Drew84(PASCARPHOTO), on Flickr
IMG_0960 by Drew84(PASCARPHOTO), on Flickr
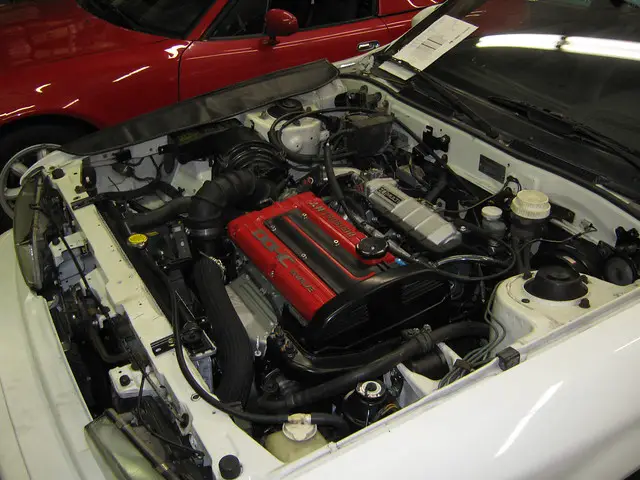
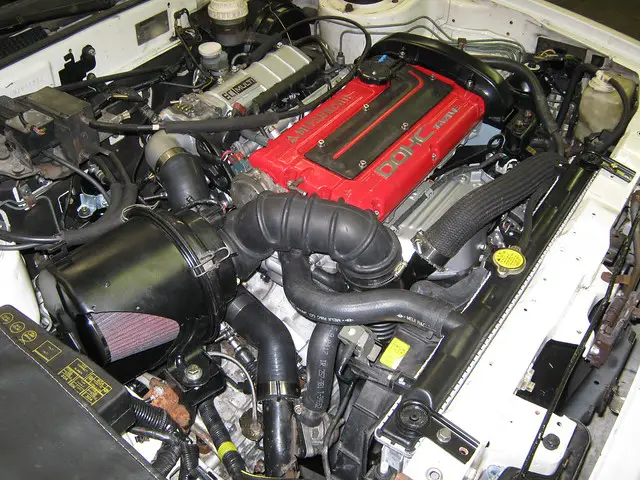
My mismashed intake setup
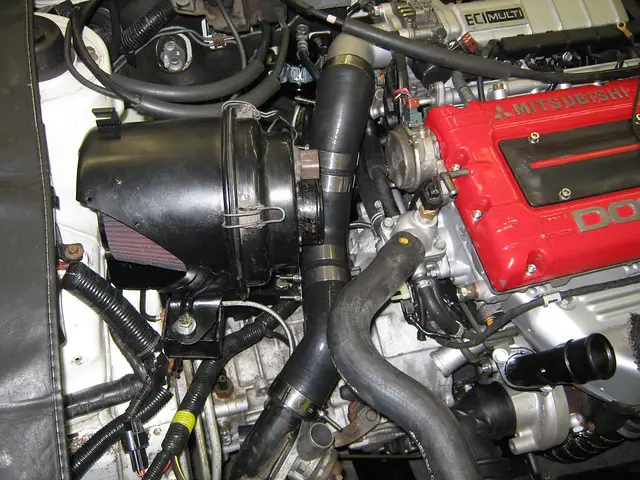
IMG_0961 by Drew84(PASCARPHOTO), on Flickr
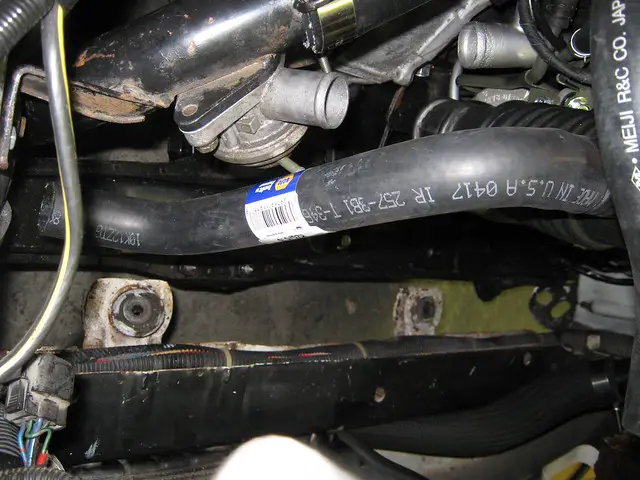
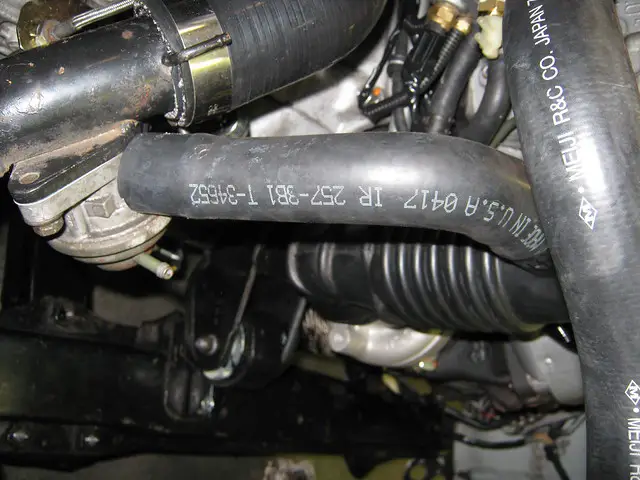
I found a Napa hose to used for the BOV return
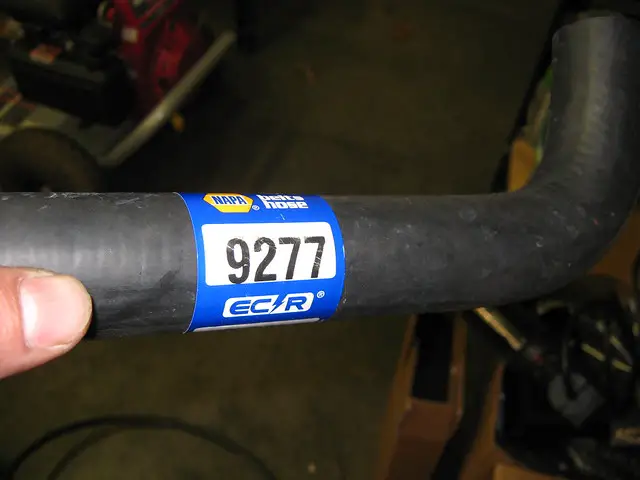
IMG_0965 by Drew84(PASCARPHOTO), on Flickr
IMG_0962 by Drew84(PASCARPHOTO), on Flickr
IMG_0966 by Drew84(PASCARPHOTO), on Flickr
IMG_0967 by Drew84(PASCARPHOTO), on Flickr
IMG_0968 by Drew84(PASCARPHOTO), on Flickr
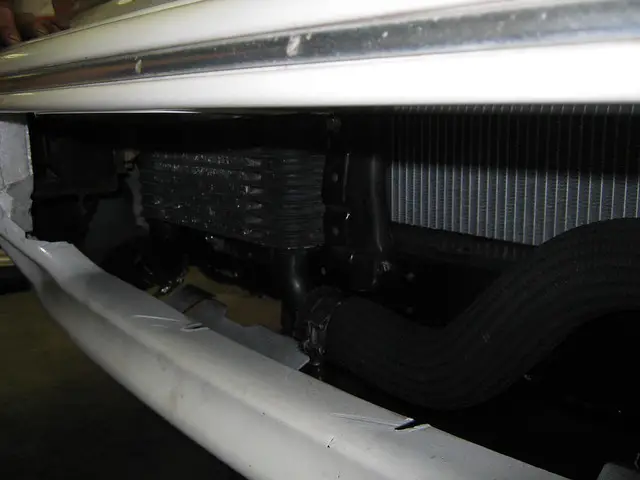
Stock inter cooler with a DSM lower inter cooler hose, eventually I will get the JDM inter cooler set up right. It needs some slight modifying, one of the brackets is bent. But this works nicely for now.
IMG_0969 by Drew84(PASCARPHOTO), on Flickr
IMG_0970 by Drew84(PASCARPHOTO), on Flickr
Some update pictures
Exhaust painted and installed
IMG_0955 by Drew84(PASCARPHOTO), on Flickr
IMG_0956 by Drew84(PASCARPHOTO), on Flickr
IMG_0957 by Drew84(PASCARPHOTO), on Flickr
IMG_0958 by Drew84(PASCARPHOTO), on Flickr
I painted the front radiator support
IMG_0959 by Drew84(PASCARPHOTO), on Flickr
IMG_0960 by Drew84(PASCARPHOTO), on Flickr
My mismashed intake setup
IMG_0961 by Drew84(PASCARPHOTO), on Flickr
I found a Napa hose to used for the BOV return
IMG_0965 by Drew84(PASCARPHOTO), on Flickr
IMG_0962 by Drew84(PASCARPHOTO), on Flickr
IMG_0966 by Drew84(PASCARPHOTO), on Flickr
IMG_0967 by Drew84(PASCARPHOTO), on Flickr
IMG_0968 by Drew84(PASCARPHOTO), on Flickr
Stock inter cooler with a DSM lower inter cooler hose, eventually I will get the JDM inter cooler set up right. It needs some slight modifying, one of the brackets is bent. But this works nicely for now.
IMG_0969 by Drew84(PASCARPHOTO), on Flickr
IMG_0970 by Drew84(PASCARPHOTO), on Flickr
Last edited:
Drew84
Well-known member
Drew84
Well-known member
I pretty much took a break from the car for the last month. Plus I got a new puppy that's been taking up much of my free time.
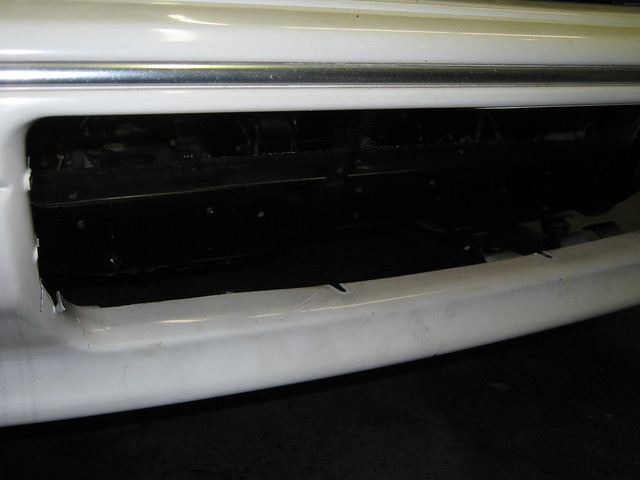
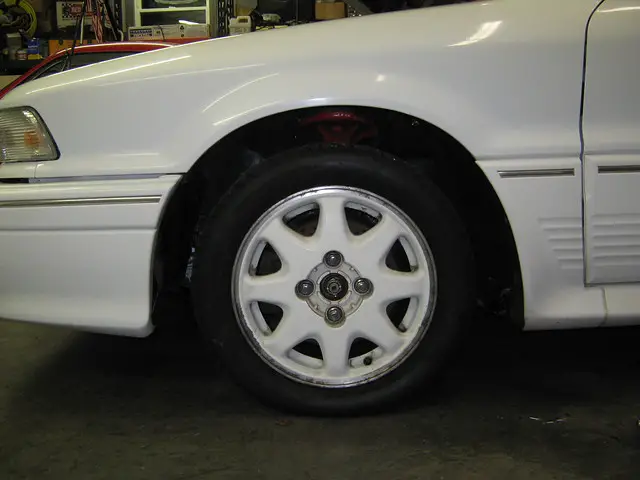
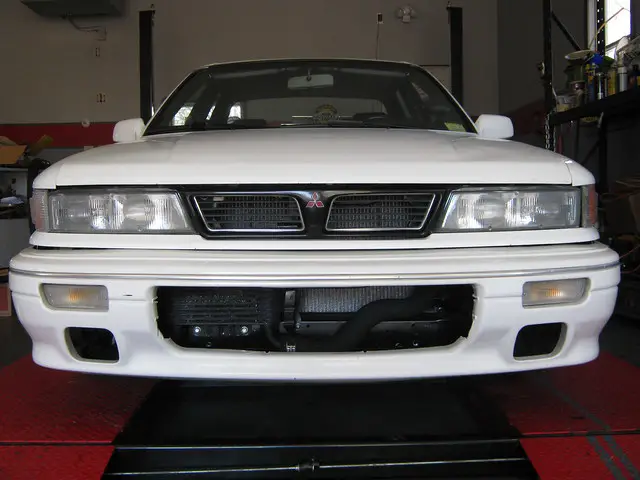
I decided to tackle the front control arms, ball joints, and bumper. I picked up an uncut front bumper in sweet condition for short money. Including fog lights.
This is the before ride height, I don't have an after picture yet.
IMG_0982 by Drew84(PASCARPHOTO), on Flickr
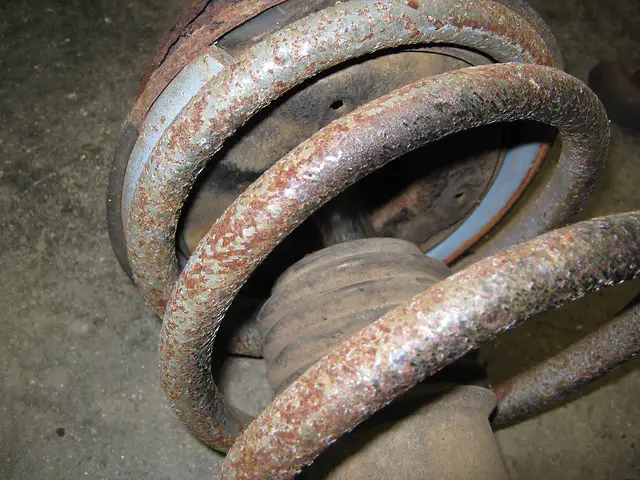
Removing the mystery springs with the rotten bumpstops.
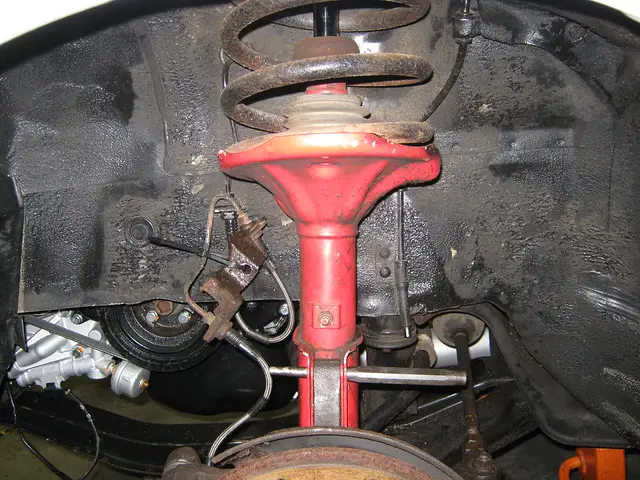
IMG_0984 by Drew84(PASCARPHOTO), on Flickr
They had the consistency of sponge cake.

IMG_0985 by Drew84(PASCARPHOTO), on Flickr
Very strange blue paint. These are not Eibachs as I was told when I bought the car.
IMG_0986 by Drew84(PASCARPHOTO), on Flickr
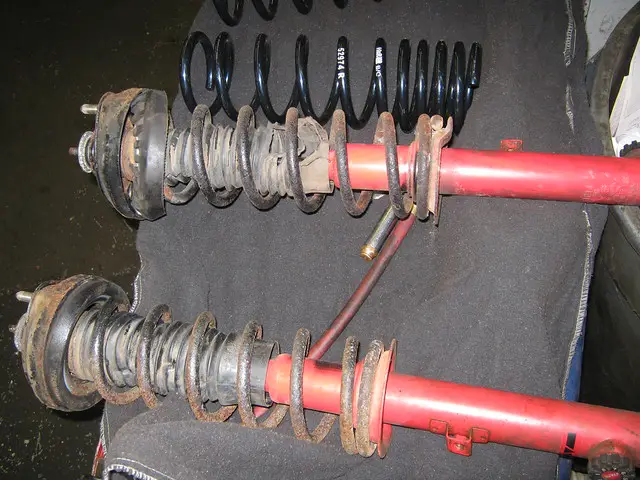
Side by side with the new H&Rs.
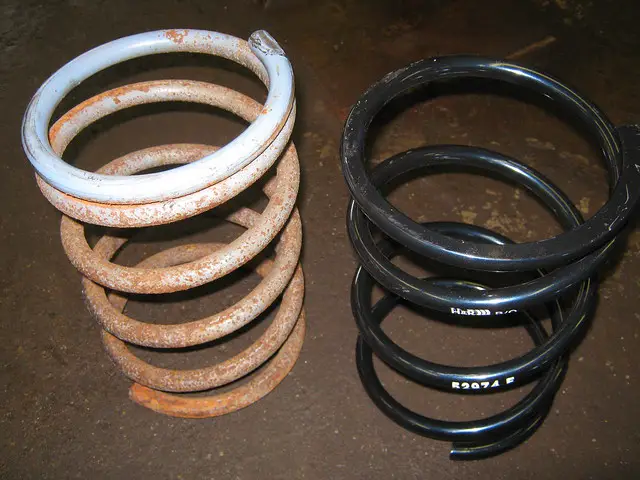
IMG_0987 by Drew84(PASCARPHOTO), on Flickr
All swapped over with remnants of the old ABS sensor.
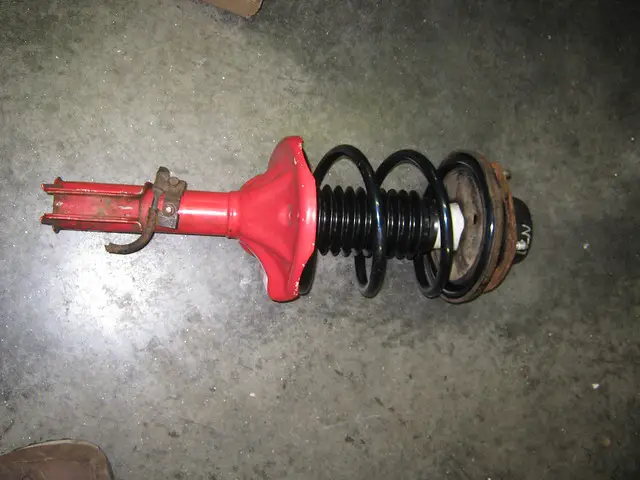
IMG_0992 by Drew84(PASCARPHOTO), on Flickr
All re-installed
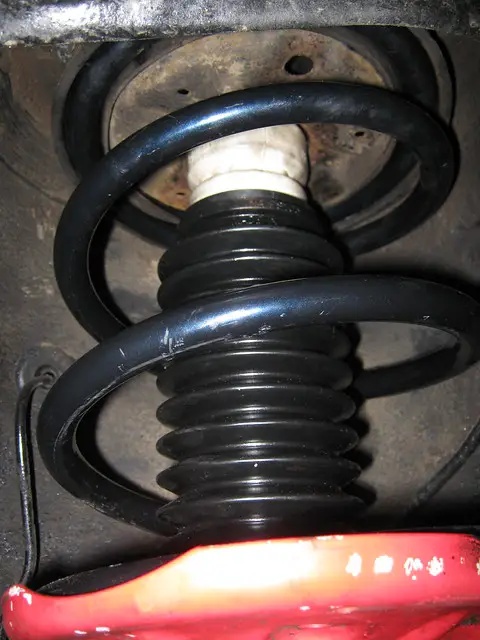
IMG_0988 by Drew84(PASCARPHOTO), on Flickr
Mystery solved, these are Whitelines. The finish is in really rough shape. I've never seen springs rust like this. A/M or factory.
IMG_0997 by Drew84(PASCARPHOTO), on Flickr
Before
IMG_1016 by Drew84(PASCARPHOTO), on Flickr
During
IMG_1019 by Drew84(PASCARPHOTO), on Flickr
After

IMG_1020 by Drew84(PASCARPHOTO), on Flickr
I didn't finish the front lower arms yet. The big bolt through the subframe up into the body on both sides was stubborn. We didn't get it free till late in the evening. I'm going to finish those up tonight. Along with the outer tie rods.
I decided to tackle the front control arms, ball joints, and bumper. I picked up an uncut front bumper in sweet condition for short money. Including fog lights.
This is the before ride height, I don't have an after picture yet.
IMG_0982 by Drew84(PASCARPHOTO), on Flickr
Removing the mystery springs with the rotten bumpstops.
IMG_0984 by Drew84(PASCARPHOTO), on Flickr
They had the consistency of sponge cake.
IMG_0985 by Drew84(PASCARPHOTO), on Flickr
Very strange blue paint. These are not Eibachs as I was told when I bought the car.
IMG_0986 by Drew84(PASCARPHOTO), on Flickr
Side by side with the new H&Rs.
IMG_0987 by Drew84(PASCARPHOTO), on Flickr
All swapped over with remnants of the old ABS sensor.
IMG_0992 by Drew84(PASCARPHOTO), on Flickr
All re-installed
IMG_0988 by Drew84(PASCARPHOTO), on Flickr
Mystery solved, these are Whitelines. The finish is in really rough shape. I've never seen springs rust like this. A/M or factory.
IMG_0997 by Drew84(PASCARPHOTO), on Flickr
Before
IMG_1016 by Drew84(PASCARPHOTO), on Flickr
During
IMG_1019 by Drew84(PASCARPHOTO), on Flickr
After
IMG_1020 by Drew84(PASCARPHOTO), on Flickr
I didn't finish the front lower arms yet. The big bolt through the subframe up into the body on both sides was stubborn. We didn't get it free till late in the evening. I'm going to finish those up tonight. Along with the outer tie rods.
Drew84
Well-known member
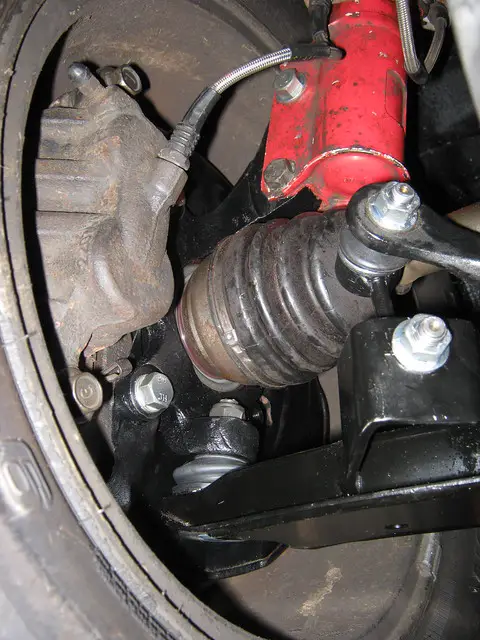
We got the bolts loose and pulled the arms out. Old rear bushings
IMG_1027 by Drew84(PASCARPHOTO), on Flickr
Old ball joints
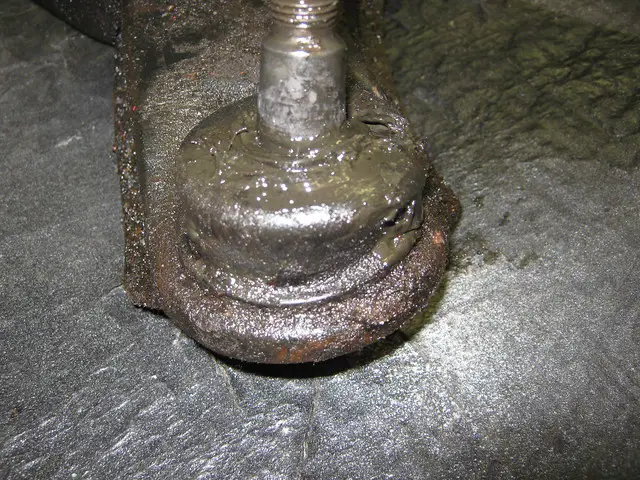
IMG_1024 by Drew84(PASCARPHOTO), on Flickr
New Dorman arms
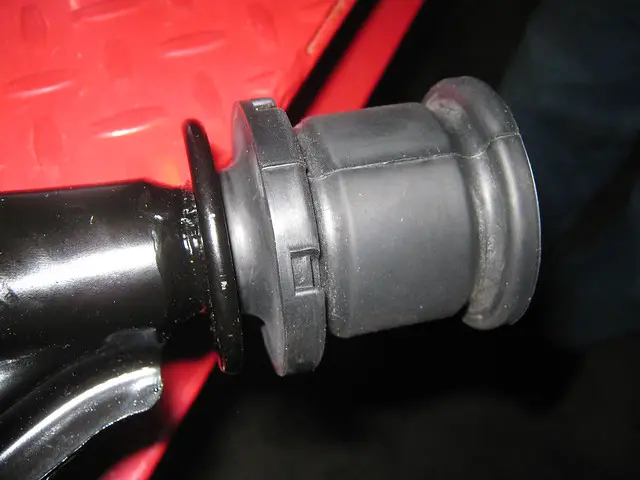
IMG_1021 by Drew84(PASCARPHOTO), on Flickr
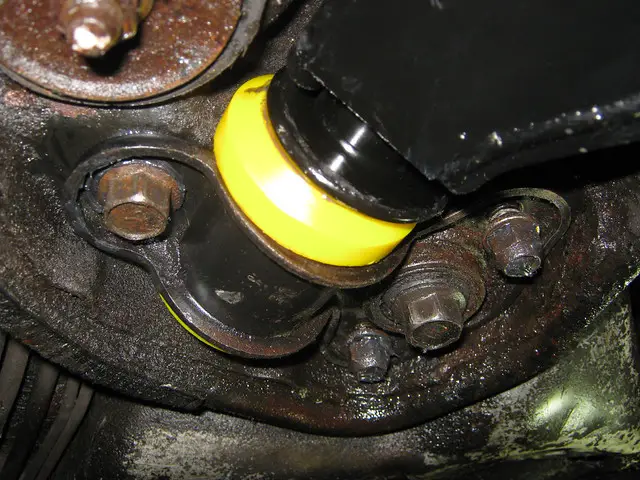
I pulled those bushings and replaced them with the Whiteline extra caster bushings.
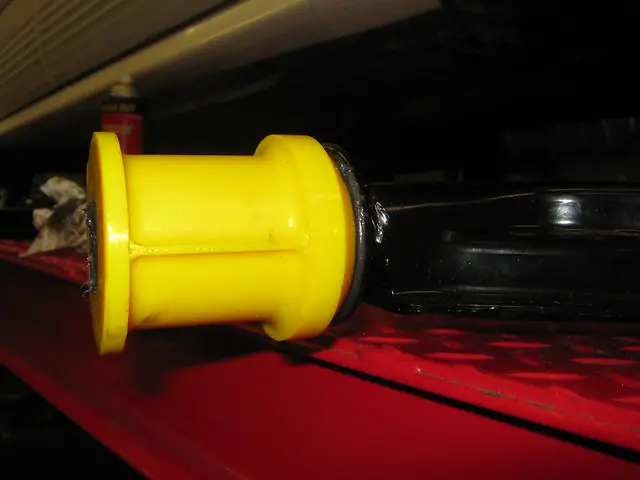
IMG_1023 by Drew84(PASCARPHOTO), on Flickr
IMG_1028 by Drew84(PASCARPHOTO), on Flickr
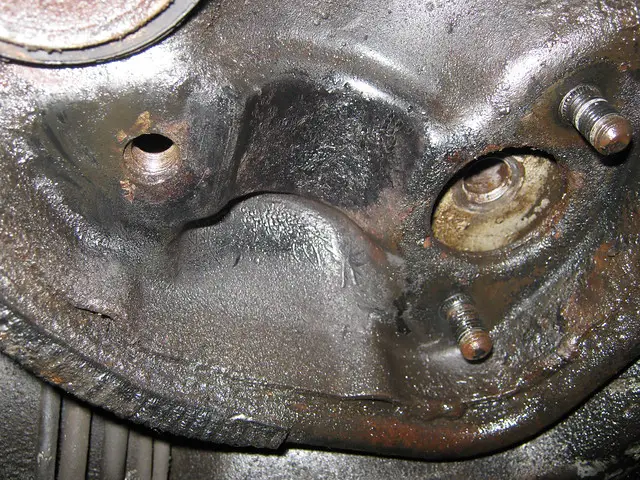
Arms are installed
IMG_1029 by Drew84(PASCARPHOTO), on Flickr
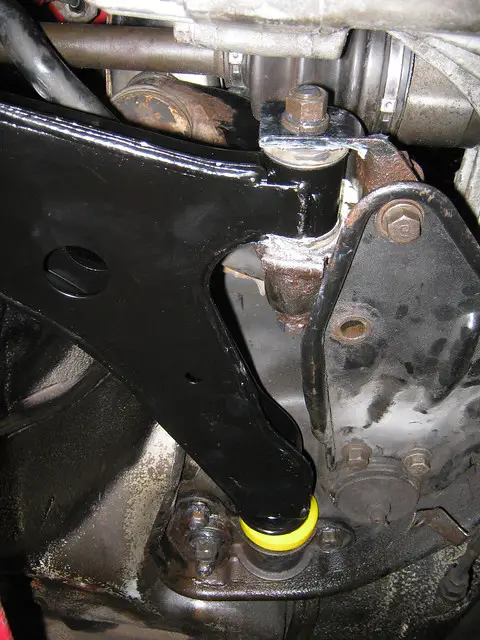
IMG_1049 by Drew84(PASCARPHOTO), on Flickr
The Wheel bearings had to much play so we replaced them.
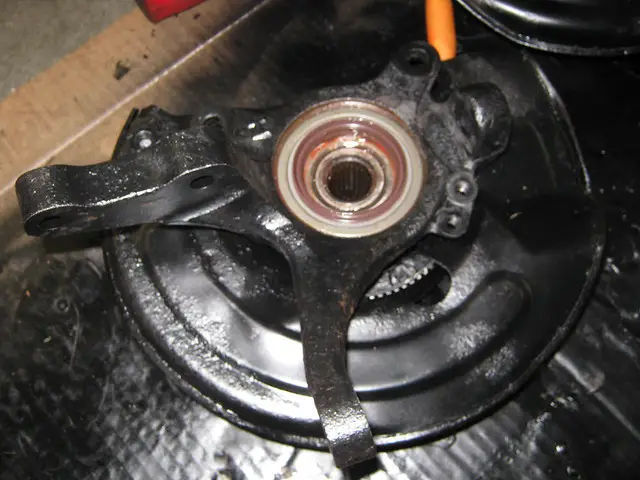
IMG_1046 by Drew84(PASCARPHOTO), on Flickr
Old tie rod ends
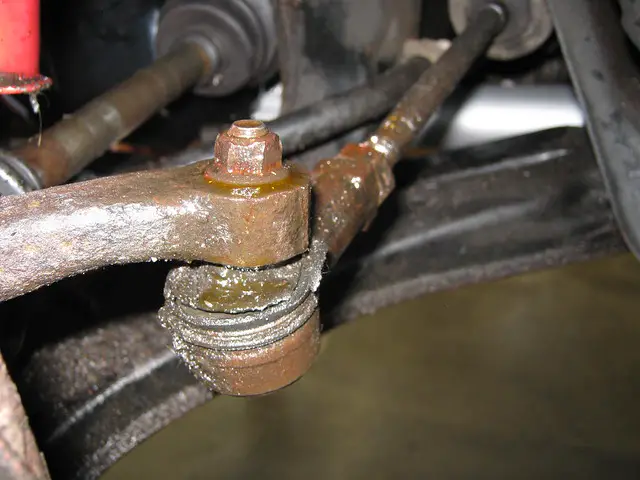
IMG_1018 by Drew84(PASCARPHOTO), on Flickr
New tie rod ends
IMG_1046 by Drew84(PASCARPHOTO), on Flickr
IMG_1048 by Drew84(PASCARPHOTO), on Flickr
I also swapped out the rear whiteline springs for the H&Rs, I like the rake and I like the softer ride.
IMG_1069 by Drew84(PASCARPHOTO), on Flickr
My dad and I are having some drama with the T-case, both spares had seized center bearings that ruined the Aluminum case. It made the center bearings too loose in the housing. Instead of having to press them in they could slide in and out by hand. So I ordered a new center t-case section from Mitsubishi. So the next time I update this the car should have plates and be on the road.
IMG_1027 by Drew84(PASCARPHOTO), on Flickr
Old ball joints
IMG_1024 by Drew84(PASCARPHOTO), on Flickr
New Dorman arms
IMG_1021 by Drew84(PASCARPHOTO), on Flickr
I pulled those bushings and replaced them with the Whiteline extra caster bushings.
IMG_1023 by Drew84(PASCARPHOTO), on Flickr
IMG_1028 by Drew84(PASCARPHOTO), on Flickr
Arms are installed
IMG_1029 by Drew84(PASCARPHOTO), on Flickr
IMG_1049 by Drew84(PASCARPHOTO), on Flickr
The Wheel bearings had to much play so we replaced them.
IMG_1046 by Drew84(PASCARPHOTO), on Flickr
Old tie rod ends
IMG_1018 by Drew84(PASCARPHOTO), on Flickr
New tie rod ends
IMG_1046 by Drew84(PASCARPHOTO), on Flickr
IMG_1048 by Drew84(PASCARPHOTO), on Flickr
I also swapped out the rear whiteline springs for the H&Rs, I like the rake and I like the softer ride.
IMG_1069 by Drew84(PASCARPHOTO), on Flickr
My dad and I are having some drama with the T-case, both spares had seized center bearings that ruined the Aluminum case. It made the center bearings too loose in the housing. Instead of having to press them in they could slide in and out by hand. So I ordered a new center t-case section from Mitsubishi. So the next time I update this the car should have plates and be on the road.
Drew84
Well-known member
Bonus Puppy picture

mooserage
Staff member
Forgot a bracket /ubbthreads/images/graemlins/wink.gif
Fixed:
Quote:
Bonus Puppy picture

Fixed:
Quote:
Bonus Puppy picture
Last edited:
Drew84
Well-known member
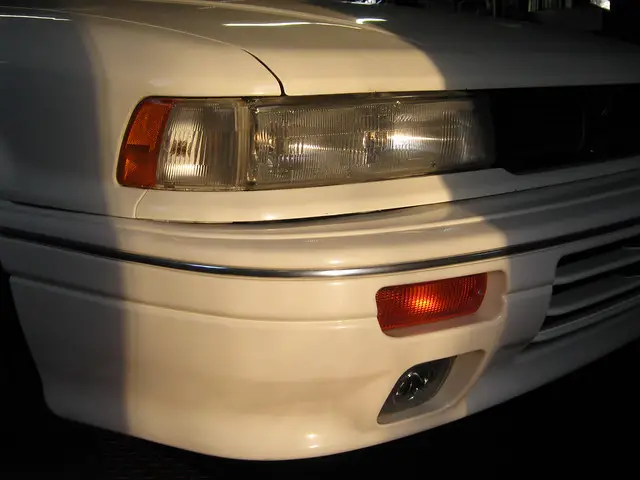
I wet sanded and polished the turn signals,
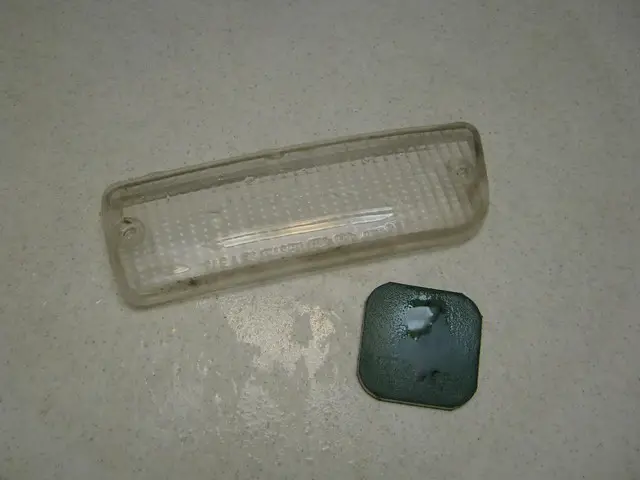
IMG_1085 by Drew84(PASCARPHOTO), on Flickr
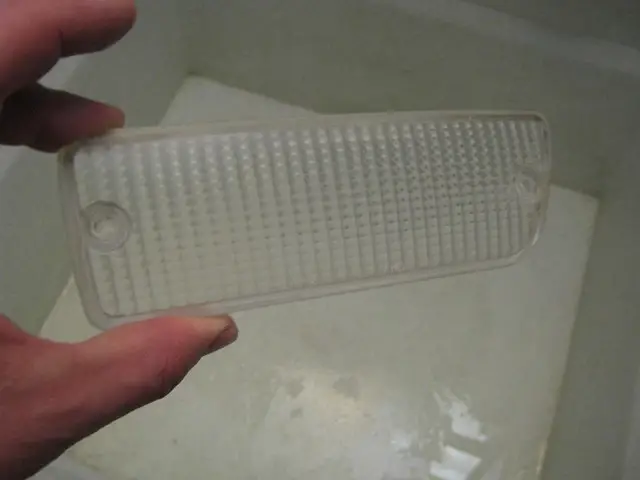
IMG_1086 by Drew84(PASCARPHOTO), on Flickr
Then I used Dupilcolor Metalcast orange and painted them Amber.
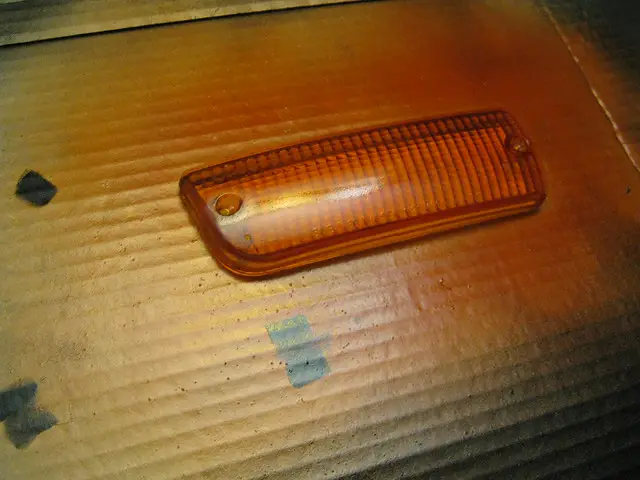
IMG_1087 by Drew84(PASCARPHOTO), on Flickr
Before
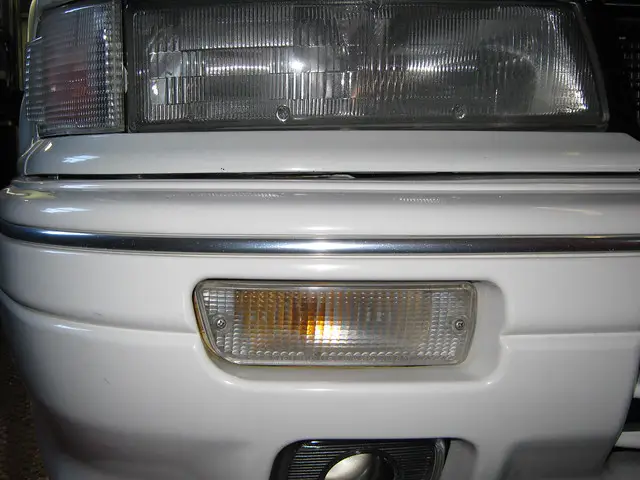
IMG_1088 by Drew84(PASCARPHOTO), on Flickr
After
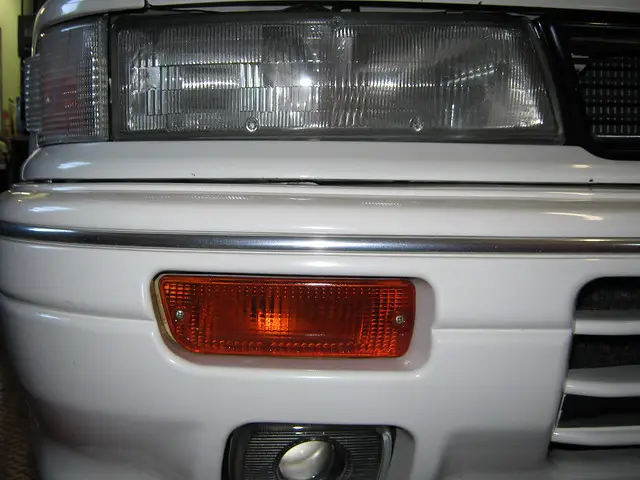
IMG_1090 by Drew84(PASCARPHOTO), on Flickr
USDM side markers installed.
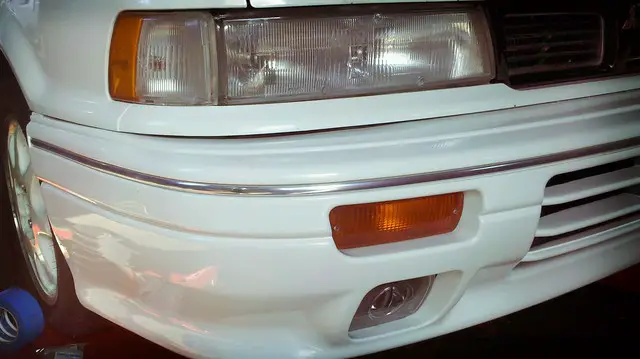
USDM side markers installed by Drew84(PASCARPHOTO), on Flickr
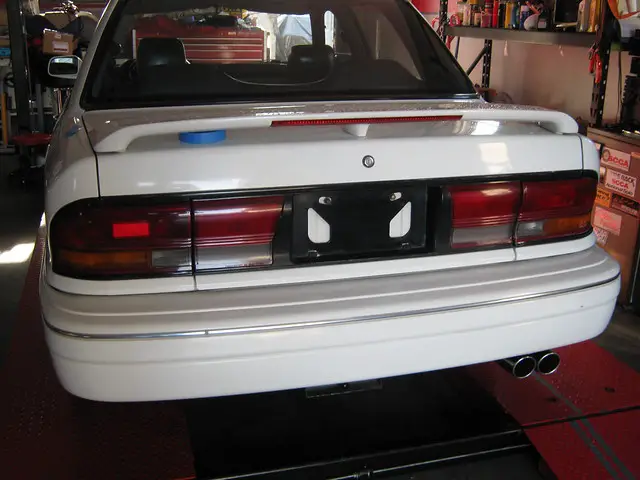
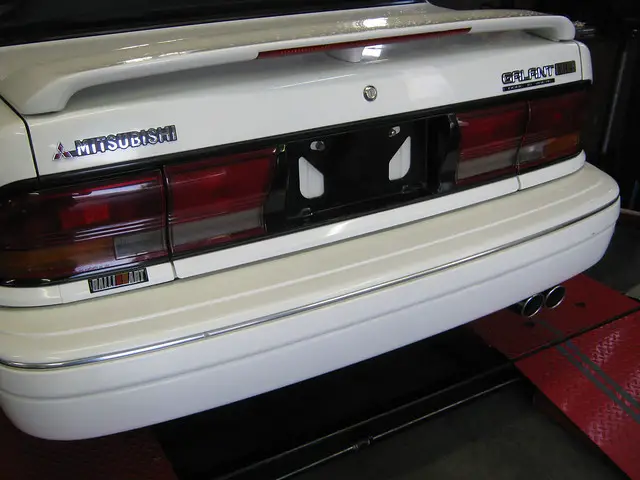
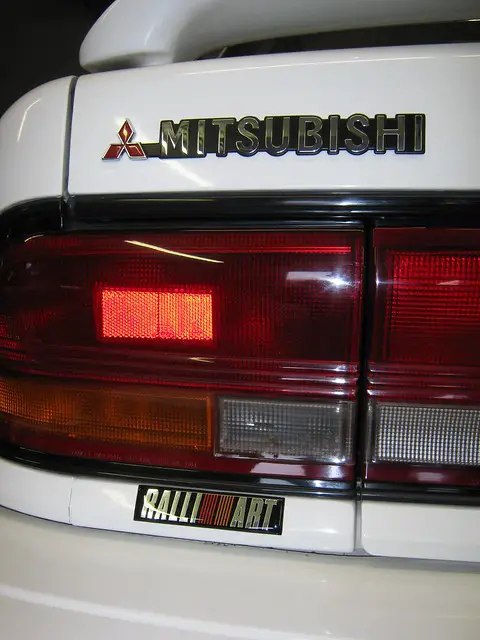
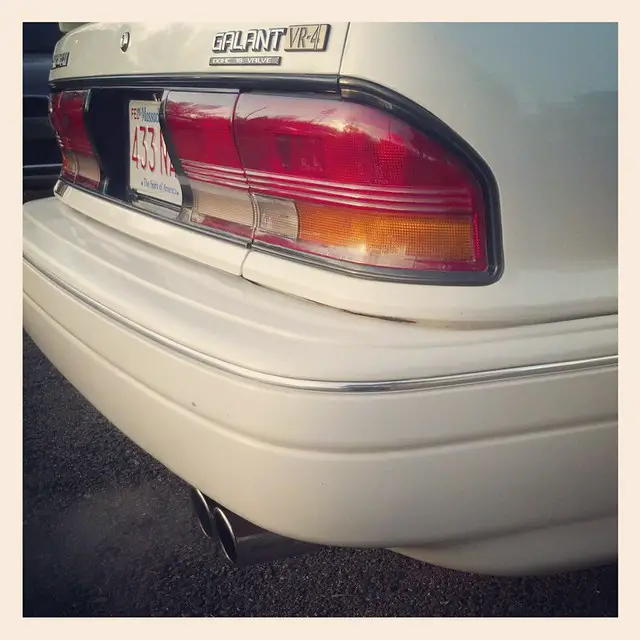
Also I am a fan of the stock badges so I put them all back on and polished up the tailights. I also added a Late model Galant Ralliart badge.
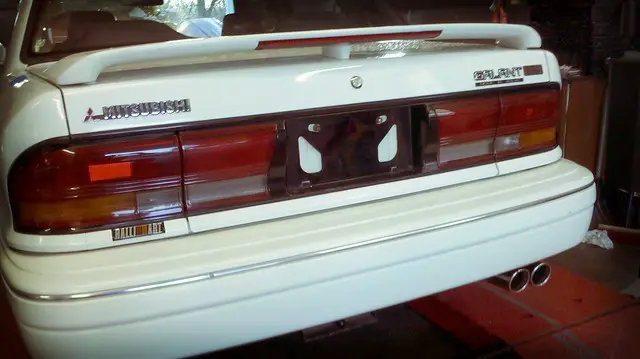
Polished tail lamps and new emblems by Drew84(PASCARPHOTO), on Flickr
IMG_1085 by Drew84(PASCARPHOTO), on Flickr
IMG_1086 by Drew84(PASCARPHOTO), on Flickr
Then I used Dupilcolor Metalcast orange and painted them Amber.
IMG_1087 by Drew84(PASCARPHOTO), on Flickr
Before
IMG_1088 by Drew84(PASCARPHOTO), on Flickr
After
IMG_1090 by Drew84(PASCARPHOTO), on Flickr
USDM side markers installed.
USDM side markers installed by Drew84(PASCARPHOTO), on Flickr
Also I am a fan of the stock badges so I put them all back on and polished up the tailights. I also added a Late model Galant Ralliart badge.
Polished tail lamps and new emblems by Drew84(PASCARPHOTO), on Flickr
Drew84
Well-known member
I did a couple more things before I put it on the road. I put all the badges back on.
IMG_1108 by Drew84(PASCARPHOTO), on Flickr
IMG_1109 by Drew84(PASCARPHOTO), on Flickr

IMG_1110 by Drew84(PASCARPHOTO), on Flickr
IMG_1111 by Drew84(PASCARPHOTO), on Flickr
IMG_1112 by Drew84(PASCARPHOTO), on Flickr
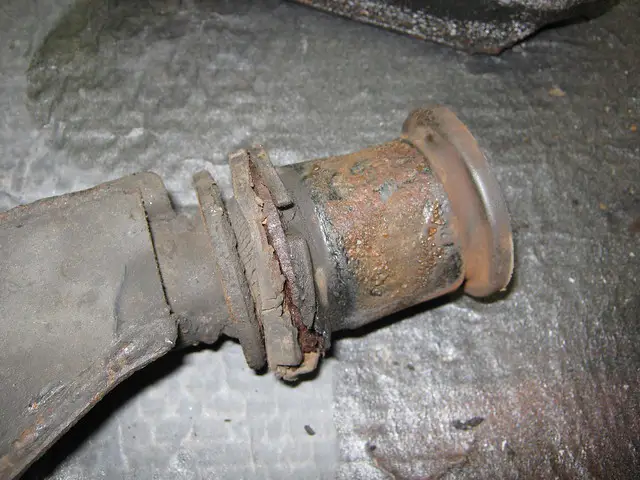
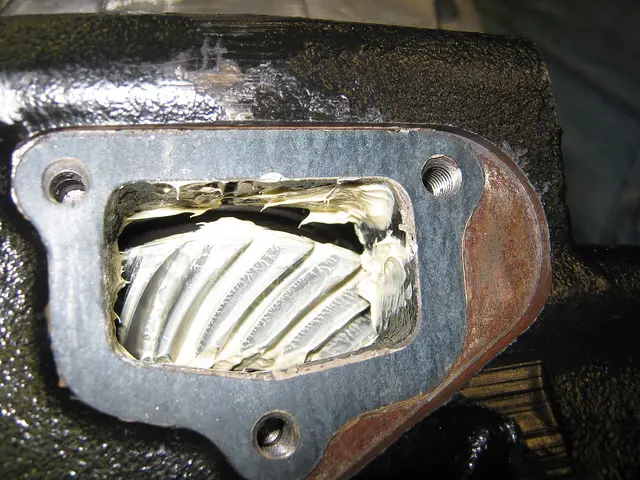
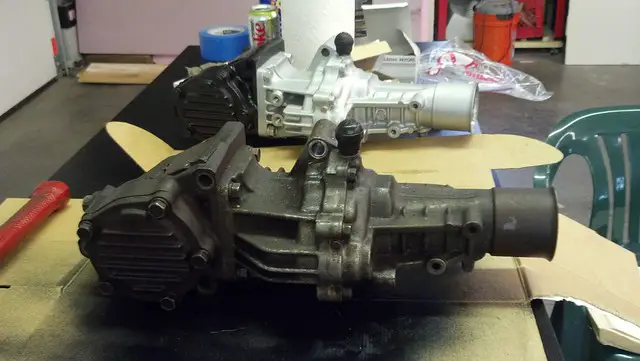
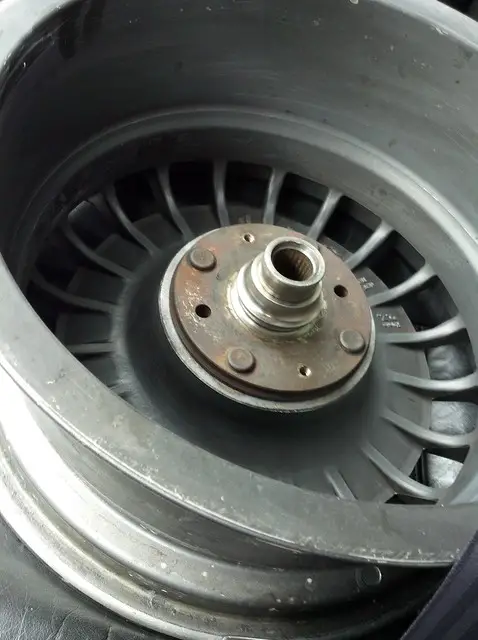
Brand new center section for the T-case. The other case had the center bearing seize and spin inside the race and wear the aluminum away.
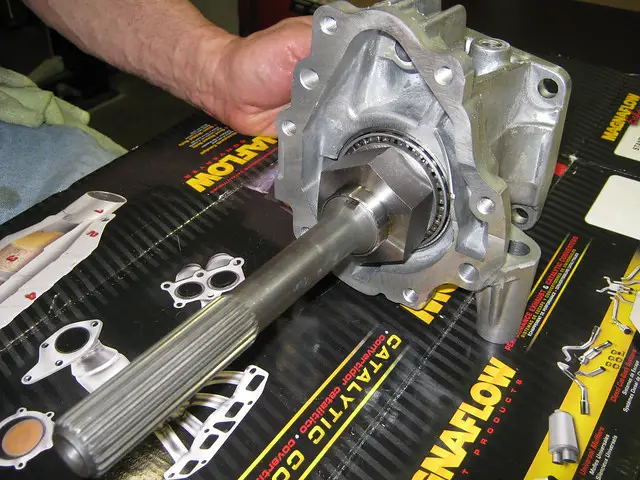
IMG_1124 by Drew84(PASCARPHOTO), on Flickr
New Lock nut

IMG_1125 by Drew84(PASCARPHOTO), on Flickr
IMG_1126 by Drew84(PASCARPHOTO), on Flickr
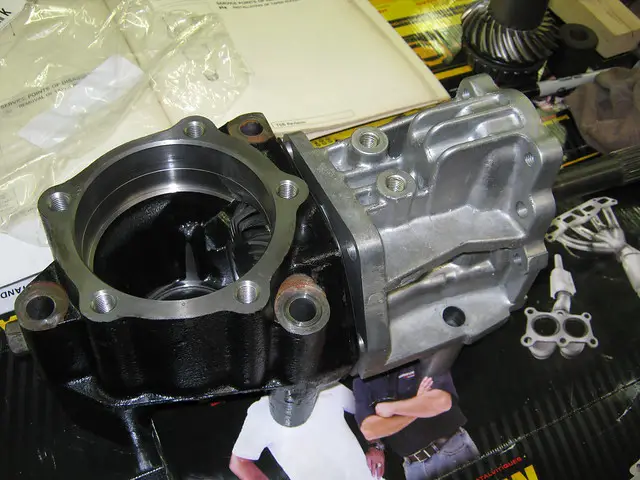
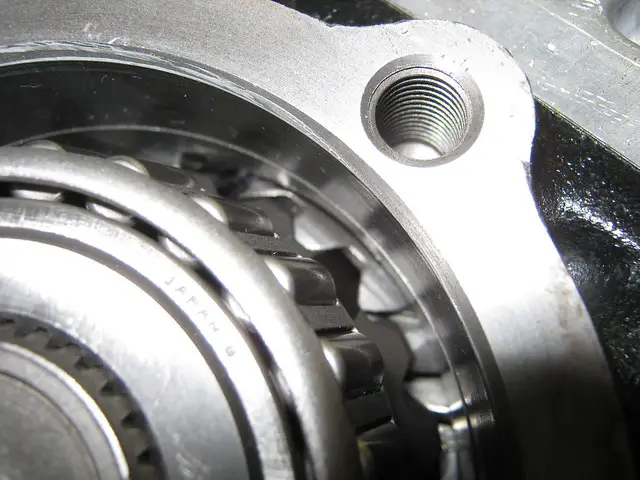
Difficult to tell from the picture but the gears are not 1:1, when you line them up at the marks and spin them. 1 revolution does not bring it back to the same spot. I think it took three spins, I should have counted but I didn't.
IMG_1127 by Drew84(PASCARPHOTO), on Flickr
IMG_1128 by Drew84(PASCARPHOTO), on Flickr
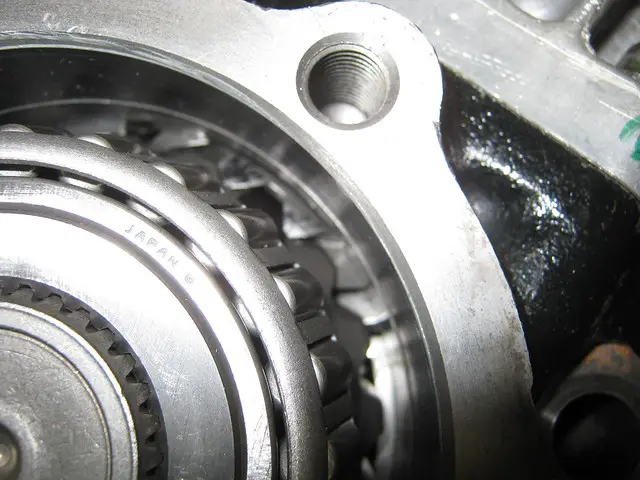
The input gears had a nice mesh pattern,
IMG_1129 by Drew84(PASCARPHOTO), on Flickr
All assembled back up. New seals on both ends. Spins nice and smooth.
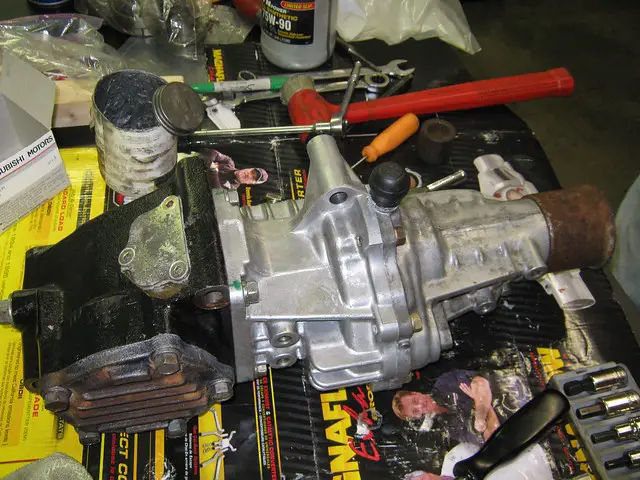
IMG_1130 by Drew84(PASCARPHOTO), on Flickr
Untitled by Drew84(PASCARPHOTO), on Flickr
IMG_1131[1] by Drew84(PASCARPHOTO), on Flickr
IMG_1108 by Drew84(PASCARPHOTO), on Flickr
IMG_1109 by Drew84(PASCARPHOTO), on Flickr
IMG_1110 by Drew84(PASCARPHOTO), on Flickr
IMG_1111 by Drew84(PASCARPHOTO), on Flickr
IMG_1112 by Drew84(PASCARPHOTO), on Flickr
Brand new center section for the T-case. The other case had the center bearing seize and spin inside the race and wear the aluminum away.
IMG_1124 by Drew84(PASCARPHOTO), on Flickr
New Lock nut
IMG_1125 by Drew84(PASCARPHOTO), on Flickr
IMG_1126 by Drew84(PASCARPHOTO), on Flickr
Difficult to tell from the picture but the gears are not 1:1, when you line them up at the marks and spin them. 1 revolution does not bring it back to the same spot. I think it took three spins, I should have counted but I didn't.
IMG_1127 by Drew84(PASCARPHOTO), on Flickr
IMG_1128 by Drew84(PASCARPHOTO), on Flickr
The input gears had a nice mesh pattern,
IMG_1129 by Drew84(PASCARPHOTO), on Flickr
All assembled back up. New seals on both ends. Spins nice and smooth.
IMG_1130 by Drew84(PASCARPHOTO), on Flickr
Untitled by Drew84(PASCARPHOTO), on Flickr
IMG_1131[1] by Drew84(PASCARPHOTO), on Flickr
Last edited:
Drew84
Well-known member
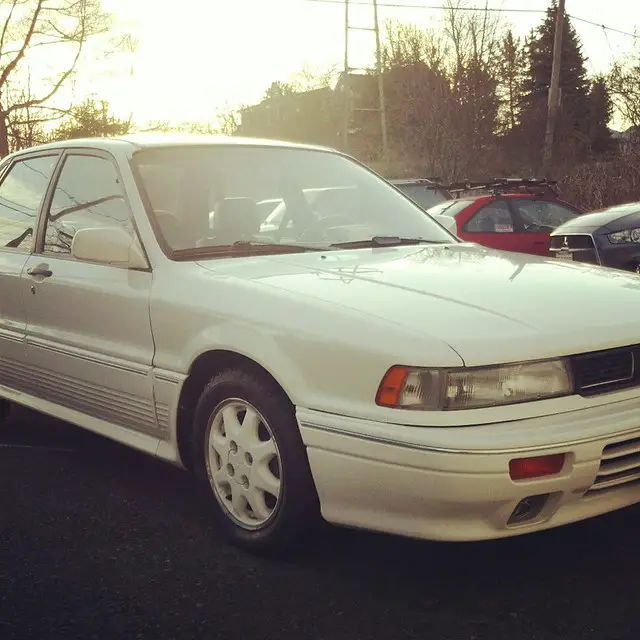
Having some fun with Instagram

Untitled by Drew84(PASCARPHOTO), on Flickr
Untitled by Drew84(PASCARPHOTO), on Flickr
Untitled by Drew84(PASCARPHOTO), on Flickr
Untitled by Drew84(PASCARPHOTO), on Flickr
Untitled by Drew84(PASCARPHOTO), on Flickr
Untitled by Drew84(PASCARPHOTO), on Flickr
Drew84
Well-known member
At a local meet over the weekend. This car is so much fun to drive.

Masstuning-9904 by Drew84(PASCARPHOTO), on Flickr

Masstuning-9916 by Drew84(PASCARPHOTO), on Flickr

GVR4 by andrewjsan, on Flickr
Masstuning-9904 by Drew84(PASCARPHOTO), on Flickr
Masstuning-9916 by Drew84(PASCARPHOTO), on Flickr
GVR4 by andrewjsan, on Flickr
Drew84
Well-known member
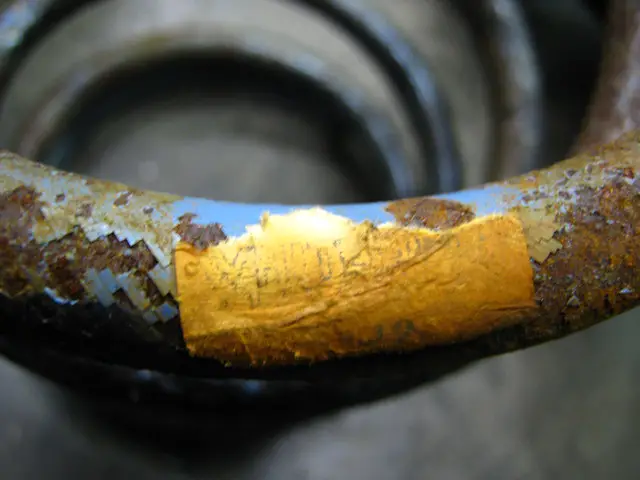
Grooved timing belt anybody ?

oh snap by Drew84(PASCARPHOTO), on Flickr
I pulled the plastic cover off for pure vanity reasons. It got scratched by the hood insulator and I wanted to repaint it. I found one of the rubber seals had turned to hard plastic from all the years of heat cycles. It fell and jammed against the belt and wore a groove in it. Crazy /ubbthreads/images/graemlins/roll.gif
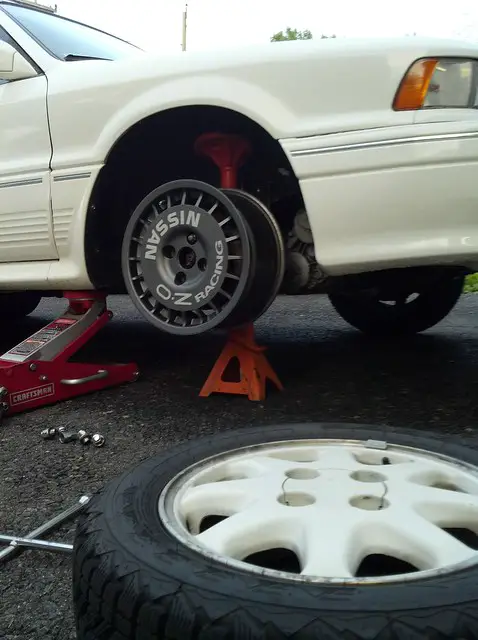
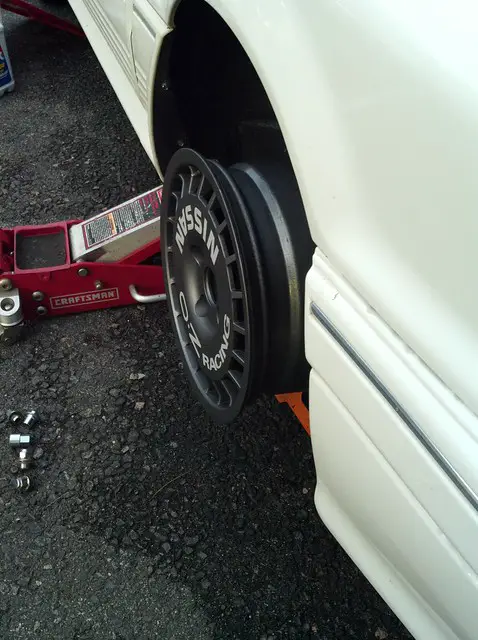
I was working on these wheels this weekend. I had them sent from Poland. Yes they say Nissan. But, the wheels are 4x114.3, the hub bore is 66.1 a Nissan hub bore, so I bought an extra Galant hub to send to the machine shop. So these can be opened up to 67.1. Specs on the wheels are 4x114.3, 15x7, et38, 20lbs each. A nice sturdy rally wheel.
Untitled by Drew84(PASCARPHOTO), on Flickr
Untitled by Drew84(PASCARPHOTO), on Flickr
Getting them prepped and read for paint.
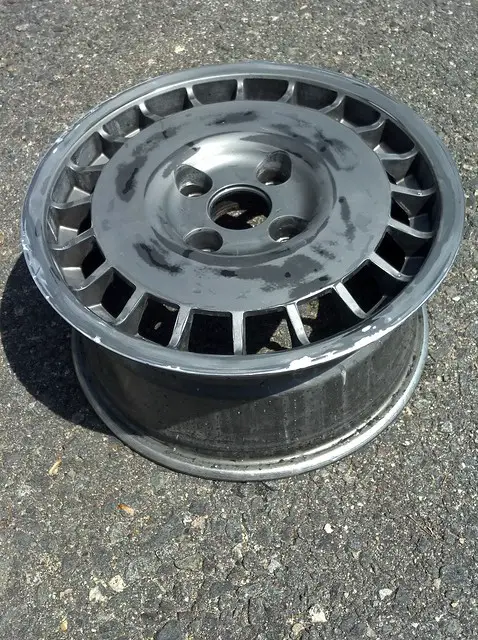
Untitled by Drew84(PASCARPHOTO), on Flickr
When these are finished they will look like this
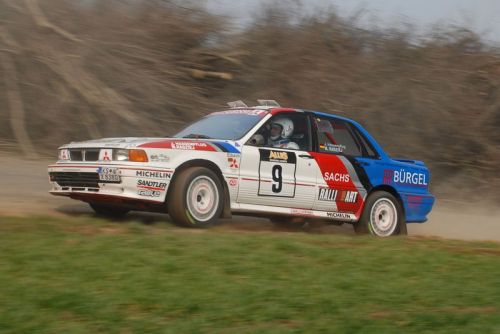
Just imagine them clean
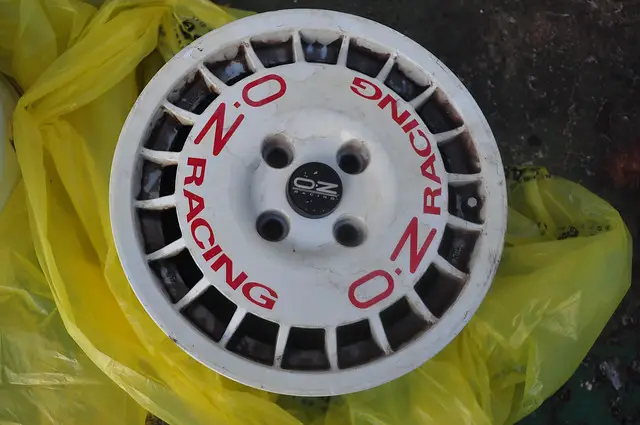
24 Aug 10 006 by Koopa.kodakgold, on Flickr
oh snap by Drew84(PASCARPHOTO), on Flickr
I pulled the plastic cover off for pure vanity reasons. It got scratched by the hood insulator and I wanted to repaint it. I found one of the rubber seals had turned to hard plastic from all the years of heat cycles. It fell and jammed against the belt and wore a groove in it. Crazy /ubbthreads/images/graemlins/roll.gif
I was working on these wheels this weekend. I had them sent from Poland. Yes they say Nissan. But, the wheels are 4x114.3, the hub bore is 66.1 a Nissan hub bore, so I bought an extra Galant hub to send to the machine shop. So these can be opened up to 67.1. Specs on the wheels are 4x114.3, 15x7, et38, 20lbs each. A nice sturdy rally wheel.
Untitled by Drew84(PASCARPHOTO), on Flickr
Untitled by Drew84(PASCARPHOTO), on Flickr
Getting them prepped and read for paint.
Untitled by Drew84(PASCARPHOTO), on Flickr
When these are finished they will look like this
Just imagine them clean
24 Aug 10 006 by Koopa.kodakgold, on Flickr
ApexHunter
Well-known member
Excellent wheel choice sir, i believe it will go well with the overall concept. /ubbthreads/images/graemlins/applause.gif
Drew84
Well-known member
I'm going to go gray with white decals on the wheels.
Drew84
Well-known member
blacksheep
Well-known member
Nice build
OT - I know Andrew San well - he took some pics of your car. He lived in Iowa before.
OT - I know Andrew San well - he took some pics of your car. He lived in Iowa before.
