looking nice .....g/l
You are using an out of date browser. It may not display this or other websites correctly.
You should upgrade or use an alternative browser.
You should upgrade or use an alternative browser.
5 lug conversion process - Updated 3/17/09 - Now Done
- Thread starter Terry Posten
- Start date
1990ggsxnj
Well-known member
Keep those pics coming! I'm gunna have to do the rear on 139. Front was already done though.
Terry Posten
Well-known member
OK, today was all about pretty. No real progress other than making the overall finished product a little better looking.
Took me about 2 hours to clean and paint. I did not do a 100% job but things are looking a LOT better.
Used High temp (1200 deg) Silver spray paint for the calipers and Rustoleum, flat black oil based paint. Brushed on in a VERY heavy coat.
Tomorrow the rear hubs go on. Wish me luck /ubbthreads/images/graemlins/grin.gif.
Terry Posten
Well-known member
OK, today I spent about 7 hours on the job.
I started by finishing up the rear which took about 3 hours. Would have been faster IF I would have installed the rear outer seal in the right direction /ubbthreads/images/graemlins/banghead.gif. The rubber flared side goes OUT toward the 4 bolt cup. No biggie, I just popped them out with a small pry bar and flipped them. Did not damage anything.
I did end up renting a bearing punch kit from Autozone. It was the only way to get the rear outer bearing fully seated in the hub. Once the outer bearing and seal was in, I slid the hub assembly into the control arm and then used a dead-blow hammer to seat the rear hub fully. It was not hard at all. I then used the 1/2" impact to spin the 4 bolt cup nut down and torqued the piss out of it. The book calls for 160lb.
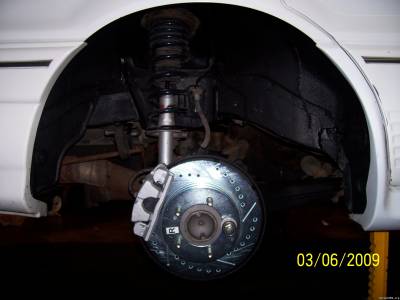
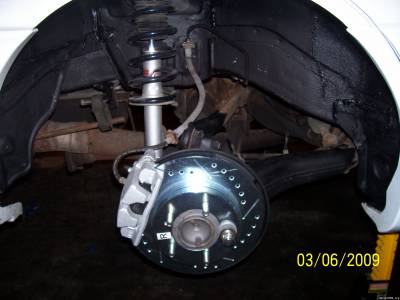
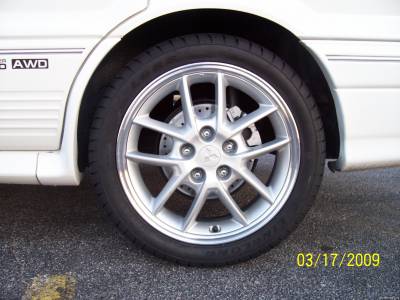
The rear brakes look great. Can't wait to mount tires into the wells and see how it looks. I will be ordering the tires on Monday.
Rear finished pics.
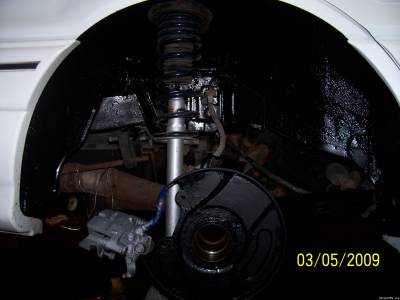
Now onto the front. Took the brakes off last night. Today I removed the complete hub assembly from the car. Pretty simple. Dropped the tie-rod, un-did the axle nut, ripped the ABS crap out, dropped the brake line from the strut, used a pry bar to pry up and hit the ball joint mount a few times and the joint popped loose, removed the lower strut bolts and lifted out the whole thing. Spent about 2 hours punching out the old bearings and cleaned the hubs up and readied them for a trip to Midas in the morning to have them pressed back together. I did use a propane torch to heat the front bearing outer race before attempting to punch it out. They came but Autozone might not be to happy with me. I marked up a few of the bearing block plates. /ubbthreads/images/graemlins/grin.gif.
I then spent quite a bit of time degreasing the wheel well area. It was caked on. I used 2 cans of brake cleaner and got it pretty good. I then used the same paint as I did in the back. Painted the calipers silver and the wheel wells flat black. I need to get a passenger side splash shield for the tranny. I have never had one.
I did find one bad tie rod end and have it ready to go on. It really was still good but the boot was ripped and there is no point in not replacing it now. I will get it tomorrow morning. I don't need the other side because it was replaced a year ago.
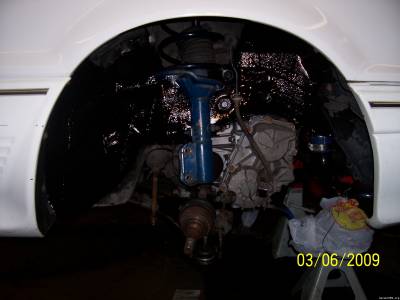
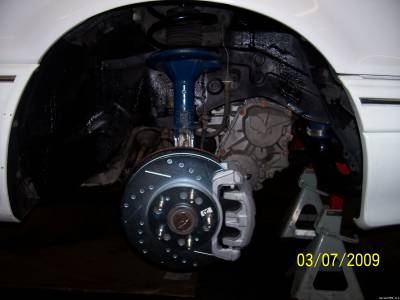
Some quick pics. Paint is still wet. Again, not a 100% job. This car is not #3 condition. /ubbthreads/images/graemlins/grin.gif

I started by finishing up the rear which took about 3 hours. Would have been faster IF I would have installed the rear outer seal in the right direction /ubbthreads/images/graemlins/banghead.gif. The rubber flared side goes OUT toward the 4 bolt cup. No biggie, I just popped them out with a small pry bar and flipped them. Did not damage anything.
I did end up renting a bearing punch kit from Autozone. It was the only way to get the rear outer bearing fully seated in the hub. Once the outer bearing and seal was in, I slid the hub assembly into the control arm and then used a dead-blow hammer to seat the rear hub fully. It was not hard at all. I then used the 1/2" impact to spin the 4 bolt cup nut down and torqued the piss out of it. The book calls for 160lb.
The rear brakes look great. Can't wait to mount tires into the wells and see how it looks. I will be ordering the tires on Monday.
Rear finished pics.
Now onto the front. Took the brakes off last night. Today I removed the complete hub assembly from the car. Pretty simple. Dropped the tie-rod, un-did the axle nut, ripped the ABS crap out, dropped the brake line from the strut, used a pry bar to pry up and hit the ball joint mount a few times and the joint popped loose, removed the lower strut bolts and lifted out the whole thing. Spent about 2 hours punching out the old bearings and cleaned the hubs up and readied them for a trip to Midas in the morning to have them pressed back together. I did use a propane torch to heat the front bearing outer race before attempting to punch it out. They came but Autozone might not be to happy with me. I marked up a few of the bearing block plates. /ubbthreads/images/graemlins/grin.gif.
I then spent quite a bit of time degreasing the wheel well area. It was caked on. I used 2 cans of brake cleaner and got it pretty good. I then used the same paint as I did in the back. Painted the calipers silver and the wheel wells flat black. I need to get a passenger side splash shield for the tranny. I have never had one.
I did find one bad tie rod end and have it ready to go on. It really was still good but the boot was ripped and there is no point in not replacing it now. I will get it tomorrow morning. I don't need the other side because it was replaced a year ago.
Some quick pics. Paint is still wet. Again, not a 100% job. This car is not #3 condition. /ubbthreads/images/graemlins/grin.gif
Terry Posten
Well-known member
OK, fronts are done.
Paint is still a little wet. It is raining out and very humid and probably a little cold for optimum drying. No big deal, it will be a week before the tires are here.
Nothing really exciting about this part of the job. I got the hub assembly back from Midas and it only took about an hour to install both sides and get the brakes done.
This whole process did not take as long as I was thinking. I have not pulled the ABS motor and install the new brake lines yet. For right now, I will just pull the fuses and do the whole ABS tear out latter. I am going to leave the rear sensors in place because if I take them out, it will leave a hole in the rear arm/hub to collect dirt/water.
Last edited:
im in the process of doing my 5 lug also except i ran into a slight problem after i removed the axle here are some pics if anyone has some help they would like to offer im all ears ive been working on this part for about an hour with no luck
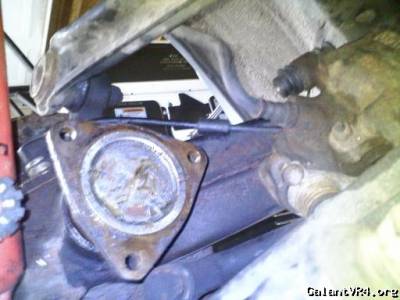
sorry for the crappy pics camera phone is all i have at my disposal right now
sorry for the crappy pics camera phone is all i have at my disposal right now
jepherz
Staff member
What's the problem, Mike?
isnt the plate suppsoed to come out with the axle so i can get to the bolt underneath it?
Terry Posten
Well-known member
I replied on your post. /ubbthreads/images/graemlins/grin.gif
Terry Posten
Well-known member
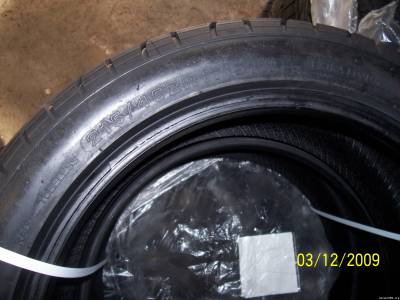
New tires were delived today.
But I wont have time to get them on until next weekend (the 21st). I am a little buzy this weekend picking up my new DD. /ubbthreads/images/graemlins/devil.gif
So I will be "jackstand ballin" for another couple weeks. But I will have something else to play with in the meantime.
But I wont have time to get them on until next weekend (the 21st). I am a little buzy this weekend picking up my new DD. /ubbthreads/images/graemlins/devil.gif
So I will be "jackstand ballin" for another couple weeks. But I will have something else to play with in the meantime.
Terry Posten
Well-known member
OK, back on topic.
New tires are here.
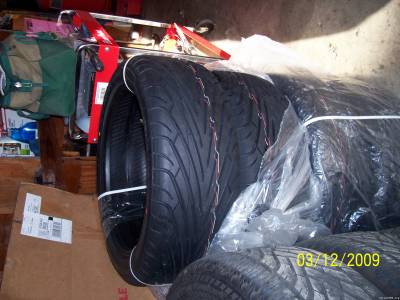
EXTRA LOAD rated - because the GVR4 is a PIG. /ubbthreads/images/graemlins/grin.gif
Again, it will be about a week or two before I can get these mounted/balanced. Then I need to have here aligned.
New tires are here.
EXTRA LOAD rated - because the GVR4 is a PIG. /ubbthreads/images/graemlins/grin.gif
Again, it will be about a week or two before I can get these mounted/balanced. Then I need to have here aligned.
Terry Posten
Well-known member
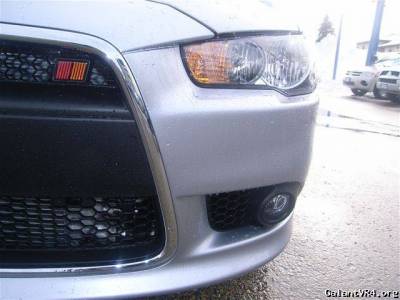
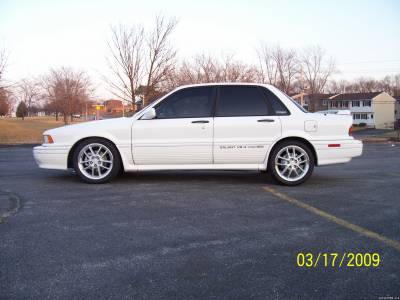
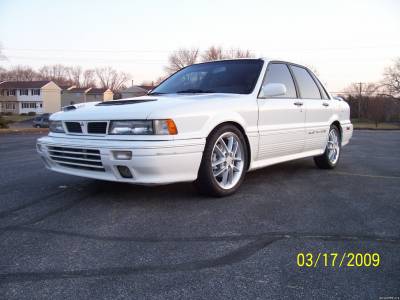
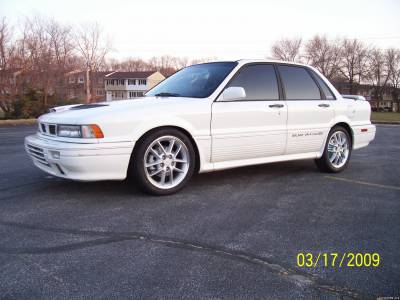
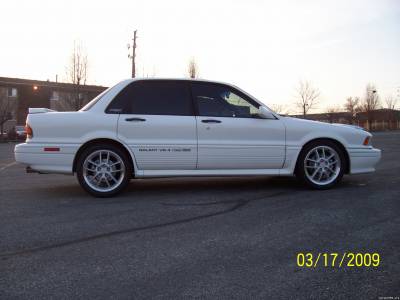
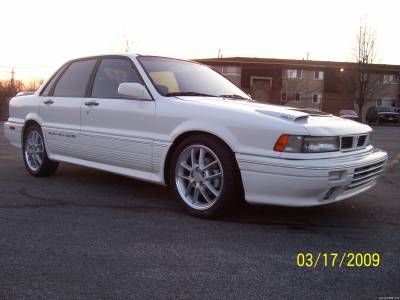
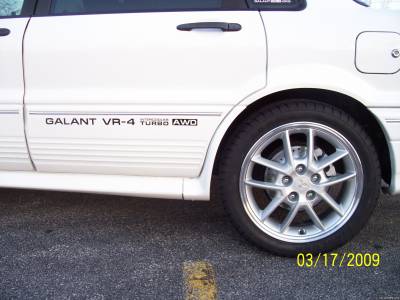
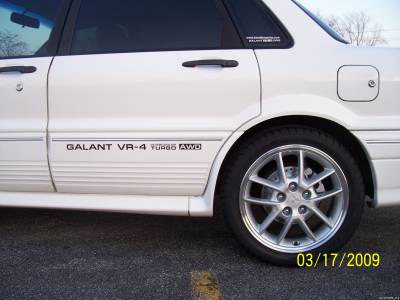
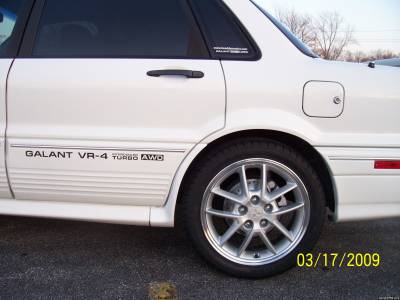
All done except for the alignment. Wont be driving it until April anyway.
What do you think?
What do you think?
Those wheels look great, good work!
galant344
Well-known member
looks good Terry!
Terry Posten
Well-known member
Thank you. It was quite the job and a little more $$$ than what I was thinking before I started.
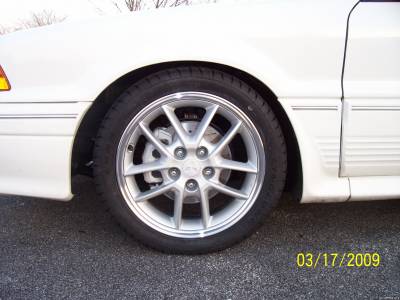
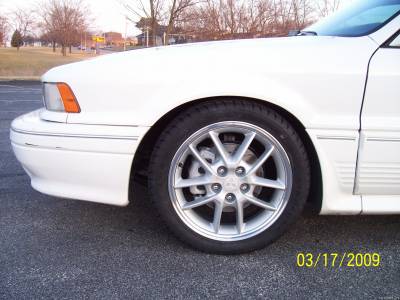
I am a little embarrassed to say what tires I went with. All the reviews (that I could read) were very positive and the price was too good to pass up.
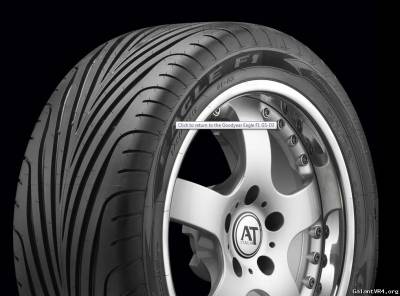
They are Ling Long L688 215/45/17ZR extra load with a rating of 280-A-A. /ubbthreads/images/graemlins/crazy.gif Basically they just copied the Goodyear Eagle F1 GS-D3.
Ling Long L688
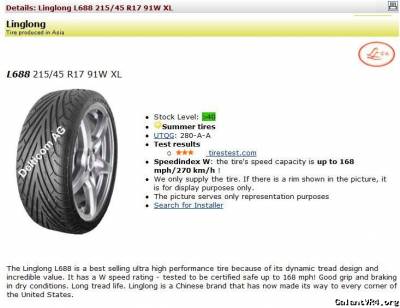
Goodyear Eagle F1 GS-D3
They look great for only $44.97 a tire.
Flame on /ubbthreads/images/graemlins/grin.gif
I am a little embarrassed to say what tires I went with. All the reviews (that I could read) were very positive and the price was too good to pass up.
They are Ling Long L688 215/45/17ZR extra load with a rating of 280-A-A. /ubbthreads/images/graemlins/crazy.gif Basically they just copied the Goodyear Eagle F1 GS-D3.
Ling Long L688
Goodyear Eagle F1 GS-D3
They look great for only $44.97 a tire.
Flame on /ubbthreads/images/graemlins/grin.gif
Last edited:
Jordangvr4
Well-known member
Looks good!
Romanova
Well-known member
Not feeling the wheels...
slugsgomoo
Well-known member
i've got the wanli knockoff of the AVS sports on my car, got all 4 tires for $20 /ubbthreads/images/graemlins/hsugh.gif
they're honestly not that bad, but i'm guessing that yours will be similarly not as good as the tire they're copying as mine have been.
But for the price, I'm not complaining. /ubbthreads/images/graemlins/wink.gif
they're honestly not that bad, but i'm guessing that yours will be similarly not as good as the tire they're copying as mine have been.
But for the price, I'm not complaining. /ubbthreads/images/graemlins/wink.gif
LOL ling long tires
