OK, first real post for the process.
I will leave out the stuff about jack stands and tire removal. If you can't manage that, don't even start /ubbthreads/images/graemlins/grin.gif.
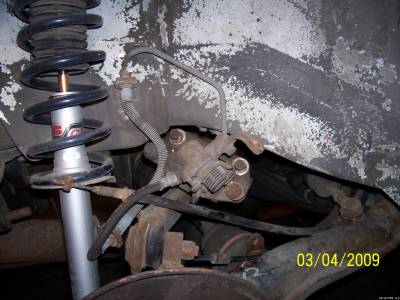
Starting on the rear:
The first thing to do is remove caliper. I just did a full rear brake job less than 300 miles ago so this came apart really easy. I pulled the e-brake cable completely out of the way. I did not mess with the caliper bolts, I just removed the 14mm bolts (2) so the whole bracket assembly fell away. I then just flipped it up and out of the way without breaking the lines loose. I am planning on reusing the stock calipers. The rotors came away with a few hits with a dead-blow hammer. Most of the time, rear rotors will not come off that easy, but they are brand new and were not rusted on.
Caliper stored away
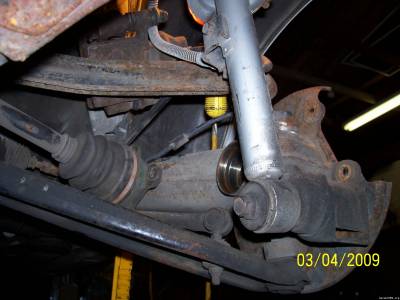
I then removed the axle bolts from the cups (again, this was easy because I did a 4-bolt swap early last year and I used all stainless hardware. I left the axles in the center diff and just wedged the axle forward and let them rest on the lower control arm. I then used an impact gun and removed the large locking nut that holds the cup on. I did not have to use a bar to keep the hub from spinning. I was able to just hold the hub still with my hand. (Gotta love powerful impact guns).
Axle stored away
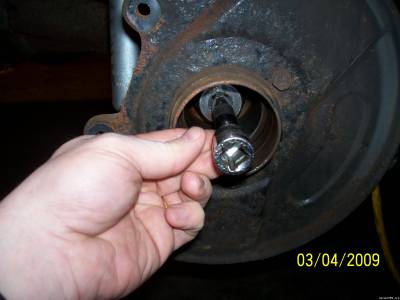
Once the cup is off, I used a dead-blow hammer and hit the threaded end of the hub to knock it out of the carrier. It came out WAY to easy. The rear bearings were shot. Looks like I should have done this a few years ago. If your hub has good bearings, it most likely will not come out very easily. If your going to reuse/sell the old 4 bolt hubs, protect the threaded end by spinning the nut back on the treads so that the nut is damaged and not the threads.
The only thing left to do is pop out the inner bearing and oil seal. I found that the socket I have for the front axle nuts is a perfect size so I put that into the hub with a 4" extension (1/2" drive) and used the dead-blow hammer and tapped it out. This did not come out to easily. I did have to use some force for this and once the bearing let go, the seal, bearing, and socket went flying. So be careful not to have fragile stuff around the car while working.
"special tool" /ubbthreads/images/graemlins/grin.gif

"special tool" used
I took a few minutes to clean the inner "hole" up and then put a very thin layer of axle grease over all the fresh metal to keep it from oxidizing because it will be a few days before I can slide the new hub in. If your going to re-assemble right away, grease is not needed.
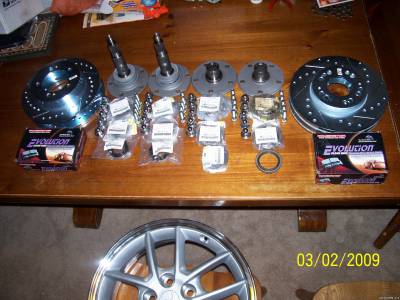
I then turned my attention to all those shinny new parts shown at the beginning of this thread.
Here is a parts blow-up courtesy of Mitsu manual
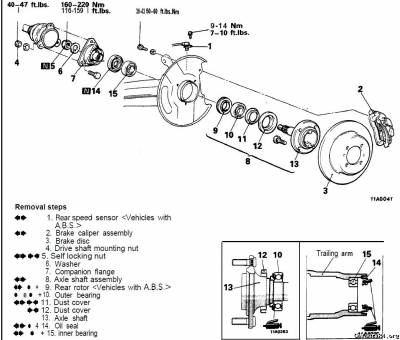
Slide the two dust caps onto the hub as shown in this pic. Just tap them gently down with a small dead-blow hammer.
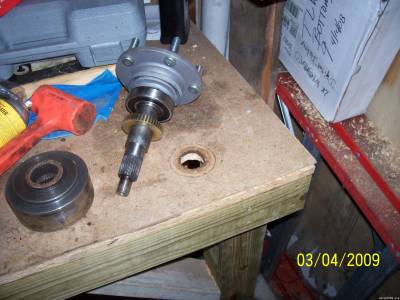
I own a GVR4, so I am "crafty". I find ways to make tools and such. This one is a very simple way of doing bearings without buying a press.
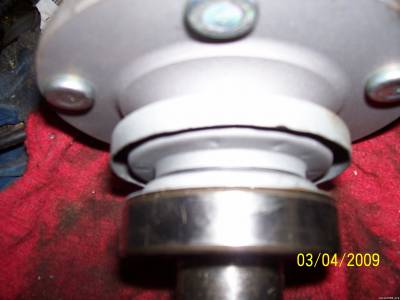
I have a very heavily built bench (that I built from leftover deck lumber). So I used a large spade-bit and drilled a hole through the far corner of the top, right next to a 4x4 leg. I then slide the outer bearing onto the shaft (after coating the rubber lip side of the bearing with axle grease) and then slid the whole thing into the hole in the bench. (I did not have the wheel studs in the hub yet.) I did that step last but took the pics after I was done.
I then used an old junk viscous clutch as a buffer from the 10lb hammer and drove the outer bearing down and then the ASB ring.(Again, ignore the wheel studs, they were not there when I was seating the bearings.)
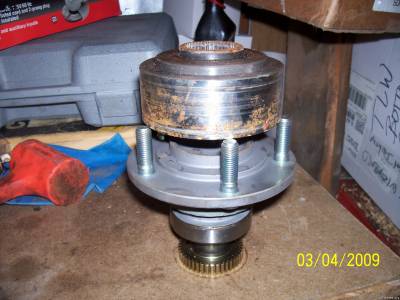
I then installed the wheel studs because it is very easy to do on the bench instead of trying to get them fully seated once on the car. I just used a 16oz hammer and my bench vice. tapped them flush to the back side of the hub.
I will not be installing the hubs into the arm until I can clean/respray the wheel well.
More to come this weekend.