The Top Mitsubishi Galant VR-4 Resource

Join the best E39A 1991-1992 Mitsubishi Galant VR-4 community and document your GVR4 journey.

  • Software Upgraded - Reset Your Password to Login
    In order to log in after the forum software change, you need to reset your password. If you don't have access to the email address you used to register your GVR4.org account, you won't be able to reset your password. In that case, follow the instructions here to regain access to the forum.

The never ending build of 1062.

CarRacer

Well-known member
Joined
Jun 28, 2007
Messages
4,371
Location
Shakopee, MN
Being able to tie the body to the cage like that would be pretty badass like you suggest.

What kind of tubing material are you using?
 

Galantvr41062

Well-known member
Joined
Aug 20, 2007
Messages
410
Location
plymouth, MN
I have thought of adding bracing like that. But normally it is road race, auto cross, Drift, and rally cars that have this done. For this build I am not sure its needed, but does look really nice. The material is 1 5/8" .083" wall DOM chrome moly tube.

~John
 

Galantvr41062

Well-known member
Joined
Aug 20, 2007
Messages
410
Location
plymouth, MN
A little up date for the never ending project.


The lower cross member pieces are almost done, I just need to finish weld the pipe onto the rear mount for both. We came up with a slick way to mount the lower cross members to the front frame rail/core support. It uses two flat brackets, one on the top and bottom that are welded to the front cross member. Then we fish mouthed the end of the lower cross member and drilled a hole threw the brackets and the pipe and used a threw bolt to hold it together. This method should be easy to remove and light weight, plus strong. We also have most of the gussets in place and the front end is 75% finish welded. I also finished up the driver upper motor mount, I will snap a few more pics of this when its off the block and a few pics of the install/removal.

~John
 

Galantvr41062

Well-known member
Joined
Aug 20, 2007
Messages
410
Location
plymouth, MN
I have the motor up at work and next week I will be building a bell housing and motor mounts to get this engine up on a Superflow engine dyno. I have been working on making my tube bender hydraulic so I could add another work bench to the garage to be more productive in fabrication. I will have time over the holidays to get a lot done, keep looking for updates.

~John
 
Last edited:

464/2K

Well-known member
Joined
Oct 21, 2003
Messages
4,671
Location
Denver,Co
Nice build!

How come you decided to put the wastegate off of one runner rather then the collector??
 

Galantvr41062

Well-known member
Joined
Aug 20, 2007
Messages
410
Location
plymouth, MN
If I was going to try and run low boost I would have put the WG off the collector. The main issue was room and this was quick and easy. If I can get the boost down to 30 or so I will be fine.

~John
 

Galantvr41062

Well-known member
Joined
Aug 20, 2007
Messages
410
Location
plymouth, MN
Now the hole cage, front end structure is finish welded and gussets added where needed. We made a new mount for the steering wheel. And finished up the strut mounts. I have made the mounts for the engine dyno but a project at work has taken up the engine dyno for a few weeks so I still need to make the bell housing and run coolant hoses. I also finished up the exhaust manifold and intake manifolds, now I just need to flatten the head flanges and they will be good to bolt on. I will snap a few picks of the progress in the next few days. On the intake manifold I welded some big bungs to the bottom portion of the runners close to the plenum, then drilled 2 injector holes next to each other at an angle. So the 8 1600's will be my secondary's and the AEM will think they are 3200cc injectors with an external injector driver box. Then I will use a set of smaller injectors at the stock location for idle and low throttle.

~John
 

/ubbthreads/images/graemlins/jawdrop.gif can't wait to see the pics of the manifolds.
 

Galantvr41062

Well-known member
Joined
Aug 20, 2007
Messages
410
Location
plymouth, MN
Picture_8036.jpg

Picture_8038.jpg


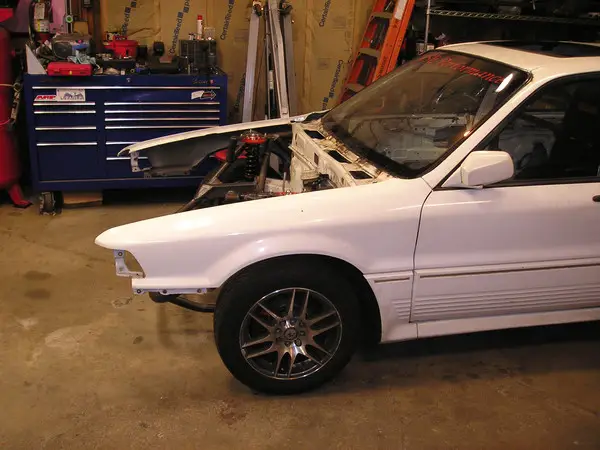
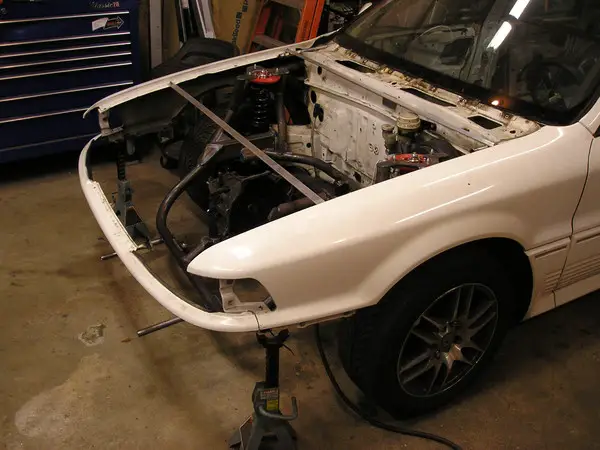
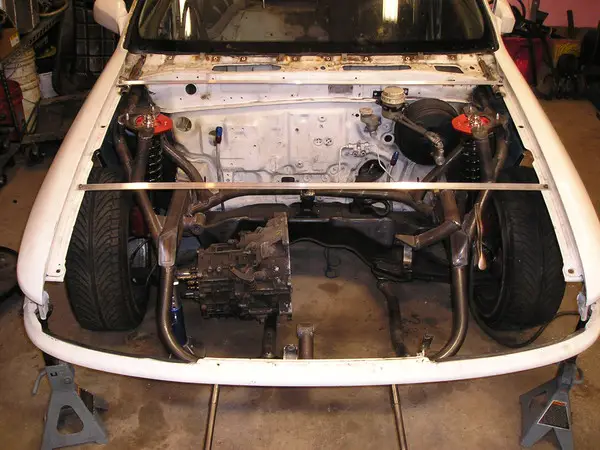
Back on all 4, with the fenders just bolted back on with some original factory mounts.


Picture_8040.jpg

Picture_8042.jpg

Picture_8041.jpg


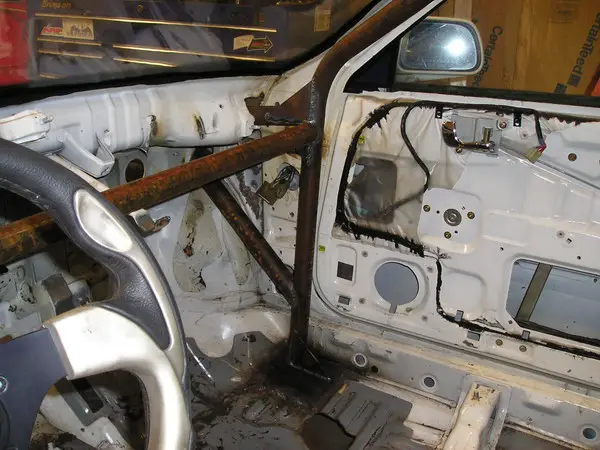
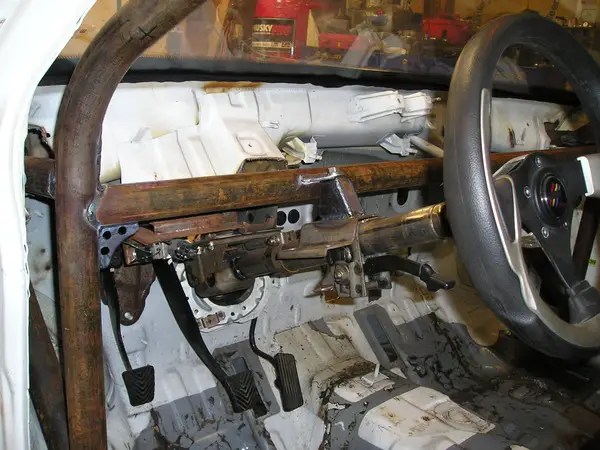
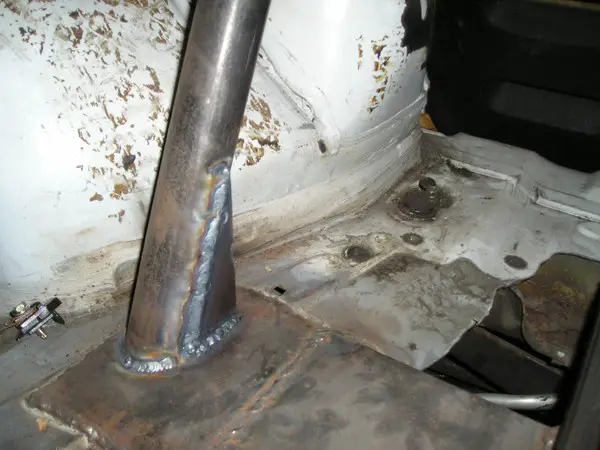
A lot of gussets and a new steering wheel mount.


Picture_8045.jpg


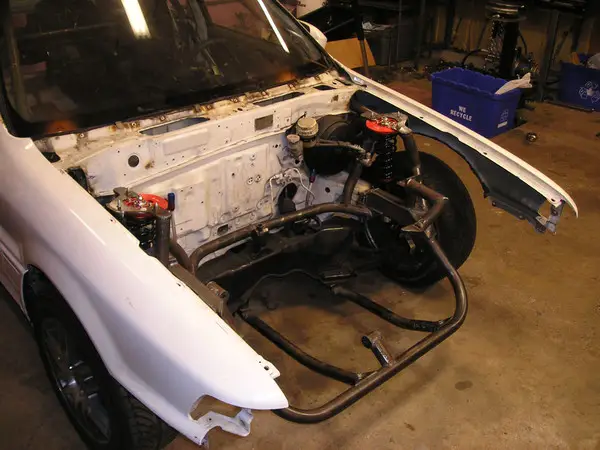
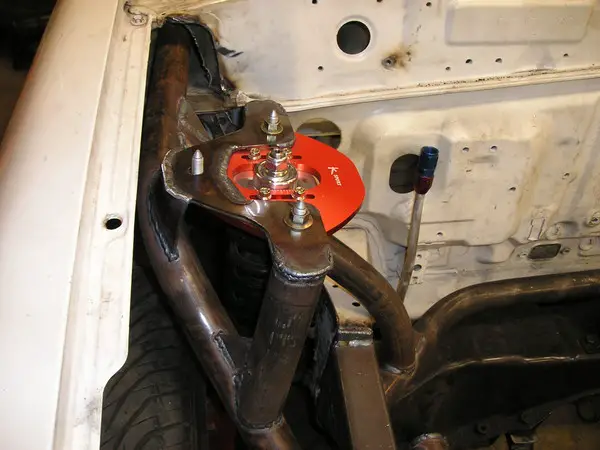
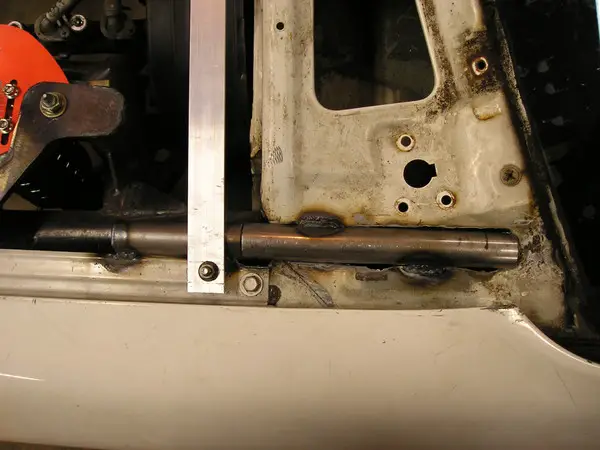
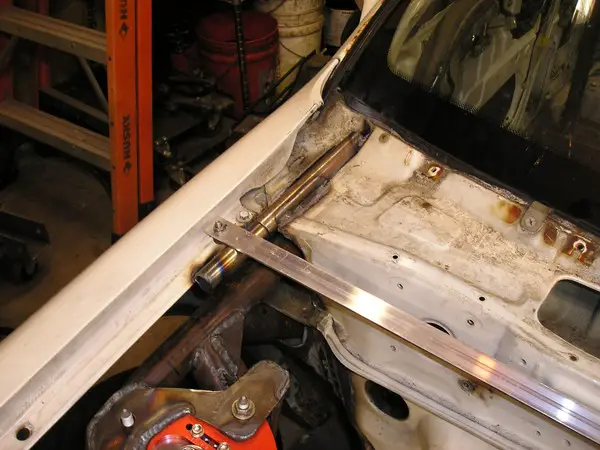
I added some material to the strut mounts.


Picture_8057.jpg

Picture_8053.jpg

Picture_8056.jpg

Picture_8061.jpg


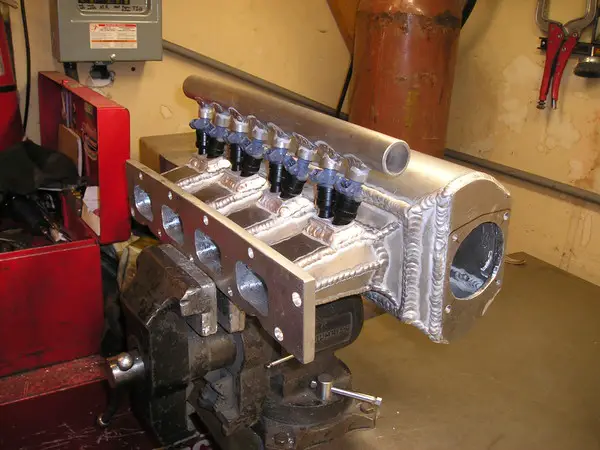
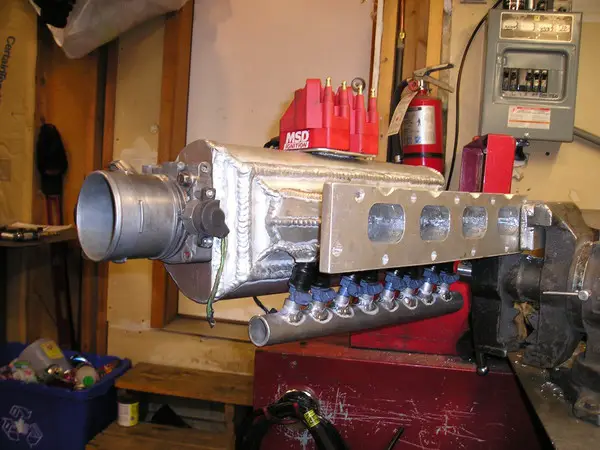
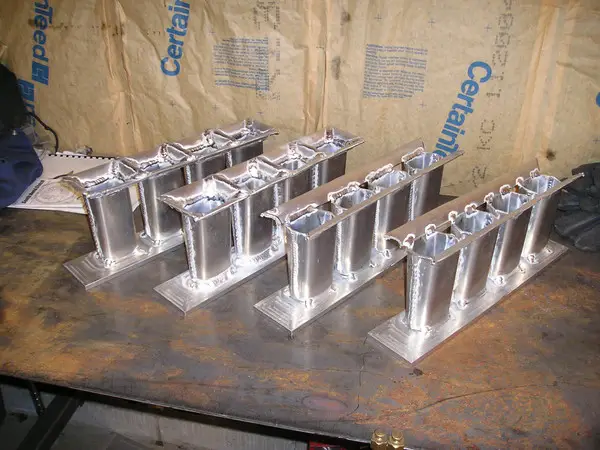
I will have 3 injectors per runner. That is a custom 1 1/4" aluminum fuel rail, I just need to weld on some -10 AN fittings. The secondary fuel injectors are as high up the runner as they can be. They are mounted on the bottom to provide a little cleaner look to the engine bay.


Picture_8049.jpg

Picture_8047.jpg

Picture_8046.jpg


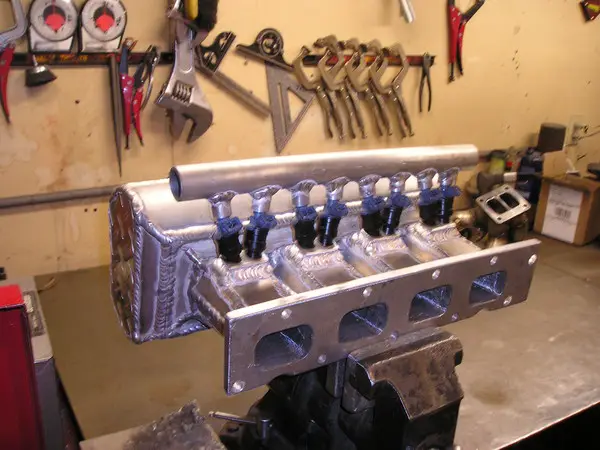
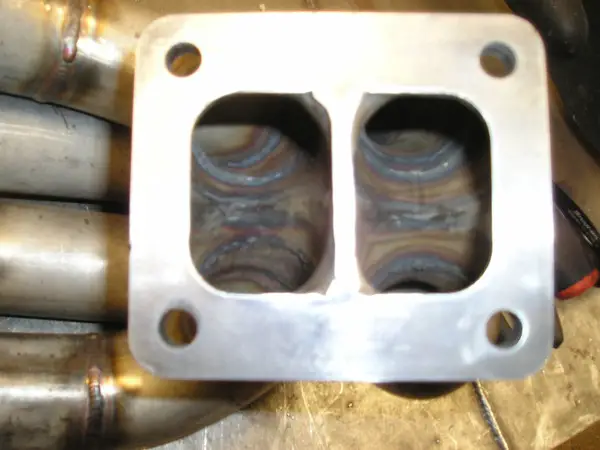
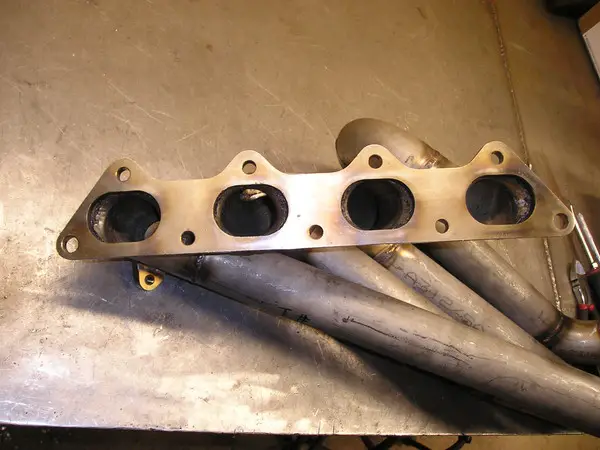
Here is the finished exhaust manifold.


Picture_8067.jpg

Picture_8068.jpg

Picture_8071.jpg


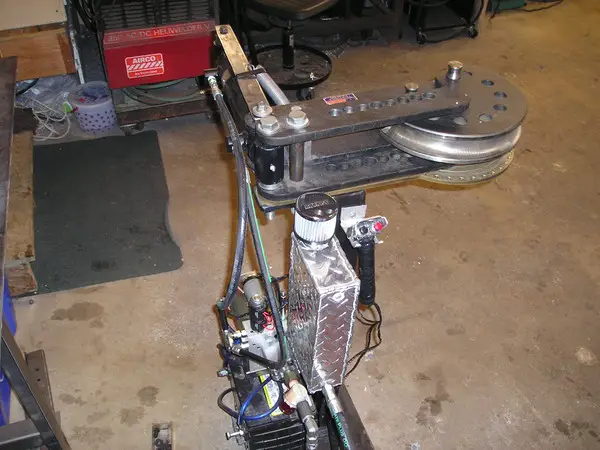
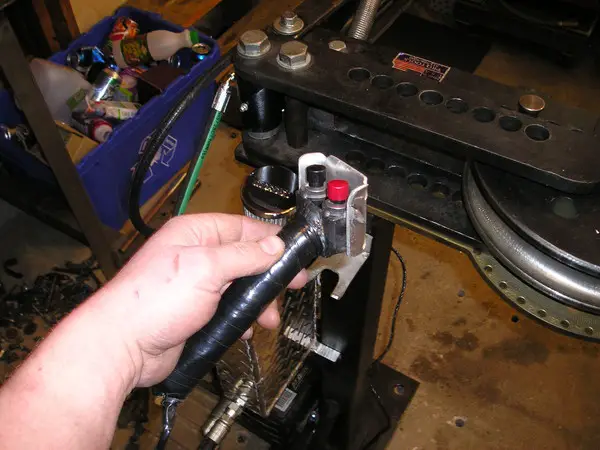
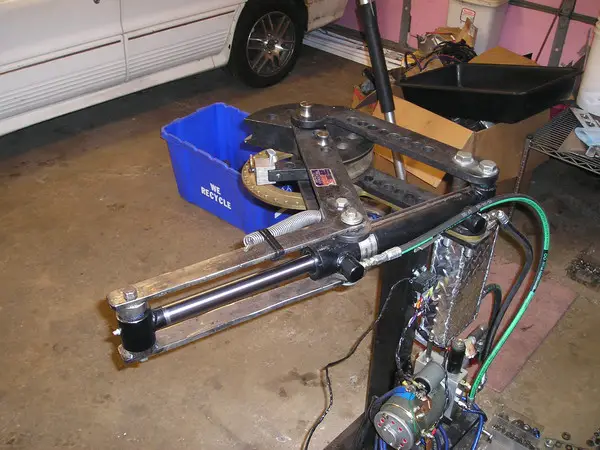
Here is the pipe bender converted to hydraulic power. It now uses a 2" cylinder with a 10" stroke to bend the pipe. This is a 12v DC hydraulic power supply so a car battery with a battery charger back up is used during bending. It will do a 30 deg bend in one stroke of the cylinder and the system is really quiet and works great. We decided to build another work bench along the west wall of the garage so we needed to eliminate the hand operated bending arm. I have a few more pics in my garage section of my photo gallery. link

~John
 

Polish

Well-known member
Joined
Jan 10, 2005
Messages
8,936
Location
NE, IN
Damn, epic build status for sure. /ubbthreads/images/graemlins/jawdrop.gif /ubbthreads/images/graemlins/worthy.gif

That is a crap load of work.
 
Last edited:

Galantvr41062

Well-known member
Joined
Aug 20, 2007
Messages
410
Location
plymouth, MN
Well I put the rolling chassis up on the scales last night. 1720lbs, so if I end up around 2500 race weight with driver I will be happy. I have put some time into fabricating some more SMIM's, here is a link to the thread where it was in a SMIM flow bench test. The web page no longer works but it did out flow the manifolds tested threw a stock throttle body flange. click
I will be working on the removable front end later this week.

~John
 

NateCrisman

Well-known member
Joined
Nov 22, 2008
Messages
2,054
Location
Blairstown, NJ
Wow, I have a feeling this car is going to bump everyone down a peg on the GVR4 drag times order.

That tube front end setup is NICE.
 

Galantvr41062

Well-known member
Joined
Aug 20, 2007
Messages
410
Location
plymouth, MN
Picture_9037.jpg

Picture_9036.jpg


I am working on the 4 slide tube mounts right now, the aluminum strips are just to hold the fenders at the right distance apart. The hood will either have 4 pins for easy removal or be mounted to the removable front end. I will drill holes threw the slide connection and add pins, the 2 up by the windshield will be removed from the top just behind the hood. And the lower 2 will be removed from under the front bumper cover.

Picture_9038.jpg

Picture_9039.jpg


The bigger long tube is welded to the chassis, then there is a tube that slides in, and is welded to the fender.

Picture_9040.jpg

Picture_9041.jpg


The removable front end will be mounted to a frame that will slide into the lower slide tube mounts.

Picture_9042.jpg

I am also spending some time here and there to produce a few of these R.E.E.F SMIM for the 1g DSM.

~John
 

You do excellant work. Very impressive. Truly epic status.
+1 to what Nate said about the drag times too. 2500lbs isn't sh*t for a caged awd vehicle. /ubbthreads/images/graemlins/jawdrop.gif
 

onesickcrx

Well-known member
Joined
Jun 3, 2007
Messages
1,076
Location
NY
I have never seen anyone run wastegates that high on a long tube twin scroll exhaust manifold.... I would think it would have a hard time controlling the boost on the cylinders that don't have gates on them /ubbthreads/images/graemlins/dunno.gif

I love the effort your putting into your build will be really cool car when finished.
 

Galantvr41062

Well-known member
Joined
Aug 20, 2007
Messages
410
Location
plymouth, MN
The WG's have to work harder to run low boost. If you are running at the limit of the turbo the WG's do not do much. If I can get the boost down to 30 some PSI I will be happy. The WG's are off the #1 and #2 runner because that is how the manifold is divided, so I am running a WG on each side of the scroll, they are just up by the head. Which I did this before I knew I was cutting the front of the car off, so space was a little bit of an issue down by the collector. So when this turbo craps the bed I will invest into the new billet series GTX 4202 with a Tial V-band exhaust housing and build a new header that points the turbo out the front with a half sized radiator. Thanks for looking, I will post more pics as the front end comes together.

~John
 
Support Vendors who Support the GVR-4 Community
Boosted Fabrication ECM Tuning ExtremePSI Fuel Injector Clinic Jacks Transmissions JNZ Tuning Kiggly Racing Morrison Fabrications RixRacing RockAuto RTM Racing STM Tuned
Top