The Top Mitsubishi Galant VR-4 Resource

Join the best E39A 1991-1992 Mitsubishi Galant VR-4 community and document your GVR4 journey.

  • Software Upgraded - Reset Your Password to Login
    In order to log in after the forum software change, you need to reset your password. If you don't have access to the email address you used to register your GVR4.org account, you won't be able to reset your password. In that case, follow the instructions here to regain access to the forum.

Tear down and rebuild of MadBeachDSM's #145/2000

TurboTrader

Well-known member
Joined
Jan 30, 2009
Messages
161
Location
Pemberton, NJ
Well, I've had serious cabin fever staying in and taking care of my dear wife after her surgery.

I had a couple free hours today and got out and got a little done to #145. Some of you may have read my other thread about the knock issue I was having.

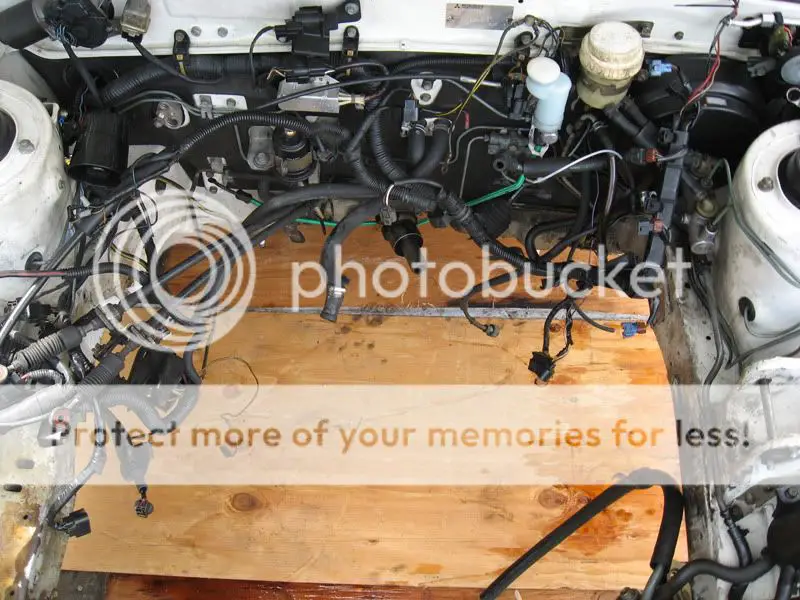
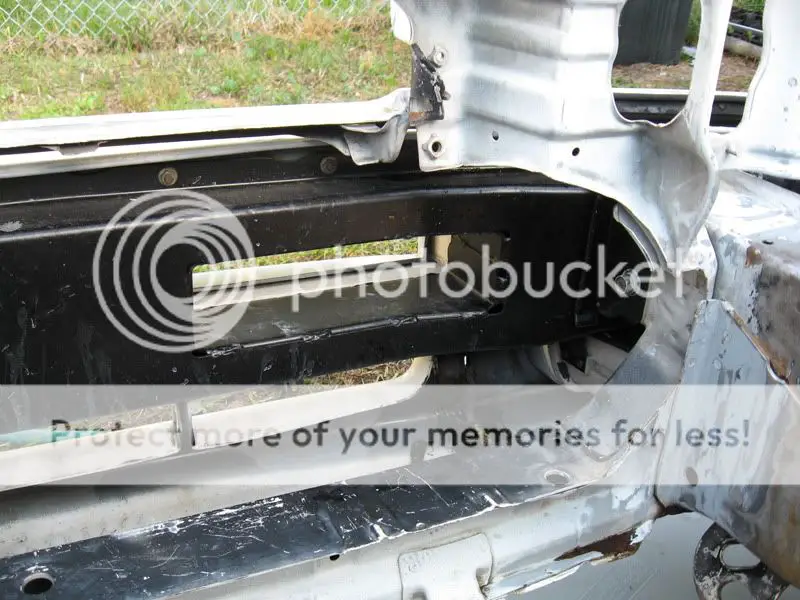
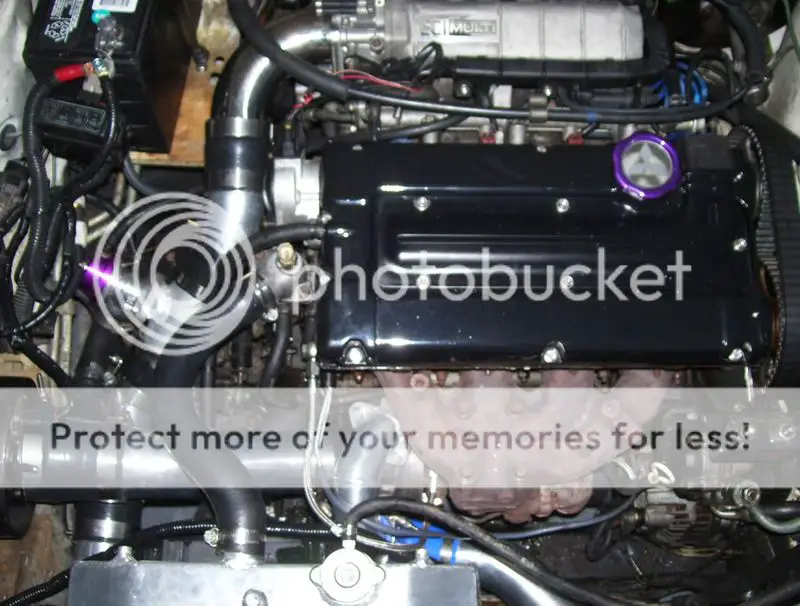
Started out pretty much here this afternoon:

100_5660.jpg


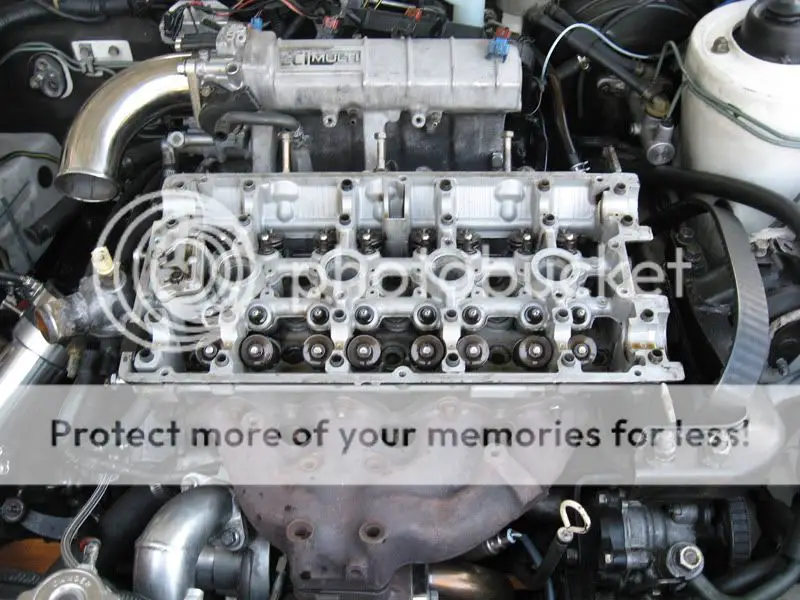
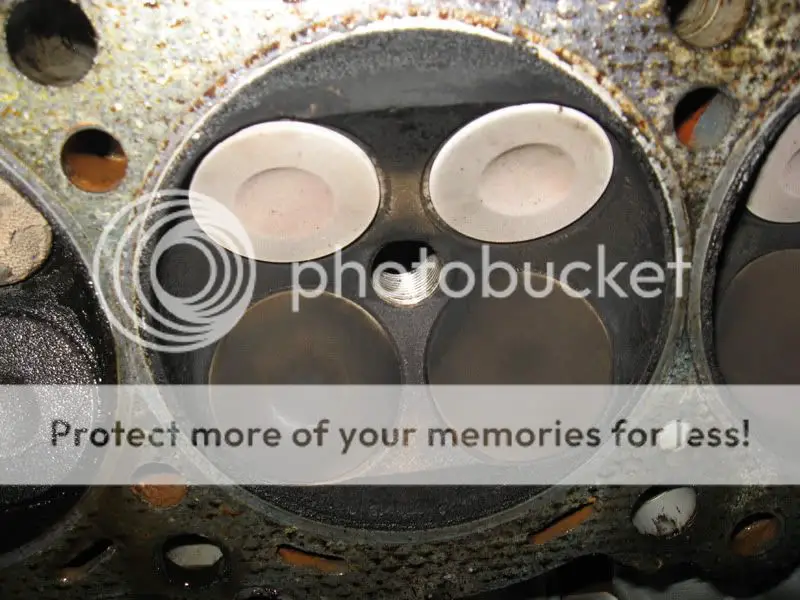
Half-hour later, head looks pretty clean to me:

IMG_0436.jpg


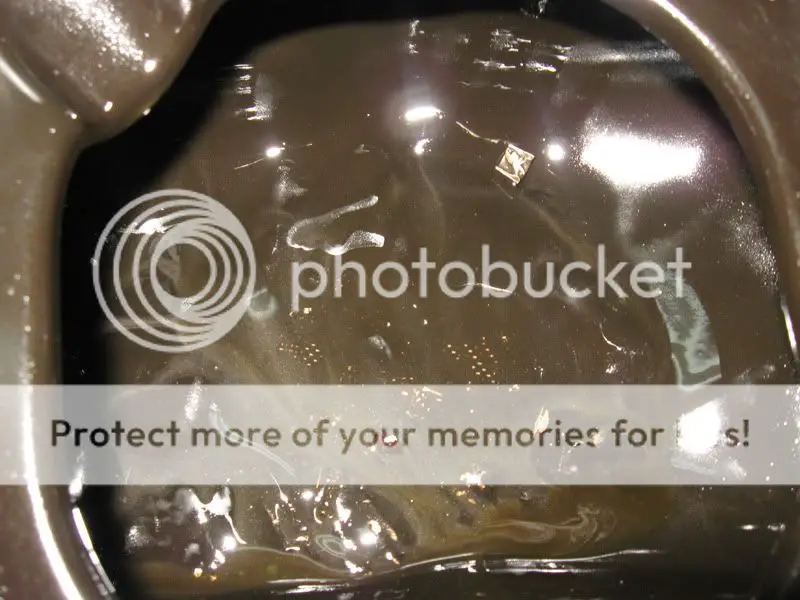
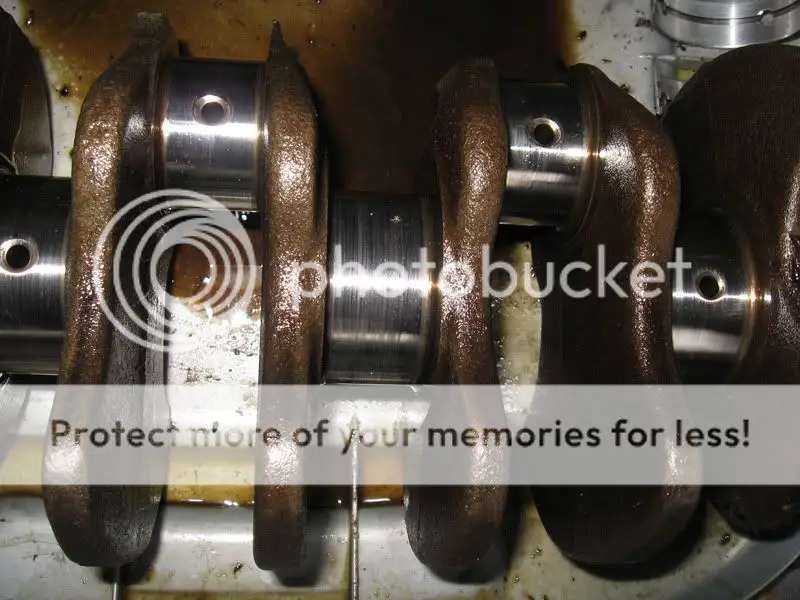
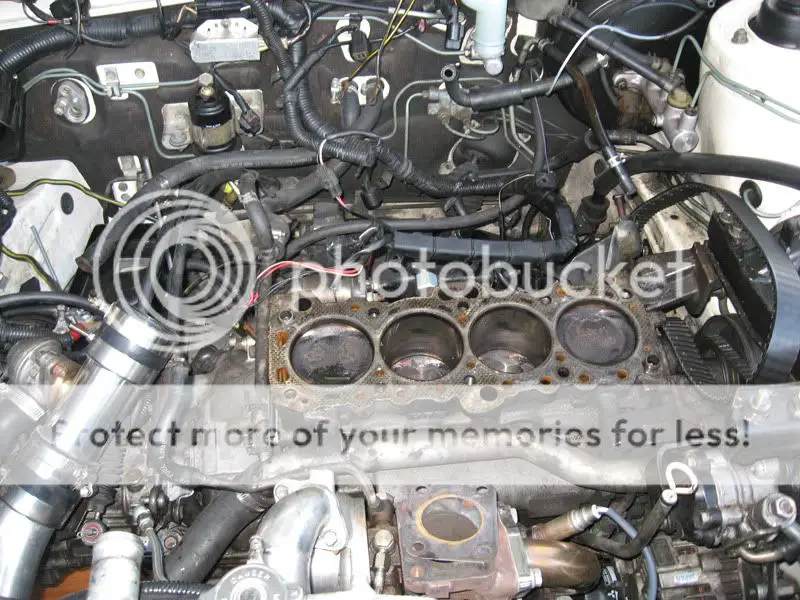
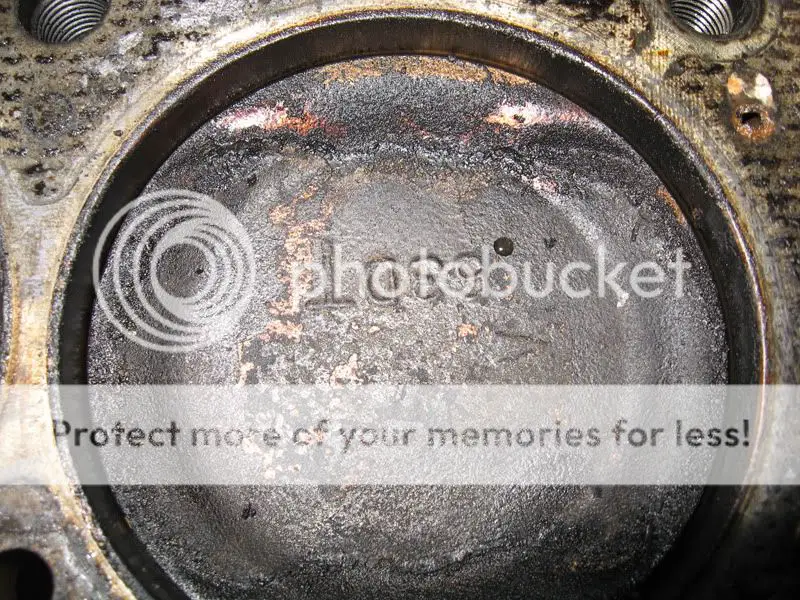
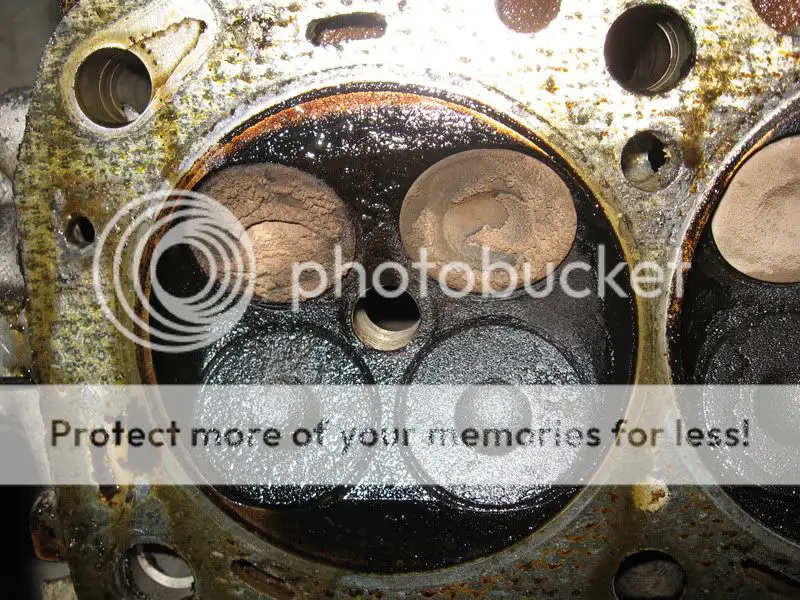
Another half-hour later. Looks pretty nasty to me. I highly doubt this was rebuilt just 12,000 miles ago as I was told. Oh well, I'll get over it and make it much better in the process.

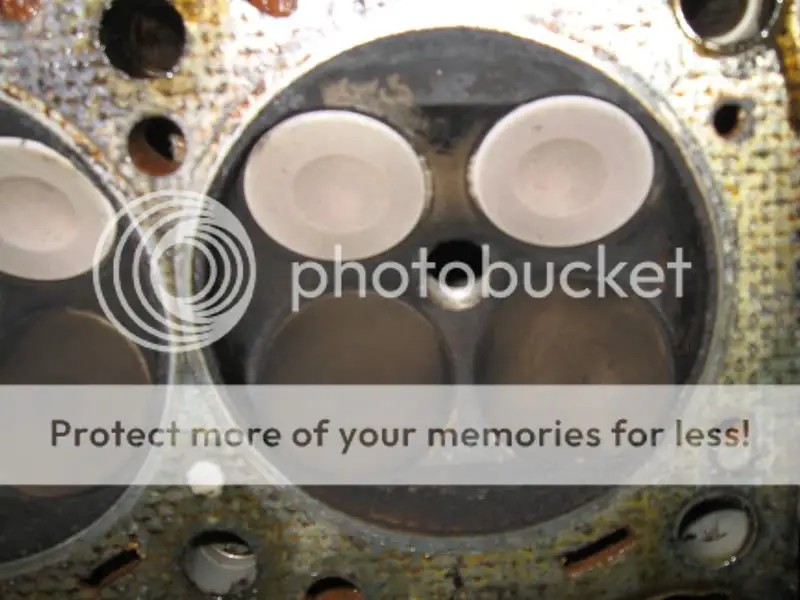
Knock sensor looks to be in the wrong hole as well. When I replaced it twice, I put it in the same hole the original was in, but always thought it felt a bit high up.

IMG_0438.jpg


IMG_0441.jpg


IMG_0444.jpg


IMG_0445.jpg


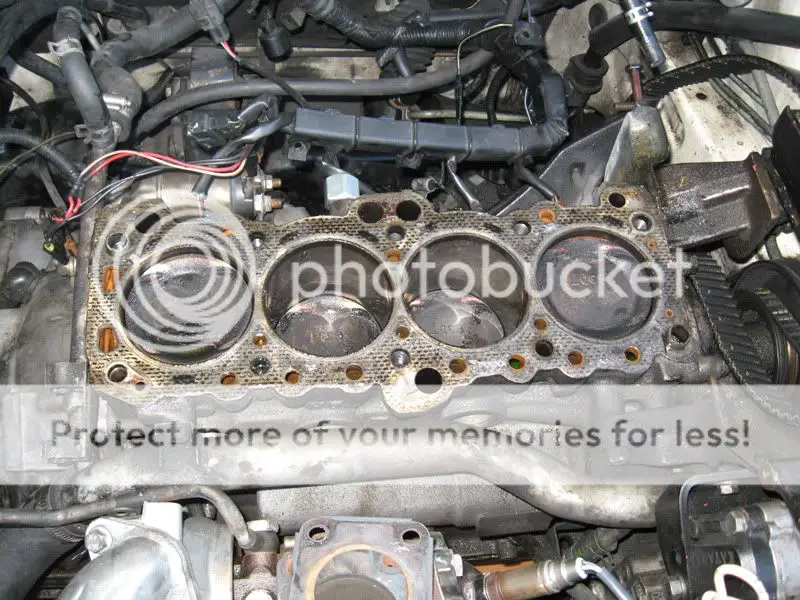
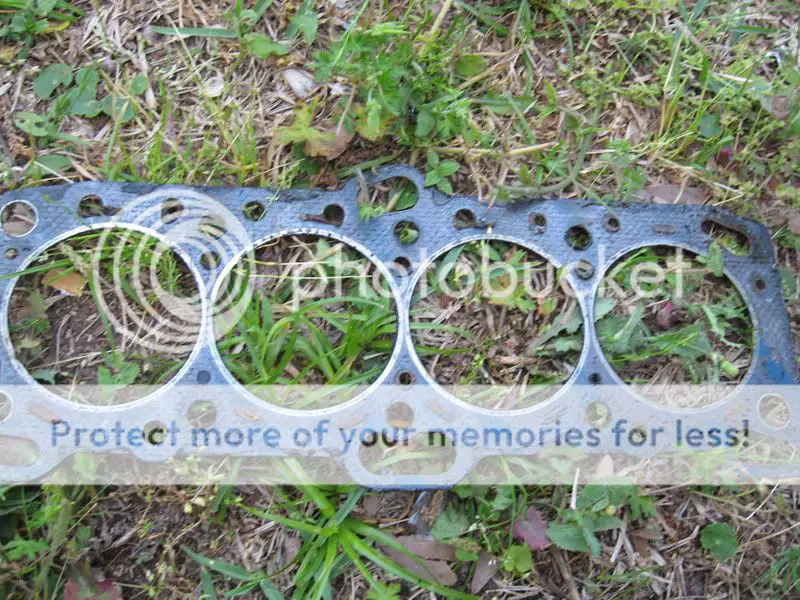
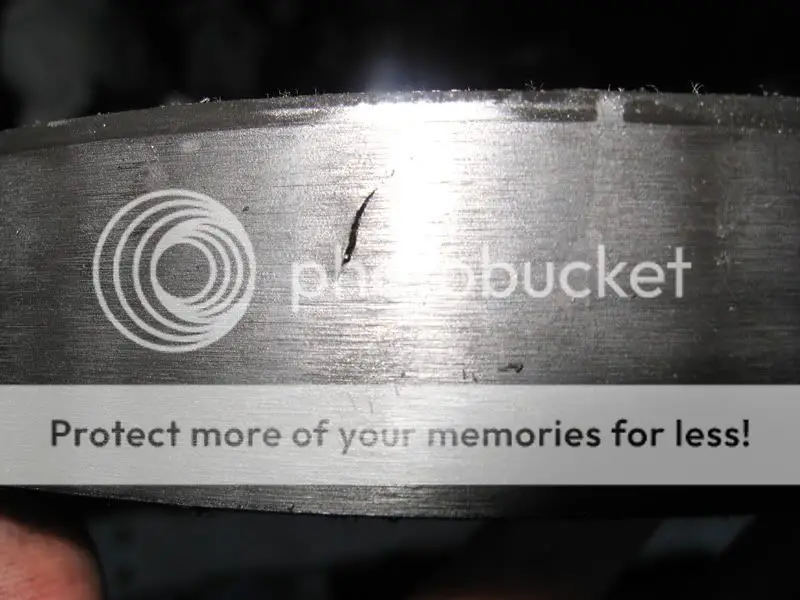
Fel-Pro Composite HG. Held up quite well, actually. Still looks to be fine, although it's going in the garbage.

When the head was rebuilt it appears the stock head bolts were reused! Big no-no!

IMG_0446.jpg


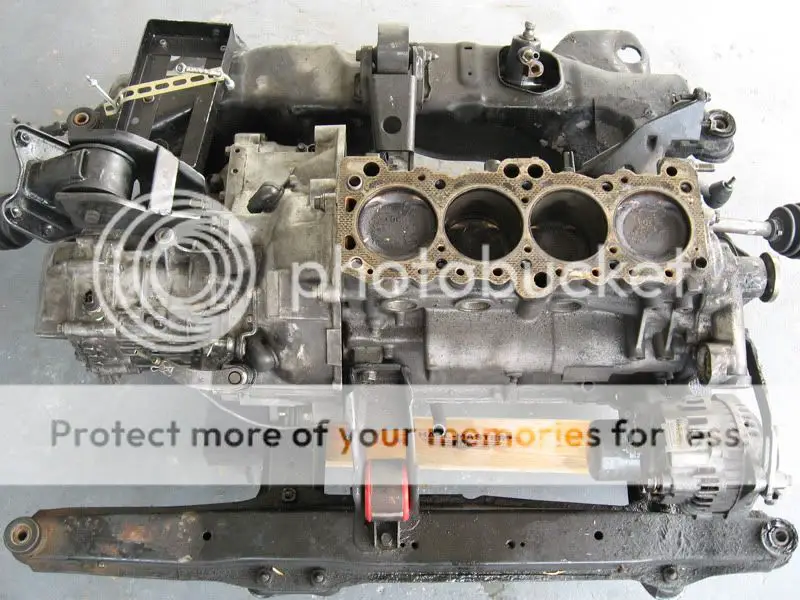
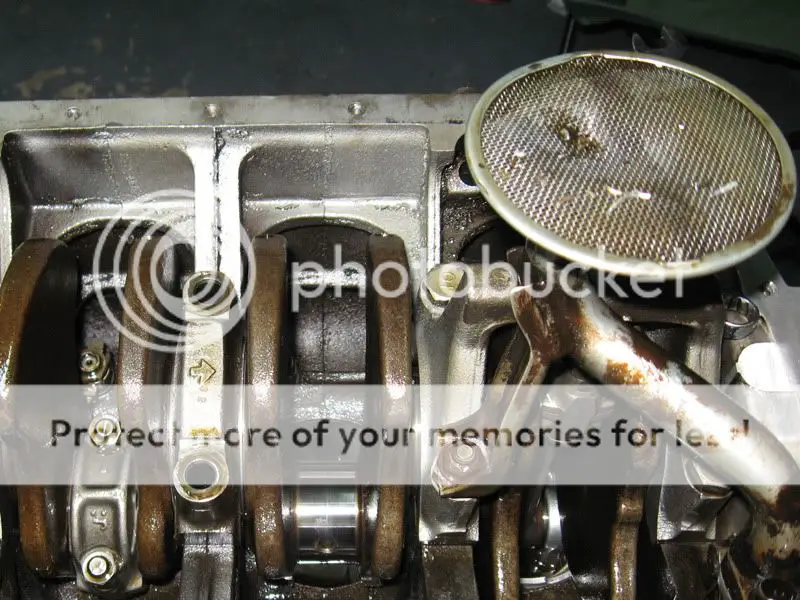
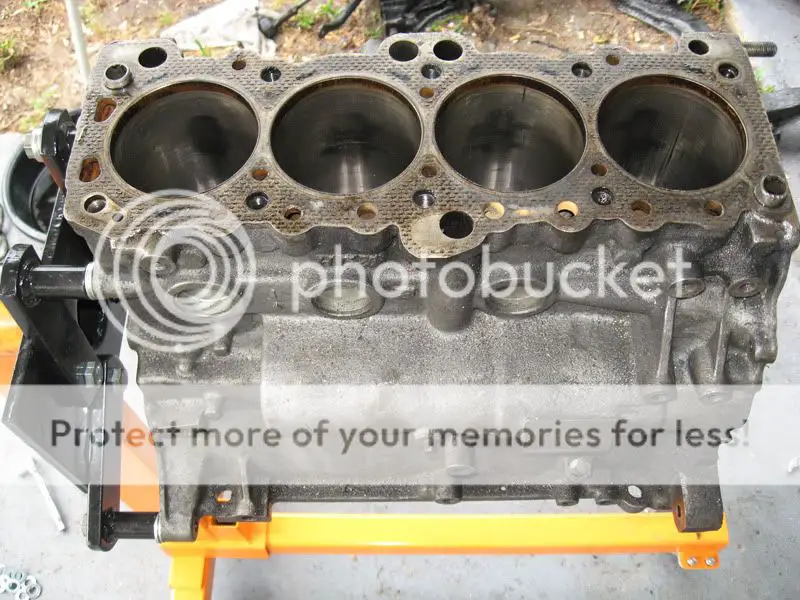
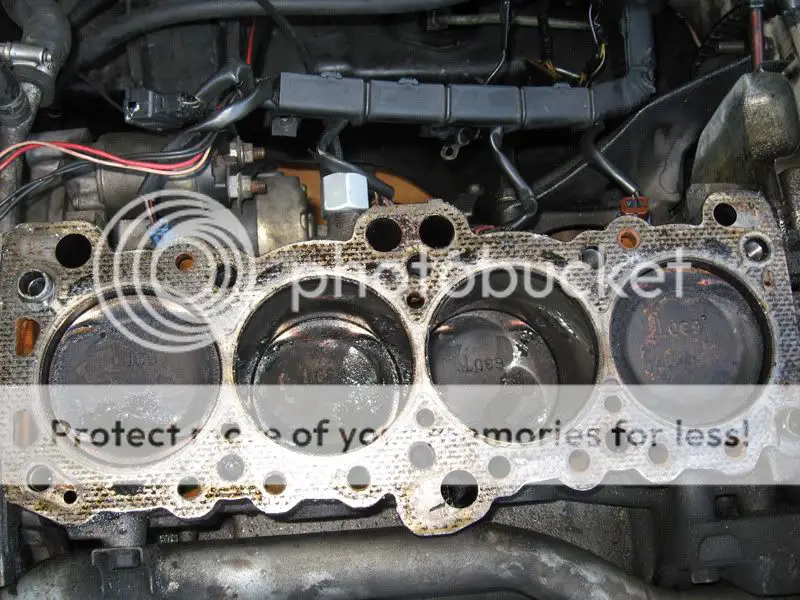
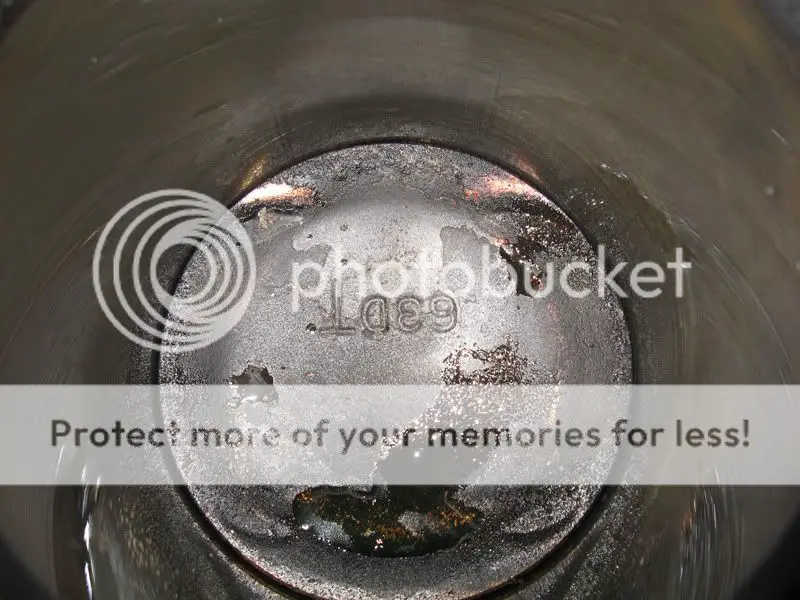
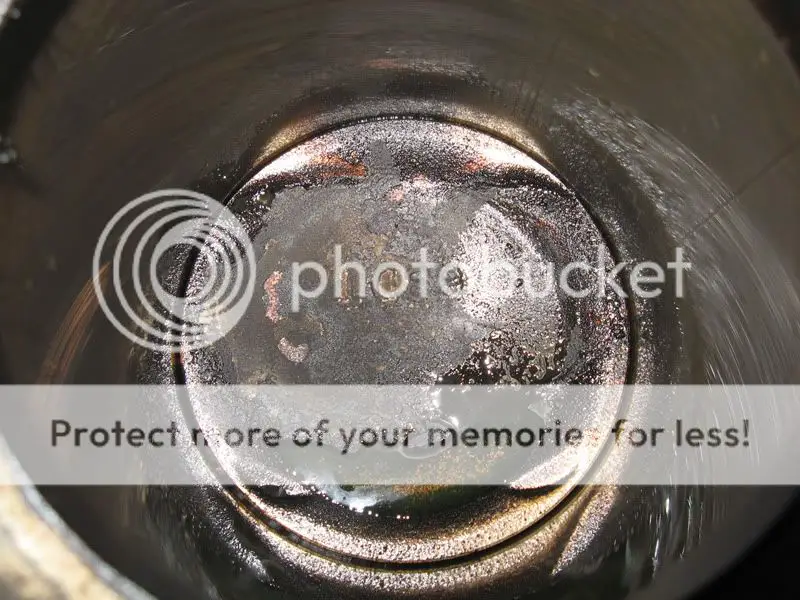
Some more nastiness. Cylinder walls don't look to terrible, at least no gouges my finger nails can catch, the pistons, however, look absolutely horrid:

IMG_0448.jpg


IMG_0449.jpg


IMG_0450.jpg


IMG_0451.jpg


Ouch! Non-OEM timing belt, supposedly 12,000 miles old:

IMG_0453.jpg


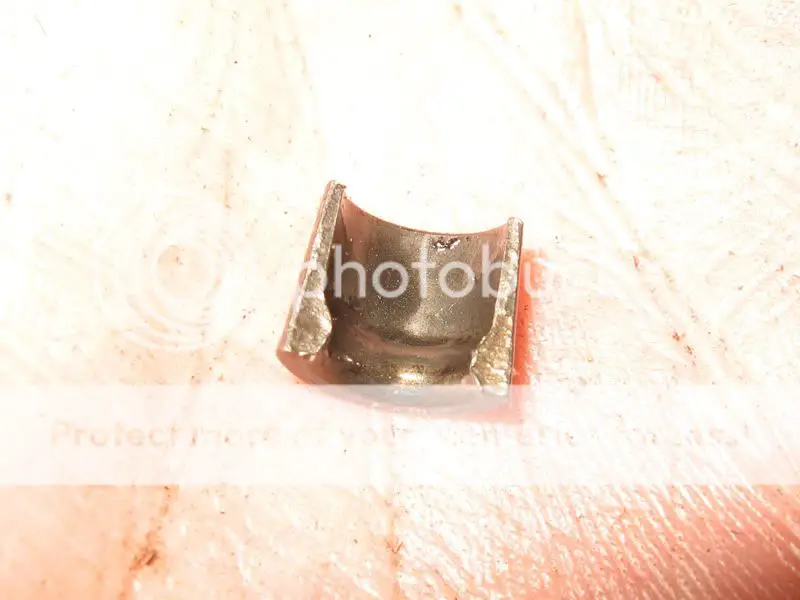
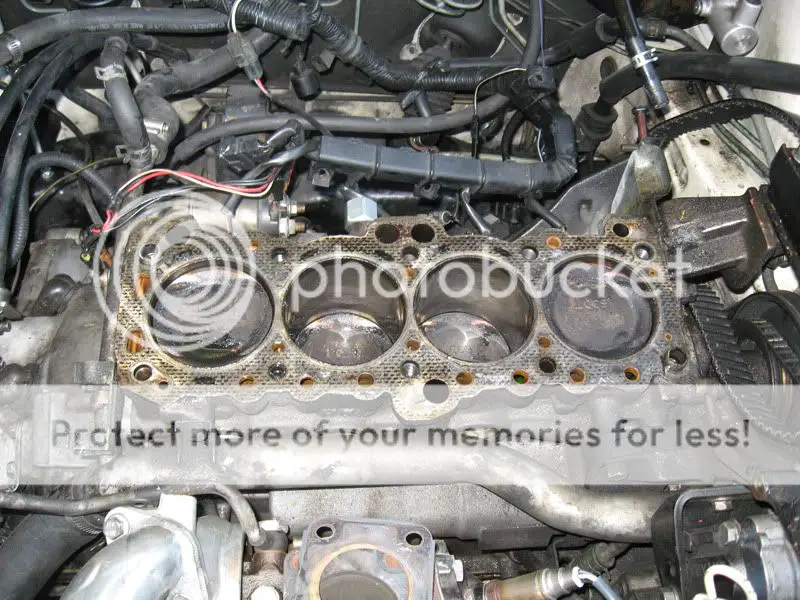
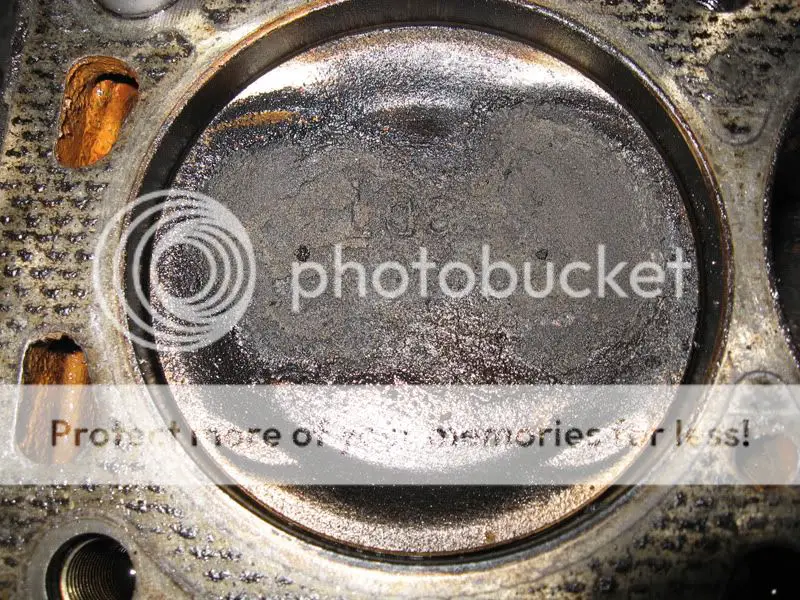
Looks like a bit of a lean condition to me. I'll go ahead and attend to the valves while I'm in there:

IMG_0454.jpg


IMG_0455.jpg


IMG_0456.jpg


IMG_0457.jpg


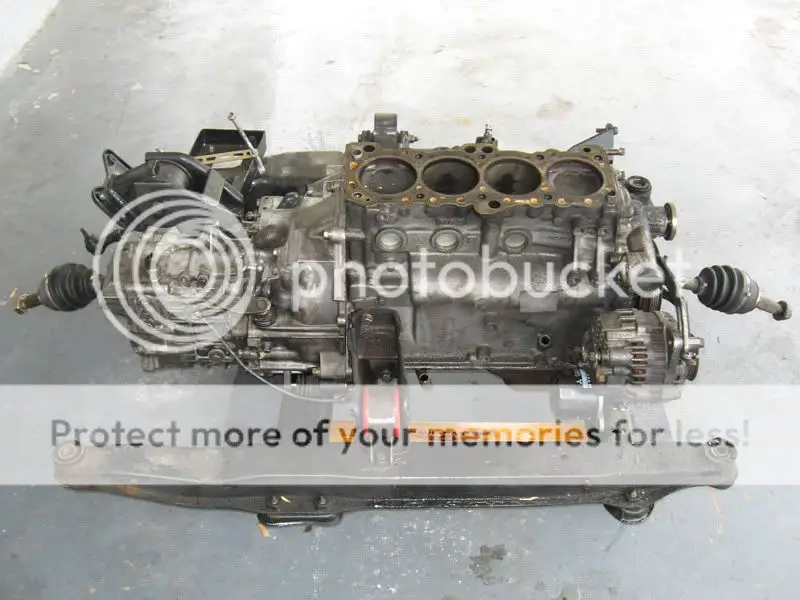
Head completely out. Doesn't look bad at all at the top, still undecided on what to do to it:

IMG_0458.jpg


That's all for now!

Time to pull the motor out soon and tear into it, but I really don't have the stuff to pull it just yet, so that's about the only set-back for now.

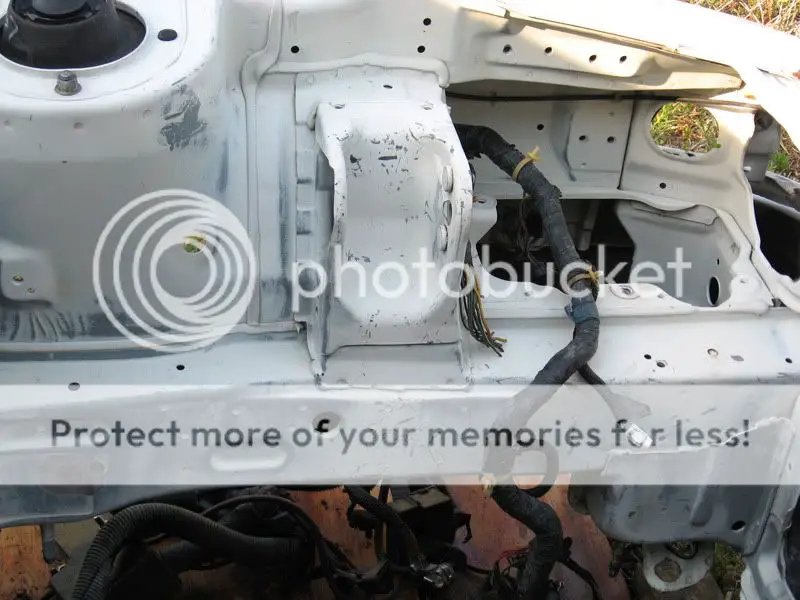
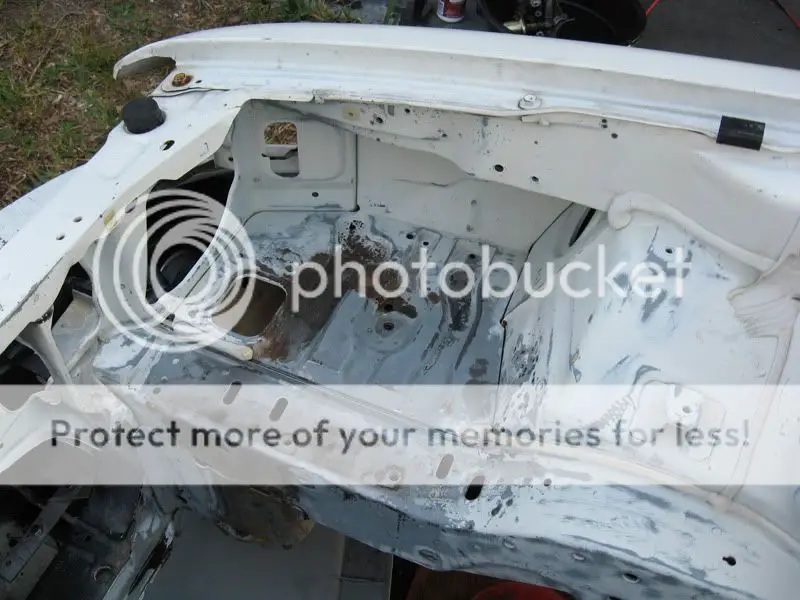
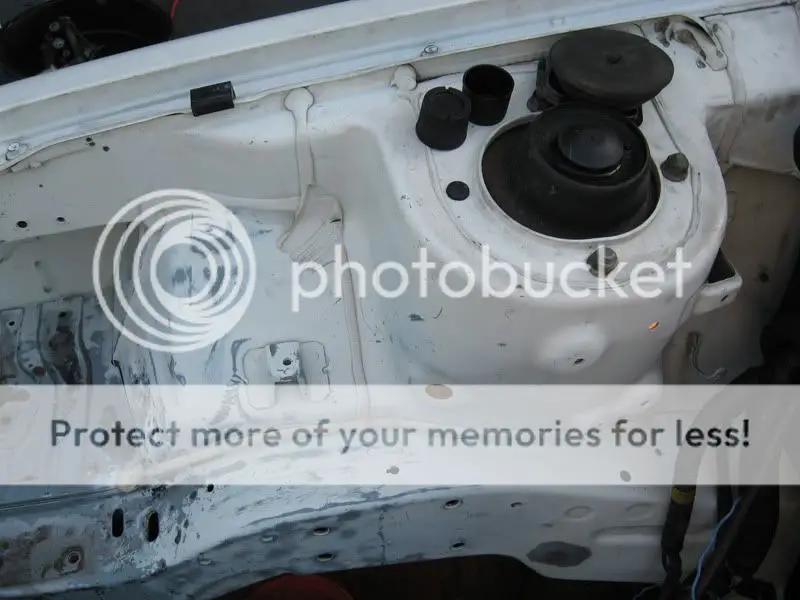
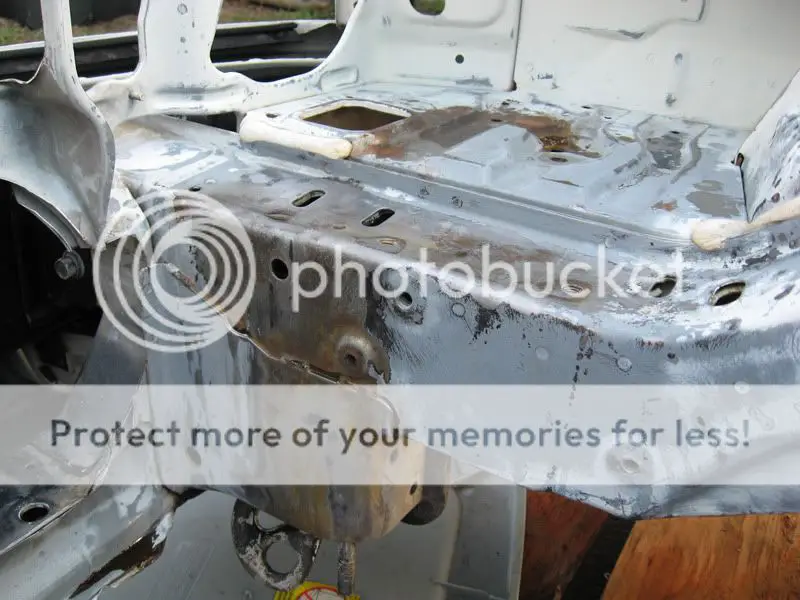
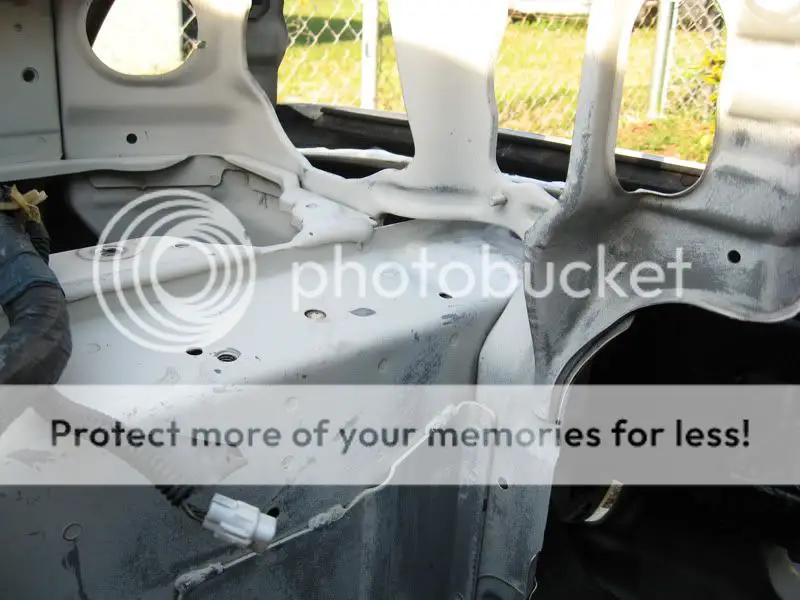
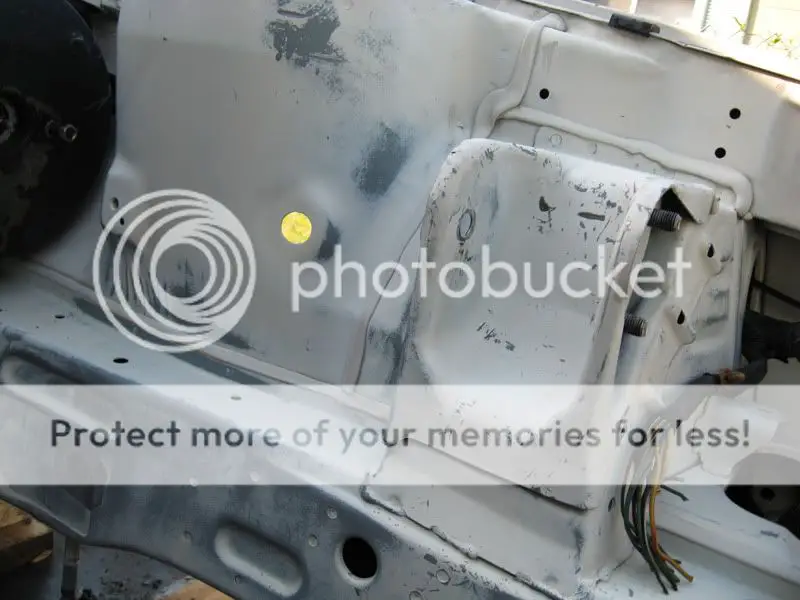
I've also decided I'll be stripping everything from the bay and laying a fresh coat of paint, even though White is so ridiculously hard to keep clean in there. Also a bit of rust where the battery used to be (must have exploded at one time), that I'm still unsure what to do about it.

More progress to come.
 

TurboTrader

Well-known member
Joined
Jan 30, 2009
Messages
161
Location
Pemberton, NJ
Not a whole lot of progress to report. I've been dragging a bit with work and other stuff to attend to.

I tore the head down this evening. Although I didn't originally expect to need to do so, the combustion area seemed quite nasty after pulling the head. Rebuilt or not recently, I feel it can use some attention, as it seems to have been a pretty crappy rebuild. Better safe than sorry.

Checked the flatness of the head, and it seems to be good. I can tell it has been resurfaced recently, so I'm good there.

The intake valves didn't look bad at all, actually pretty good, and I would almost reuse them, but I won't.

IMG_0461.jpg


The exhaust valves, on the other hand, seem to be cheap, crappy replacements.

IMG_0462.jpg


IMG_0459.jpg


All 16 appear to be burned to some extent. They could be re-used, but I opt not to do so. I'm unsure of the brand used, but poor quality, nonetheless. One of the valves seemed to want to stick in place when I was trying to pull it out straight. Not bent, just not smooth in the guide.

With that said, it appears the head will get more work than planned originally. The plans are Stainless Valves (Standard size polished), new Brass valve guides and OEM stem seals, BC Springs and retainers and revised lifters. Cams will remain stock.

The goal is still around the 350HP mark, and I feel a moderately stock rebuild on the head will be on par.

I also put together a somewhat "beta" list on the bottom end re-build. The plans are a moderately stock re-build using OEM parts, ACL bearings and Evo 9 pistons on 1g rods.

This setup I feel will make for some nice off-boost torque and shouldn't cause tuning nightmares with just a 16g.

Parts list so far:

OEM Composite HG
BC Valve springs/retainers (considered Evo 8, opinions?)
Stainless Valves, Brass guides, revised lifters
OEM valve stem seals
Fidanza replacement surface plate
Competition Clutch stage 2 Clutch/Flywheel/PP
OEM slave assembly
OEM master cylinder
Braided stainless master to slave

The fuel setup will be 660cc injectors, Evo/3g style 482 MAF, Walbro 190LPH with the Small 16g at around 16psi.

Sound like a good plan?
 

Good luck with the build, and nice detailed pic's ftw. Looks like straight water was run in the cooling system?
 

TurboTrader

Well-known member
Joined
Jan 30, 2009
Messages
161
Location
Pemberton, NJ
I'm not sure if you're referring to the water on the top of the pistons, or the rust in the water passages.

I've always personally run distilled water and Water Wetter in the summer and 50/50 mix of antifreeze and distilled water in the mild Florida winter. What was drained out was Water Wetter and water.

Keep in mind, as near as I can tell, this is the original 150,000 mile block, so some rust/corrosion build-up is to be expected, even though I was told at the time of sale the top and bottom end was rebuilt. Still stock size 85mm pistons as well, so I can make an educated guess that the block was not rebuilt.


Either way, the block will be hot tanked anyway.

I also got some cleaning on the head done as best I could. It will be cleaned further by the head builder.

IMG_0468.jpg


IMG_0467.jpg


As a slight change of plans, the head will be getting a 5-angle valve job, 1mm OS valves and possibly intake/exhaust gasket match matched. I also decided to go with Evo valve springs possibly if I can get my hands on some, otherwise, going with standard BC single springs.
 

TurboTrader

Well-known member
Joined
Jan 30, 2009
Messages
161
Location
Pemberton, NJ
Got the block pulled finally.

Lots of cleaning up to do. More fun ahead. /ubbthreads/images/graemlins/smile.gif

IMG_0486.jpg


IMG_0488.jpg


IMG_0489.jpg


From the looks of things, I'm still extremely curious whether this is the original bottom end or not, but I'm leaning towards that being the case. Just recently broke 152,000 miles if it is. Not too shabby. The cylinder walls are still the stock bore, but some marks I'm sure .020 over will take care of nicely. Now it's time to dig in and see what I find inside.
 

I think she has seen a hot tank before, I'm pretty sure all Mitsu 4g63 blocks are painted from the factory
 

TurboTrader

Well-known member
Joined
Jan 30, 2009
Messages
161
Location
Pemberton, NJ
Entirely possible. Any characteristics I should look for when I tear it down to know for sure? Not that it matters too much, I'm just overly curious.

Not to mention, I was promised when I purchased the car just over a year ago and 10,000 miles, that it was rebuilt top to bottom within a few hundred miles of the purchase.
 

G

Staff member
Joined
Feb 24, 2004
Messages
8,896
Location
zompton
Does the vin # match the chassis? Most machine shops will stamp their own coding on or around the outer edges of the oil pan gasket area of the block.
 

I would send out your injectors and have them balanced and cleaned. From the looks of each cylinder, something is going on and one cylinder looks lean and the next is all carboned up.

Just my 2 cents. From the top side of that head, it was cleaned not too long ago.
 

TurboTrader

Well-known member
Joined
Jan 30, 2009
Messages
161
Location
Pemberton, NJ
I was thinking fuel problems as well. No worries, as I am planning on running a fresh set of 660cc injectors after the rebuild, and some form of tuning (ECMLink, most likely).

I'll double check the block tomorrow for the numbers. I've been slacking and haven't checked that as of yet. I'm hoping the block is number matching with the car.
 

TurboTrader

Well-known member
Joined
Jan 30, 2009
Messages
161
Location
Pemberton, NJ
Not too much to share today, as my job demanded me much more than the Galant did, but I still managed to get out and make some progress. Down and dirty with some cleaning.

As seen in the previous pictures, there is a ton of caked on grease/oil/dirt in the entire bay that needs to be removed well before paint. I really need a pressure washer, but I did my best for the time being without, and made some pretty good progress. I attended to the rust on the passenger side a bit, and found it's not bad at all, on the frame rail anyway, which was my concern. I'll get on it more a bit later.

For now, some degreasing.

IMG_0509.jpg


IMG_0510.jpg


IMG_0511.jpg


IMG_0512.jpg


IMG_0513.jpg


IMG_0514.jpg


IMG_0515.jpg


IMG_0516.jpg


Scotch brite pads and superclean work wonders, would be even better with a pressure washer, but that will wait until I can get the last bit of the harness pulled. I've been procrasting pulling the rest of it, as the dash will need to come out to disconnect it. I still need to pull the steering column and brake booster as well after that is done, as the firewall being flat and clear of stuff will make life easier through the process.

I'm debating on the seam sealer at the moment. This crap at the seams.

IMG_0517.jpg


My thoughts are to remove the sealer and have the seams welded to stiffen the frame, and ground them smooth. I'm not sure I am up for the task, that's why it's up in the air. Also taking into account the safety factor and researching a bit.

Anyway, that's all for now.
 

Quoting MadBeachDSM:
Entirely possible. Any characteristics I should look for when I tear it down to know for sure? Not that it matters too much, I'm just overly curious.

Not to mention, I was promised when I purchased the car just over a year ago and 10,000 miles, that it was rebuilt top to bottom within a few hundred miles of the purchase.


My guess is he was right, Pretty sure that block got a hot tank, if its still stock bore they must have just did and overhaul, I'm sure your finsihed product will be a beauty.
 

TurboTrader

Well-known member
Joined
Jan 30, 2009
Messages
161
Location
Pemberton, NJ
Yep, interesting enough, I later found out last night it's not even the original block. Decoding the vin on the block it is a 6-bolt from a '90 Eclipse GST FWD, which really sucks a bit since I assumed it was completely numbers matching. Oh well, at least now I don't feel so bad about not having left it stock from the start.

Lots of work ahead of me, but I can't wait to get everything immaculate, and she should look and drive like brand new when I am done.

Once I get the whole bay done, and engine back in she will likely get a full paint job on the outside. I still need to track down a new hood as well, since I think mine is beyond repair. But that's a ways out.
 

TurboTrader

Well-known member
Joined
Jan 30, 2009
Messages
161
Location
Pemberton, NJ
I got some tear down done on the motor today, and just as I had suspected. One rod bearing looks terrible. The crank bearings don't look too hot either. Definitely time for a rebuild.

Metal particles in the oil pan. Also another interesting find in the pan.

IMG_0522.jpg


IMG_0534.jpg


This! :eek6:

IMG_0536.jpg


Don't ask me how a valve lock could find it's way into the oil pan. When I tore the head down I counted exactly 32 locks, so there is no way it's from this head. Pretty big oversight on somebody's part.

Also found metal slivers stuck in the oil pick-up screen. Looks like pieces of bearing to me.

IMG_0526.jpg


Probably from this one.

IMG_0533.jpg


I'm still unsure just by looking at the crank if it will be usable or not, but it really doesn't look too bad considering. I'd rather not have it turned, so I'll see what the machine shop says.

IMG_0537.jpg


I also made another interesting discovery by decoding the VIN on the block. The block is from a '90 GST, so that would explain why it is the stock bore, likely swapped from a totaled vehicle I would assume.

That's about all for now. I also managed to break my 30" breaker bar the first time I've ever used it. Cheap tools suck! /ubbthreads/images/graemlins/banghead.gif
 

Crank looks pretty good maybe just needs a polish, I'm Willing to bet those are poor quality bearings just like the valves, thank god that
valve lock made it safly to to bottom of the oil pan, Probly had a broken spring at one point or somthing of the sort, I cant imagine anyone
who knows how to build a motor would be like " oh lost one, ill just grab another" lol.

Might wanna do a tripple check on the oil pump gear clearences, And cleck to see if its really OEM oil pump.

There has been a coupple pan's I've droped down to find Flattened Balence Shaft bearings in the bottom, with the shaft eating away at the block, consider yourself lucky /ubbthreads/images/graemlins/ooo.gif
 
Last edited by a moderator:

TurboTrader

Well-known member
Joined
Jan 30, 2009
Messages
161
Location
Pemberton, NJ
That's what I was thinking. The crank doesn't look bad at all, and I'm pretty pleased considering the bearings seem to be the extent of the damage.

I consider myself lucky a few times with this one, most definitely. Most notably the crack in the timing belt that could have easily left us stranded, plus the bearings that were caught just in time to hopefully still have a completely usable crank. I was expecting much worse, so I don't feel to bad at this point.

It still surprises me finding the lock, especially if anyone halfway competent did the prior work. Even when I was tearing down the head, I made sure I counted the locks I took out to make sure I had 32 still, even with the plans to have the head thoroughly cleaned (at which point it would get washed out anyway), I guess it pays to do your own work, that's where care and attention come to play. I entirely agree though, and makes sense, I'm betting one popped out and they didn't bother to look for it, just slapped on a new head.

I'm leaning towards the front case/oil pump being a topline unit judging by the numbers stamped on it. There was also a BSE kit put on it at one point, but not the typical stub shaft I've seen in a kit. It looks more like a stock shaft that was cut down. There was also a Fel-pro paper gasket on the front case, so I'm willing to bet it was replaced with a topline. Either way, it will be replaced with OEM.

So far, a running list of what I will be putting in the bottom end:

Evo 9 Piston and ring set, 8.8:1 compression
1g stock rods
ACL Tri-metal rod/main bearing set
OEM Front cover gear set, gears, pump seal, crank seal, bs seal, gasket
OEM Rear main gasket
OEM Rear main seal
OEM OFH gasket
OEM Front case plug
OEM Water pump, gasket and o-ring set (although others would suffice)
OEM Crank pulley
OEM Crank pulley bolt set
BWD Knock sensor
OEM Oil pickup/strainer
Oil pan
Oil pan drain bolt
OEM dipstick
OEM dipstick tube o-ring
OEM dipstick tube
OEM timing belt
OEM tensioner pulley/idler pulley
OEM Flywheel bolts
OEM timing belt cover (lower)

There are parts I could skimp on, reuse, or find a cheaper alternative, but I firmly believe in "do it once, do it right", and I am going for a bottom end that can hold up for a long time to come. The running total on the bottom end is $1857.00 figuring shipping, etc., not including the machine work, which really isn't bad at all. If you figure labor hours, it would be triple, so considering I am comfortable doing my own work, I don't feel so bad and neither does my wife.

Should be a good build coming along.
 

Quote:
There was also a BSE kit put on it at one point, but not the typical stub shaft I've seen in a kit. It looks more like a stock shaft that was cut down. There was also a Fel-pro paper gasket on the front case, so I'm willing to bet it was replaced with a topline. Either way, it will be replaced with OEM.


Probly have this or a version of it

click

More Luck is comming your way it seems, I wish the PO of my car put that kit in mine /ubbthreads/images/graemlins/jawdrop.gif

Unless it really is a stock cut one, then /ubbthreads/images/graemlins/banghead.gif
 
Last edited by a moderator:

TurboTrader

Well-known member
Joined
Jan 30, 2009
Messages
161
Location
Pemberton, NJ
The block is all stripped ready to go to the machine shop.

IMG_0538.jpg


IMG_0541.jpg


Now the metal slivers on the pickup definitely make sense now. The center main bearing was SHOT!

IMG_0543.jpg


The crank isn't bad at all. I think I caught it just in time.

IMG_0544.jpg


Now I can't wait to start ordering some parts up and get it all back together!
 
Support Vendors who Support the GVR-4 Community
Boosted Fabrication ECM Tuning ExtremePSI Fuel Injector Clinic Jacks Transmissions JNZ Tuning Kiggly Racing Morrison Fabrications RixRacing RockAuto RTM Racing STM Tuned
Top