GSTwithPSI
Well-known member
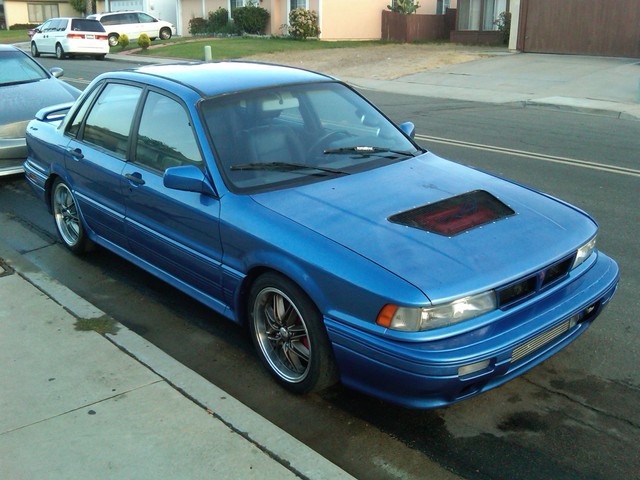
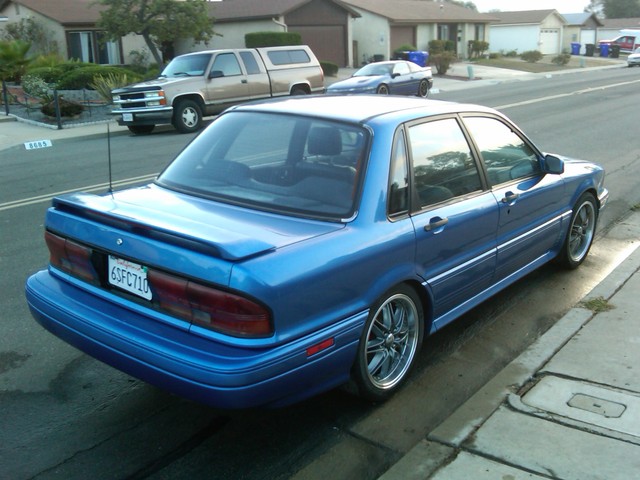
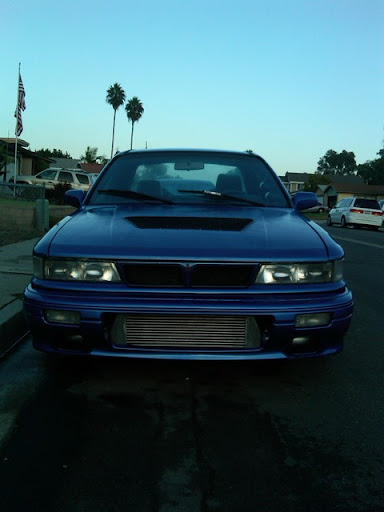
This is the intro to my build/restoration thread for 1813. I purchased this car in August of 2011 and have been stacking parts, and doing repairs and restoration slowly over time. I’ve found that the car’s previous owner(s) have done quite a bit of damage by half-ass repairs and mod jobs. 80% of what I’ve done has been reversing damage that’s been done by bad mechanics. You can see more background on the car here click in my initial intro thread from when I bought the car.
My goals for the car are primarily just to be a fun DD. I would like to do some drag racing with it as well in my free time. I have a huge mod list, but the major mods are:
2.0L refresh
1G rod, 2G piston combo
Balanced and blueprinted rotating assembly originally built by RRE
Cyclone Intake
Holset HE351VE Variable Geometry Turbo
Snow Performance Methanol Injection
DSMlink…
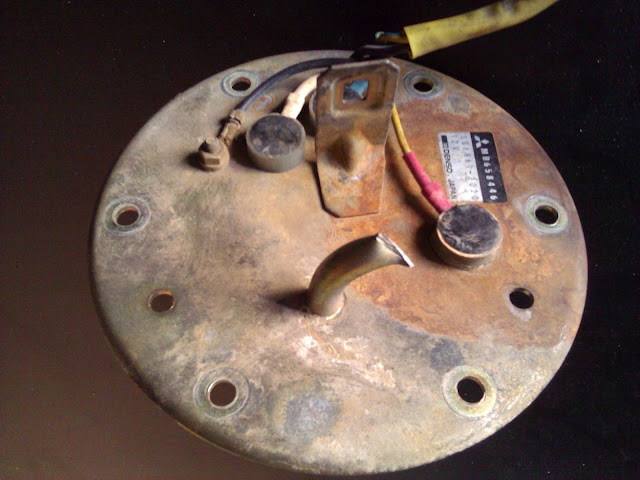
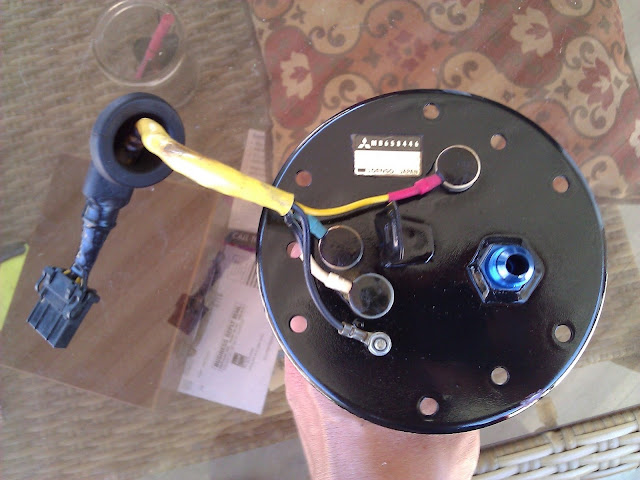
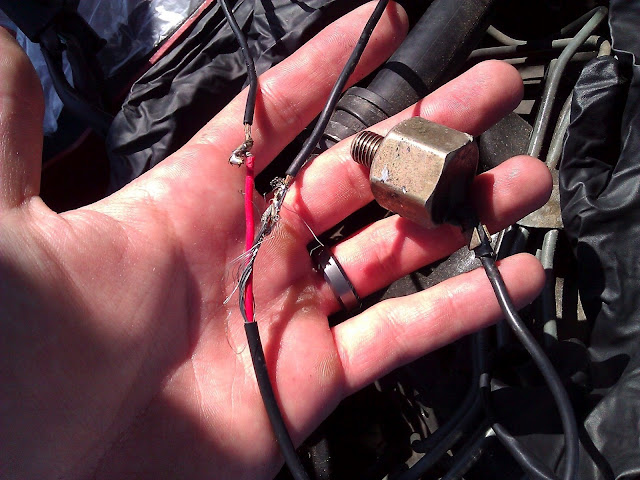
So to start, I bought the car and was told by the last owner that all the car really needed was a fuel pump. That turned out to be farther from the truth than I could have ever imagined. I got a sender unit with a kinked outlet line. Here are pics of the reconditioning and -6 AN line conversion.
Here’s how the unit started.
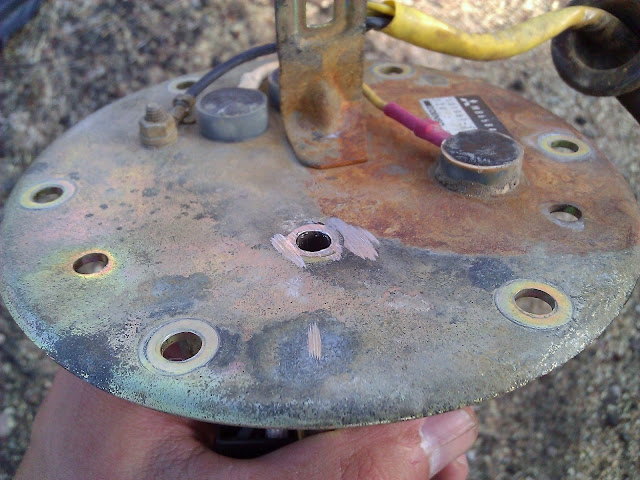
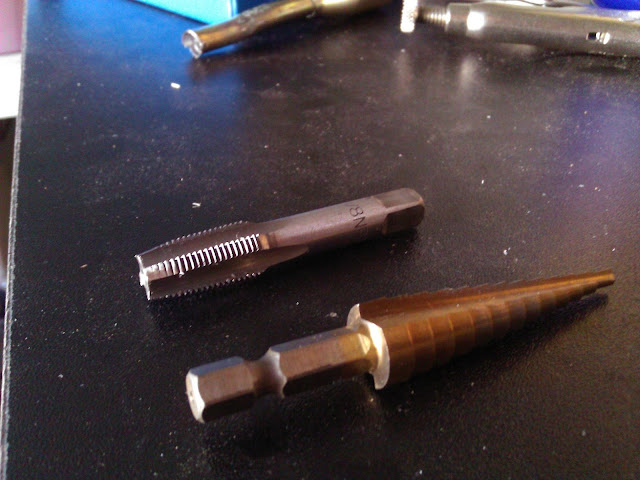
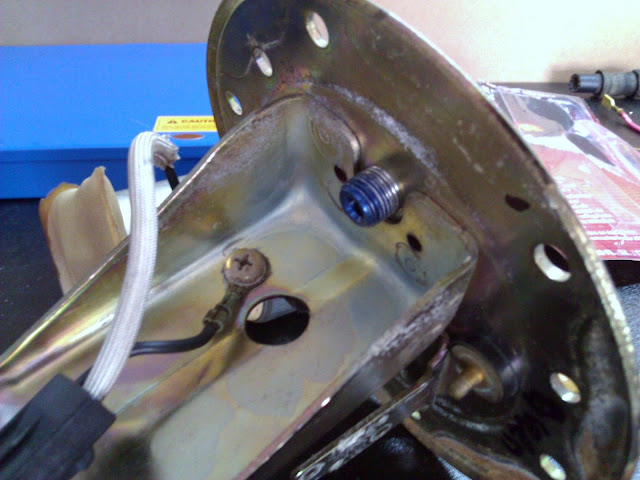
I ground the outlet line flush and drilled and tapped the hole with a 1/8 NPT tap.
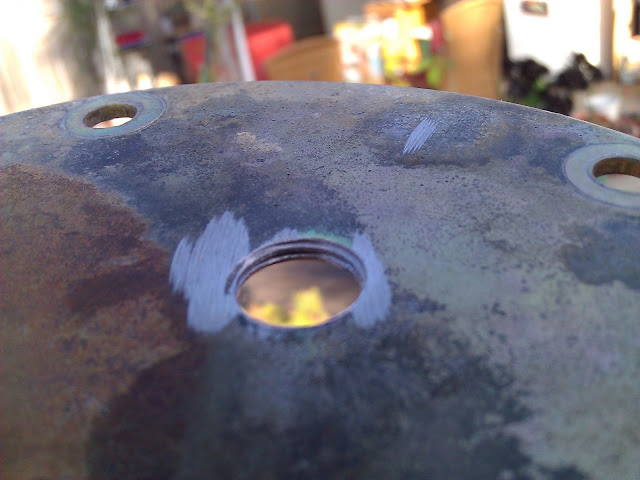
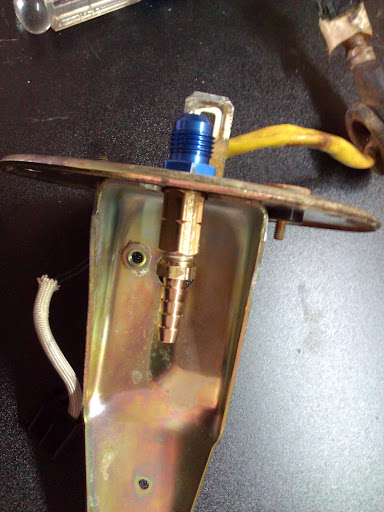
I used a 1/8 NPT / -6 AN fitting and put Teflon high temp sealant on the threads after I screwed the fitting into the sending unit. I then used some fuel resistant epoxy putty to seal the fitting just as a precautionary measure.
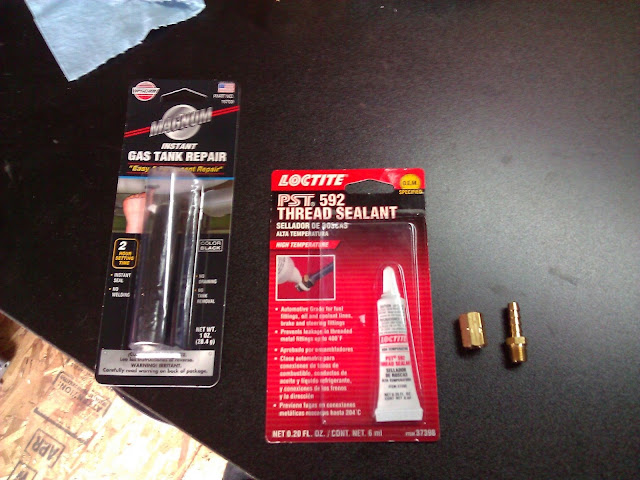
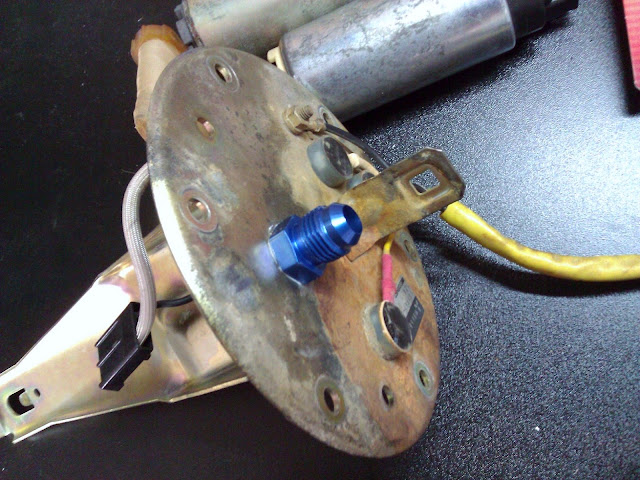
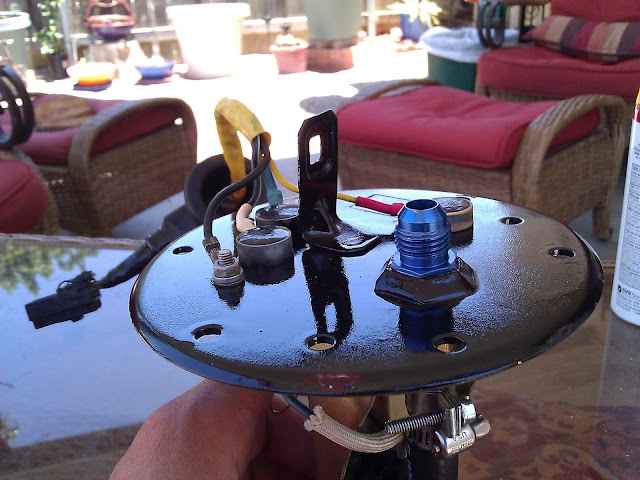
Lastly, I used a 1/8 NPT coupler and barb fitting to attach the fuel pump hose. I sanded the top of the sending unit and removed all the rust. Taped the fittings and wiring and painted the unit.
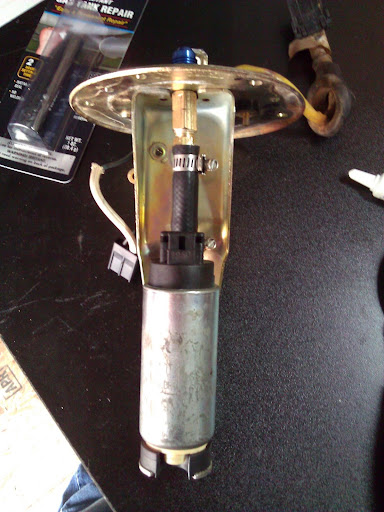

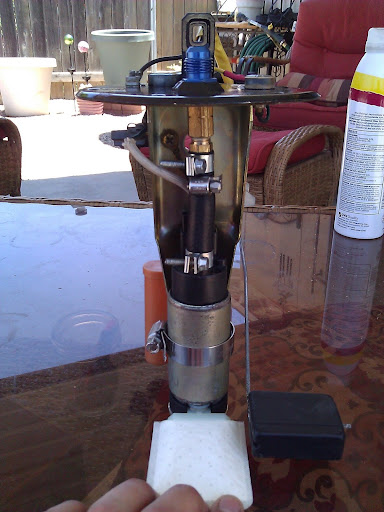
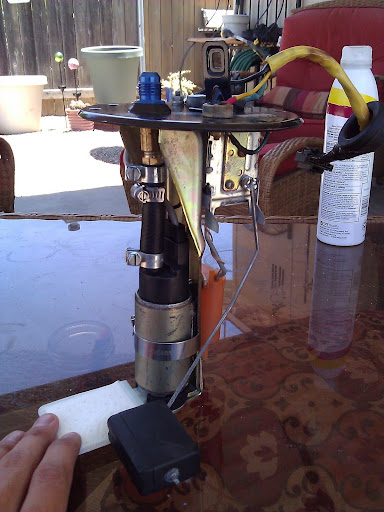
Here is the finished product.
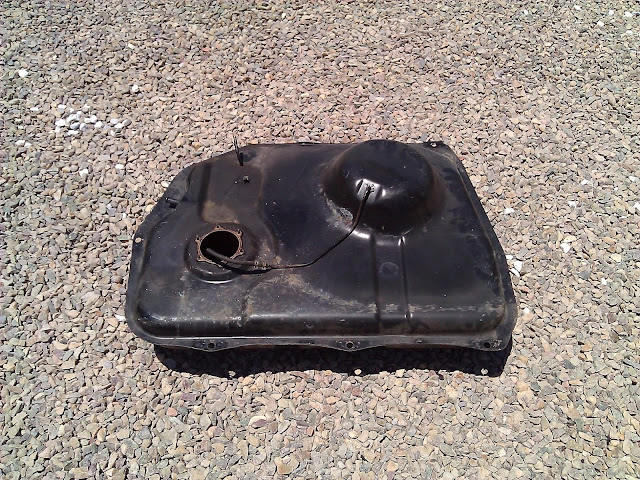
I dropped the fuel tank. I cleaned, prepped and painted the exterior. The inside was starting to rust and corrode so I had to do a lot of work cleaning the inside also. I’ll have some after pics of it soon but it turned out good.
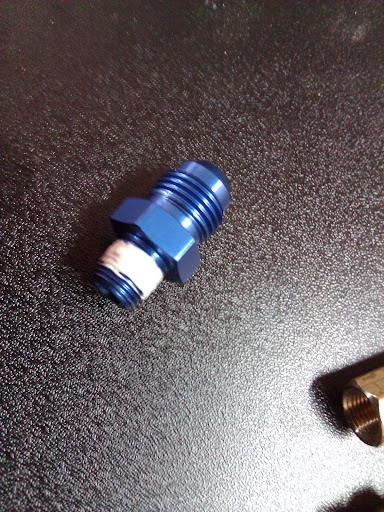
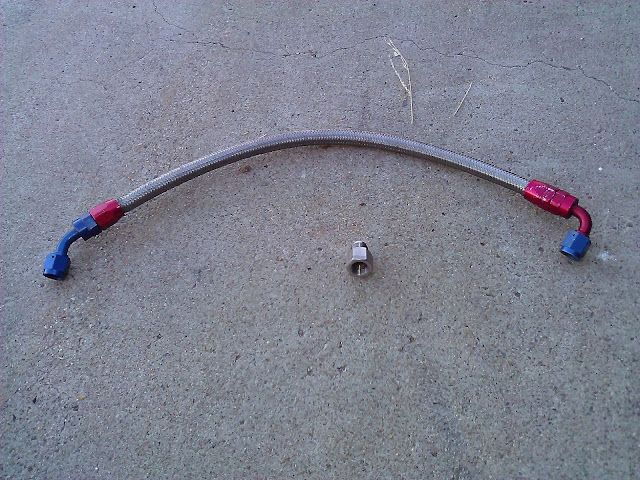
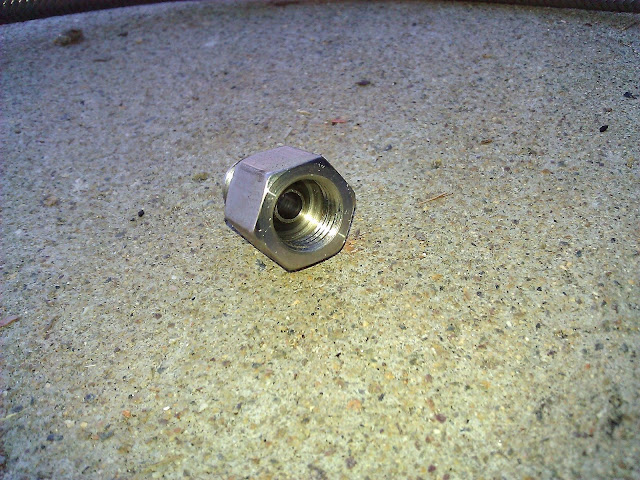
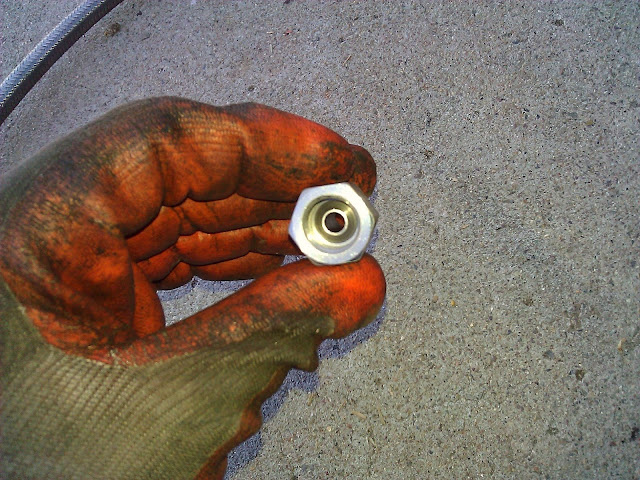
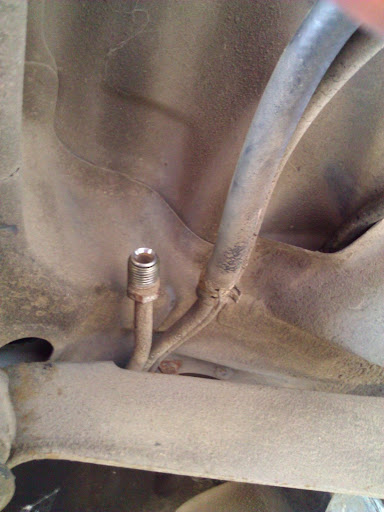
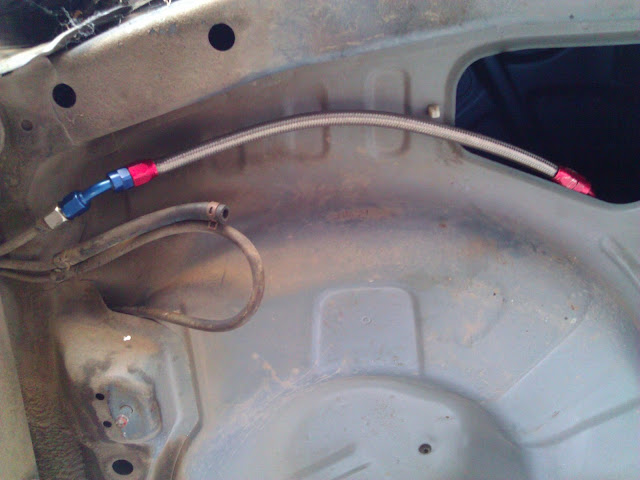
For anyone trying to adapt a AN line to the stock hard line here’s how you do it. You MUST have an inverted flare adapter fitting. I got mine from RCI, but they are available other places. If you aren’t familiar with what im talking about, just know if you do not have the correct fitting, the line will leak and sh*t can catch on fire. That should be enough to deter anyone from screwing the wrong fitting on. See here for a good read on some of the incorrect fittings that are used: click
Notice the flared center inside of this fitting. I included a few shots of the progression of installation from the stock hard line to the finished product with the -6 AN line installed.


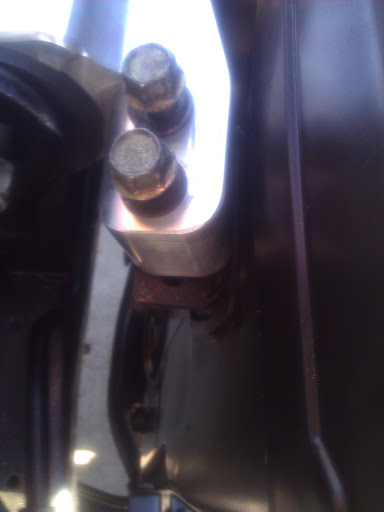
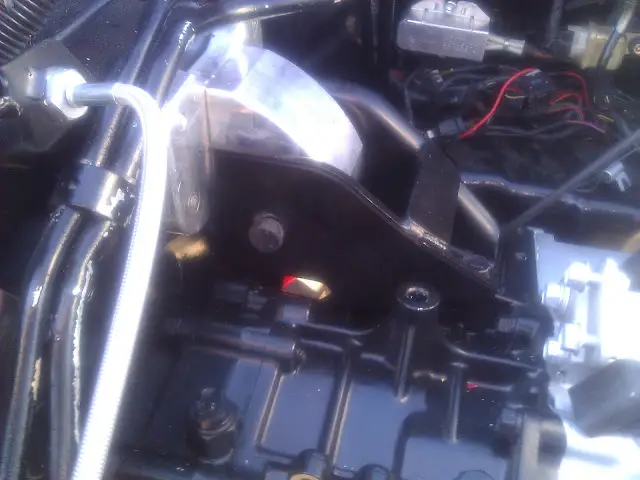
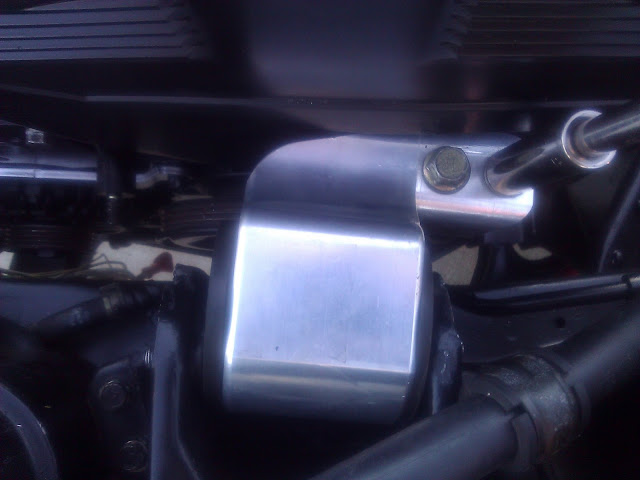
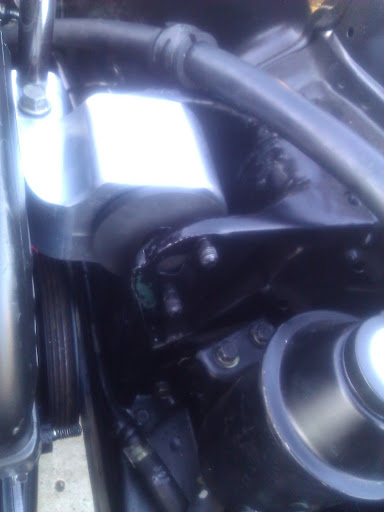
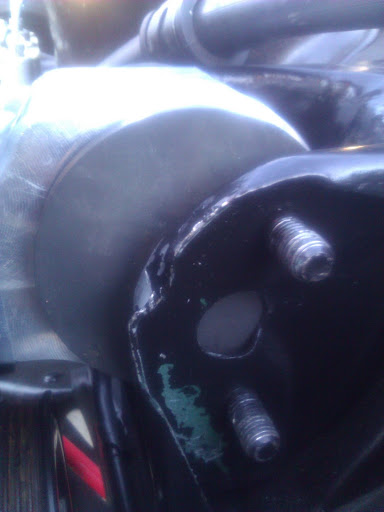
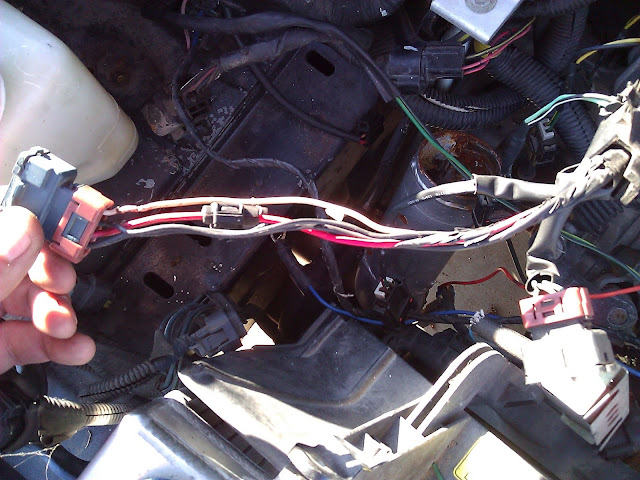
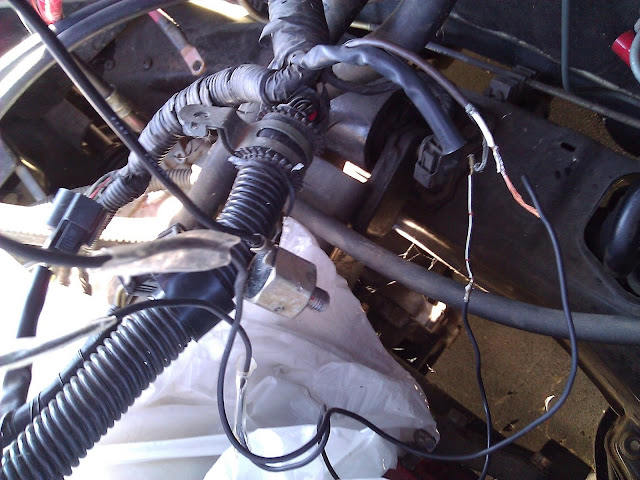
As I mentioned before, the previous owners were quite the backyard mechanics. Here are a few shots of how hacked and messed up a few of the previous owner’s repairs were. These were just a few of the things that were messed up by hack job repairs.
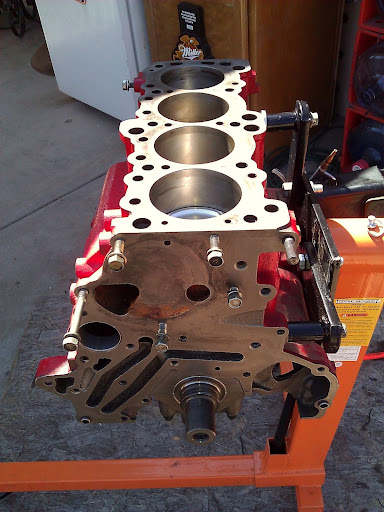
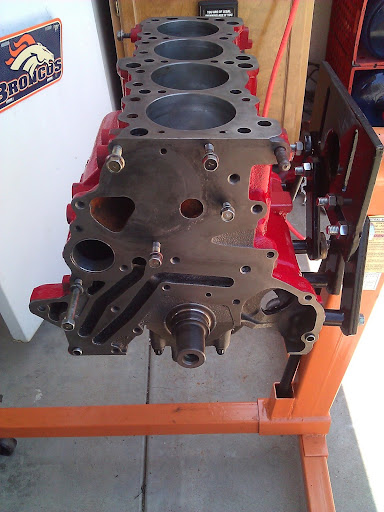
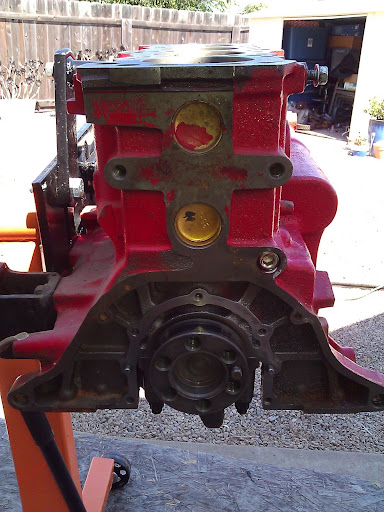
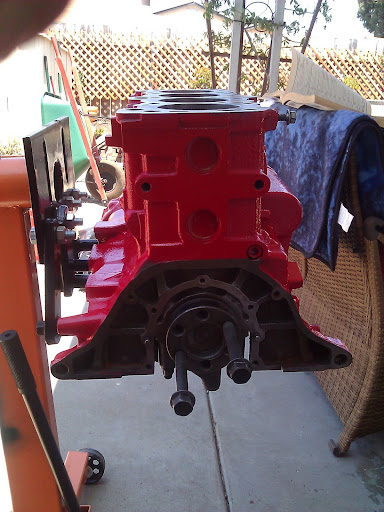
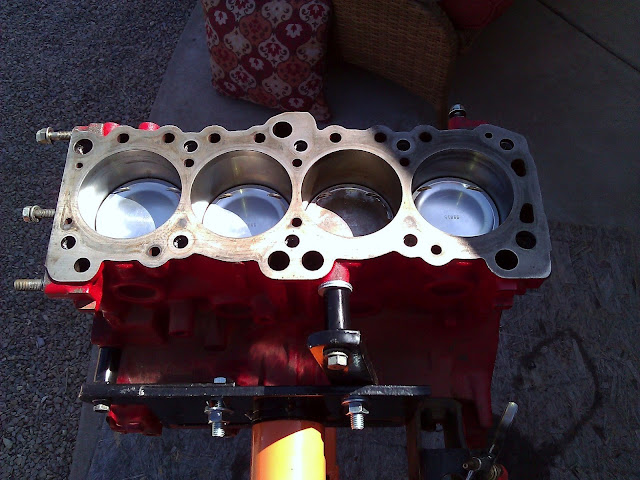
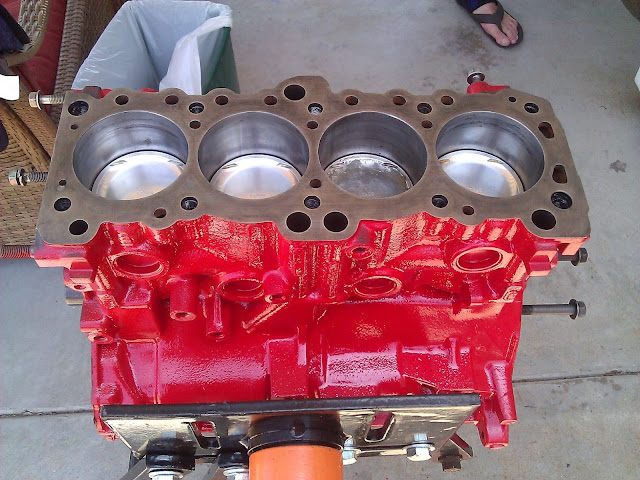
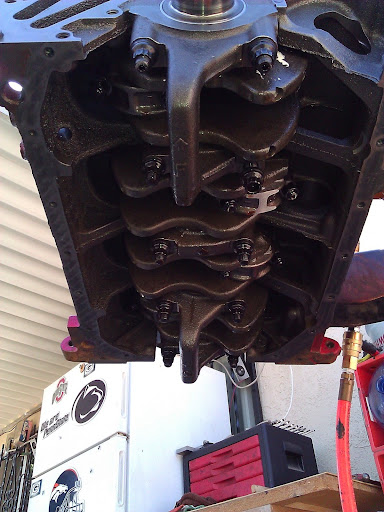
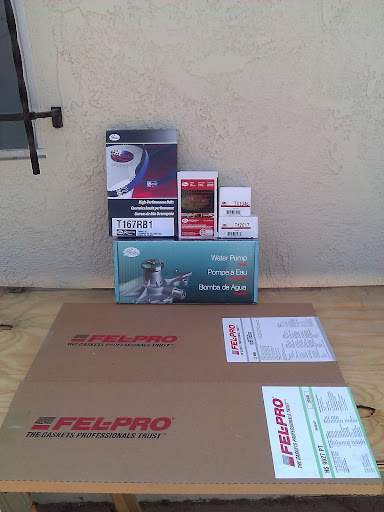
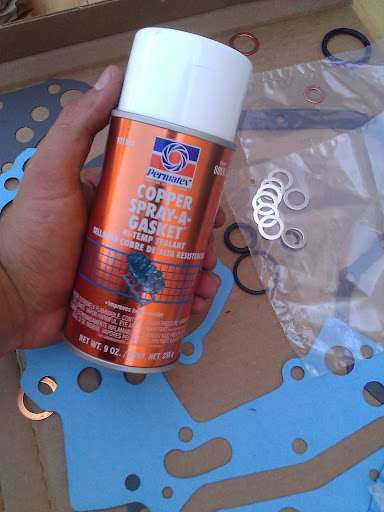
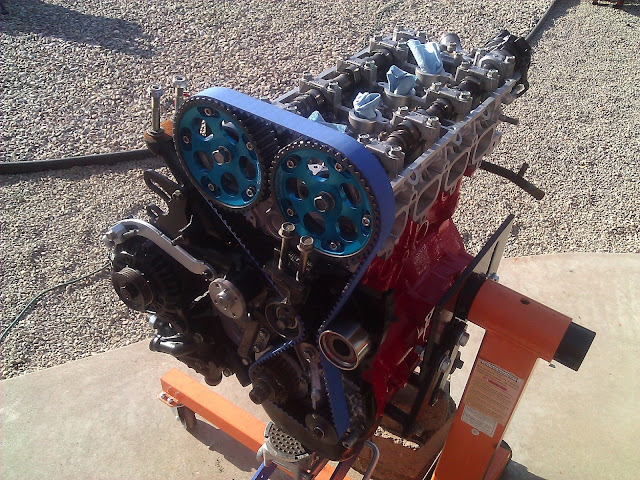
The motor.... I bought the car under the impression it just needed a fuel pump. As it turned out though, the car ended up having 8 bent intake valves. Fu*k me. I pulled the head and just planned to get the head fixed and slap it back on. As I started to check out the timing components, I realized the oil pump had RTV sealant oozing from where it sealed to the block. This worried me. I am a firm believer in gaskets. IMO using RTV sealant or gasket maker for anything that a gasket is specifically made for is stupid. It’s a band aid at best, and not using a gasket whenever you can is just dumb to me. People spend tons of money on parts and expensive engine components and then cheap out on sh*t like gaskets. I just don’t get it? Anyways, because of this find I decided to pull the motor, tear it down and inspect everything; and it's a good thing I did. I dissembled the motor down to the block and rotating assembly. There wasn’t a single gasket in the entire thing. Whoever built this motor used RTV sealer on EVERYTHING!!!??? The oil pickup, oil pump, water pump, oil pan, rear main seal, blah, blah, blah. Literally, the only gasket that was used in the whole motor was a head gasket. Even the thermostat housing was sealed with RTV. I couldn’t understand it. It probably took me 8 damn hours to scrape and clean off all the RTV off of everything. I finally got it all off and cleaned all the mating surfaces good and checked them for trueness and damage. I pulled everything apart and reinstalled everything using FelPro gaskets. I used copper spray on almost all of the gaskets except for the head gasket. It does a great job sealing any imperfections that the paper gasket can’t. Plus, after you spray it on it gets a little tacky so the gasket is easy to place. Copper spray is amazing. I installed ARP head studs and a FelPro composite head gasket (9627PT). Lastly I painted the block with few coats of high temp paint and checked all the torque on the rod and main caps just to be safe.
Before:
After:
Before:
After:
Before:
After:
A few additional shots:
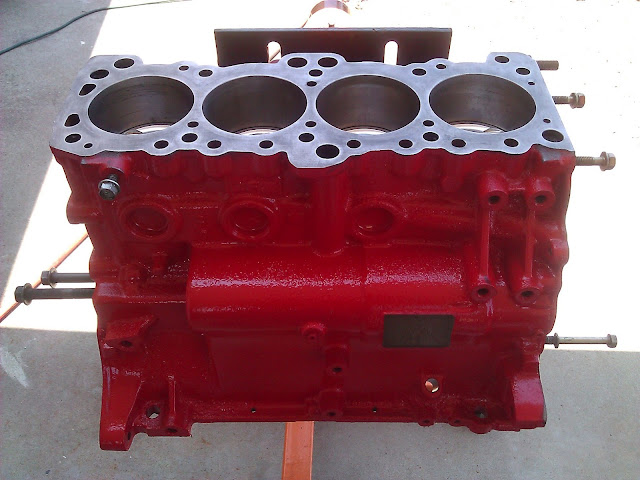
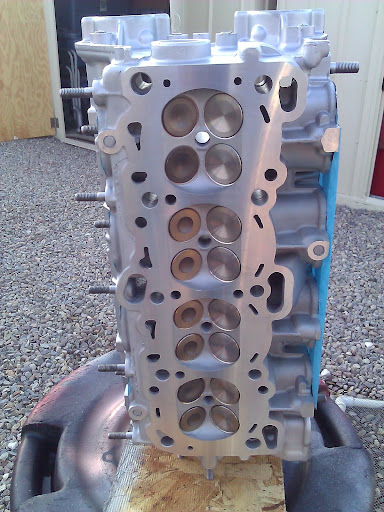
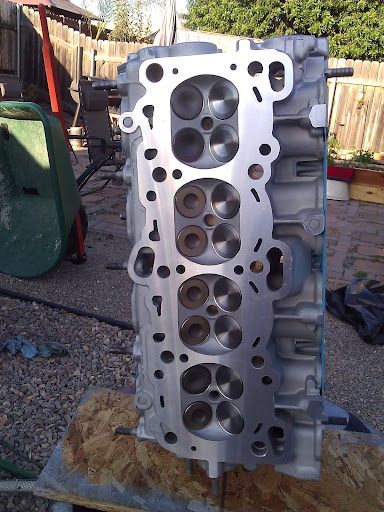
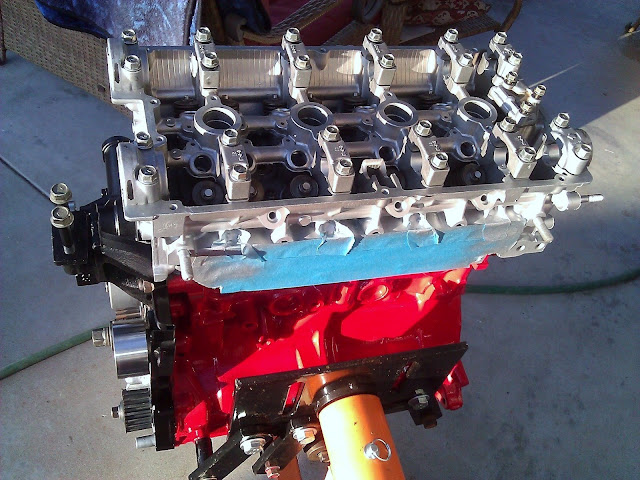
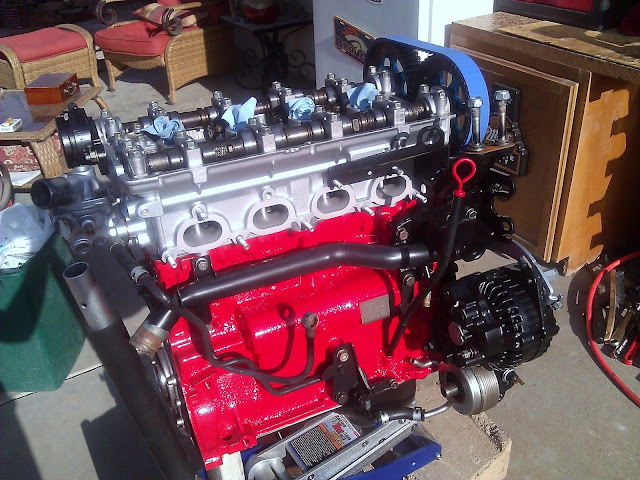
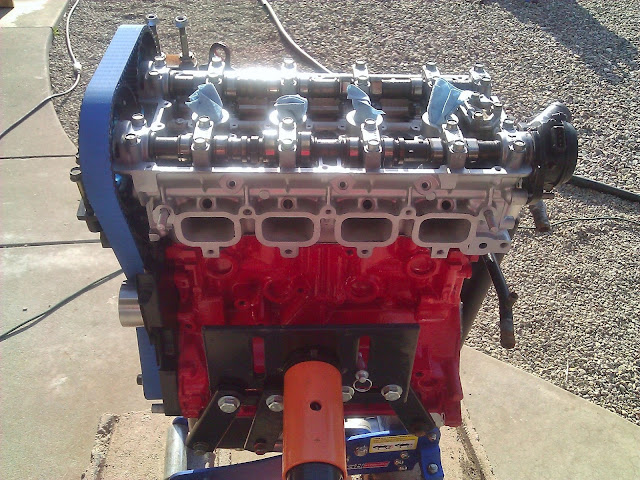
I had the head reconditioned at a local machine shop here in SoCal. They milled the deck surface and replaced all the intake valves. They gave it a nice cleaning and I gave it a coat of high temp paint before I slapped it on the nice clean block. I torque it down with new ARP bolts using ARP molly lube.
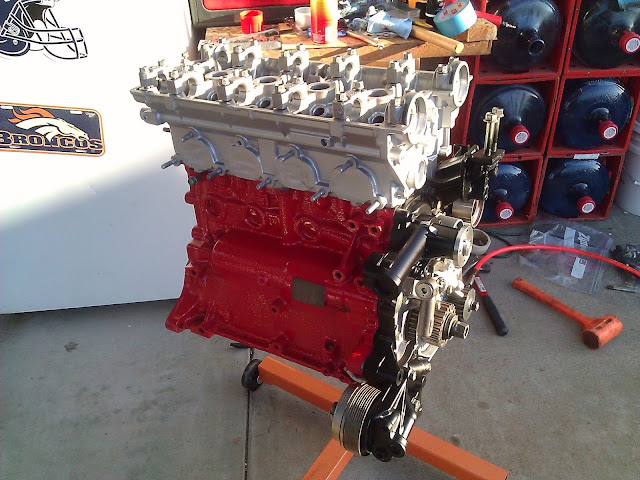
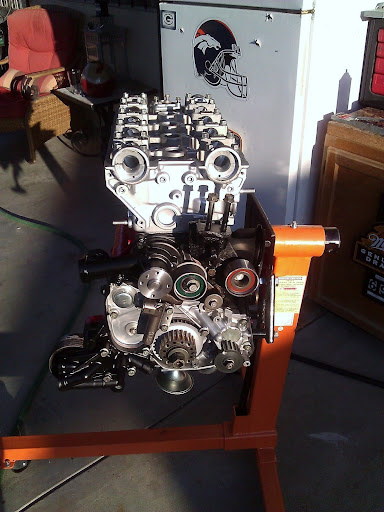

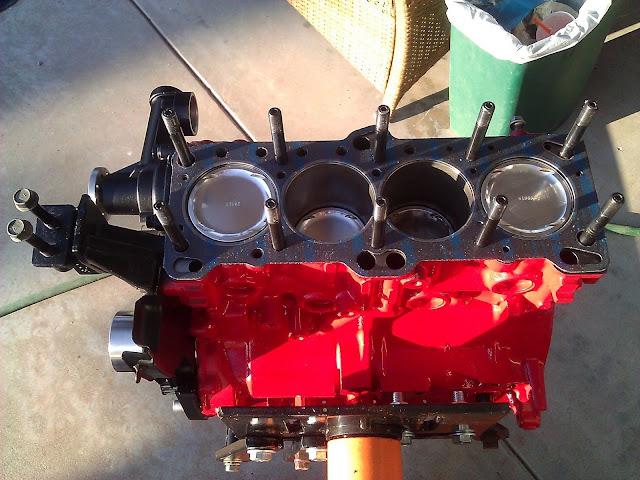
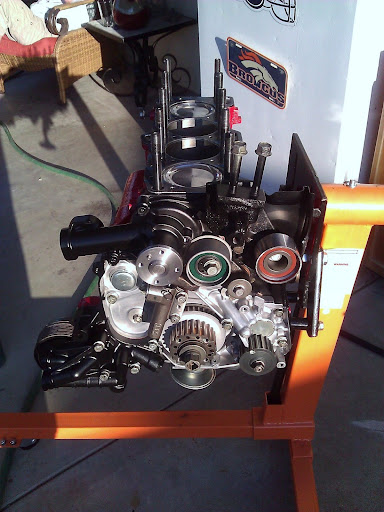
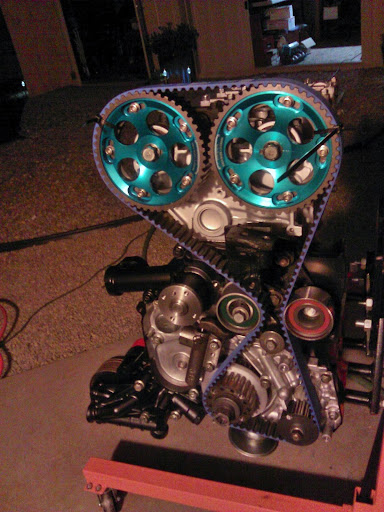
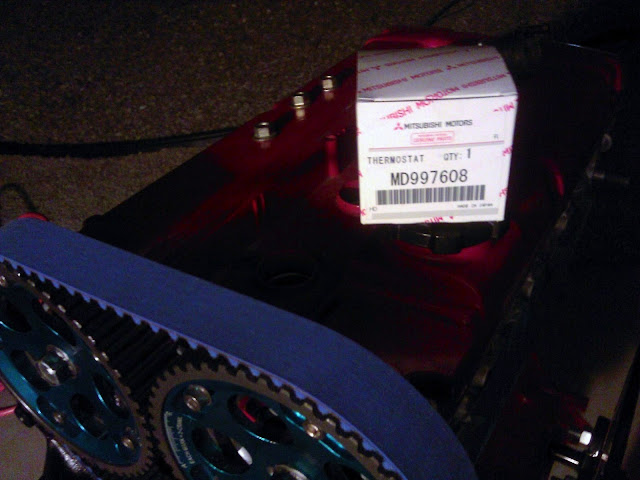
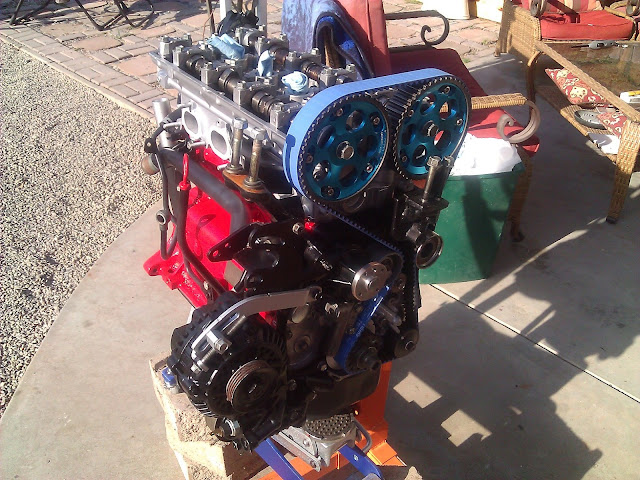
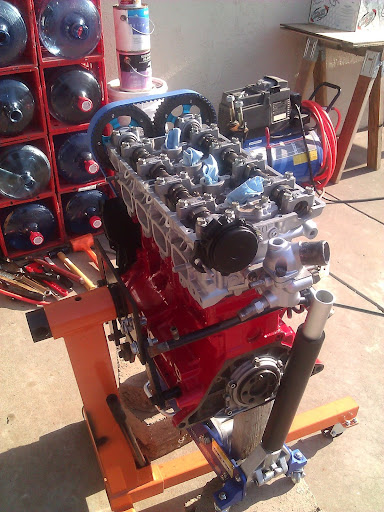
I installed Fidanza adjustable on the stock cams for now. EVERYTHING else is gates. New gates water pump, tensioner pulley, idler pulley and hydraulic tensioner. I went with a Gates racing timing belt also. OEM Mitsu thermostat was installed as well as Mitsu knock and temp sensors. I’m just waiting on a few timing tins covers to finish up assembly. I cleaned and touched up all the engine accessories before they were bolted on. The long block is now mostly assembled and looks super clean.
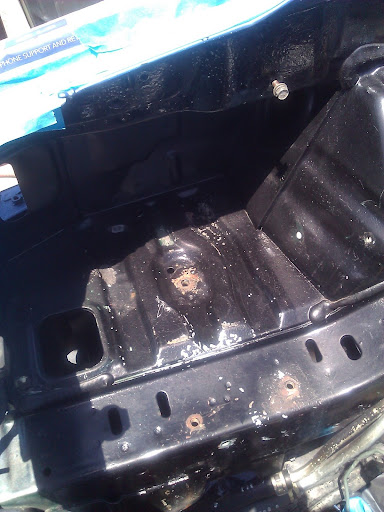
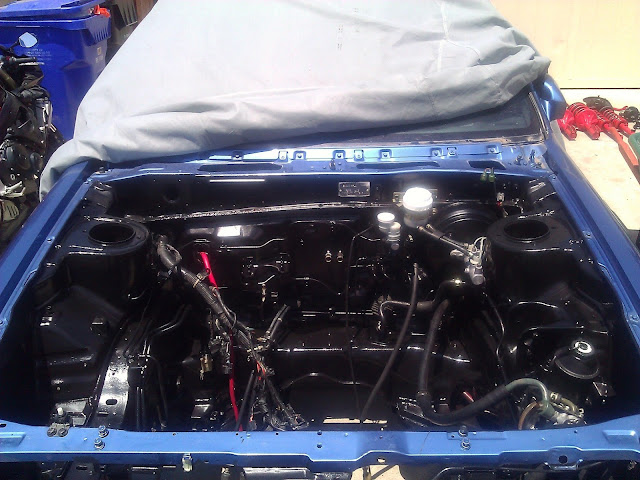
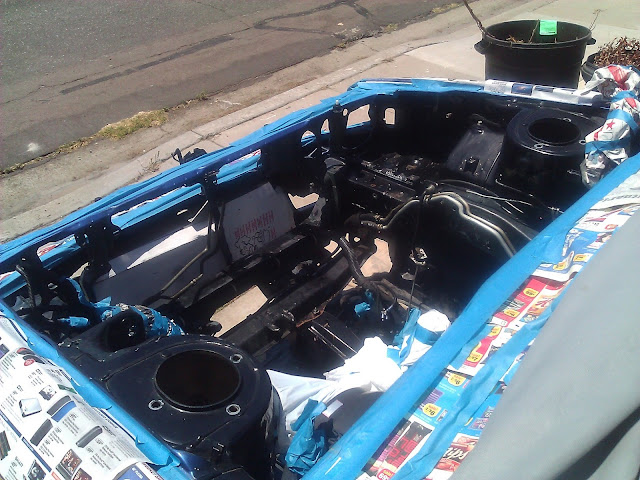
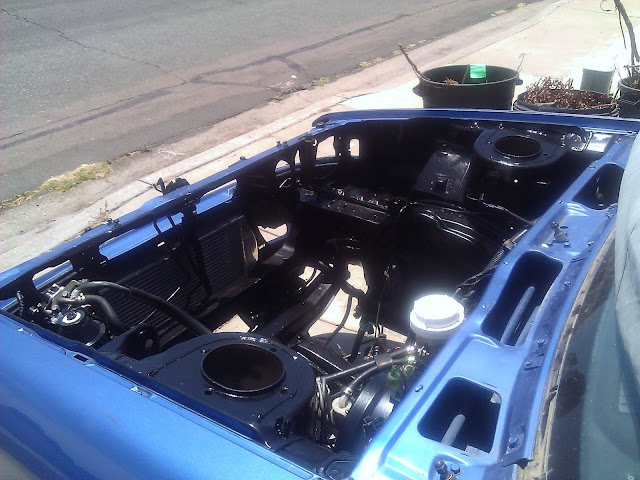
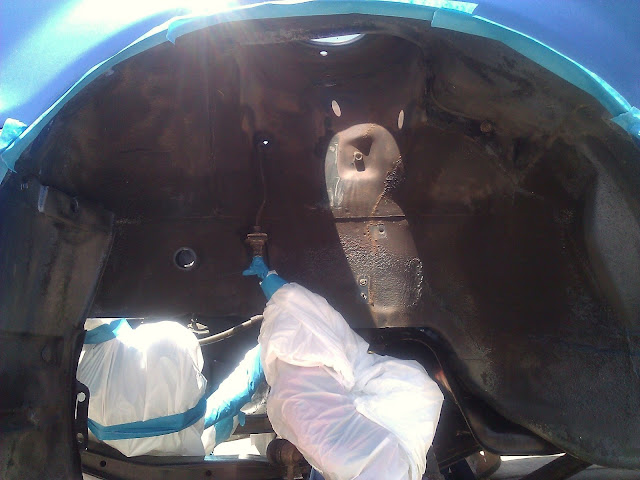
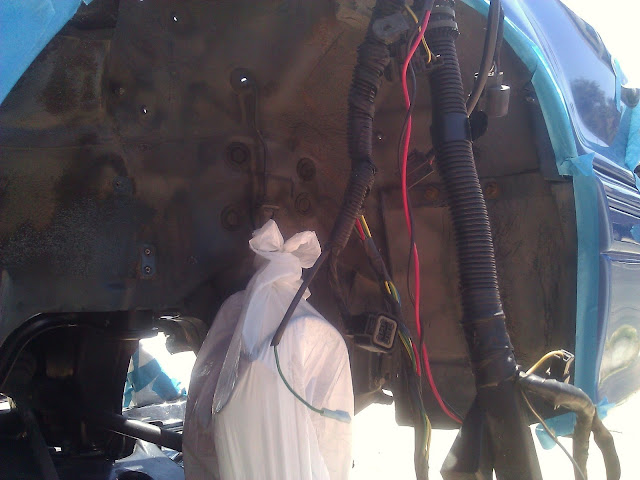
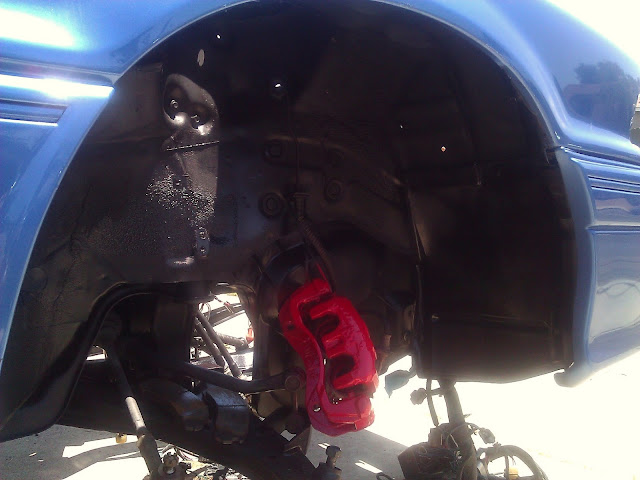
While I had the motor out I went ahead and repainted the engine compartment with some semi-gloss black. I also did the front wheel wells. A few before and after shots.
Before:
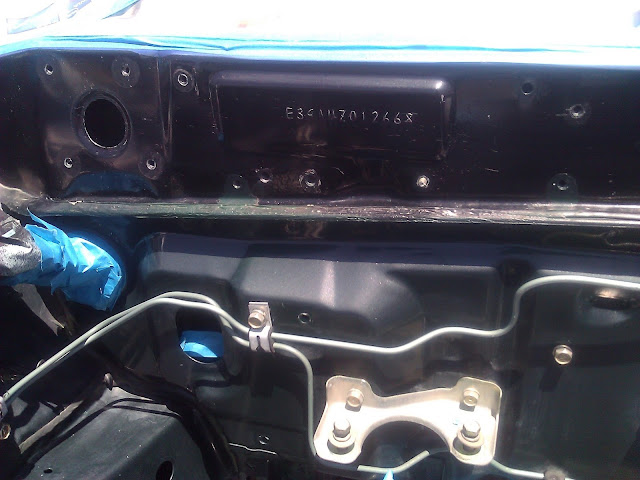
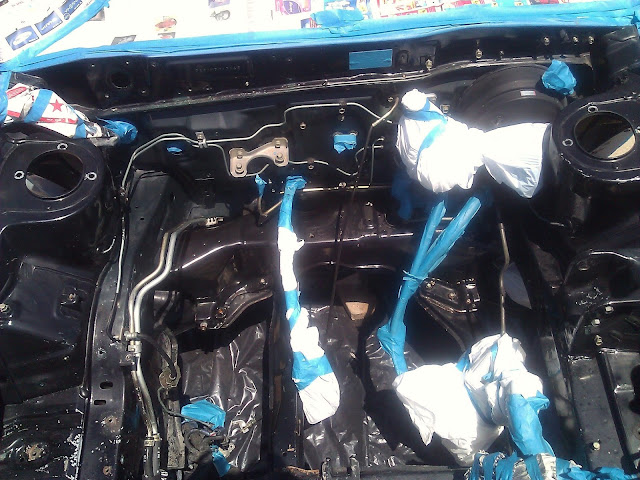
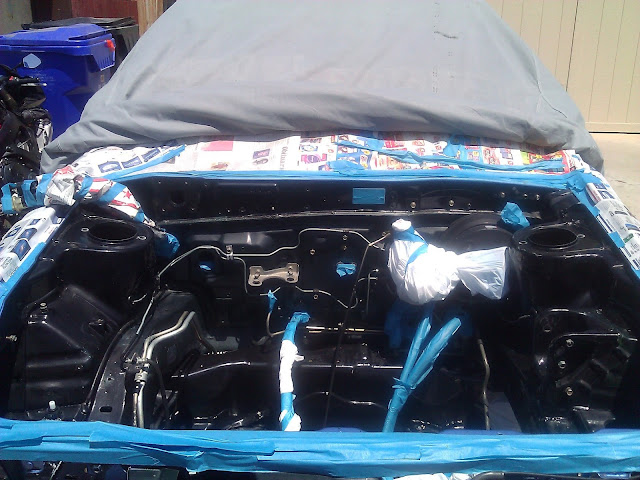
After:
Before:
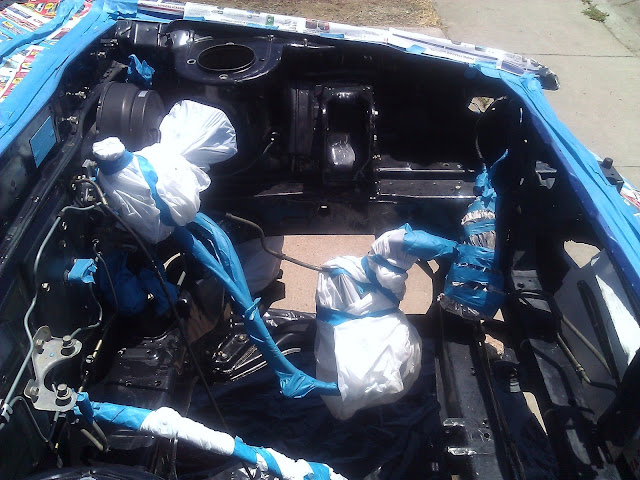
After:
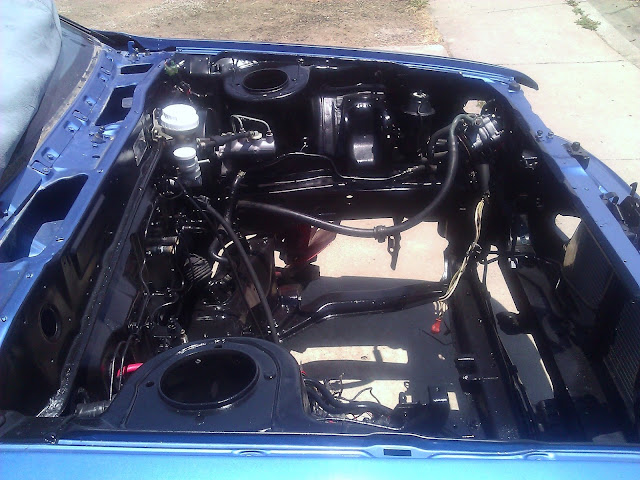
Before
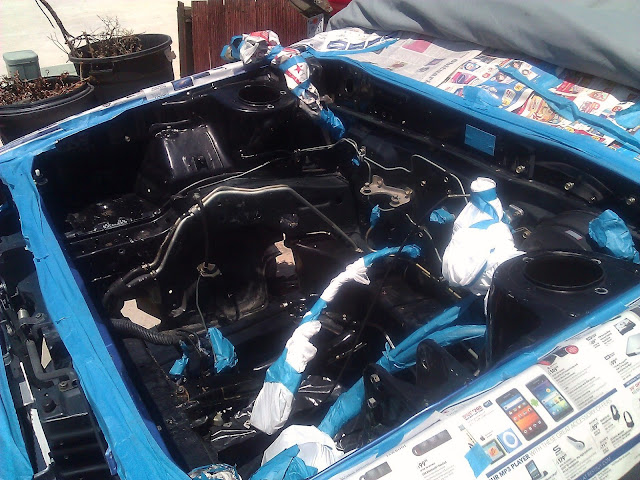
After:
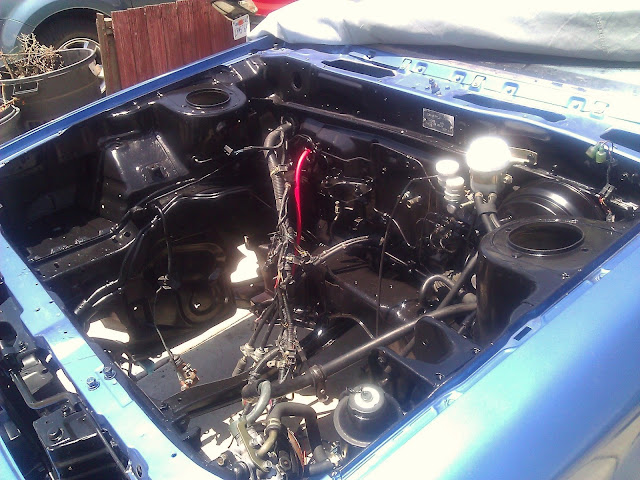
Before:
After:
Before:
After:
Before:
After:

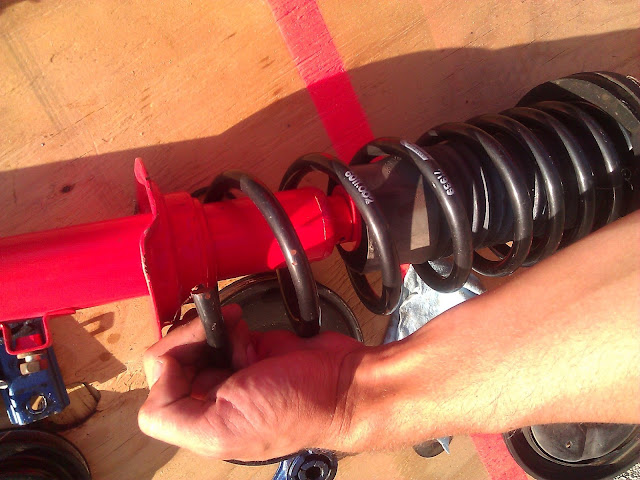
The suspension....Let me just start this by saying what a fu*king disaster this was. If I knew exactly who screwed the suspension on this car up so bad I would have beat them to death with the damn strut assembly. I only started working on the suspension because I was doing a 5 lug swap on the car. As soon as I removed the wheels I knew there was a problem. I noticed the front springs were sitting crooked in the front strut perch. Additionally, the spring was rubbing on the inside of the wheel well when compressed. It wasn’t until after I removed the front and rear strut assemblies that I figured out what was going on. It turns out the guy who had the car before me actually cut the springs so short they wouldn’t even sit snug in the strut anymore. I should mention these weren't even stock springs, but ebach sportlines. I have never heard of anyone cutting a spring that is already designed to lower a car, but I am never ceased to be amazed. Cutting a lowering spring seems really stupid, but after seeing all the other sh*t messed up by the previous owner I’m not even surprised. Here’s a pic of me actually wiggling the spring in the strut while it’s fully assembled. The springs were so loose I didn’t even need to use a spring compressor to remove them.
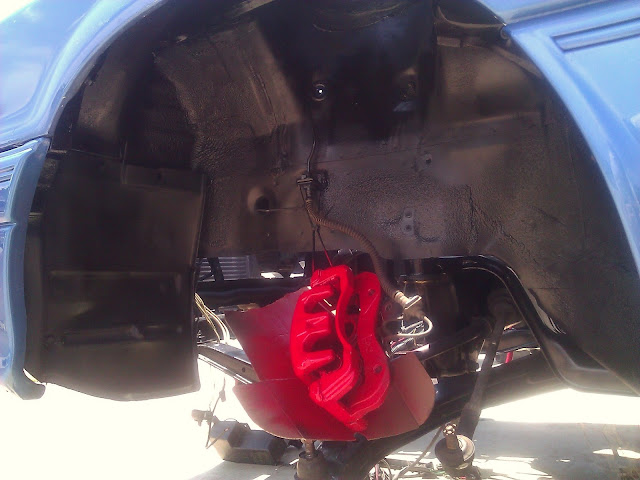
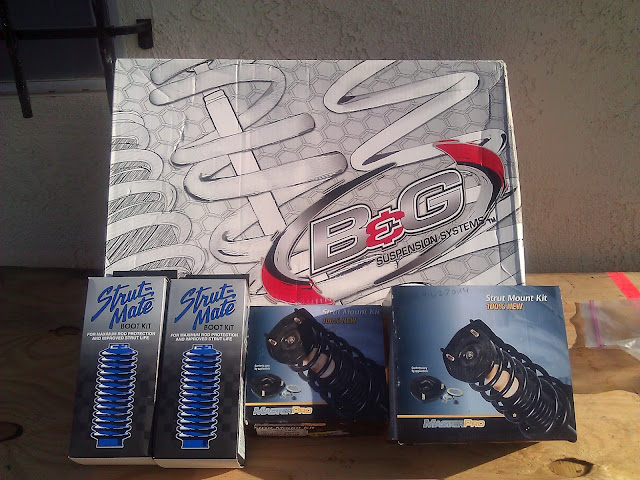
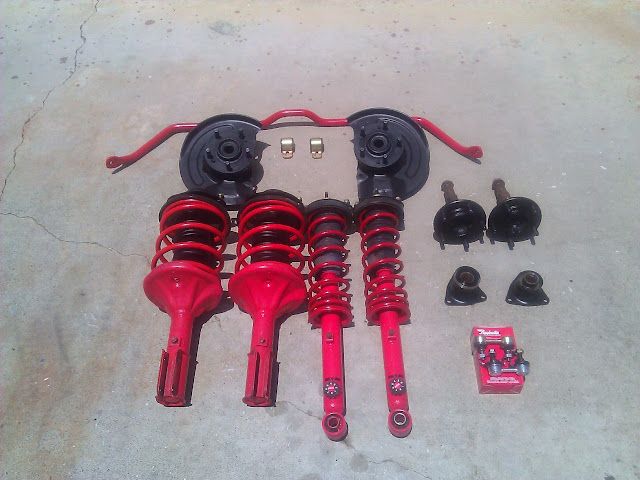
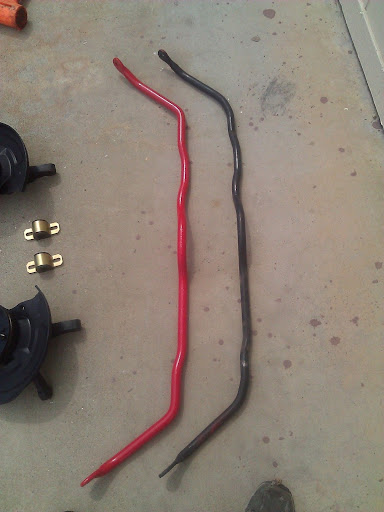
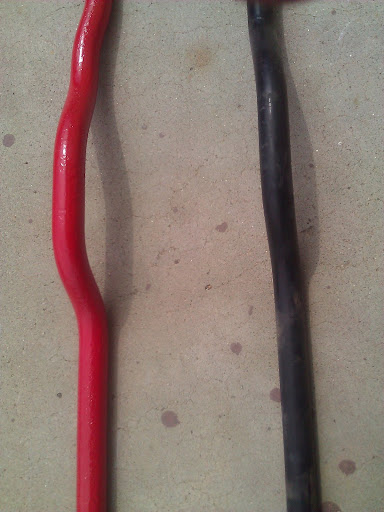
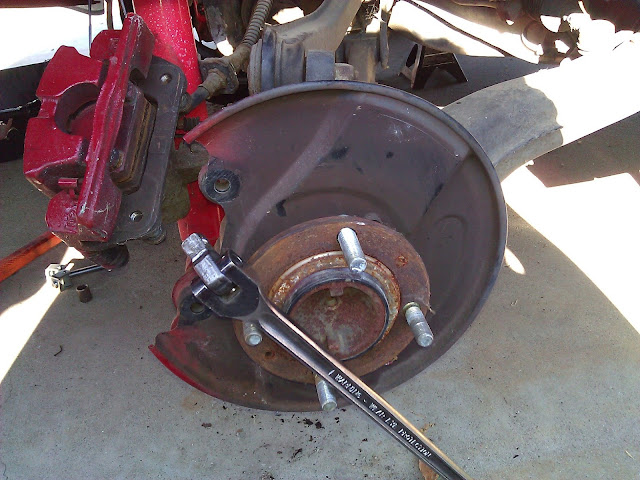
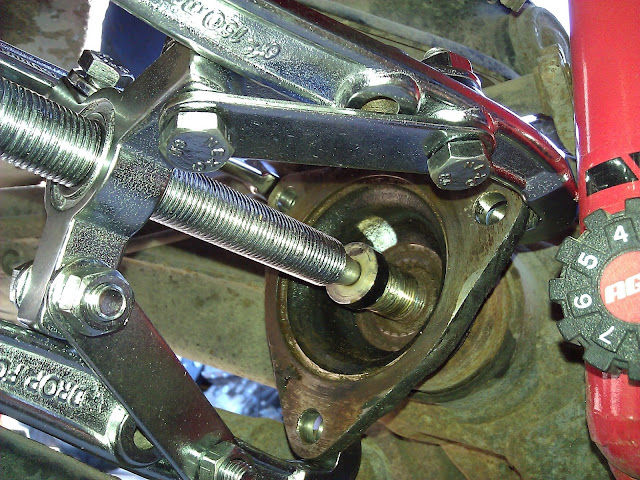
Here are some shots of the 5 lug swap, and how I removed the rear axle cups with a 3 jaw puller. I cleaned, inspected, lubed and painted all the hub assemblies before installation. I trashed the cut Eibachs for a set of B&G lowering springs. I reinstalled them on the almost new KYB AGX adjustable struts that were already on the car. I also put on new bump stops and strut rod covers while I had the assemblies apart. I’m excited to see how the car’s stance looks when it’s all said and done. Up top I installed new upper strut mounts on both sides. I threw on my Whiteline 22mm front swaybar and new stock swaybar end links on both sides to finish up.

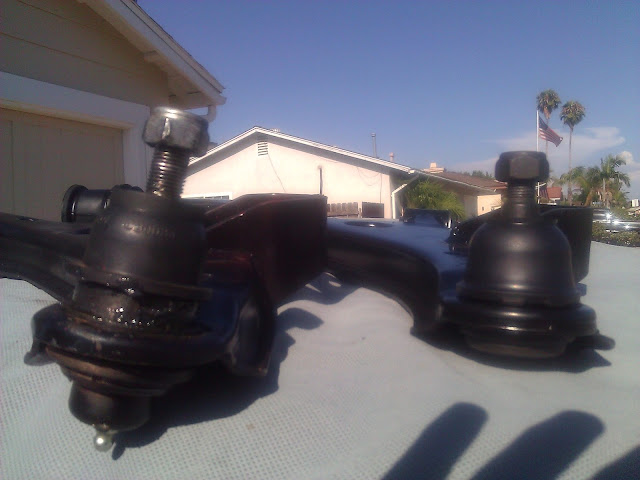
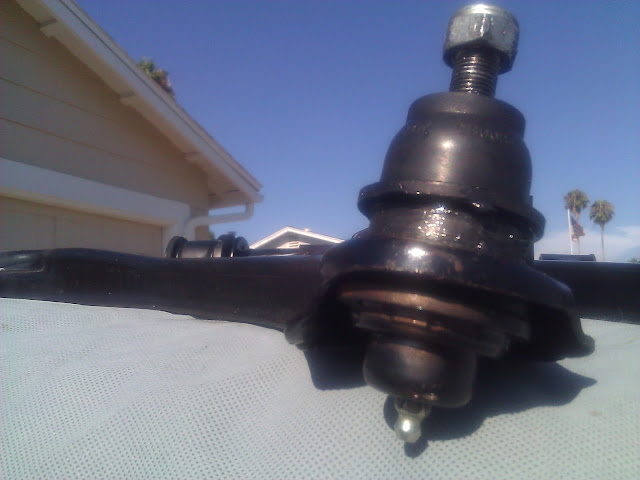
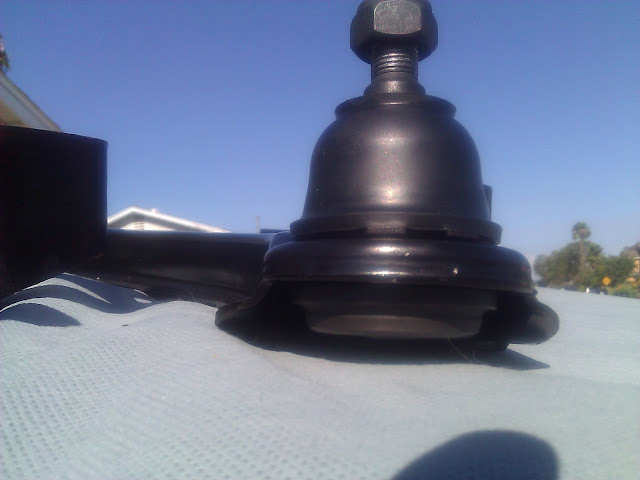
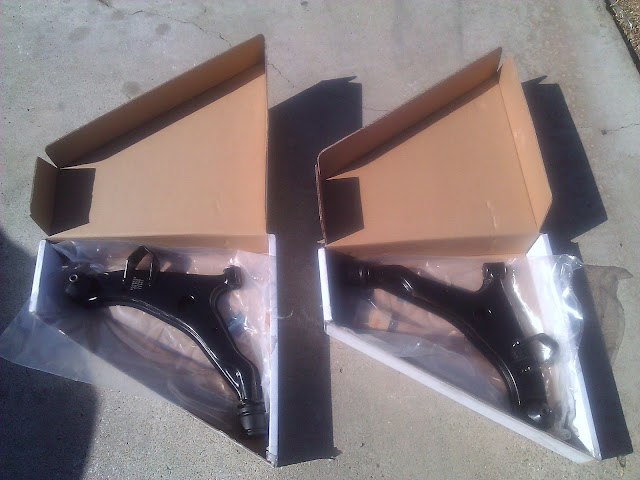
So I get everything together start bolting the passenger side strut assembly onto the car. I get it on and notice it will only turn about 20 degrees before it locks up. It wasn’t allowing enough motion for the strut to rotate like it should. The ball rotated perfectly in the socket with the strut removed though. It was blowing my mind. Come to find out the lower control arm was bent, and increased the ball joint’s center angle so much that it wouldn’t allow the strut full range of motion. It wasn’t until I ordered new control arms that I realized how messed up the old arm was. I replaced both sides with new arms just to be safe. Here are a few shots of the new arm side-by-side with the old arm.
Bad:
Good:
Next on the agenda is finishing up the motor and throwing it back in the car. I have an external 255 to wire up that will be used in conjunction with the stocker in tank pump, and then need to reinstall the fuel tank. More updates to follow soon...
My goals for the car are primarily just to be a fun DD. I would like to do some drag racing with it as well in my free time. I have a huge mod list, but the major mods are:
2.0L refresh
1G rod, 2G piston combo
Balanced and blueprinted rotating assembly originally built by RRE
Cyclone Intake
Holset HE351VE Variable Geometry Turbo
Snow Performance Methanol Injection
DSMlink…
So to start, I bought the car and was told by the last owner that all the car really needed was a fuel pump. That turned out to be farther from the truth than I could have ever imagined. I got a sender unit with a kinked outlet line. Here are pics of the reconditioning and -6 AN line conversion.
Here’s how the unit started.
I ground the outlet line flush and drilled and tapped the hole with a 1/8 NPT tap.
I used a 1/8 NPT / -6 AN fitting and put Teflon high temp sealant on the threads after I screwed the fitting into the sending unit. I then used some fuel resistant epoxy putty to seal the fitting just as a precautionary measure.
Lastly, I used a 1/8 NPT coupler and barb fitting to attach the fuel pump hose. I sanded the top of the sending unit and removed all the rust. Taped the fittings and wiring and painted the unit.
Here is the finished product.
I dropped the fuel tank. I cleaned, prepped and painted the exterior. The inside was starting to rust and corrode so I had to do a lot of work cleaning the inside also. I’ll have some after pics of it soon but it turned out good.
For anyone trying to adapt a AN line to the stock hard line here’s how you do it. You MUST have an inverted flare adapter fitting. I got mine from RCI, but they are available other places. If you aren’t familiar with what im talking about, just know if you do not have the correct fitting, the line will leak and sh*t can catch on fire. That should be enough to deter anyone from screwing the wrong fitting on. See here for a good read on some of the incorrect fittings that are used: click
Notice the flared center inside of this fitting. I included a few shots of the progression of installation from the stock hard line to the finished product with the -6 AN line installed.
As I mentioned before, the previous owners were quite the backyard mechanics. Here are a few shots of how hacked and messed up a few of the previous owner’s repairs were. These were just a few of the things that were messed up by hack job repairs.
The motor.... I bought the car under the impression it just needed a fuel pump. As it turned out though, the car ended up having 8 bent intake valves. Fu*k me. I pulled the head and just planned to get the head fixed and slap it back on. As I started to check out the timing components, I realized the oil pump had RTV sealant oozing from where it sealed to the block. This worried me. I am a firm believer in gaskets. IMO using RTV sealant or gasket maker for anything that a gasket is specifically made for is stupid. It’s a band aid at best, and not using a gasket whenever you can is just dumb to me. People spend tons of money on parts and expensive engine components and then cheap out on sh*t like gaskets. I just don’t get it? Anyways, because of this find I decided to pull the motor, tear it down and inspect everything; and it's a good thing I did. I dissembled the motor down to the block and rotating assembly. There wasn’t a single gasket in the entire thing. Whoever built this motor used RTV sealer on EVERYTHING!!!??? The oil pickup, oil pump, water pump, oil pan, rear main seal, blah, blah, blah. Literally, the only gasket that was used in the whole motor was a head gasket. Even the thermostat housing was sealed with RTV. I couldn’t understand it. It probably took me 8 damn hours to scrape and clean off all the RTV off of everything. I finally got it all off and cleaned all the mating surfaces good and checked them for trueness and damage. I pulled everything apart and reinstalled everything using FelPro gaskets. I used copper spray on almost all of the gaskets except for the head gasket. It does a great job sealing any imperfections that the paper gasket can’t. Plus, after you spray it on it gets a little tacky so the gasket is easy to place. Copper spray is amazing. I installed ARP head studs and a FelPro composite head gasket (9627PT). Lastly I painted the block with few coats of high temp paint and checked all the torque on the rod and main caps just to be safe.
Before:
After:
Before:
After:
Before:
After:
A few additional shots:
I had the head reconditioned at a local machine shop here in SoCal. They milled the deck surface and replaced all the intake valves. They gave it a nice cleaning and I gave it a coat of high temp paint before I slapped it on the nice clean block. I torque it down with new ARP bolts using ARP molly lube.
I installed Fidanza adjustable on the stock cams for now. EVERYTHING else is gates. New gates water pump, tensioner pulley, idler pulley and hydraulic tensioner. I went with a Gates racing timing belt also. OEM Mitsu thermostat was installed as well as Mitsu knock and temp sensors. I’m just waiting on a few timing tins covers to finish up assembly. I cleaned and touched up all the engine accessories before they were bolted on. The long block is now mostly assembled and looks super clean.
While I had the motor out I went ahead and repainted the engine compartment with some semi-gloss black. I also did the front wheel wells. A few before and after shots.
Before:
After:
Before:
After:
Before
After:
Before:
After:
Before:
After:
Before:
After:
The suspension....Let me just start this by saying what a fu*king disaster this was. If I knew exactly who screwed the suspension on this car up so bad I would have beat them to death with the damn strut assembly. I only started working on the suspension because I was doing a 5 lug swap on the car. As soon as I removed the wheels I knew there was a problem. I noticed the front springs were sitting crooked in the front strut perch. Additionally, the spring was rubbing on the inside of the wheel well when compressed. It wasn’t until after I removed the front and rear strut assemblies that I figured out what was going on. It turns out the guy who had the car before me actually cut the springs so short they wouldn’t even sit snug in the strut anymore. I should mention these weren't even stock springs, but ebach sportlines. I have never heard of anyone cutting a spring that is already designed to lower a car, but I am never ceased to be amazed. Cutting a lowering spring seems really stupid, but after seeing all the other sh*t messed up by the previous owner I’m not even surprised. Here’s a pic of me actually wiggling the spring in the strut while it’s fully assembled. The springs were so loose I didn’t even need to use a spring compressor to remove them.
Here are some shots of the 5 lug swap, and how I removed the rear axle cups with a 3 jaw puller. I cleaned, inspected, lubed and painted all the hub assemblies before installation. I trashed the cut Eibachs for a set of B&G lowering springs. I reinstalled them on the almost new KYB AGX adjustable struts that were already on the car. I also put on new bump stops and strut rod covers while I had the assemblies apart. I’m excited to see how the car’s stance looks when it’s all said and done. Up top I installed new upper strut mounts on both sides. I threw on my Whiteline 22mm front swaybar and new stock swaybar end links on both sides to finish up.
So I get everything together start bolting the passenger side strut assembly onto the car. I get it on and notice it will only turn about 20 degrees before it locks up. It wasn’t allowing enough motion for the strut to rotate like it should. The ball rotated perfectly in the socket with the strut removed though. It was blowing my mind. Come to find out the lower control arm was bent, and increased the ball joint’s center angle so much that it wouldn’t allow the strut full range of motion. It wasn’t until I ordered new control arms that I realized how messed up the old arm was. I replaced both sides with new arms just to be safe. Here are a few shots of the new arm side-by-side with the old arm.
Bad:
Good:
Next on the agenda is finishing up the motor and throwing it back in the car. I have an external 255 to wire up that will be used in conjunction with the stocker in tank pump, and then need to reinstall the fuel tank. More updates to follow soon...