The Top Mitsubishi Galant VR-4 Resource

Join the best E39A 1991-1992 Mitsubishi Galant VR-4 community and document your GVR4 journey.

  • Software Upgraded - Reset Your Password to Login
    In order to log in after the forum software change, you need to reset your password. If you don't have access to the email address you used to register your GVR4.org account, you won't be able to reset your password. In that case, follow the instructions here to regain access to the forum.

1988 Dynamic 4 restoration / VR4 conversion (pictures)

Spyke169

Well-known member
Joined
Aug 17, 2005
Messages
324
Location
Greenfield, Wi
What he ^ said. Great to see someone putting the time and effort into the car instead of parting and scrapping it when it's a bit rough.
 

r4pt0x

Well-known member
Joined
Nov 20, 2013
Messages
123
Location
Bavaria / Germany
Long time no update... I got the car back from the paintshop a few days ago - but it's already back there to correct some flaws in the paint. I just want it to be perfect as it's such a complete rebuild now.

a little sneak preview:

DSCN4585.JPG


DSCN4586.JPG


DSCN4587.JPG


All the plastic parts (bumpers, side skirts/panels) have been securely packed away so they don't get any scratches - totally forgot to take pictures... /ubbthreads/images/graemlins/blush.gif


I also received the new rear calipers - brand new with the bigger 35mm piston /ubbthreads/images/graemlins/cool.gif - and some other parts from mitsubishi which were on backorder since a few months... some bumper mounting brackets, front air vents... all these parts i've waited for so long were newly produced in japan /ubbthreads/images/graemlins/ooo.gif no "old stock" parts but brand new, no dust, no old plastic bag or yellowish stickers which would indicate they "found" them somwhere.

I also got a pair of nice old 80/90's PIAA foglights I want to add to the front, mounted to a metal frame without modification to the front bumper. or maybe they will be mounted in front of the radiatr grille - this will be worked out when I reassemble the front part of the car.

As soon as I have a new mobile phone (the crappy samsung finally died...) there will be more pictures /ubbthreads/images/graemlins/wink.gif
 

iceman69510

Turn Right Racing
Staff member
Joined
Mar 5, 2001
Messages
10,964
Location
Michigan
He's building a donk.
 

r4pt0x

Well-known member
Joined
Nov 20, 2013
Messages
123
Location
Bavaria / Germany
Found some nice brand new rims in our warehouse... Z0615730 - OEM Mitsubishi rims, originally for The Carisma or Galant EA0 but they look awesome on the E30:

click
 

r4pt0x

Well-known member
Joined
Nov 20, 2013
Messages
123
Location
Bavaria / Germany
After another 6 weeks waiting for the car to get back from the paintshop i finally got the car last week and continued the rebuild...

A few weeks ago I got some nice 90s style PIAA headlights:

20140911_001.jpg


The chrome rings need some polishing and the back covers may get some new paint, but otherwise they are in good condition


the rear underbody needed another overhaul as the rust-protective primer i used turned out to be total crap. nearly all spots I already treated were showing new rust bloom underneath the paint... so i removed all the paint and rust again, used owatrol oil and ovagrundol primer just as I did at the front and floor panels:

20140927_011.jpg

20140927_001.jpg


just as the taillights I also cleaned the headlights:

20140928_001.jpg


Also removed the rust on the adjustment shafts with some phosphoric acid de-ruster, now they look like brand new 8)


To prevent any new rust to bloom or still existing rust to spread out, I started the body-cavity sealing;

20140927_004.jpg

20140927_005.jpg

20140927_009.jpg


I used a mixture of fluid film and wax in different mixing ratios, depending on where i applied it - at the A/B/C pillars, doors and other parts on the interior, I used more wax to limit the time it flows like oil. for the frame and axle parts I used less wax so it can penetrate every smallest gap for a long time. after ~6 months I'll apply a mixture with more wax to get a more resistant "final" coating.


Today I installed the new windscreen with all new mouldings:

20140928_003.jpg


And as I still had time I started installing the front wiring loom:

20140927_002.jpg


Next week i'll get some new clips, bolts etc pp so I can reinstall everything piece by piece with shiny new (or good-as-new) bolts. No need to save on these few bucks at this point /ubbthreads/images/graemlins/wink.gif

I also decided to repaint the whole underfloor - so I already ordered some more primer and chassis-paint for the middle section. The underfloor then will only get a thin layer of wax/fluid film as protection and will be all silver without any ugly bitumen on it /ubbthreads/images/graemlins/smile.gif
 

r4pt0x

Well-known member
Joined
Nov 20, 2013
Messages
123
Location
Bavaria / Germany
Another update...

The galant looks more and more like a car now. After finishing the rear underbody (spraying the body-sealant and painting another 3 layers of ovagrundol) the rear end also got treated with fluidfilm/wax in every cavity. I then had to move to another lift where I started to assemble some parts in the engine bay:

20141012_005.jpg


Every part I have in my hand gets cleaned and eventually swapped with another used part in better condition or a new one. The air inlets in front of the windshield are new (waited ~3 months for them to arrive..), the brake lines are made by hand because I change the system to front/rear setup instead of an X-setup and completely eliminated the ABS. The slightly rusty bracket for the fuel filter was only installed for fitting the brake line and will be painted and all the brake line brackets will be replaced with new ones...


During the last 2 days I assembled the doors:

20141012_001.jpg

20141012_003.jpg

20141012_004.jpg


At the front passenger side the yellow bracket where the door panel gets mounted is missing, so I have to wait until tuesday when it arrives with all of the other parts...
I also ordered all 4 outer window mouldings as new parts - the old ones had some scratches and dents and as they're the first thing you see approaching the car they should look nice and clean /ubbthreads/images/graemlins/wink.gif

Before moving again from one lift to another hall where I can hopefully stay until the car gets the engine/drivetrain parts, I applied another ~2l of body-cavity sealing mixture to the frame and side skirts. the car is now dripping from every small gap so there shouldn't be one single spot left in the whole frame that's not completely covered in fluidfilm and wax 8)
 
Last edited:

bobdole

Well-known member
Joined
Aug 23, 2007
Messages
866
Location
U.K.
Some great work.
 

92_talon_awd

Well-known member
Joined
Feb 11, 2014
Messages
456
Location
Knoxville, TN
This thread is epic. Anybody who asks "is this car worth saving" should be pointed here. /ubbthreads/images/graemlins/worthy.gif
 
Last edited:

r4pt0x

Well-known member
Joined
Nov 20, 2013
Messages
123
Location
Bavaria / Germany
One month since the last update, so here a few pictures on whats going on...

The middle section of the underbody is finished:
20141109_005.jpg


So as theres nothing left to do making much dirt i cleaned the roof liner:
20141101_001.jpg


Steering lines are finally Installed except for a bulkhead + 45° fitting from goodridge for the feed/return line which were on backorder... (axle parts are quite dusty now...)
20141116_006.jpg

20141109_002.jpg

20141109_001.jpg

20141116_010.jpg

20141116_005.jpg

20141116_002.jpg


The control lines are made of steel tubes, hydraulic fittings and hydraulic pressure hoses - the weakest links are rated for 500bar working pressure, so there shouldn't be any problem <img src="/ubbthreads/images/graemlins/wink.gif" alt="" />
All steering lines are covered by heat insulating hoses. I'll join both return lines from front + rear steering rack and install a proper oil cooler into the single return to the reservoir tank to keep steering oil temperatures as low as possible.

On the rear all oil lines are new except for the pressure line from pump to control cylinder, as its no longer available eiher from MME nor from MMC japan. So i'm restorating the old one which luckily only had some rust - which already has been completely removed with phosphoric acid... The rear steering pump also got refurbished with phosphoric acid and should be ready on the next weekend, so I'll start assembling the rear diff.


At the firewall the bits and pieces are also coming together with all mounts/brackets refurbished or new and all new brake/clutch lines.
20141116_011.jpg

20141116_013.jpg


Today I got the rear window trims I ordered so these will be installed within the next days. I also finally got a brand new trunk lid which I hopefully get within the next 2 weeks so the body is finally complete...

Either on the upcoming or next weekend I'll take the engine out of the old car, make it pretty and install it into the new car. Then the engine wiring loom will be extended for additional sensors, boost control solenoids, fan control etc... I made all additions/modifications in the old car with an seperate wiring loom for easy troubleshooting/modifications when testing with different software versions on the evo7/8 ECU, so now I'll include it all to the stock wiring loom so it looks completely clean and stock <img src="/ubbthreads/images/graemlins/smile.gif" alt="" />

Still lots of work, but I'm confident to get it done by next spring...
 

r4pt0x

Well-known member
Joined
Nov 20, 2013
Messages
123
Location
Bavaria / Germany
Found some goodies today when searching for engine mounts /ubbthreads/images/graemlins/cool.gif

20141204_001.jpg


Front axle member bushings, Rear upper + lower arm bushings (uniball) and front + rear engine mount bushings. The left engine mount had been replaced with a stronger evo 7/8/9 one when I rebuilt the engine, the gearbox side bushing has also been replaced with an evo bushing...

Didn't want to use urethane ones because 1st they look ugly as hell and 2nd they are much too stiff for normal driving... The Ralliart ones are stiffer than the stock ones but you can still move them a few mm by hand, so they should still dampen the engine vibrationas engine mounts are supposed to do.
 
Last edited:

r4pt0x

Well-known member
Joined
Nov 20, 2013
Messages
123
Location
Bavaria / Germany
small update:

last week I partly disassembled the engine, de-rusted the engine block and all attached parts as they already started to corrode after >1 year in the FWD without driving...

I also took out the fuel tank i'm going to use and removed the fuel pump unit. The interior of the tank looked just like the fule pump nit:

20141205_001.jpg


from the utside it looked way better...

20141205_002.jpg


The white crystaline coating could be brushed/washed away relatively easily, leaving completely blank metal surfaces (even without any coating...)

After I wahsed out all the brownish jelly-like stuff the tank was quite clean inside and will be de-rusted and coated the next few days.


The engine block and all brackets/attaching pats have been cleaned, purged of all corrosion building up during the last ~12 months and painted with KBS rust-seal. Then I desperaely searched for the box with all the bolts from the engine but couldnt find it - so I searched for every nut and bolt in some "old&new bolt collections" to install the engine and finally at ~8pm the engine was in its place:

20141207_001.jpg

20141207_003.jpg

20141207_005.jpg


The oil pan and valve cover will be replaced later, but I wanted to get the engine installed so I can adapt/install the remaining fuel and steering lines. Of course: after cleaning the workshop while walking home I finally remembered where I put the box with all the bolts... (Yes, the only place I completely ignored while searching...)
 

r4pt0x

Well-known member
Joined
Nov 20, 2013
Messages
123
Location
Bavaria / Germany
small holiday-update - with less pictures as most work was done on the wiring loom, brackets and small bits and pieces here and there...

2 weeks ago I temporarily installed the intercooler, A/C radiator and front bumper support (the new front bumper support should arrive next week /ubbthreads/images/graemlins/smile.gif) to make a mock-up for the engine and steering oil coolers and decide where to route the steering lines.

The gained space from removing the ABS is perfect for some huge radiators:

20141214_005.jpg

20141214_007.jpg

20141214_008.jpg

20141214_009.jpg


The slim goodridge radiator in the front is for the steering oil, the mocal for engine oil. A 25-row series 6 should be sufficient to keep the oil at moderate temperatures /ubbthreads/images/graemlins/wink.gif

The pictures were taken before finishing/installing the brackets i made - both radiators are mounted on both upper corners and the inner lower one with a modified alternator bracket. Air will come from the lower vent in the front bumper, guided by a hose. If this should be insufficient the left foglight cover will also be used as an air-inlet. As a last resort i can still install a small spal fan in front of the radiators...


The last 2 days and last weeend i partially restorated and adapted the wiring looms. From '89 to '90 and again to '91 Mitsubishi changed the connection to the interior wiring loom from 2 to 3 connectors and the radiator fan actuation has been changed from 2 relays with simple thermoswitch + A/C ECU signal to additional control from the engine ECU. So it was a little bit of work to get the '92 engine wiring loom fit the '88 wiring looms at the car...

I already prepared the engine wiring loom at home and removed some ECS related stuff and wires no longer needed due to the Evo7/8 ECU. I also had to find out the '88 wiring diagrams are wrong at some pin numbers on the interior interconnection for the cruise control. So after sorting this out at the car and with wiring diagrams for 89, 90 and 91 models I added the missing third fan relay in the fuse box and changed the wiring so both fans can be controled by the engine ECU and the smaller one also by the A/C ECU.
AEM UEGO Wires including analog out and serial out have been integrated into the wiring loom as well as the wires for oil temp and oil pressure gauges, OBD and flash connector. The AEM gauge and connectors will be hidden in the glovebox, boost and oil gauges will be installed underneath the radio. So i can keep a nice stock look but still have everything easily accessible for logging/tuning.


Next week i'll finally de-rust and seal the fuel tank with the new tank sealant i just received (ethanol-resistant). With the fuel tank and engine wiring loom installed, i can finish all remaining fuel and oil lines and start putting together the drivetrain so the car will hopefully soon be able to drive on its own again /ubbthreads/images/graemlins/smile.gif
 

r4pt0x

Well-known member
Joined
Nov 20, 2013
Messages
123
Location
Bavaria / Germany
Long time no update, so heres what happened the last weeks...

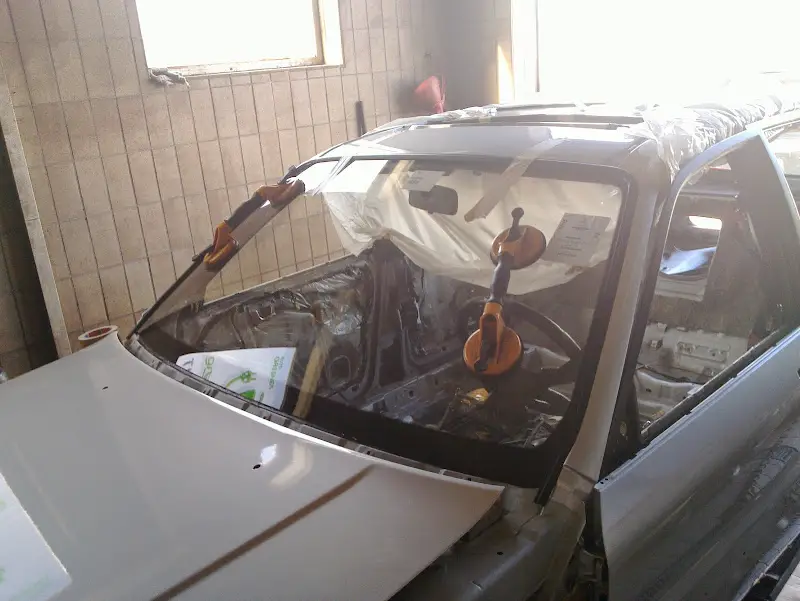
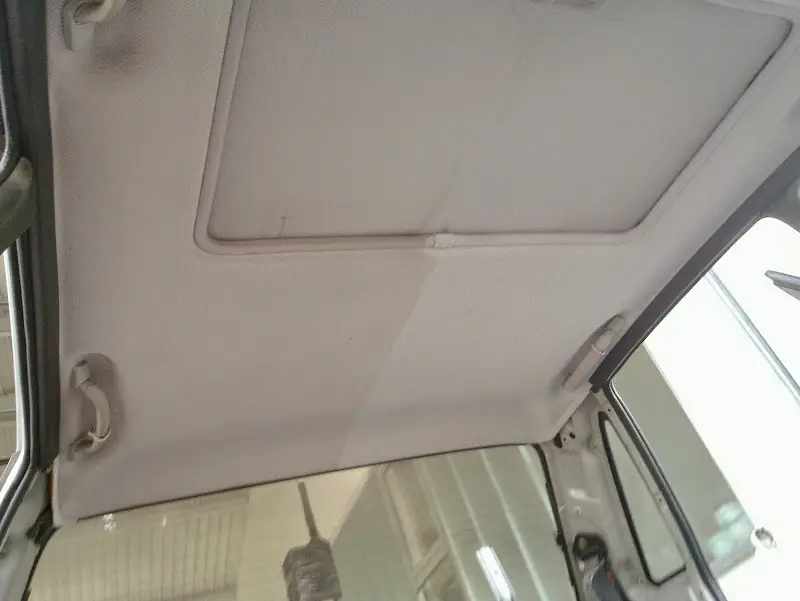
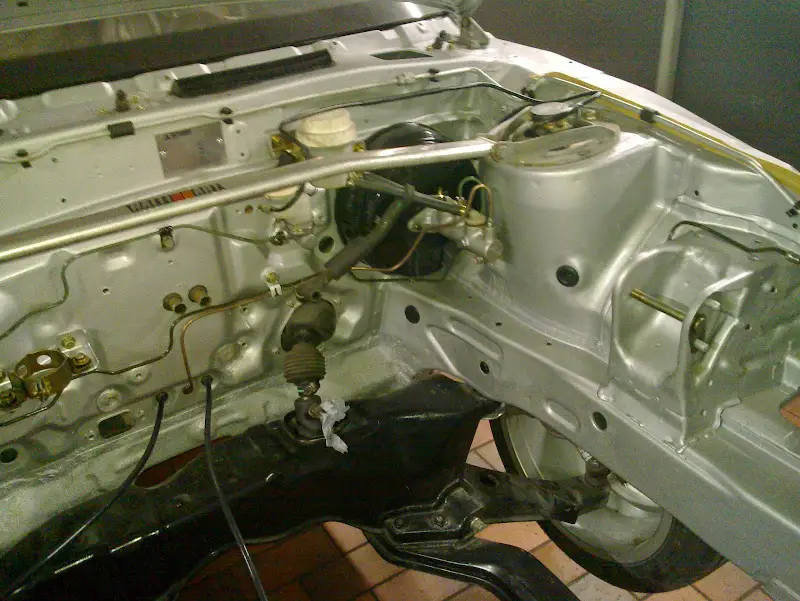
The engine wiring loom is finished and in place, so all heater/A/C modules on the inside were installed.

20150113_008.jpg


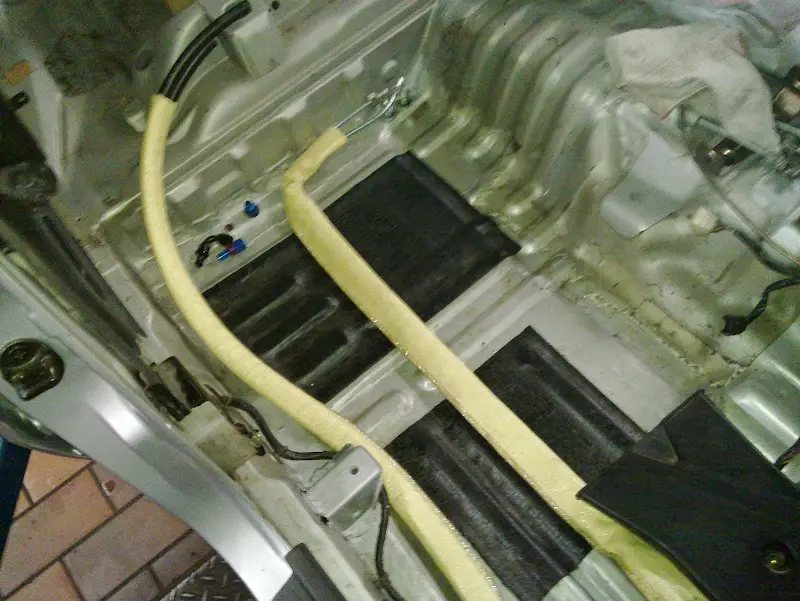
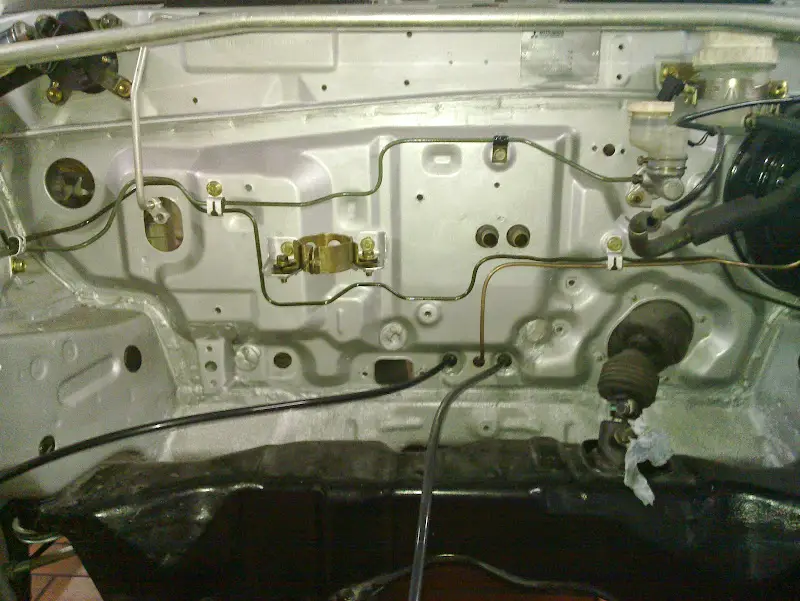
The wires on top of the crossbar are the "extension" of the engine wiring loom leading to the glovebox where I will install the AEM UEGO + serial port and obd+flash connector. I'm also thinking about putting the alpine stereo into the glovebox and install the stock mitsubishi one I still have in the center console. Main wiring will go to the alpine and the stock stereo will be connected with an level-converter to the alpines line in and still be fully functional. Together with the classic VDO gauges for boost, oil pressure and temperature this would give a nice classic look to the center console...

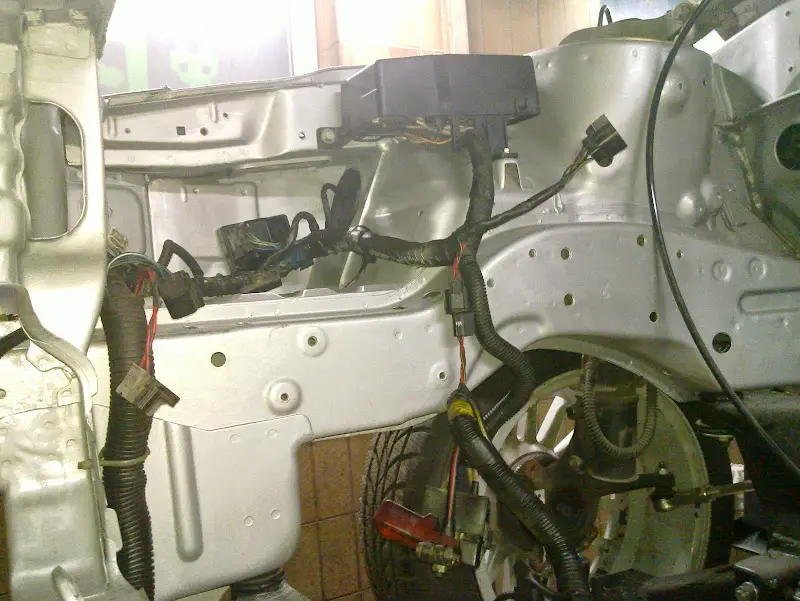
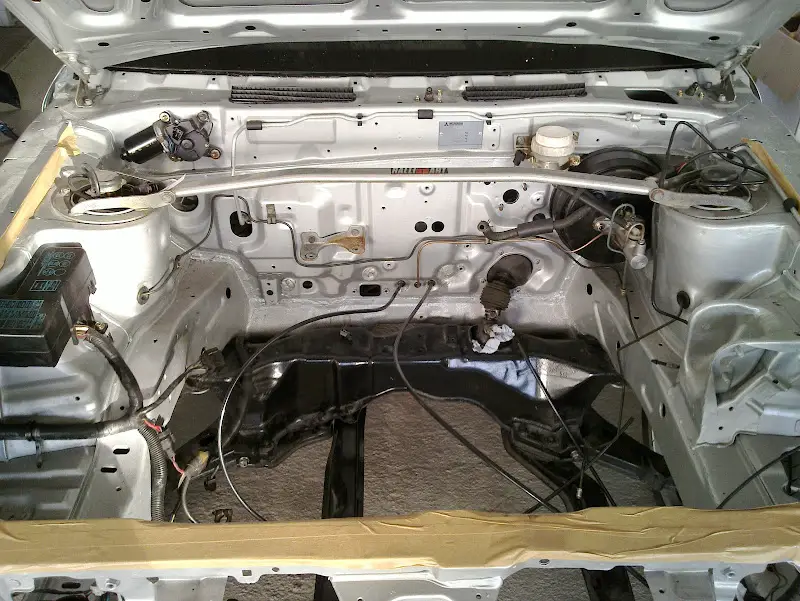
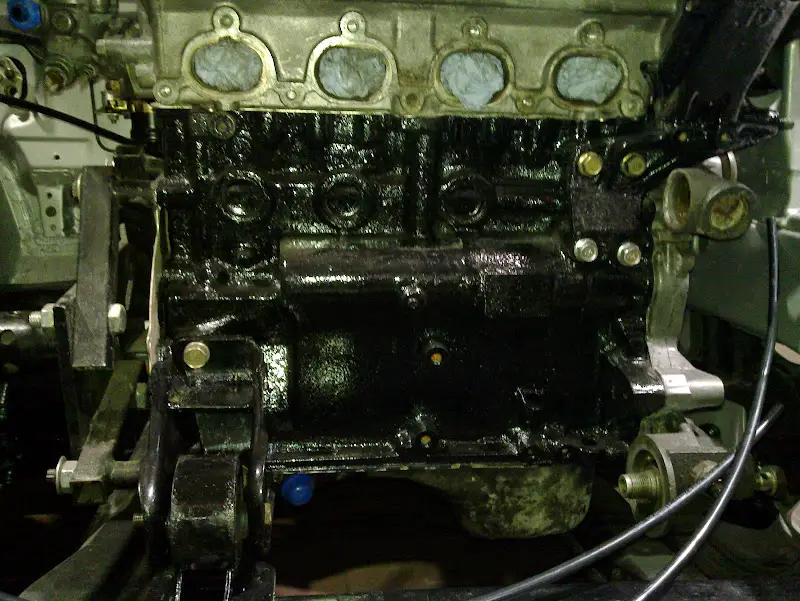
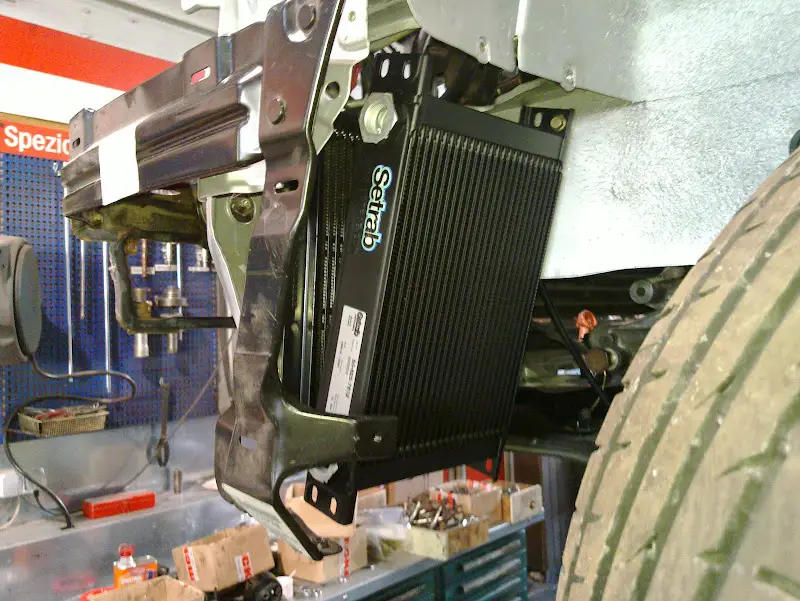
The engine bay gets more and more crowded. All new/changed lines found their place somewhere and brackets have been made. Just waiting for a delivery from goodridge so i can finally connect the fuel lines, oil coolers etc...
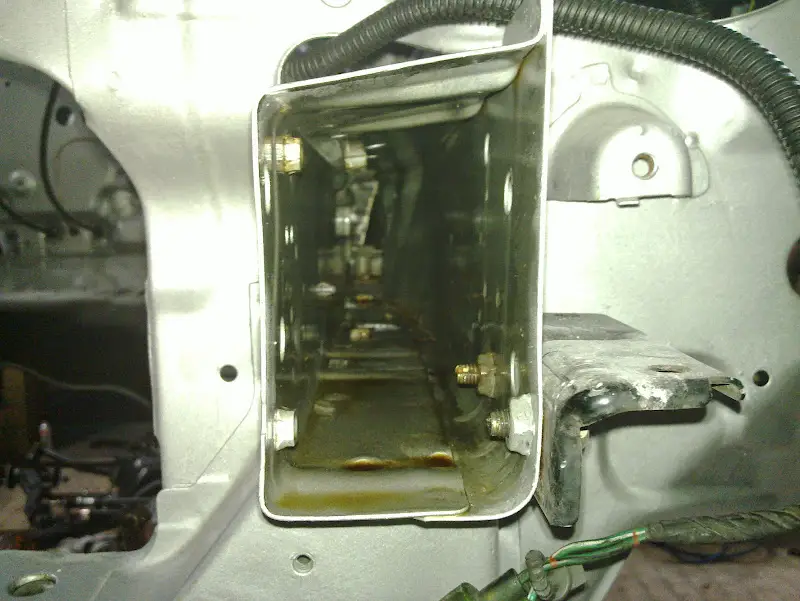
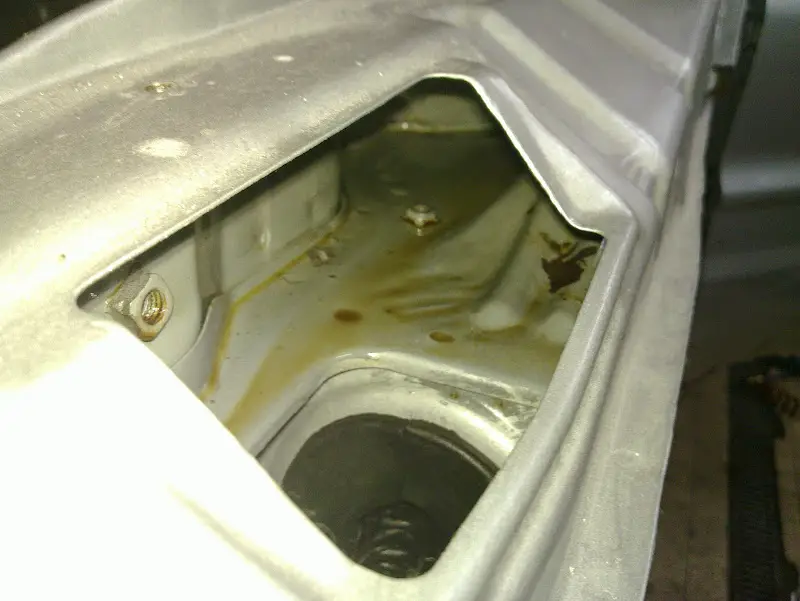
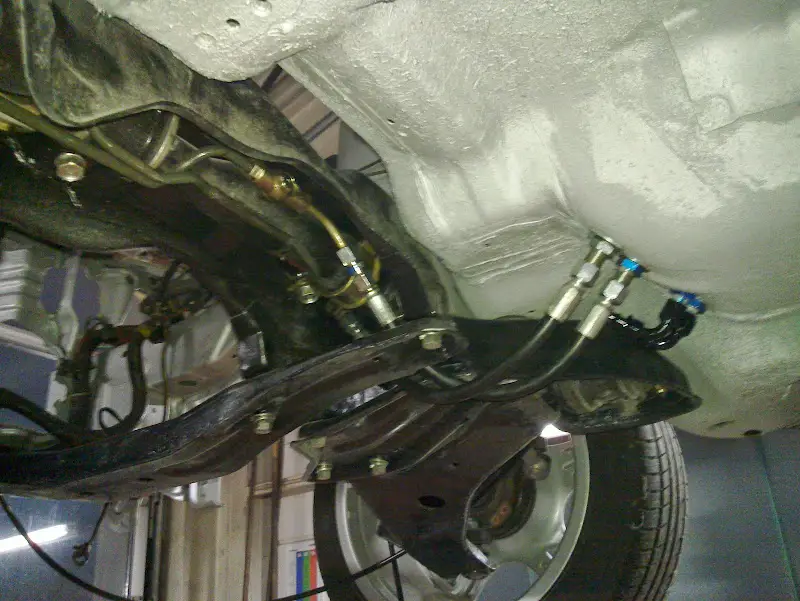
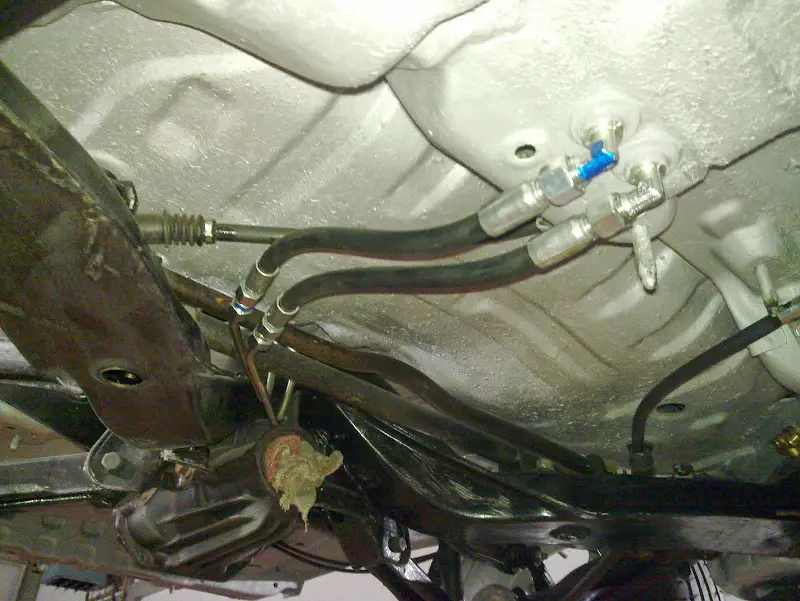
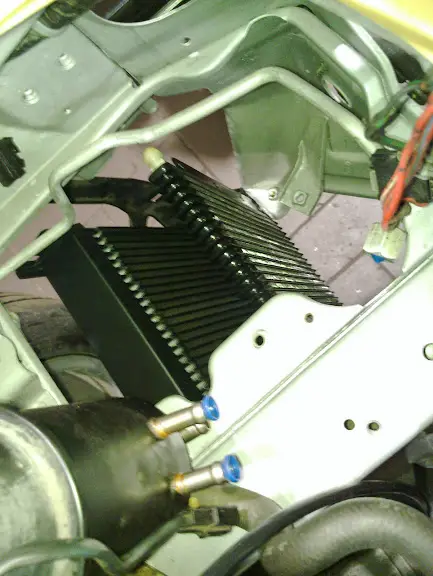
The oil lines from/to the rear steering are now routed at the firewall and the left frame:

20150113_004.jpg


The upper steel line is the return line, connecting to the oil cooler. the lower one is the rear feed line. Return lines are joined at the firewall so oil from front&rear steering is returning through the oil cooler.

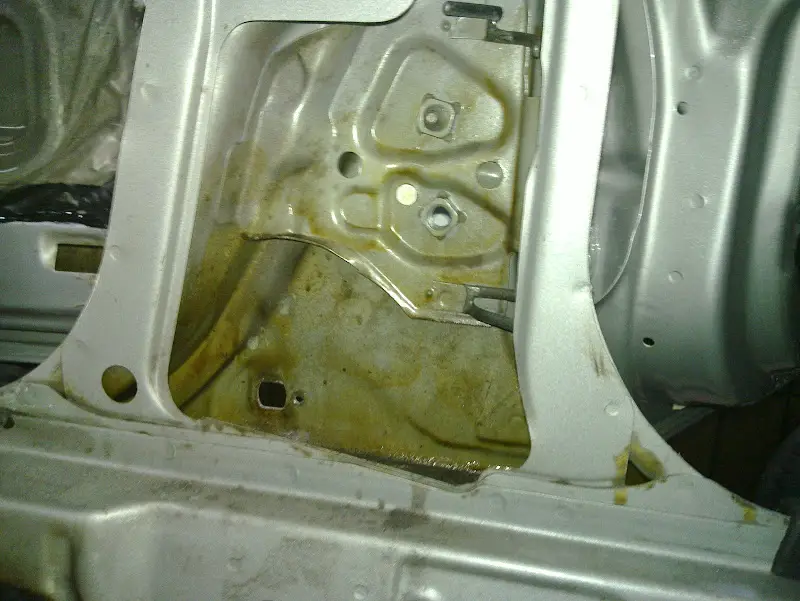
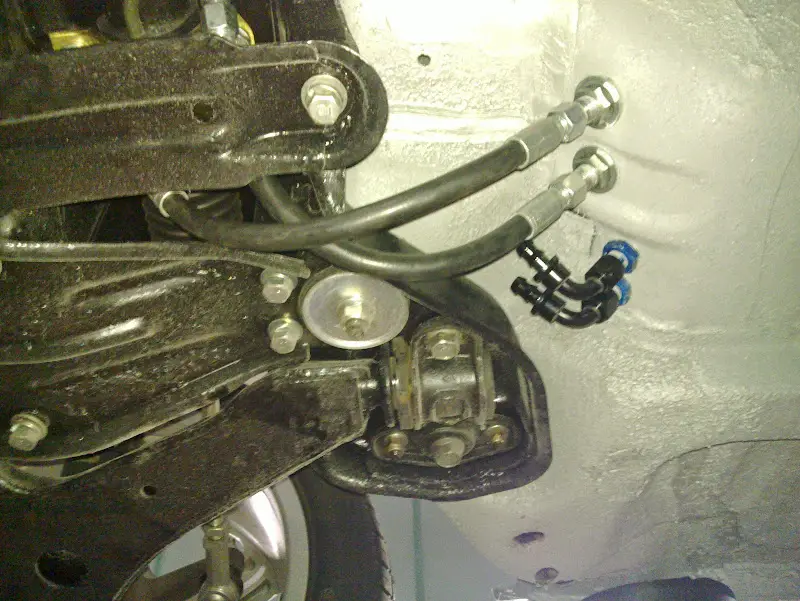
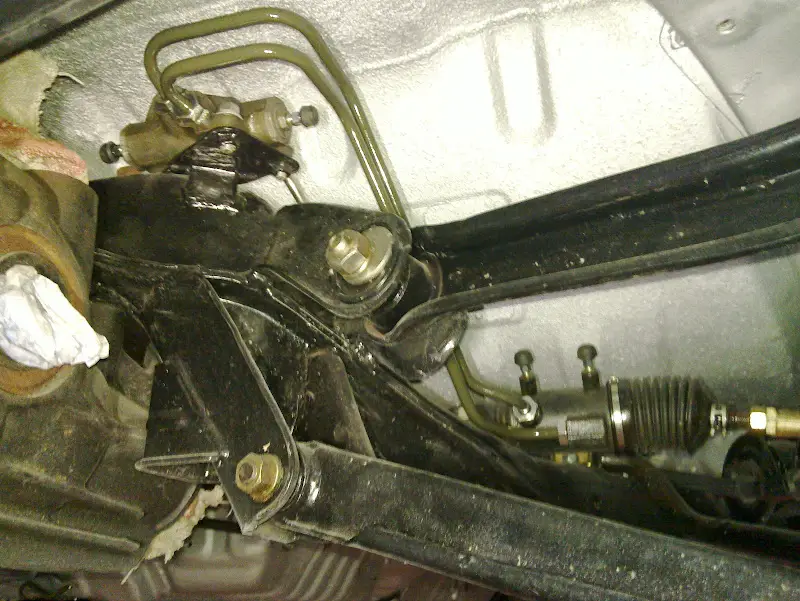
The cruise control actuator found its plaece deep down where the charcoal canister normally sits. I didn't want this ugly thing to sit as high as it normally does, plus the '88 model misses the upper 2 threads for the bracket I don't have and that's no longer available...

20150113_010.jpg


The two rubber lines are the rear power steering lines - not lined up properly because the picture was taken before I installed the Y connector to the return line and all mounting brackets...


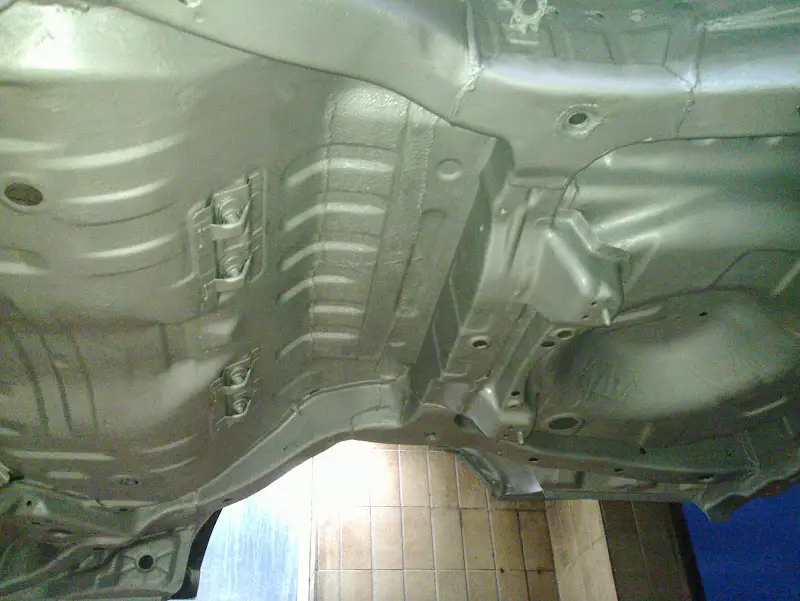
The water tube got some fresh paint and a new heat insulation. The P/S pump was also de-rusted and painted and is already in place.

20150125_006.jpg


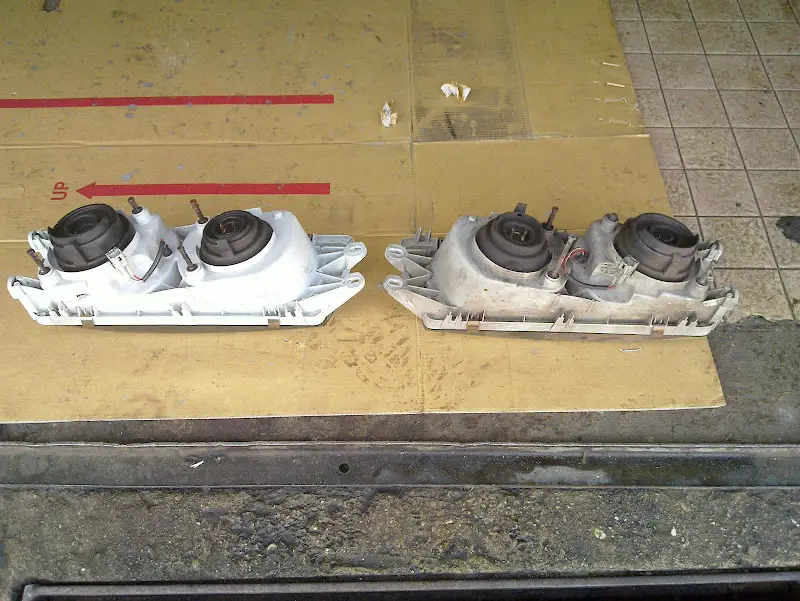
As the fuel filler tube is also no longer available I searched our garage where we store used fuel tanks... Under a coat of dirt and lots of sticky black underbody coating I found a decent fuel filler tube:

20150118_011.jpg


I also discovered why there are 2 different part numbers for it:

20150118_010.jpg


The rear wheel well panel seems to have changed for model 89->90 so I had to use a spacer. Mounted this way no dirt can pack on top of the bracket - so it could also be seen as an improvement /ubbthreads/images/graemlins/wink.gif

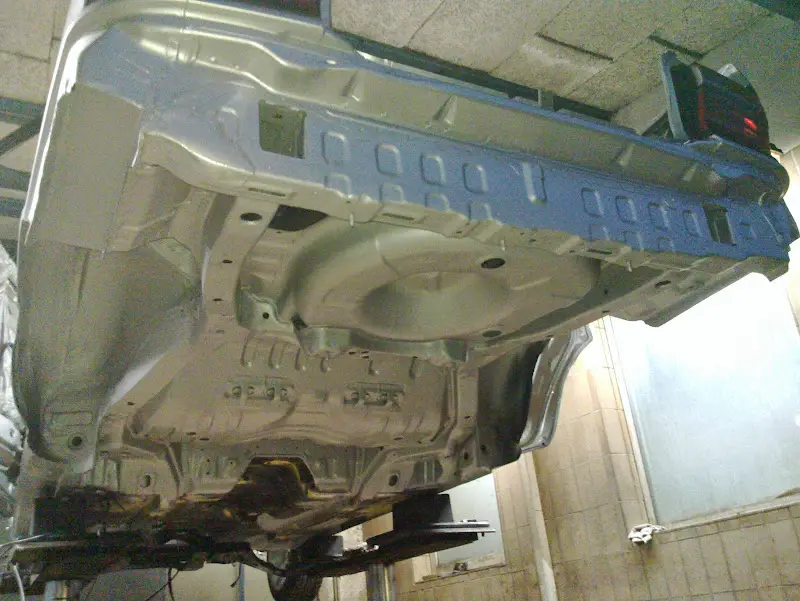
The fuel tank got painted with chassis paint during the last week after I already de-rusted and coated the inside of the tank 2 weeks ago.

20150125_002.jpg


Today I bolted up the fuel tank (as I needed the space in the cellar for painting the next parts...) and the rear bumper to get it out of danger when lying around in the workshop...

20150125_015.jpg


Yesterday I cleaned the A/C radiator and intercooler, painted the ac-radiator, coated the intercooler with a few layers of aluminium-coating and coated both with protewax to get a good protection and nice, shiny finish /ubbthreads/images/graemlins/smile.gif

20150125_015.jpg


The intercooler has lost some fins over the years, but its not bent or leaking so I can live with that as it performs really well for its size... Actually it looks much worse at the angle the picture was taken from as it looks when standing in front of it.

20150125_003.jpg


Last week I received some goodies from samco - not sure yet which version i'll use but i think i'll go with the classic (flat black) ones...

20150124_001.jpg


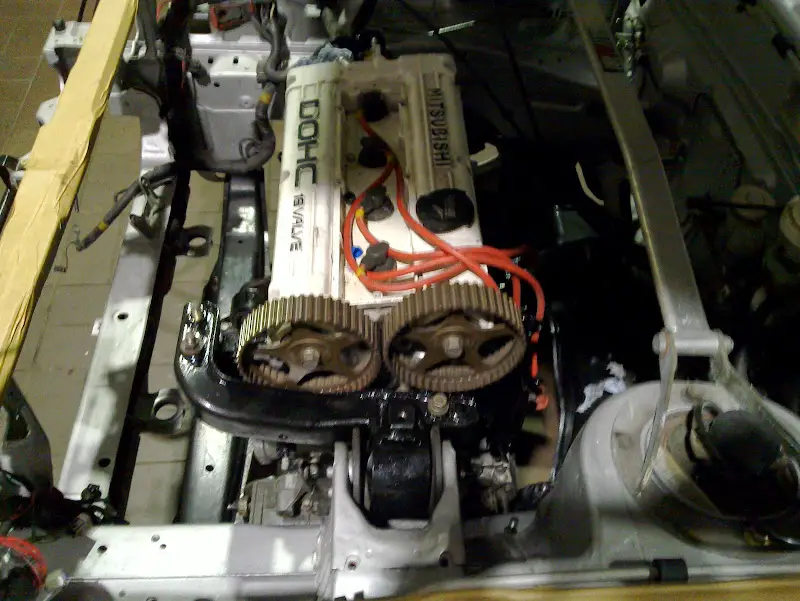
The inlet manifold, throttle body and everything attached to it got refurbished and protected with protewax. The front knuckles also got de-rusted, painted and received new bearings and ne + longer wheel studs. Of course the camera managed to f.. up all the pictures I took of these parts, along with the pictures taken from the oil pan with added NPT-thread for the oil temperature sensor and the Evo 9 dampers + H&R springs i'm preparing for the front. At the rear i'm using new stock dampers and also H&R springs - this will do for the first year or so, then i'll switch to a proper suspension (KW competition)


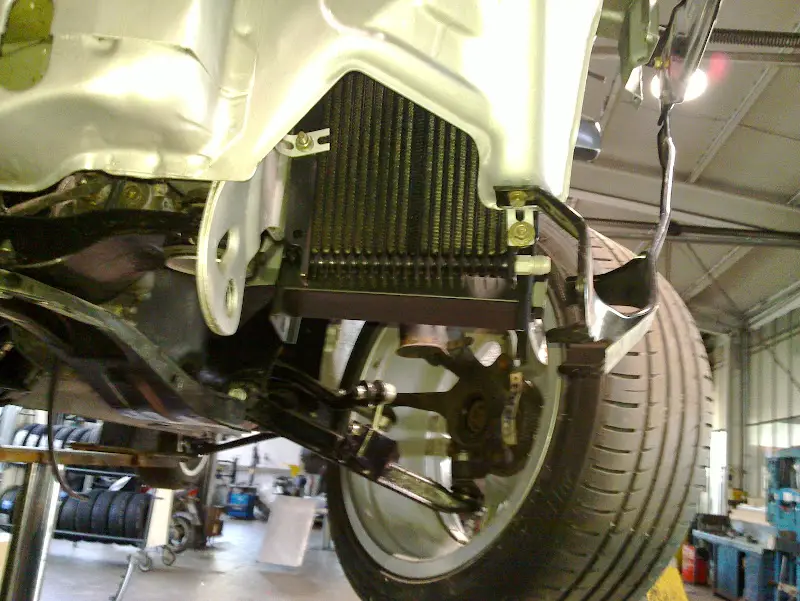
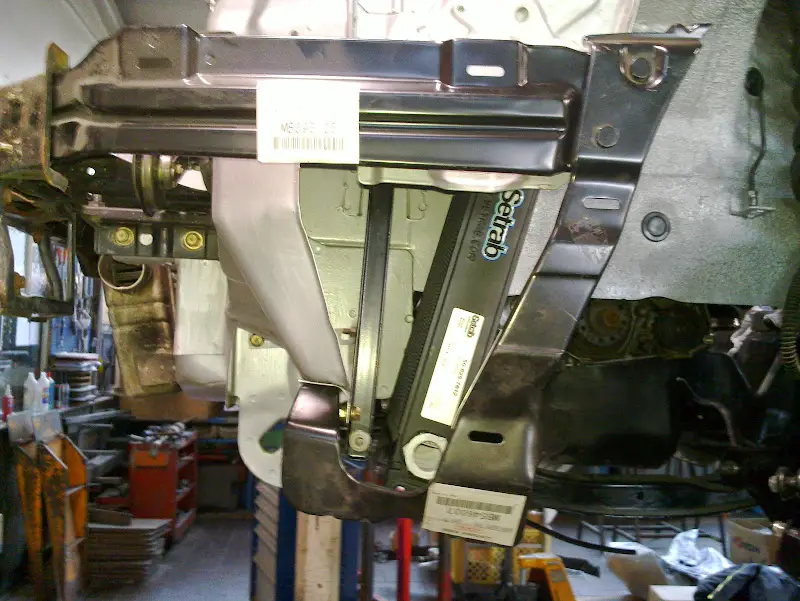
For the next weeks I'll focus on the drivetrain and refurbish all 4 driveshafts + propshaft and assembling the rear diff. The gearbox will eventually already get the oil cooler setup I'll use on the upcoming one, just to gain some experiences with the optimal oil pickup and return positions so I can change them if needed on the next gearbox...
As the mounting point of the stock oil cooler is unused in my current setup, I can put the gearbox oil cooler there. The oil pump can sit in front of the passenger side front wheel as there is plenty of space next to the washer tank.

I just ordered a new exhaust manifold (the VR4 one started to crack on the bottom between cyl 1+2) and a stock evo3 o2 housing. But I still have to figure out what to do about the ported turbine housing I got the turbo with. Without the sealant ring protecting the gasket I will continue blowing gasket after gasket. Even the thick single-layer stainless steeel gasket, that was said to work without the ring, already started to flow to the inside - and I definately don't want to have chunks of a 3mm thick SS-gasket going through the turbine wheel...
 
Last edited:

r4pt0x

Well-known member
Joined
Nov 20, 2013
Messages
123
Location
Bavaria / Germany
Another update /ubbthreads/images/graemlins/smile.gif

The goodridge parts that were on backorder arrived on friday, so I finally finished all fluid connections on the front of the car, including the oil coolers

20150208_003.jpg


The manifold was already installed last weekend, yesterday in added the fuel rail & injectors (precision 1200cc) and connected all the fule lines.
I'm quite happy with the routing of the throttle cables and the position of the cruise control actuator. After a little modification to the upper mount i was also able to mount the washer tank at its stock location.

20150208_008.jpg

20150208_007.jpg


Yesterday I also made some brackets for the fan (I had totally forgotten about when installing the intercooler 2 weeks ago /ubbthreads/images/graemlins/wink.gif ) and installed the new and modified center support.

20150208_002.jpg


All remaining parts for the front suspension also arrived so i could install the refurbished evo struts with H&R springs:

20150208_010.jpg


(thats not rust at that upper seam - it's the cavity protection still creeping out EVERYWHERE...)

H&R also on the back and everything cleaned and covered with protewax:

20150208_012.jpg


The rear wheel hubs got de-rusted during the last few days, tomorrow after the protewax dried up I'll install the rear studs so the car could be moved if necessary and I can also start assembling the brakes front&rear.
 

G

Staff member
Joined
Feb 24, 2004
Messages
8,896
Location
zompton
Awesome job man, can't wait to see it done. You are religious with that fluidfilm, as am I. That suff is awesome.
 
Last edited:

bobdole

Well-known member
Joined
Aug 23, 2007
Messages
866
Location
U.K.
Those look nice. What size are they?
 

r4pt0x

Well-known member
Joined
Nov 20, 2013
Messages
123
Location
Bavaria / Germany
Those are 7.5x17. IIRC they were an option for the Carisma Sport here and surprisingly light. Will compare them to the 16" OZ 5-spoke i have on the FWD Galant, but I expect them do be at most 1kg heavier (if any)

Have to decide yet what tires i'll be using. Most likely I'll go again for the Hankook R-S2 as they worked really well on my FWD. They are not spectecular but had the most consistent performance overall on braking/cornering/dry/wet/cold/hot etc pp and give a very good feedback and make it easy to get confident with them.
I tried the Federal 595RS-R once on a car I made the suspension setup for, and they had a considerably lower grip at braking/accelerating, which was strange because the cornering grip was really good. But they always had this dead and "wooden" feeling around the center and on turn-in no matter what i've tried with the geometry and thats a total no-go for me. Same with the Kumho KU36 but on a slightly lower Grip level plus they were rubbish when cold AND overheated very fast (you get what you pay for..). Both also gave much less feedback so I never got really confident in the tires as they didn't let you feel how much grip was left - they just tried to kill you when you've overdone it. The R-S2 are even above the limit much easier to control (easy enough for occasional 4 wheel drifts with an FWD Galant turbo /ubbthreads/images/graemlins/wink.gif )

But in 225/45R17 the Yokohama AE07 and Bridgestone RE070 are around the same price - both I haven't tried yet (well I've driven the RE070 on Evo X, but never really "tried" them...), so I'll see if I can find any reliable comparisons with one of the tires I already know or try them by myself...
 
Last edited:

r4pt0x

Well-known member
Joined
Nov 20, 2013
Messages
123
Location
Bavaria / Germany
Gearbox got installed today after lots of cleaning last weekend and de-rusting + painting the clutch release fork and all brackets yesterday

20150222_002.jpg

20150222_009.jpg


Front intercooler piping and side cover got repainted and installed with the cleaned stock hoses:

20150222_006.jpg

20150222_007.jpg


The right hand side pipe had to be cut when i installed this setup to my FWD due to the ECS tank and lines on that side. If i can find a complete pipe i'll replace it, if not i'll build the rest of the piping myself...
 
Support Vendors who Support the GVR-4 Community
Boosted Fabrication ECM Tuning ExtremePSI Fuel Injector Clinic Jacks Transmissions JNZ Tuning Kiggly Racing Morrison Fabrications RixRacing RockAuto RTM Racing STM Tuned
Top