The Top Mitsubishi Galant VR-4 Resource

Join the best E39A 1991-1992 Mitsubishi Galant VR-4 community and document your GVR4 journey.

  • Software Upgraded - Reset Your Password to Login
    In order to log in after the forum software change, you need to reset your password. If you don't have access to the email address you used to register your GVR4.org account, you won't be able to reset your password. In that case, follow the instructions here to regain access to the forum.

Is this the tranny or bellhousing?

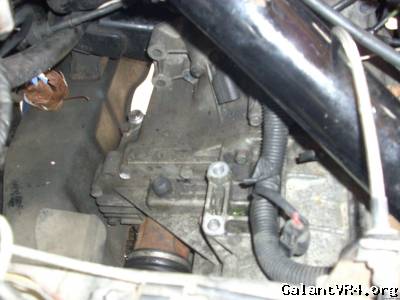
Getting ready to drop the tranny and I am not sure where the tranny begins and ends. I want to remove the tranny in one shot and not find out that I moved the bellhousing with it. I have only dropped a tranny once, and did so many years ago.

Could you please let me know where the tranny begins and ends?

Pics are below....

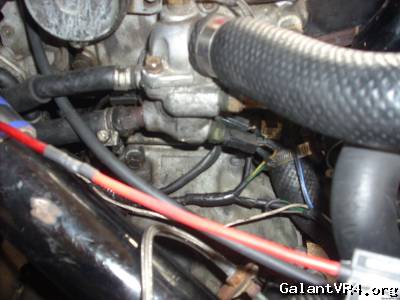
Pic 1, I am guessing that the two bolts right below the thermostat housing are the top tranny bolts, but what is confusing me are the series of bolts in pic 2 where the passenger axle goes into the tranny. I don't want to take the tranny apart accidentally!

Thank you

 
Last edited by a moderator:

maroonmetallic

Well-known member
Joined
Jun 10, 2004
Messages
2,100
Location
central WI
The two top bolts are the top series that you need to remove when you pull the transmission. Additionally you well need to remove the 5 bolts that hold the transfer case on. Also removing the inner part of the drivers halfshaft.

If I remember correctly there is 10 bolts that vary in size as you run around the bellhousing from the starter to the flywheel inspection plate.

-Shawn
 

89Mirageman

Well-known member
Joined
Jul 5, 2006
Messages
2,502
Location
Stantonsburg, NC
There is also a hidden bolt going towards the tranny from the engine side down by the starter. You also need to remove the flywheel inspection cover from the bottom of the engine/tranny.
 

Thanks for the heads up. Transfer case is down. Just the tranny and the driver's axle remain.

Quoting maroonmetallic:
The two top bolts are the top series that you need to remove when you pull the transmission. Additionally you well need to remove the 5 bolts that hold the transfer case on. Also removing the inner part of the drivers halfshaft.

If I remember correctly there is 10 bolts that vary in size as you run around the bellhousing from the starter to the flywheel inspection plate.

-Shawn


Thanks for letting me know about this one!
Quoting 89Mirageman:
There is also a hidden bolt going towards the tranny from the engine side down by the starter. You also need to remove the flywheel inspection cover from the bottom of the engine/tranny.


So there are more or less like 8-10 bolts right? Do the bolts to the transfer case count as some of them? Nothing left now but the tranny to remove!

Also how badly is that one bolt hidden behind the starter etc. I don't see anything. I just see one bolt kind of pointing inwards from the block to the tranny.

I really don't see a whole lot of bolts holding the tranny on. I want to try and get the bottom bolts out first but I don't see any besides the ones on pic 2 which seem to hold the tranny itself together.

There were 2 bolts on top and I removed one...I don't want the bastard to fall on me /ubbthreads/images/graemlins/jawdrop.gif

Any pointers? So close /ubbthreads/images/graemlins/grin.gif

Thanks!
 

Update tranny is about 2 inches out...wonder what is holding it in. It can't be a bolt if it moves at all. What the heck?
 

belize1334

Well-known member
Joined
Nov 18, 2003
Messages
3,316
Location
Bozeman, MT
There are 6 bolts total which attach the transmission to the block. Three thread into the block and 3 thread into the bell-housing.

BLOCK TO BELL-HOUSING: Two 14mm at the top of the bell housing. 1 14mm just above the clutch slave cylinder (accessible from underneath).

BELL-HOUSING TO BLOCK: 1 8mm for the inspection plate above the slave cylinder (I never replaced this one after the first removal). 1 12mm for the inspection plate below the slave cylinder (important for keeping debris out). 1 12mm below the starter (accessible from underneath after dropping x-fer case and important if you don't want to crack the bell-housing).

Otherwise you just have to remove the 2 bolts in the transmission mount, pull the axles, unhook the reverse-light, unhook the speed sensor, pull the slave cylinder off of the transmission, pull the starter, drop the x-fer case, down-pipe, fore-aft sub-frame brace and support plate, pull the wheel-well dust cover, and then drop it down.

Tips:

1) If you remove the brake-line brackets you can pull the two 17mm suspension strut bolts and tip the hubs out. This will allow you to pull the axles from the transmission without removing the 36mm castle-nuts from the spindles. That is, you can leave the axles in the vehicle and just slide them out of the transmission.

2) Removing the radiator and the lower water-hose makes for more room when wiggling the transmission out.

3) If you have trouble aligning the input shaft with the clutch disk try using a 1/2" socket driver to turn the engine through the drivers wheel well. Always turn clockwise (consistent with engine rotation).

4) Make sure you torque down the transmission bolts a little at once and evenly. If you let the bell-housing get crooked you could do damage to the seals and the clutch disk.

5) The passenger axle can be a BITCH to pull from the transmission but I came up with a slick trick that works like a charm. Get a nice beefy flat-headed screw-driver with a square handle. Get a big crescent wrench and put it on the handle so you can twist it easily. Slide the black of the screw-driver up between the head of the axle and the casting of the transmission. Twist and watch the axle slide away like butter. Wear glasses to keep debris out of your eyes.
 
Last edited:

mitsuturbo

Well-known member
Joined
Jun 2, 2008
Messages
3,551
Location
Near Seattle, Washington
When you put it back together, you better make DAMN SURE that bolt with the 12mm head, with a 10 stamped on it is put in near the driver side axle.
Make sure it's a grade 10 too. I've seen grade 7's (# stamped on bolt head) put in there and get snapped before.

If you leave that bolt out, you -WILL- end up with a broken transmission bellhousing.
 
Last edited:

Good stuff everyone. I will take heed to all of this when putting it back together! Thank you.
 
Support Vendors who Support the GVR-4 Community
Boosted Fabrication ECM Tuning ExtremePSI Fuel Injector Clinic Jacks Transmissions JNZ Tuning Kiggly Racing Morrison Fabrications RixRacing RockAuto RTM Racing STM Tuned
Top