The Top Mitsubishi Galant VR-4 Resource

Join the best E39A 1991-1992 Mitsubishi Galant VR-4 community and document your GVR4 journey.

  • Software Upgraded - Reset Your Password to Login
    In order to log in after the forum software change, you need to reset your password. If you don't have access to the email address you used to register your GVR4.org account, you won't be able to reset your password. In that case, follow the instructions here to regain access to the forum.

#83/2000 Project Cluster To Capable (12/1/09) 56K Beware

CarRacer

Well-known member
Joined
Jun 28, 2007
Messages
4,371
Location
Shakopee, MN
Fixed some random things on #83 yesterday.

I replaced the grille clips with some on a grille I had bought at a junkyard. I took out the screen and painted it with some silver paint I had around. It turned out well, and the grille is actually attached to the car now.
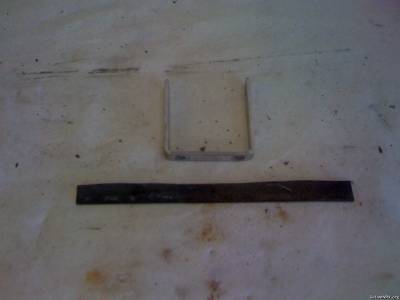
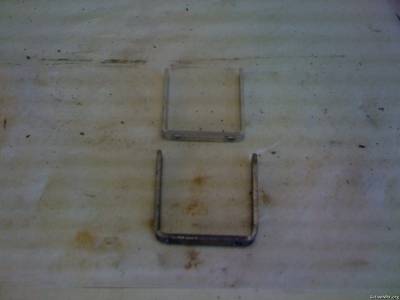
I replaced the hood release cable protector. I painted the one that went on to clean it up a bit.


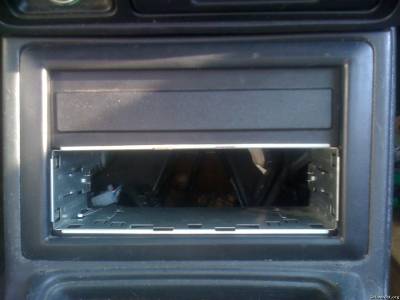
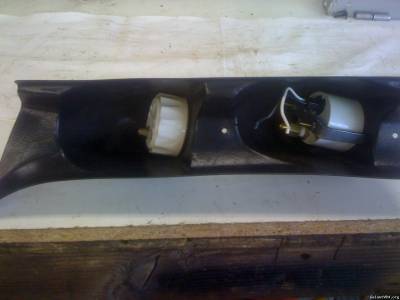
I modified a DSM radio surround that I bought for 5 bucks to fit. I used 2 pieces of 3/8 hard brake line to make spacers for the lower 2 screws. It fits without any problems. I'm not sure what I'm going to do with the blank space above it. I guess it was for an equalizer or something.


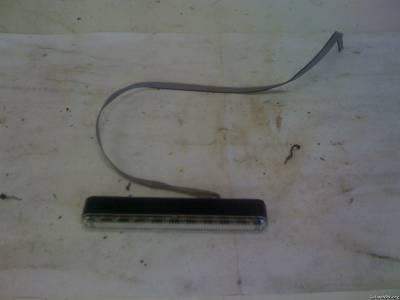
I did find this LED light in the space behind where the radio goes. I think it's one of those "chaser" led lights the ricers use to simulate a car alarm. Not really sure though.


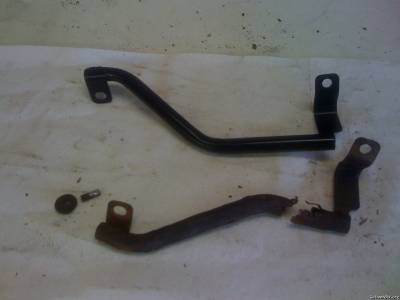
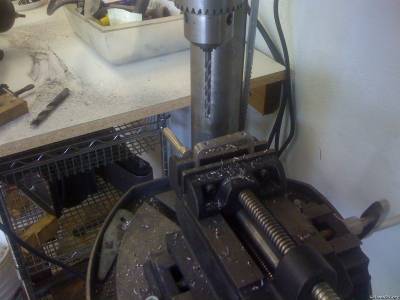
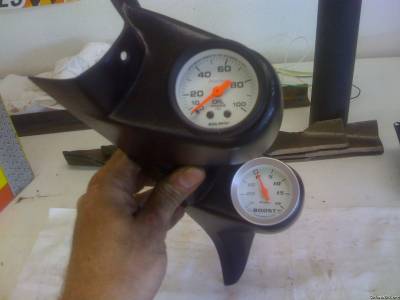
I made a bracket to mount an oil pressure gauge in the A pillar pod. Also, note the cheap ass boost gauge. I don't know where he got it from. It screws together into the gauge pod. I'm tossing that thing next paycheck for an Autometer one.


Polish

Well-known member
Joined
Jan 10, 2005
Messages
8,936
Location
NE, IN
Nice job, keep up the good work.
 

CarRacer

Well-known member
Joined
Jun 28, 2007
Messages
4,371
Location
Shakopee, MN
I forgot to include that the Galant made the first strike of the battle this weekend!
I was changing the routing of the boost gauge hose to the clutch hose grommet. I reached under the padding and grabbed the hose. Something under there on the firewall was crazy sharp cause it cut me without me putting much pressure on my hand.
The Galant now knows what my blood tastes like, hope it doesn't develop an appetite. /ubbthreads/images/graemlins/hsugh.gif


BluFalcon

Well-known member
Joined
Jan 20, 2002
Messages
1,312
Location
Wichita, KS
When the car draws blood, I usually mark it with the blood somewhere. That way it'll always have a part of you on it. It's a ritual that I've gone through a few times unfortunately. /ubbthreads/images/graemlins/grin.gif
 
Last edited:

Sean92AWD

Well-known member
Joined
Dec 17, 2007
Messages
247
Location
Newington, CT
Good work man. I ripped my thumb and middle finger open on mine sunday. Using the deadblow to straighten the tie down i whailed my intercooler mount. Left as pool of blood on the floor. Fun times!
 

CarRacer

Well-known member
Joined
Jun 28, 2007
Messages
4,371
Location
Shakopee, MN
Removed the throttle body today to block off the FIAV. When I start the car, the idle jumps to 2k. Reading on this site has led me to believe the FIAV is fubar. Instead of draining the coolant, I clamped the hoses with some body clamps and a visegrip. I'm going to loop the thermostat to the water pipe when I get done with the TB. I shot the TB with carb/tb cleaner while it was off. I didn't take pictures as it was still in pieces. I used a screwdriver bit for a 3/8 ratchet to get the screws out. I'm replacing them with allen head screws when I put it back together. I whacked the bit with an extension onto the screw and that seemed to loosen the screws. I only had problems with one, and it was on the outside so I broke it loose with a needlenose visegrip. I'm grabbing some new gaskets as well, so I don't have to use RTV. I made the block off plate out of some sheetmetal we had left over from the race car interior. I painted it black and let it dry. I know no one will see it, but at least I know it looks better.


CarRacer

Well-known member
Joined
Jun 28, 2007
Messages
4,371
Location
Shakopee, MN
Did a few things on the car today.

Looped the coolant line going to the throttle body to finish that part of the FIAV delete.


I also addressed another issue the car has. The battery mount had been relocated to the OEM MAF spot.
Whoever did it, hacked it together. I'm surprised it lasted as long as it did. 50 lbs of weight crashing around in the engine compartment would have been bad.


I built a new mount out of angle iron. Nothing fancy, but it should work.
I put it in place in the car, and I'll probably have to space it up a bit with some round tubing. The clearance is pretty tight with the intercooler piping.
I'm contemplating adding a mount to the fender liner, but a storm rolled in before I had a change to do some further planning.


Here's the welder I used. I haven't used it in a couple months, so don't bag on my welds too much. :p


CarRacer

Well-known member
Joined
Jun 28, 2007
Messages
4,371
Location
Shakopee, MN
I finished up two projects on my car today.

I completed installing the FIAV block off plate on the TB. I looped the lines on the TB and replaced the screws with allen head bolts.


I completed my battery bracket as well.
It was quite a bit more work than I had planned.
My bracket was narrower than the mounts on the car. I ended up drilling into the flat part on one of them. I'll be using a bolt and nut to hold that side down.
I also had to weld a spacer on to the bottom of my bracket. The mounts are two different heights. Not a big deal, but more measuring and whatnot.
I also constructed a strap that will survive anything I put the car through. I looked for thinner flat stock, but I couldn't find anything. I ground off the heads of two bolts for the studs and welded them to the side of the bracket.
I put a coat of black spray paint on it and do the final installation later.


turbowop

Well-known member
Joined
Apr 29, 2001
Messages
11,972
Location
Yakima, WA
You didn't need to loop the lines on the TB. You can just leave them open if you want, or if you want it to look more finished, a couple of large size vacuum caps will work. Either way, it will look better than that coolant hose on there.
 

CarRacer

Well-known member
Joined
Jun 28, 2007
Messages
4,371
Location
Shakopee, MN
Installed the TB with new gaskets, block off plate and got it running. No more high rev start up or idle surge, so that was a good feeling.


I installed the battery mount I made as well. It doesn't wobble like the previous mount did and won't interfere too badly with my future piping construction.


I started installation of the foglights as well. I basically planned how I was going to do it and started on one bracket.
Just planning on continuing to make progress on the car, no matter how small.


CarRacer

Well-known member
Joined
Jun 28, 2007
Messages
4,371
Location
Shakopee, MN
Finally got to do some "fun" work on my car.
I like working on my car (shut up), I just got to install something besides maintenance parts.

I installed my K sport coilovers I purchased recently.
I started by weighing my car as a baseline. I also wanted to see what my corner weights were, to get an idea of what to shoot for.

I scaled the car with 40 psi air pressure, empty tank of gas, some random parts in the trunk and interior, and no driver.


I cleaned up the shocks prior to install. I used a little windex and elbow grease.


I started with the rear shocks. They were a pain in the ass.
I used a torch on the right side and an air hammer on the left.
The air hammer was 10x easier. I just gave it a little buzz at 12, 3, and 6 (clock numbers) on the bushing and then gave it about 50% at 3 and it came right off.
The torch took forever and made the shop smell like ass. I still ended up using the air hammer to get the inner sleeve off anyways.
The air hammer didn't hose the shock for future use either.


Here's a photo of the ride height after I installed it.


Fronts were a lot easier as I had already removed the shocks once before to fix the axles.


I roughed in the camber while I installed them by taking a measurement before and trying to achieve that at the height I measured as well. Here's the tool I used.


Here's the numbers I came up with after the install.
The shocks even dropped 34 lbs off the total weight.
I made a few adjustments to the front shocks. I moved them about 10 turns. 1 turn ended up equaling 10 lbs.


Front Percentage

Cross Percentage (RF & RR)
 

Reading and you said you blocked off your Fiav because of High idle? Personally to check the FIAV you do a boost leak check to make sure its leaking.. Did you check to see what your TPS was set at? Any way good job so far looks good...


Jesse
 

CarRacer

Well-known member
Joined
Jun 28, 2007
Messages
4,371
Location
Shakopee, MN
It was due to a high start up idle and idle surge.
My troubleshooting indicated the fiav.
I checked the TPS with an ohm meter when I had the TB off.
 

CarRacer

Well-known member
Joined
Jun 28, 2007
Messages
4,371
Location
Shakopee, MN
I never posted the actual corner weights.

Here's the before on the stock suspension for future reference:
Again, car has no a/c, full interior, empty tank of gas, random parts in trunk (~75-100lbs), battery in engine bay


Stock Corner Weights

950 | 929
------------
704 | 664

Total : 3248
Front %: 57.8
Cross %: 50.2


Coilover Corner Weights

936 | 916
------------
694 | 670

Total : 3214
Front %: 57.5
Cross %: 50.0
 

CarRacer

Well-known member
Joined
Jun 28, 2007
Messages
4,371
Location
Shakopee, MN
Removed the turbo assembly today.
It went well for my first time doing it. I didn't break anything as far as I know now.
I didn't break any exhaust manifold studs, but 2 did come out with the nuts. Not a big deal and better than breaking them.
The downpipe nuts were a bitch to remove, I ended up using our biggest 1/2 drive breaker bar. It's about 2 1/2 feet long. It was still tough.
Draining the radiator was a huge mess as well. I tried to unscrew the drain slowly and it ended up popping out. I ended up spilling a quart or so. I used my finger to semi control the flow into the bucket and keep it from spraying the oil pan and splattering. I'm going to have to find a better way to do that.

Wobble extension with a 6 sided socket was the ticket.


What kind of hack would be happy with this on their car?


I did have 2 questions.

What are these pipes on the bottom of the radiator? There wasn't anything connected to either side.


What's does this resistor pack do with the fan? The wires are broken and I'm doubtful it works.


Last edited:

strokin4dr

Well-known member
Joined
Aug 30, 2005
Messages
2,770
Location
Savannah, GA
The resistor on the fan is for the high/low speed control. You can loop one of the wires to make it run on high all the time. There is a how-to on this I believe.
 

CarRacer

Well-known member
Joined
Jun 28, 2007
Messages
4,371
Location
Shakopee, MN
I transferred the oil and coolant lines over to the turbo to be installed. No studs or bolts broke today while removing the o2 housing or turbo today. I was worried about that, as removing broken ones is a pain in the ass. I put loctite on the stud for the o2 housing. Not sure if that will do anything besides hold it while I bolt it down.

Painted the brake reservoir mount today, part of the continuing to make progress plan.


Edit: Cleaned the engine bay a bit as well.


Last edited:

CarRacer

Well-known member
Joined
Jun 28, 2007
Messages
4,371
Location
Shakopee, MN
Installed a 90 turbo water pipe this weekend.
I used a wire brush wheel on the bench grinder to prep before painting. I used low gloss black engine paint, it turned out well in my opinion.
I also sprayed the ps bracket and dipstick. I used a clear coat spray to protect the paint. It glossed the flat black paint up quite a bit, but I like the result.


Polish

Well-known member
Joined
Jan 10, 2005
Messages
8,936
Location
NE, IN
Looking good, keep up the good work.

Wish I would have had corner scales.
 
Support Vendors who Support the GVR-4 Community
Boosted Fabrication ECM Tuning ExtremePSI Fuel Injector Clinic Jacks Transmissions JNZ Tuning Kiggly Racing Morrison Fabrications RixRacing RockAuto RTM Racing STM Tuned
Top