The Top Mitsubishi Galant VR-4 Resource

Join the best E39A 1991-1992 Mitsubishi Galant VR-4 community and document your GVR4 journey.

  • Software Upgraded - Reset Your Password to Login
    In order to log in after the forum software change, you need to reset your password. If you don't have access to the email address you used to register your GVR4.org account, you won't be able to reset your password. In that case, follow the instructions here to regain access to the forum.

1722/2000 burn victim rescue

GSXftw

Well-known member
Joined
Dec 22, 2014
Messages
111
Location
medford, OR
Try this one

Turbo is a H1E, with a 64x76 turbine (HX40) with a 12cm TS housing, and a 60x87 billet 7 blade. Im looking to build my own twin scroll mani for it, and/or go to a 60x70mm turbine (HX35) with this same comp wheel. Saw 28 psi at 4700~ on this open mani
 
Last edited:

GSXftw

Well-known member
Joined
Dec 22, 2014
Messages
111
Location
medford, OR
I got some goodies from TMZ today /ubbthreads/images/graemlins/smile.gif


It doesn't look like much but this is a big step, it's the last I need to assemble the trans
 

GSXftw

Well-known member
Joined
Dec 22, 2014
Messages
111
Location
medford, OR
Had a good talk with TMZperformance. When ordering the shims, I had a few questions on the double spring 1-2 hub. The reply I got was very informative, that its a good idea and most of their trans have it, but I must use a shallow 1st gear synchro to clear the springs. So I added that to the order, and got the thing together.


So you know the penny trick with torquing the two end nuts? Well its a pretty good technique, but if the trans is facing up, and if youre extremely unlucky like I am, a penny can perfectly fit in this hole.

FML. After shaking the thing and trying to get it to come out, I dove back in for the f***er. This was unnerving cause was really afraid of chipping the discontinued EVO III 5th gear, but I just took my time, lost an hour but got that stupid penny.


and there it is


My transmissions are just getting better and better /ubbthreads/images/graemlins/smile.gif I hope this thing isnt too tight... It does spin with pliers...but by hand you just dont have the grip. Then again its just got its lube used for assembly and otherwise dry, case is cold, and everything will get worked in. Judging by the clearances it had before, thats probably why I couldnt get any good, quick shifts out of it. So final mod list on this trans are-
92 DSM trans, double synchro 2nd, Jacks 4 spider center, EVO III 1st synchro/5th gear, dual spring 1-2 hub, new bearings/synchros all around, shimmed for the < 600 ft lb clearances.

And... since I was there... I looked into what will be the next step after this...


This is the trans I'd like to be building/running... But as now a full time college student, money is tight. This is a jacks trans I picked up, guy said had a broken 3rd gear fork. Its a 92, with EVO III 3rd, 4th, 5th (this is where I got my EVO III 5th Im using now) So upon insepection. Fork was fine, rail was broken.


At this point its just gonna need the rail, which Im thinking I can just rob from another trans, the EVO III 1st gear, which Ill get double synchro'd. Im looking at about $450 and I'll have better ratios to play with.
So now, my engine/trans are together, its time to join them, and work on getting them in the car. I want this thing moving on its own power when I do the bodywork on it.
 
Last edited:

GSXftw

Well-known member
Joined
Dec 22, 2014
Messages
111
Location
medford, OR
So had another very productive night. Put in a good 7 hours. Im on break before winter term starts so using it to my advantage. Not bad for 10+ years out of school huh?


First off, I realized I forgot to stake the nuts on the trans last night. Mightve been okay with 105 ft lbs and red loctite, but Ive had them back off and take out an end cover before. So broke back into it, staked them, back together. Then... I removed the water cooled oil filter housing, scraped gasket surface, and got ready to do the FFOFH


I went ahead and ported out the oil relief hole.


Then I pulled the water pipe and welded up the water outlet.


The southbend is looking real good for so many antilag launches...Im impressed.


I switched the sensors around on the OFHs, as well as the T-stat housings. I plan on using my DSM radiator, so leaving the DSM Tstat housing with a cap. Looped the coolant lines on it, and boom set up for external air cooling. After removing/installing dowells, and installing my three speed scattershield, it all came together


Looks good if I say so myself /ubbthreads/images/graemlins/smile.gif I think I am finally ready for a bay to do work on the car.
 
Last edited:

GSXftw

Well-known member
Joined
Dec 22, 2014
Messages
111
Location
medford, OR
So I did some work tonight, shop is packed full for the rest of the week so just gonna do what I can. I climbed into the engine bay, pulled the engine mounts


And did the polyethylene inserts. I also used some FIPG to fix some cracking it had going on. I was half tempted to fill it with polyurethane windshield sealant, but I dont wanna overdo it and blow the driver comfort of this car. I still wanna be able to comfortably cruise this thing anywhere. Sorry about the shitty pic


Thats all the direct progress I made on the Galant, still no bay to get the car in, so I went through a 7 bolt I got, cleaned it up took pics to list everything for sale. Gotta make that money for car parts!


Im thinking this weekend will be a good one, Ive got a lot of momentum and should be able to get the car in for work
 

GSXftw

Well-known member
Joined
Dec 22, 2014
Messages
111
Location
medford, OR
So first off... the car went in the shop


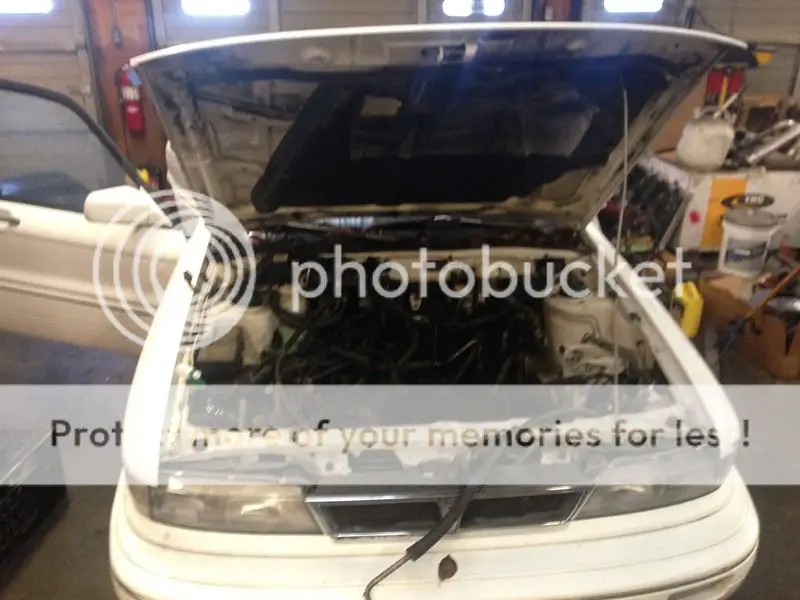
I broke out the simple green, scrubbed a bit, the engine had a leak in the front seal area that was ignored, which not only led to it seizing up from lack of oil, but wow what a freaking mess! lots and lots of grime. I got the bulk of it, sorry no pics but it was go go go.

Then I changed the fuel filter, and while the feed side was off, hooked the fuel pump up and pumped the fuel out. I dont actually know how long the car sat with the bad engine before the fire happened, and rule is when it doubt dump it out. It smelled old. hahahaha


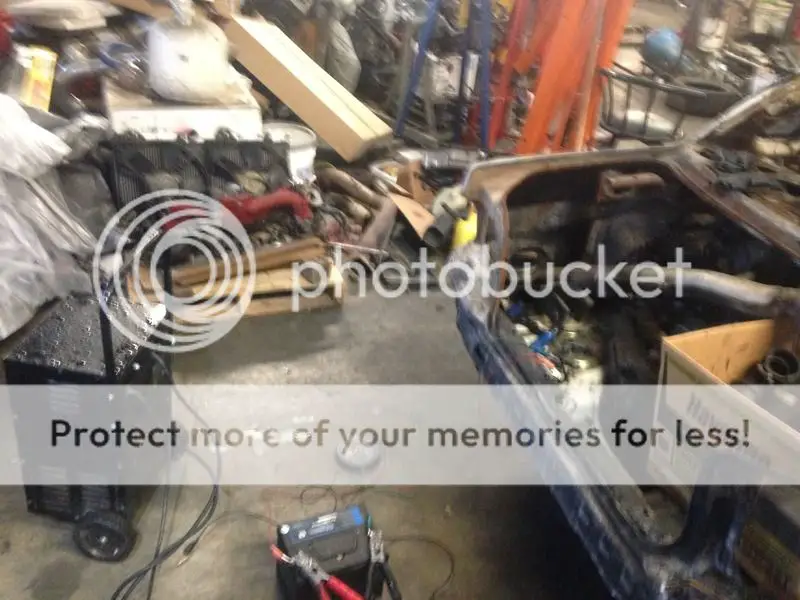
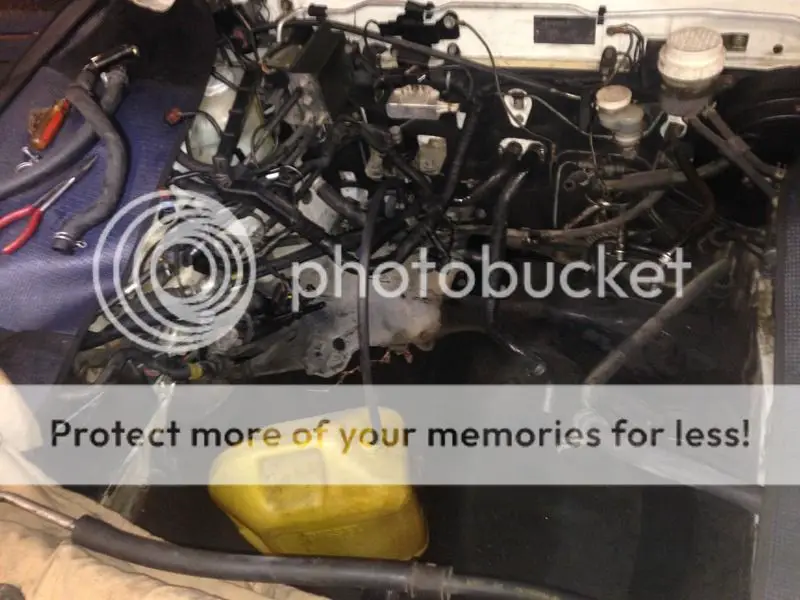
Then went ahead and tossed the evap canister/lines, not sure what Im doing on the battery placement yet, the dsm was tucked down on top of the trans area. May put it there, we'll just have to see. I swapped out the heater hoses with silicone ones.
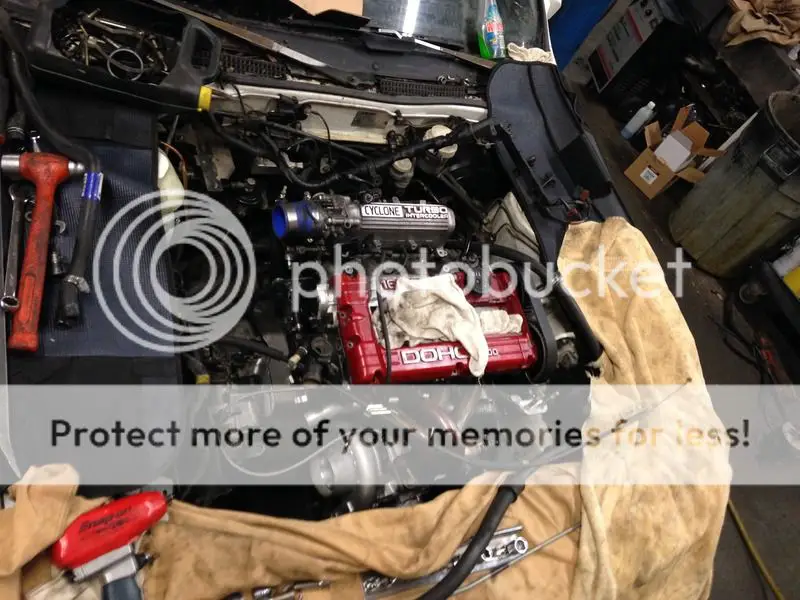
At that point, I was ready to start placing the engine in.


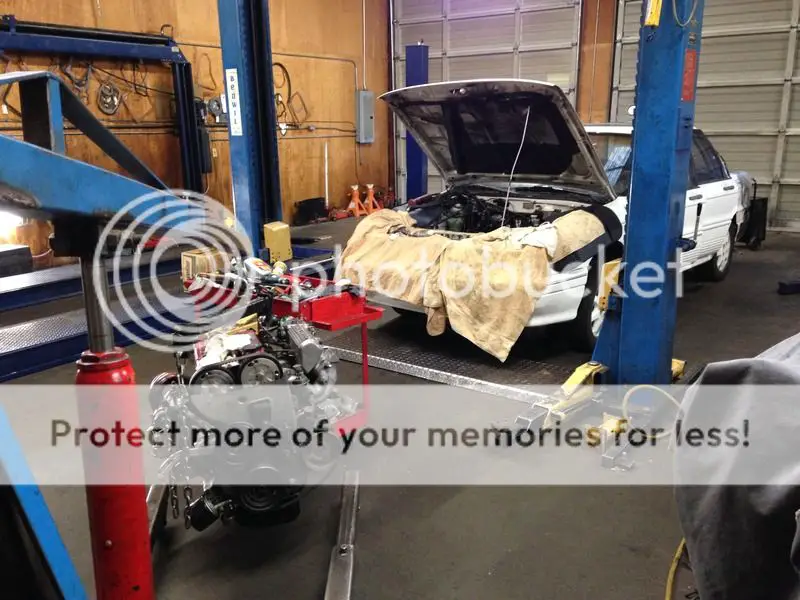
I took my time and made sure no bumping/crushing happened, and set her down. It was at this moment, I realized dsm engine mount brackets were different from GVR4


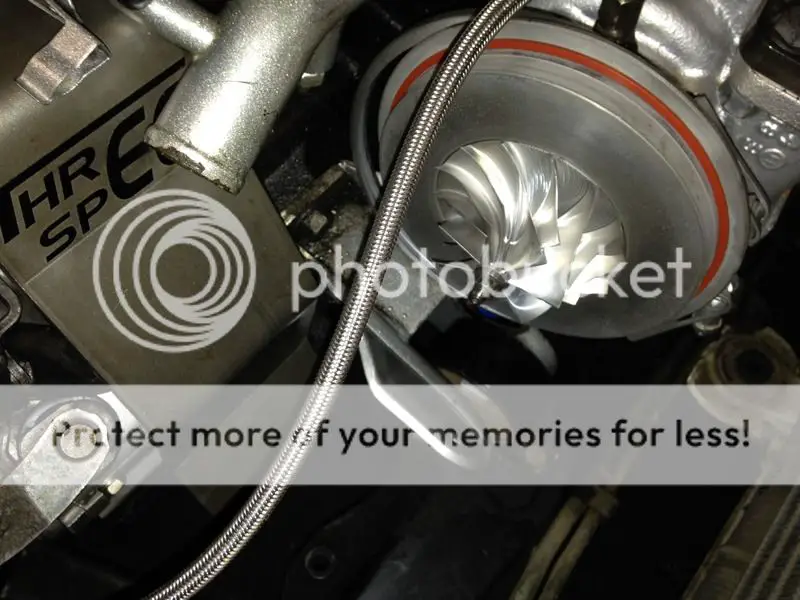
This cost me an hour, quite a little speed bump, but knew things like this would happen. I had to pull the comp cover to get to the top bolt. This made me nervous as f*** working around the billet wheel, but was super careful not to nick it.


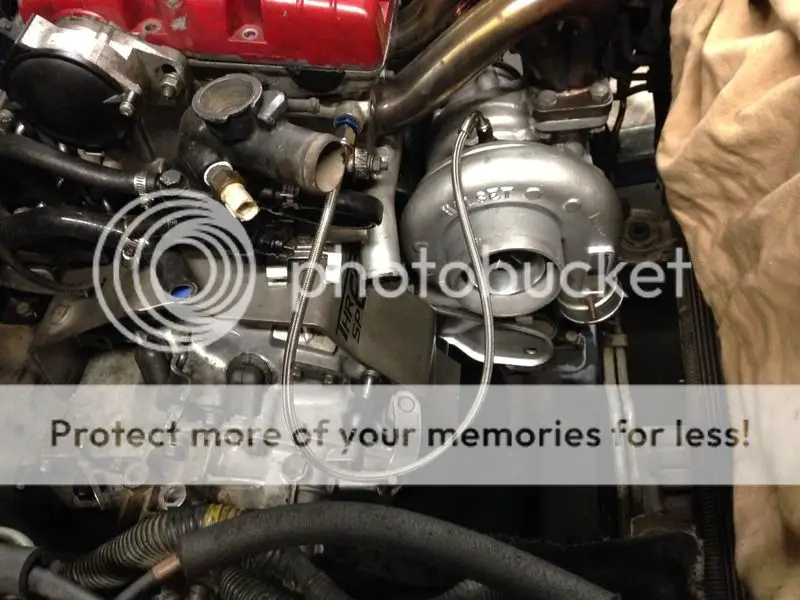
Then had to make the galant mount match the dsm one for the holset. This is what you have to do for this mani/H1x turbo, which has the drain more to the comp side than an HX series


After swapping the mounts, the engine sat back down, hopefully for a while


Then I got to see the clearance in the radiator area, I knew it would be tight... Ive got a couple plans in mind, Ill have to do something once everything is all installed and set, and get it all working in harmony


On that note I called it a night! Ill be sure and grab the laptop tomorrow, MAYBE itll fire up tomorrow...

Also, I guess I should explain what I got going in to this thing since I dont have a thread for my 1G on here that it came out of for you guys to know!
BLOCK- polished oil galleys, 2G NPR pistons, ARP 2000 rod bolts on stock rods, clevite bearings, BSE, Mighty max FFOFH
HEAD- stock 1G head with evo springs, delta 272 cams, ARP studs, fel-pro gasket, 3G lifter, AEM TRU time cam gears
BOLT ONS- rebuilt NT throttle body, cyclone intake, -10 AN catch can setup, link V3, LC2 WB, flex fuel, SD, FIC 2150s, Aeromotive A1000
TURBO- Holset 60x87 billet comp, 64x76 turbine, 12cm TS housing, open tubular T3 mani, 38mm v-band WG
 
Last edited:

GSXftw

Well-known member
Joined
Dec 22, 2014
Messages
111
Location
medford, OR
So lets see... I hooked everything up after setting the engine in, leaving some things for later... My goal today was I wanted it to pull out on its own power. I just went maf draw through to the throttle body, dont have the intercooler or anything in yet. Just did stock injectors, and the stock ecu. I know, I know, stock stuff is lame, but time was a big obstacle today, and I have a giant treasure chest of upgrade parts to put in as time allows.


So after getting everything hooked up, braided clutch line, bypassing clutch start safety, putting in solid shift cable bushings, I cranked it over for oil pressure. With the pump packed it didnt take long at all. Unfortunately after this, the oil switch decided to crap out on me.


After this I put the plugs in, jumper wired the fuel pump, checked for leaks, and fired it up. It started right up and purred like it should. Then realized I put the stock slave pushrod in. I went to my slightly extended one, adjusted to pedal out, and pulled it out the shop for the first time. Good vibes. But yes I still have a shitload to do


Even with fender covers and all...nothing is more of a dirt magnet than oxidized white paint
 
Last edited:

GSXftw

Well-known member
Joined
Dec 22, 2014
Messages
111
Location
medford, OR
So tonight was a lot of things, was kind of all over the place... First thing was switch the oil pressure switch with a working one. I installed the saturn alternator, did my first bit of wiring of the car (Much more to come) and got it charging. Then I cut the V-band off of the side exit that it was on, and start fabbing the downpipe. I was happy to see I still had most of my downpipe from before, since Ive gone from a setup like this, to a side exit, and now back to a downpipe. I got it all tacked up and hung. My buddy offered to finish weld it for me so no pics yet. Also had to cut the mount for the dipstick and move it all around out of the way, its tacked as well.
Next was putting the goodies in the return side of fuel. I installed a A1000 AFPR, cut the return line down, and plumbed the flex fuel sensor


Then I decided my next actions should be fixing some space issues


So I removed the grill, front bumper, AC fan, intercooler, ect


Killed some asshole spiders


and thats where I left off tonight. Gonna start prepping for the VRSF front mount, and tuck the AC condensor/dsm radiator all that I can with some pusher fans. Its nice being able to drive this thing in/out the shop, much less work than pushing!
 

GSXftw

Well-known member
Joined
Dec 22, 2014
Messages
111
Location
medford, OR
So...after doing the FPR, the car was running pretty rich with the added fuel pressure/cams/stock MAF going in/out of the shop. It was time to bring the laptop and get on link. I swapped EPROM chips


Then I mainly focused on wiring...I got the IAT, MAP hooked up, I couldnt find the damn MAP pigtail anywhere... The shop had one with a broken retaining clip, and another with no wires. Had to depin it and get it all hooked up. Luckily my car is a california car so it had the EGR temp input plug like my 1G did. Couldnt find any references on GVR4 color coding, and was looking at a 1G diagram that said L/Y, then found it hiding as G/R for me. Im going for an uncluttered and planned out looking setup compared to the last one, especially the wiring.


The flex sensor still needs 12+, thats the bare wire you see. And my first datalog pulling it out /ubbthreads/images/graemlins/smile.gif


Still have a sh*t ton to do, especially wiring. SO much wiring left...
 

GSXftw

Well-known member
Joined
Dec 22, 2014
Messages
111
Location
medford, OR
k
 

GSXftw

Well-known member
Joined
Dec 22, 2014
Messages
111
Location
medford, OR
So after a terrible flu that put me down for a whole week, I finally got some work done on the car today. I worked on setting up for the VRSF short route and just deleting/getting things out of the way


Then I pulled out the battery tray crap. It obviously had a leaky battery at some point


Then I had to go ahead and start deleting the rear steer. I wanted to at least drive it with it before I deleted it just to feel the difference, but it was in my way...


I sucked the AC condensor forward a bit, finnesed the lines a bit, flattened out the PS cooler


Im gonna work on getting it to sit any lower, the bumper will need a pretty considerable hack for this to slip over, but either way it looks like the plumbing will be really straightforward, Ill see how the radiator fitment looks, Im not sure if the dsm will work or if Im doing the scirroco thats partially tucked.


I also took the wastegate apart, and pulled one of the springs out, it was a 28 psi setup, and wasnt pump gas friendly. I was kinda stuck to E85 on the last setup, which was the typical "boost controller to bottom WG port and bleed to atmosphere" configuration. Upon some research Im just gonna go ahead and use the top port in the Y and recirc configuration. I also went ahead and moved the MAP sensor to a better spot, and wired it up using the sensor ground from the EGR temp source. I plan on putting the 2150s on sometime so will be doing the plugs, injector resistor delete, and a mini wire tuck just to make it look decent with minimal time spent compared to a full tuck


Ill probably run the battery this way. Itll be super easy for a hold down thatll keep the tech guys happy, no need to extend wires, and its pretty out of the way compared to stock
 

GSXftw

Well-known member
Joined
Dec 22, 2014
Messages
111
Location
medford, OR
Got some work done on the car. It left a trail when I pulled it in from not deleting all of the rear stuff yet, so figured that would be the place to start! Got it up in the air and started pulling lines out.
Pulled the lines from the rack and welded them up shut.


The car was lifted up from the subframe at the time, so wasnt able to pull the rear rack stuff yet. Then I had a friend weld up an intercooler pipe that had a water/meth jet in it.


Kept going with "massaging" AC lines to get them to fit with the intercooler. Decided to cut the junction so the high pressure side could get out of the way more


The intercooler sits down a bit more, should be happier there.


Here is my oil filter clearance currently. Will definitely be something to tackle since I want a sandwich cooler.
 

Fiascoxl

Well-known member
Joined
Jan 25, 2013
Messages
320
Location
Stuarts Draft, Va
I would buy a tubular front cross member for it if the budget allows. This will free up tons of room for the ffofh and in front of the motor.
 

GSXftw

Well-known member
Joined
Dec 22, 2014
Messages
111
Location
medford, OR
Yeah its on the bucketlist. For what I want the car to do it'll definitely need a cooler, the engine comes first, the car is just gonna have to make due /ubbthreads/images/graemlins/rofl.gif
 

GSXftw

Well-known member
Joined
Dec 22, 2014
Messages
111
Location
medford, OR
Did some things on her this weekend... Doesnt really feel like a lot since a lot of it was brainstorming and comtemplating on wiring. Im really trying to plan out my wiring so I can do it all at once and have an end result that tucks away and looks clean. Also tried dropping in my 1G radiator just to see if it was gonna work in any way shape/form...no freakin way. I put my modified oil dipstick in


Then I ported down the high spots on the DP and threw some paint on it


Trial fit


Even with the alternator post cut down and the normal tight ass angle of a V-band DP, it was still too close for comfort and trying to short. Out came the ball ping hammer, gave it a few love taps, threw more paint on, wrapped it, called it good.


And viola


I started to work on upgrading the alternator-batt wire, but given its route, opted not to for now. The DP will have to come back off for wideband bung, and to tie in to the catback. My original plans were to use the stock catback with EWG cutout, but given the fact that people gain 13hp/23tq on a bone stock car, the stock catback just plain isnt worth it. Ill do some kind of quiet catback to compliment the EWG cutout, which should still give the split personality that makes sleepers awesome.
I know it doesnt look like much on this update, I was stuck extracting a mani stud on my 2G in between this.


Thats all for now, thanks for reading
 
Last edited:

GSXftw

Well-known member
Joined
Dec 22, 2014
Messages
111
Location
medford, OR
Progress!! I was in class and made the "to do list" and put it all on paper. It seemed long, but when I got to the money part of it, its only a couple hundred, which is helpful. Its just a lot of time. So tonight I chipped away at some things. I drilled/tacked for a wideband bung, real happy with how it tucked away.


Havent wired the WB up yet, gonna do as many as I can at once. Then I found a +12v source for the GM FF sensor, so thats good to go.
Then I did the boost control solenoid. Trying a different way of plumbing on this one, using the top port and recirculating the vent air.


If you look closely, you can see a bolt/brace sticking out of the turbo. Just whipped up a bracket to take some of the weight off the header.


Thats all for now, I talked to a buddy about sandblasting the back end, so definitely working on that next step. My overall plan is to get everything major that needs done mechanically at the shop towards getting it dialed in on pump gas. I have a walbro 255hp pump to use. Then bodywork and legitimately hit the road with this thing. Then once Im sick of pump gas, do a walbro 450, high flow fuel filter, and address the rest of the drivetrain (4 bolt, 5 lug swap, coilovers, bushings, trailing arms, ect ect.) Then, I want to build a 43cc head with a 2G port design. The highest I had this combo on the other car was 30 psi, and yes it was an animal, but Im dealing with a little more car now, and I want to actually be faster than my 1G was, so Im gonna work on being more efficient. The VRSF was starting to show 120* IATs at the 30 psi area, so I'll hopefully not have to go any higher, Ill just bump up cr to 9:1(ish) and do a somewhat mild built head that makes better use of the boost. Should show big gains since the cyclone/1G head Im using is untouched, minus the EVO 8 springs. Also I have a 2G JMF race mani thats just sitting /ubbthreads/images/graemlins/frown.gif I have been thinking about it a lot and this makes great sense, so I can hit the road ASAP and start working bugs out (theres always bugs) and enjoying the car. My overall goals is to have the car on the road in April, and by the end of the year I wanna trap 130+ with a race weight around 3250. Im hoping this to be a great race season without too many issues, and the hurt feelings being the people I race and not my own lol. Thanks for reading.
 

GSXftw

Well-known member
Joined
Dec 22, 2014
Messages
111
Location
medford, OR
So first, I plumbed the Cyclone mani and extended wires for the FPS to actuate it. Pretty standard stuff there. Then I went to work on the shifter.

First order of business was the base bushings

Then I do a trick for lubing the shift cables.


Then I have the shifter from my DSM to put in.


It started as an eBay cheap item. From there its had a shift stopper added, the inside collar is pressed in, welded/drilled/ground to the exact dimensions of the shifter base and the through bolt. This gives it a super tight fit, nothing to wear out, and rock solid shifts. Heres a quick demo
click

And there she is all greased/lubed/adjusted out. Lots of work, doesnt look like a lot, but IT IS!
 

GSXftw

Well-known member
Joined
Dec 22, 2014
Messages
111
Location
medford, OR
Did some radiator things today. First order of business was grinding off the mounting tabs on the side that would be against the condenser.


Then it was drilling/threading this plug, and using it to adapt the fan switch


Doorjamb seal


Here it is next to the honda half radiator Im trying to avoid using... Im worried this scirocco isnt much bigger, but we'll just have to see how it goes


Built brackets to hold the bottom


Cut silicone hoses to fit, and there she is for now


I would've liked to have it tuck away more, but I'll be doing a shroud to direct airflow and hold the top, as well as mesh to protect it from bent fins when I work on it. Still need to extend wires for the fan switch, wire/mount pusher fan(s).
 
Support Vendors who Support the GVR-4 Community
Boosted Fabrication ECM Tuning ExtremePSI Fuel Injector Clinic Jacks Transmissions JNZ Tuning Kiggly Racing Morrison Fabrications RixRacing RockAuto RTM Racing STM Tuned
Top