blacksheep
Well-known member
Seat Install 5.27.04 - Austin Wright
This write-up pertains to installing aftermarket seats (with Honda sliders) into a gvr4. It was performed and written by Austin Wright (TheJackalGT). Please direct any questions towards him via PM or email.
I found some seats locally for sale for a decent price so I went and bought them. The install went pretty well. Since there was some fabrication involved, I figured it would help if posted how I did mine. I also took some pictures along the way to help out anybody that was in a similar situation.
Step 1 - First of all, I removed the stock seats, there are (4) 14mm bolts per seat and come out quite easily. Be careful with the stock belts as the plastic "holders" are very brittle. On the drivers side there is seatbelt warning light wiring that exists and a connector that you need to unplug.
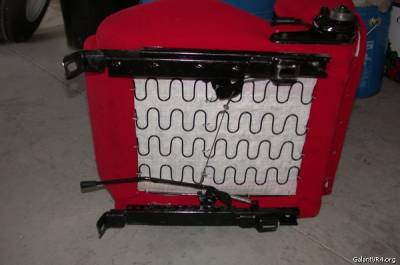
Step 2 - I did a test fit of my seats and sliders, basically they were the right length to meet up with the holes but not nearly wide enough and they sat pretty low. I fab'ed up some pieces that would not only raise the seats, but offer left to right adjustability and also give me a way to mount them.
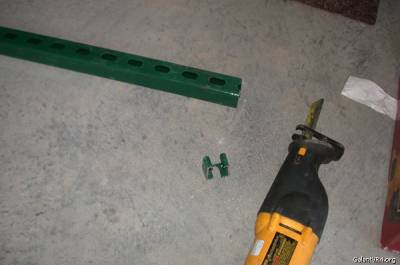
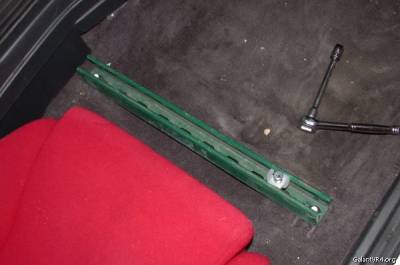
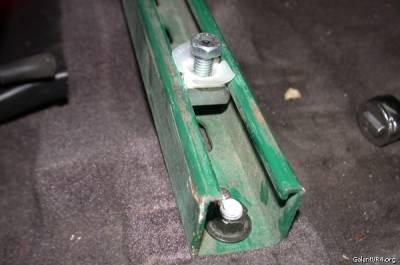
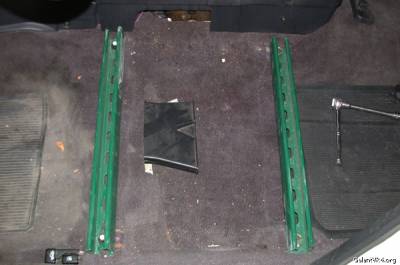
Step 3 - Using Unistrut, I cut lengths that would fit with the stock studs and holes. I cut the Unistrut with a sawzall as seen or you can use a table saw. Then Unistrut brand makes little nuts that go in and twist and create a hole for a bolt, See the pics, it will describe it a lot better.
Step 4 - Also I had to bend the sliders because the front was a 90 degree angle and I needed them to be flat. I vise works well because the top of the chair gives you plenty of leverage. This gives something for the sliders to bolt to. I used washers on bolt sides just to make sure they would mount solid.
Step 5 - The rear holes are not "level" with each other so you need to have a little ingenuity to make them work, I just re-drilled the Unistrut. After that the seats should bolt on and you can adjust and tighten as needed.
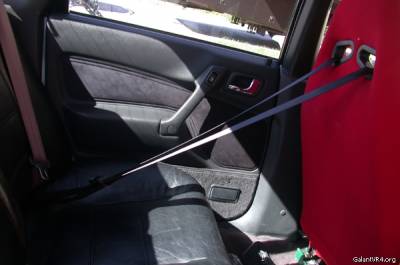
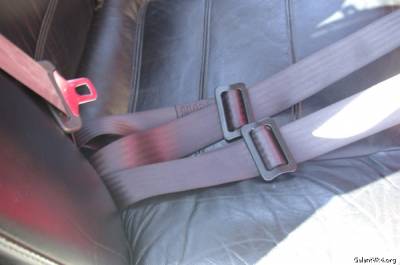
Step 6 - The Unistrut also provides a place to mount the side/floor mounting points for harnesses. Mine are 4 point Sparco’s and worked out alright. Under the rear seat near the outside, the lower seat belt mounts have a 17mm bolt. It turns out that my eye bolts have the same thread – which by the way is a fine thread, rather than standard or coarse. For the eye bolts to mount to the unistrut you need to get nuts for them. Lowe's carried the ones for me; they are sort of a specialty piece as they are fine thread as stated above.


