brute
Well-known member
First off, why do this mod? The 1g T/E/L shifter is about 2 inches shorter than the stock GVR4 shifter, and when coupled with the 1g T/E/L leather shift boot, it makes for a much cleaner interior.
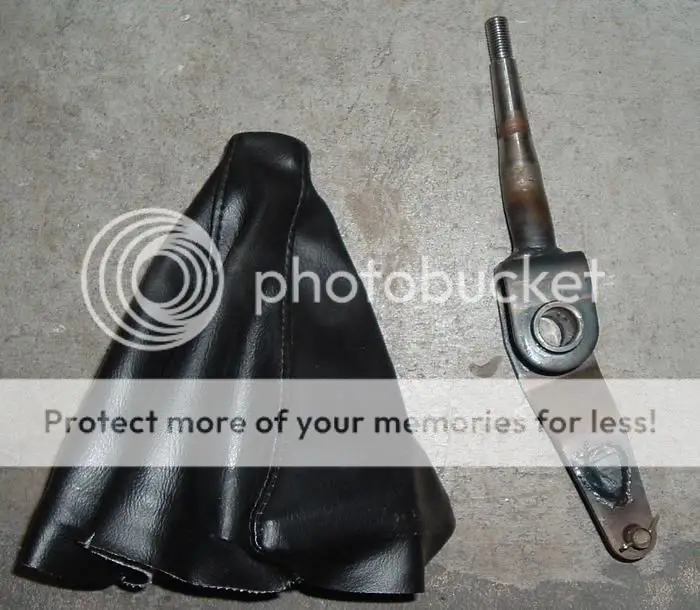
Here's a picture of the shifter/boot assembly I purchased
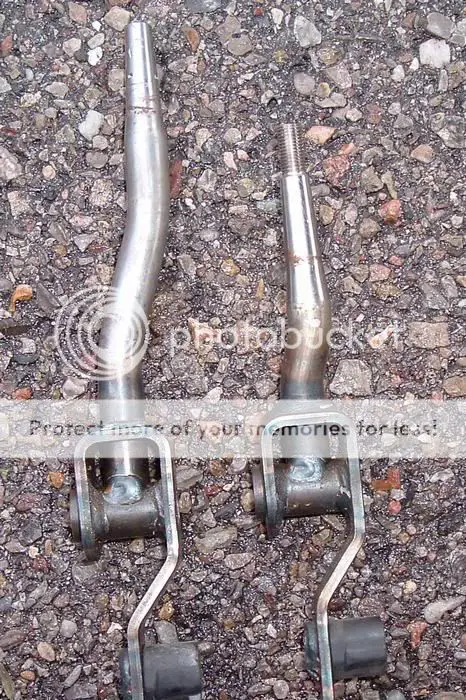
Here's a comparison picture of the two shifters. Galant is on the left, T/E/L is on the right
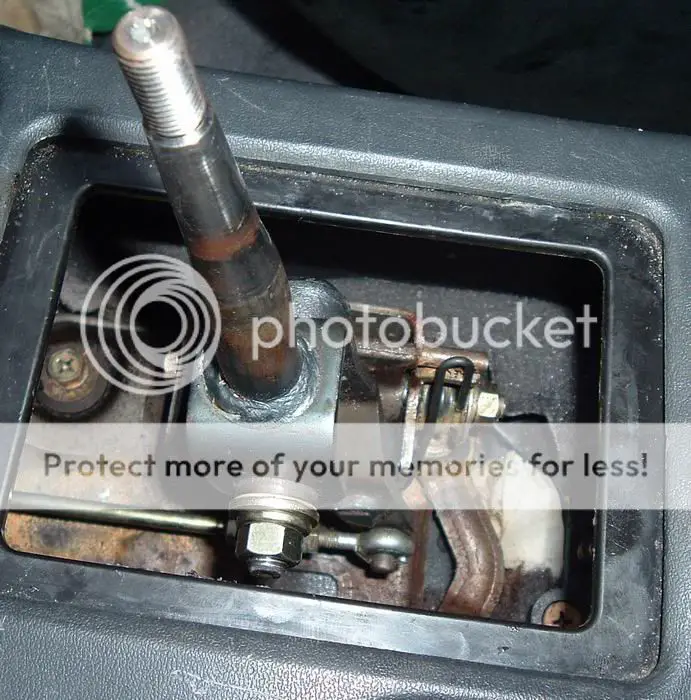
Now for the install. Start by tugging on the rubber accordion shift boot. When it's lifted up, it should look something like this:
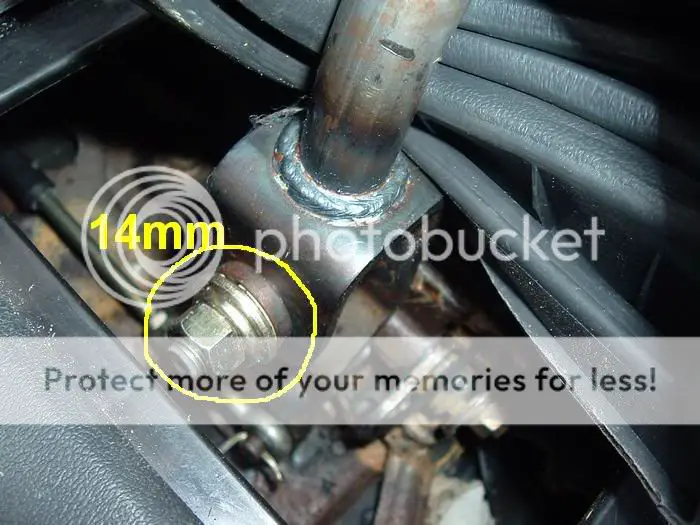
Remove the 14mm bolt, lock washer, and flat washer.

Save these pieces, as you'll be using them again. There's also a cream-colored pivot bushing. Be careful to not lose these parts! Next, look down towards the base of the shifter assembly. There's a cotter-pin where the shift linkage attaches to the bottom of the shifter. Remove this either with a cotter-pin puller or carefully with needle-nose pliers.
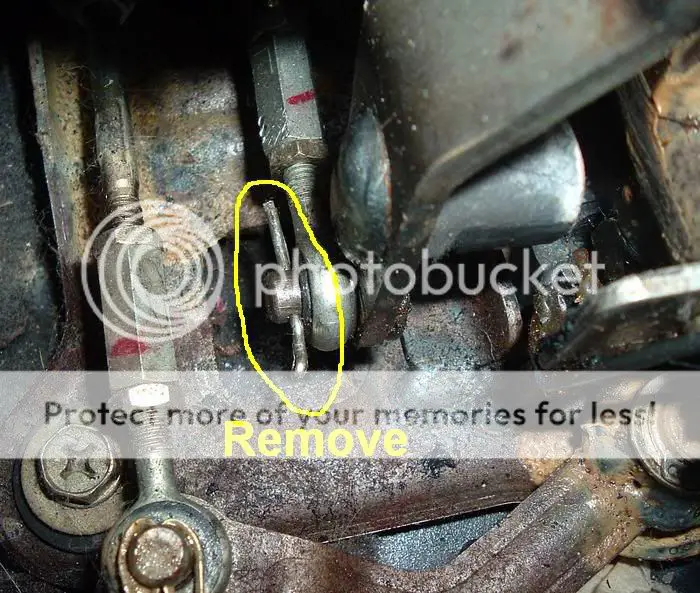
Once the cotter-pin is removed, put it aside (you're reusing this as well). Then let the linkage slide off the post it was on.
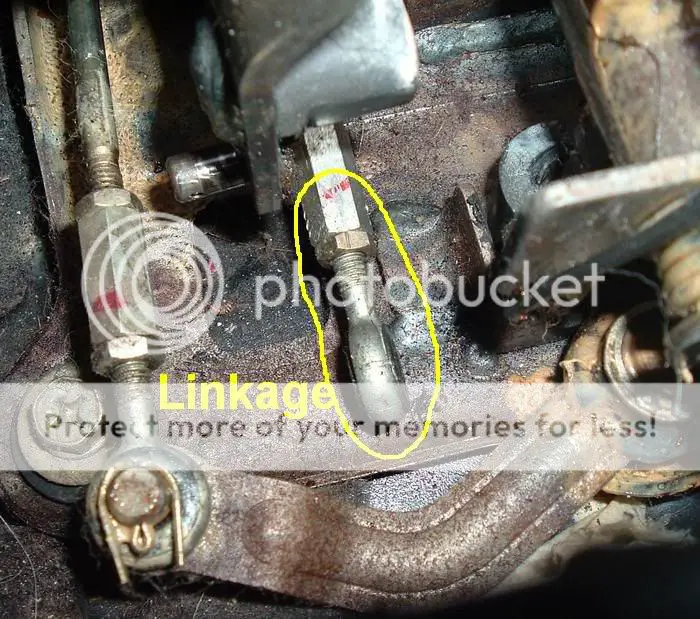
Now, with a little finesse and a lot of maneuvering, you should be able to get the shifter off the mounting bolt and out of the hole.
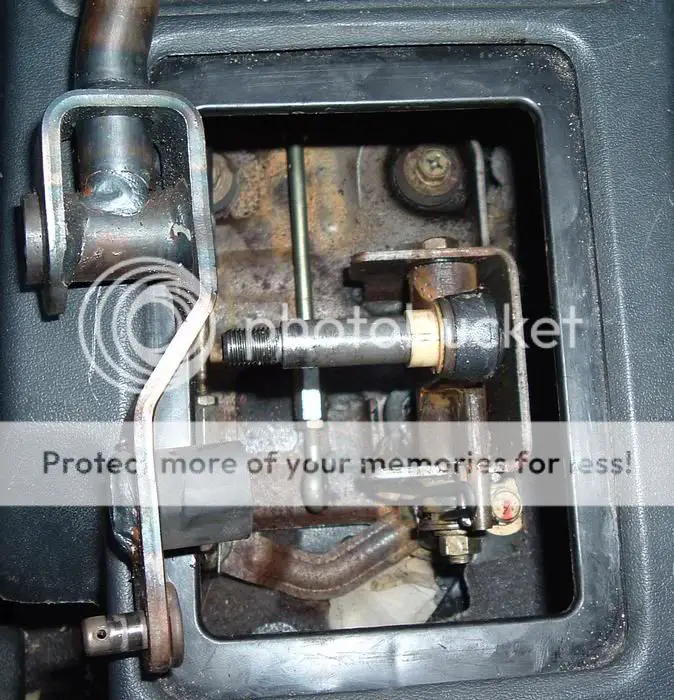
Now do the exact opposite of the previous step, and put the 1g shifter in and on the mounting bolt. Pick the linkage up, and place it on its post.
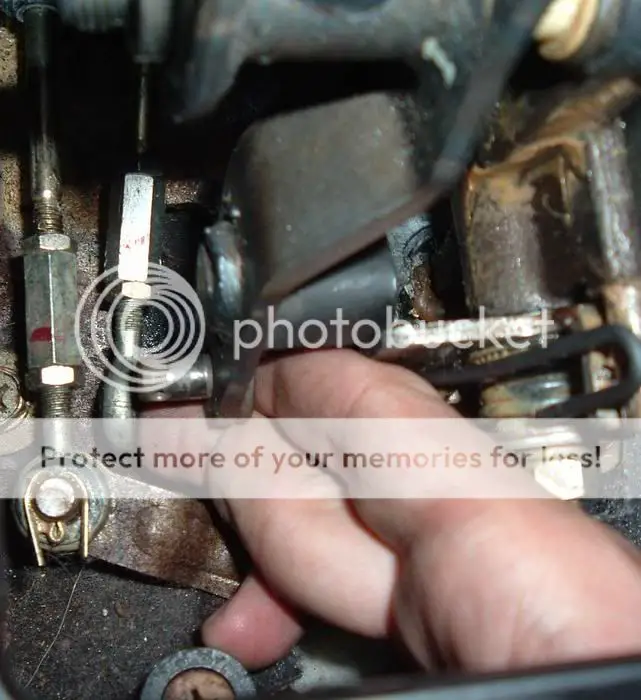
Now, reinstall the cotter-pin and bend the two legs at about a 90-degree angle so it does not fall out.
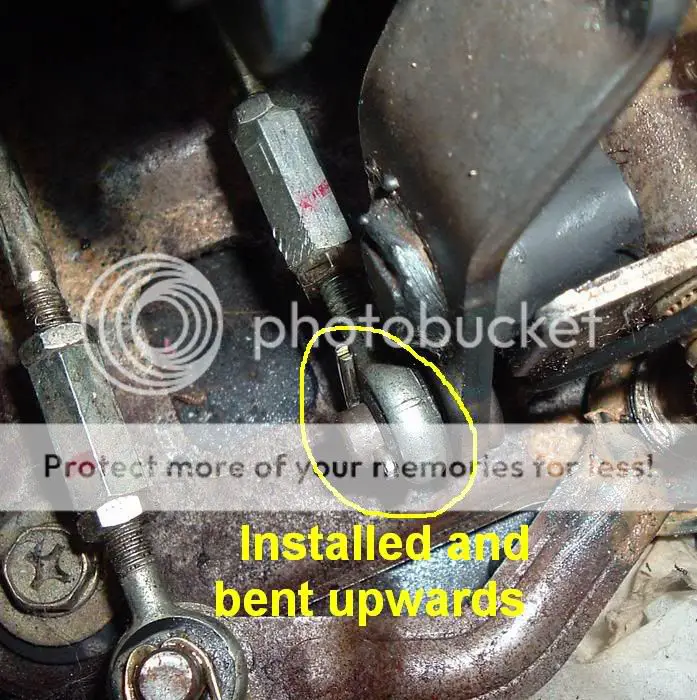
Also make sure the passenger side bushing is inserted correctly into its hole.

Get the bushing you took out in the first place from the driver side. Place it on the threaded area of the mounting bolt.

Then gently slide it in to the area it's supposed to occupy.

Now, put the flat washer, lock washer, and 14mm bolt back in, and tighten it down. It should begin to look like a shifter again.
Now for the hard part. The plastic ring that goes around the base of the boot must be removed. It has 4 philips-headed screws that thread in vertically. They are in the locations marked.
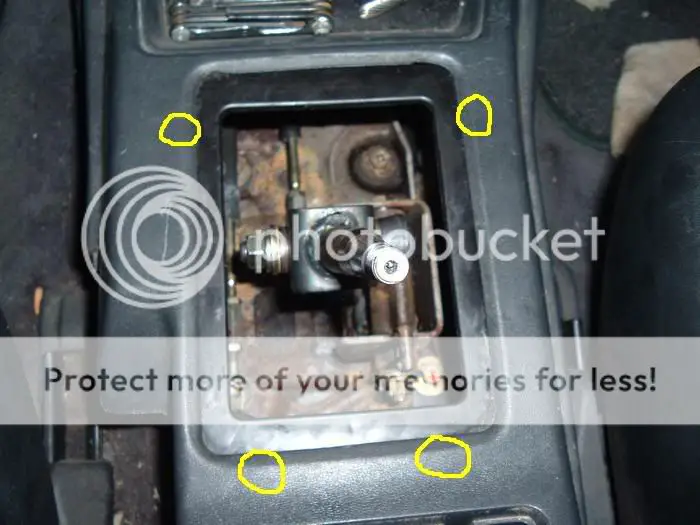
Here is a mirror-view of one of the screws

I used this to loosen the screws.

Don't get discouraged if you have trouble. This part took me the longest, but is definitely worth it in the end. Once the ring is out, stretch the 1g leather boot around it. The front two should go through the side slits, but the back two (circled in yellow) will need holes punched for the screws.
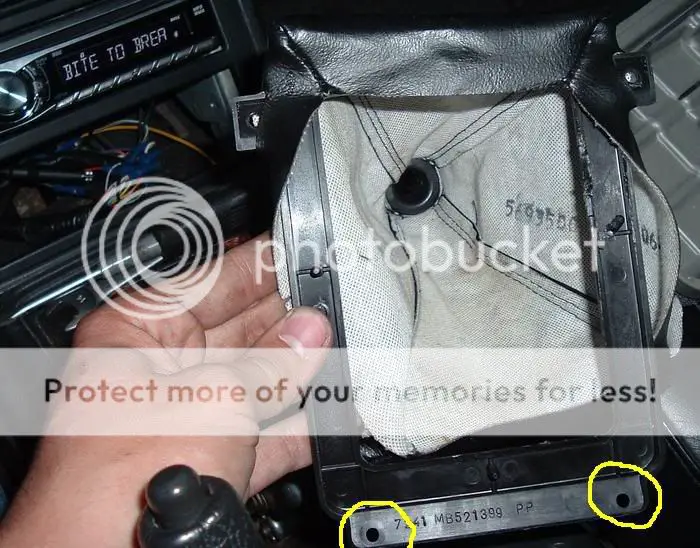
I just used a small screwdriver to pierce the holes.
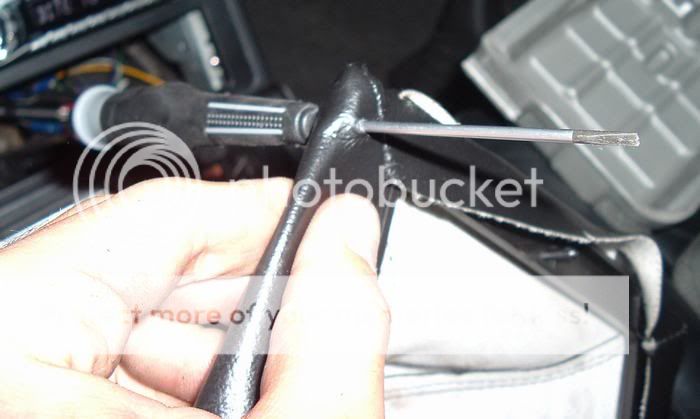
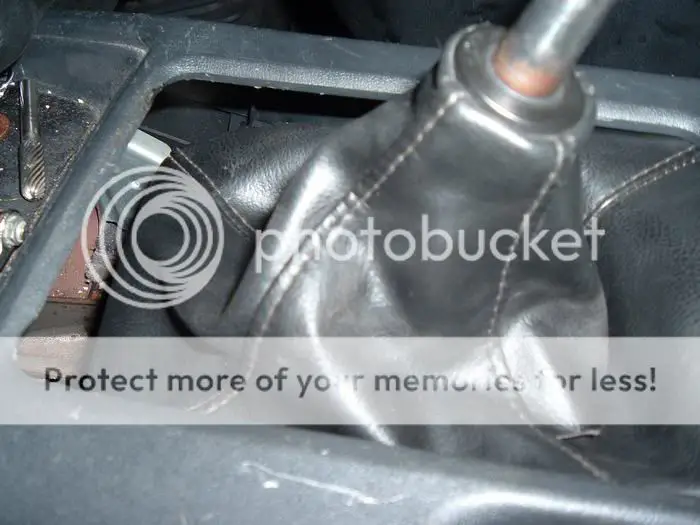
Now, get the screws and reinstall the plastic ring. I found it easier to do the rear two first, but it's up to you. Make sure the two rear screws are all the way through both holes in the leather or the threads won't stick through enough to start threading into the plastic. Here's a picture of the rear two installed.
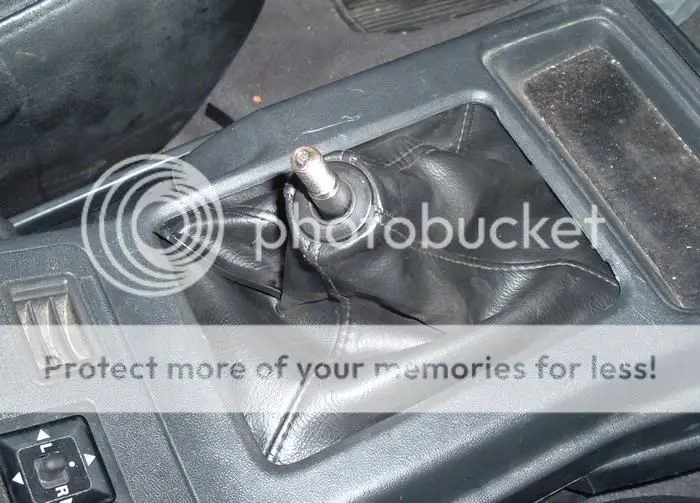
Once you get the rear two in, the front two should be pretty easy. Go ahead and tighten all the screws so you don't have to do this again. Here it is with all 4 screwed in and tightened.
Now, find yourself a shift knob, install it, and you'll be on your way! Enjoy the height being a couple inches shorter and the throw being quite a bit shorter.

Here's a picture of the shifter/boot assembly I purchased

Here's a comparison picture of the two shifters. Galant is on the left, T/E/L is on the right

Now for the install. Start by tugging on the rubber accordion shift boot. When it's lifted up, it should look something like this:

Remove the 14mm bolt, lock washer, and flat washer.

Save these pieces, as you'll be using them again. There's also a cream-colored pivot bushing. Be careful to not lose these parts! Next, look down towards the base of the shifter assembly. There's a cotter-pin where the shift linkage attaches to the bottom of the shifter. Remove this either with a cotter-pin puller or carefully with needle-nose pliers.

Once the cotter-pin is removed, put it aside (you're reusing this as well). Then let the linkage slide off the post it was on.

Now, with a little finesse and a lot of maneuvering, you should be able to get the shifter off the mounting bolt and out of the hole.

Now do the exact opposite of the previous step, and put the 1g shifter in and on the mounting bolt. Pick the linkage up, and place it on its post.

Now, reinstall the cotter-pin and bend the two legs at about a 90-degree angle so it does not fall out.

Also make sure the passenger side bushing is inserted correctly into its hole.

Get the bushing you took out in the first place from the driver side. Place it on the threaded area of the mounting bolt.

Then gently slide it in to the area it's supposed to occupy.

Now, put the flat washer, lock washer, and 14mm bolt back in, and tighten it down. It should begin to look like a shifter again.

Now for the hard part. The plastic ring that goes around the base of the boot must be removed. It has 4 philips-headed screws that thread in vertically. They are in the locations marked.

Here is a mirror-view of one of the screws

I used this to loosen the screws.

Don't get discouraged if you have trouble. This part took me the longest, but is definitely worth it in the end. Once the ring is out, stretch the 1g leather boot around it. The front two should go through the side slits, but the back two (circled in yellow) will need holes punched for the screws.

I just used a small screwdriver to pierce the holes.

Now, get the screws and reinstall the plastic ring. I found it easier to do the rear two first, but it's up to you. Make sure the two rear screws are all the way through both holes in the leather or the threads won't stick through enough to start threading into the plastic. Here's a picture of the rear two installed.

Once you get the rear two in, the front two should be pretty easy. Go ahead and tighten all the screws so you don't have to do this again. Here it is with all 4 screwed in and tightened.

Now, find yourself a shift knob, install it, and you'll be on your way! Enjoy the height being a couple inches shorter and the throw being quite a bit shorter.


