strokin4dr
Well-known member
Well, I'll say this, it's not easy to get pics of a clear film, but I tried my best! /ubbthreads/images/graemlins/rofl.gif
I had a request for some better pics so I decided to pull one of my fogs back off the car and get some pics of an install. These protectors can be installed while the lights are on the car, but being that you want to clean them very well beforehand and the fact that sitting on the ground in the driveway trying to line things up is no fun, I opt to pull them off and do it in the living room. /ubbthreads/images/graemlins/grin.gif
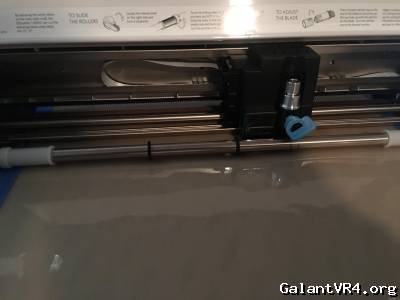
Machine during the cutting process
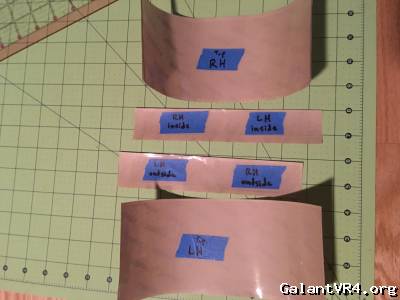
One pair of JDM covers labeled and on the backing paper
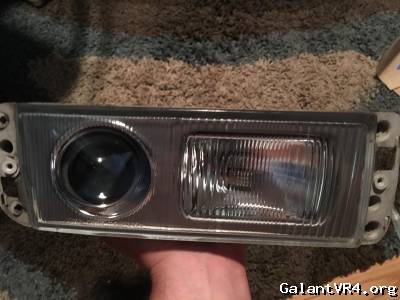
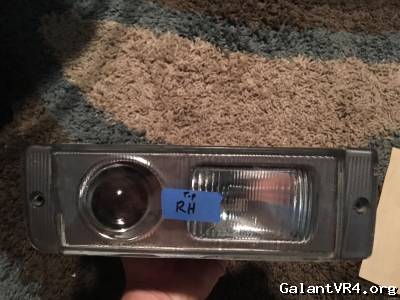
Passenger side fog cleaned and ready to go
First step is to spray the light down with some distilled water. I recommend using this instead of tap water, because you don't want any dried up mineral residue left behind after install. You can get a small spray bottle from walmart, dollar store, etc for cheap.
Wash your dirty hands before touching the adhesive backed vinyl.
DO NOT STRETCH THE VINYL. This is the biggest note that the manufacturer mentions about the product. It is not like typical vinyl or window tint. Do not stretch it and do not heat it.
That said, make sure to spray some distilled water on the vinyl as you peel it from the backing paper. The more water the better. It everything is nice and wet, you can slide the protector around on the light until you get it correctly lined up.
If its not perfect and it is starting to stick to the light, no problem, peal it back up and spray some more water. You can do this as much as you need until you have it fitting perfectly.
Once I have the vinyl laying on the light, I like to install the side cap pieces to ensure I'm lining everything up where it needs to be. Last thing you want is to get it installed and all the water out from underneath and then find out that the vinyl is too far to one side and hitting the tab. Installing the tabs while positioning the main protector prevents that from happening. The protector is in the correct position when it is not touching either one of the side tabs and when you cannot feel any overhang on the top or bottom.
Before installing the side tabs, make sure you have the correct piece of vinyl and then remove the blue tape before pulling it from the backing. This step makes it much easier to line it up correctly. It is easiest for me to line up the holes first, then make sure the side that meets the fog light glass is pushed right to the edge. It is installed correctly when the actual opening of the screw hole is in the direct center of the vinyl and there is no contact of the side tab vinyl pieces to the main vinyl protector or fog light.
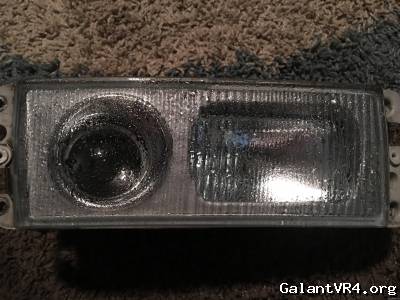
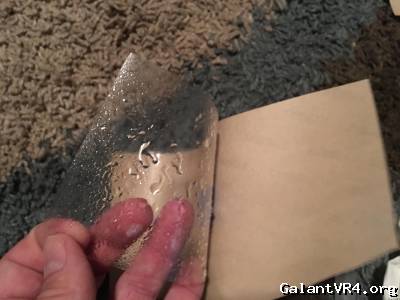
Finished installed product, but still wet
It takes a little while for all the water to evaporate from underneath and it likes to pool around the edges. I let mine dry overnight before reinstalling on the car. While its drying, I push around the edges of the vinyl every so often to ensure it is sticking completely. With moisture on the lights it may feel like the edges aren't going to stick as well, but rest assured that once dry everything will be stuck in place very well.
Also, you may think that the adhesive vinyl looks spotty and not smooth before installing or maybe even after install while still wet. They will become clear again as all the water evaporates and the adhesive is allowed to become uniform on the light.
Another note worth mentioning is that these protectors are REUSABLE! Even after they are installed and dry, you can peal them back off and install them again if you needed to for some reason. /ubbthreads/images/graemlins/grin.gif
I had a request for some better pics so I decided to pull one of my fogs back off the car and get some pics of an install. These protectors can be installed while the lights are on the car, but being that you want to clean them very well beforehand and the fact that sitting on the ground in the driveway trying to line things up is no fun, I opt to pull them off and do it in the living room. /ubbthreads/images/graemlins/grin.gif
Machine during the cutting process
One pair of JDM covers labeled and on the backing paper
Passenger side fog cleaned and ready to go
First step is to spray the light down with some distilled water. I recommend using this instead of tap water, because you don't want any dried up mineral residue left behind after install. You can get a small spray bottle from walmart, dollar store, etc for cheap.
Wash your dirty hands before touching the adhesive backed vinyl.
DO NOT STRETCH THE VINYL. This is the biggest note that the manufacturer mentions about the product. It is not like typical vinyl or window tint. Do not stretch it and do not heat it.
That said, make sure to spray some distilled water on the vinyl as you peel it from the backing paper. The more water the better. It everything is nice and wet, you can slide the protector around on the light until you get it correctly lined up.
If its not perfect and it is starting to stick to the light, no problem, peal it back up and spray some more water. You can do this as much as you need until you have it fitting perfectly.
Once I have the vinyl laying on the light, I like to install the side cap pieces to ensure I'm lining everything up where it needs to be. Last thing you want is to get it installed and all the water out from underneath and then find out that the vinyl is too far to one side and hitting the tab. Installing the tabs while positioning the main protector prevents that from happening. The protector is in the correct position when it is not touching either one of the side tabs and when you cannot feel any overhang on the top or bottom.
Before installing the side tabs, make sure you have the correct piece of vinyl and then remove the blue tape before pulling it from the backing. This step makes it much easier to line it up correctly. It is easiest for me to line up the holes first, then make sure the side that meets the fog light glass is pushed right to the edge. It is installed correctly when the actual opening of the screw hole is in the direct center of the vinyl and there is no contact of the side tab vinyl pieces to the main vinyl protector or fog light.
Finished installed product, but still wet
It takes a little while for all the water to evaporate from underneath and it likes to pool around the edges. I let mine dry overnight before reinstalling on the car. While its drying, I push around the edges of the vinyl every so often to ensure it is sticking completely. With moisture on the lights it may feel like the edges aren't going to stick as well, but rest assured that once dry everything will be stuck in place very well.
Also, you may think that the adhesive vinyl looks spotty and not smooth before installing or maybe even after install while still wet. They will become clear again as all the water evaporates and the adhesive is allowed to become uniform on the light.
Another note worth mentioning is that these protectors are REUSABLE! Even after they are installed and dry, you can peal them back off and install them again if you needed to for some reason. /ubbthreads/images/graemlins/grin.gif
