BogusSVO
Well-known member
4G63 Dropped Valve Head Repair
The Subject head is a 1G 6 bolt head.
This head had extensive work done to it and would cost way more to replace than repair.
The head was loaded with SuperTech +1mm valves, and duel valve springs and Ti retainers.
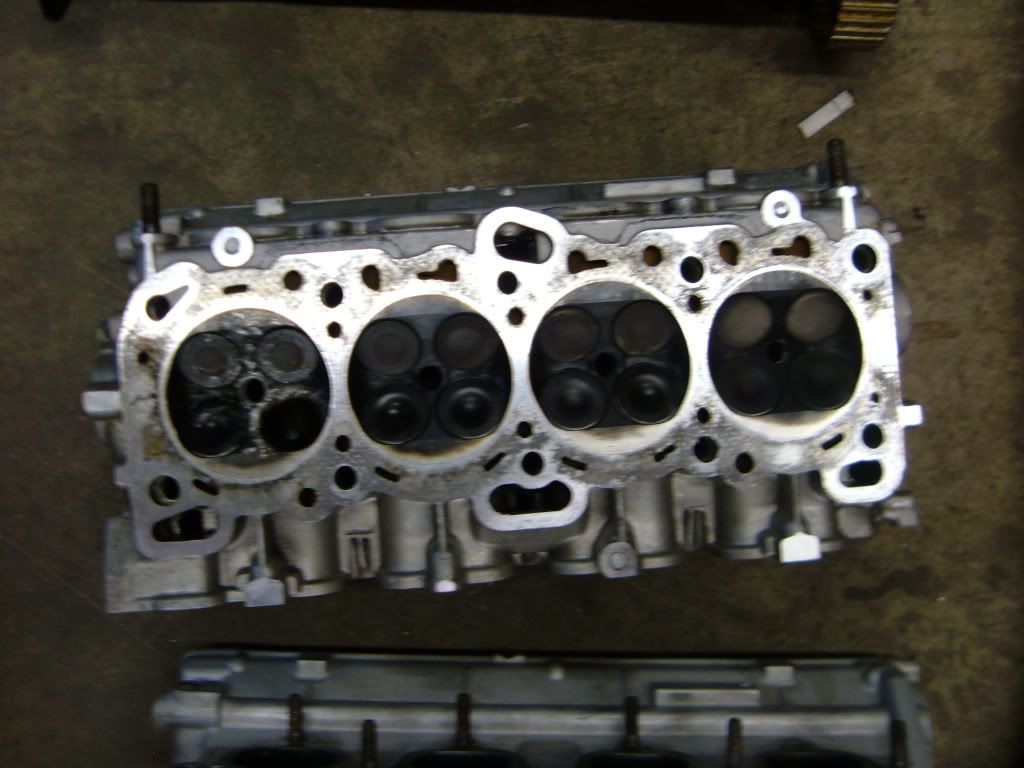
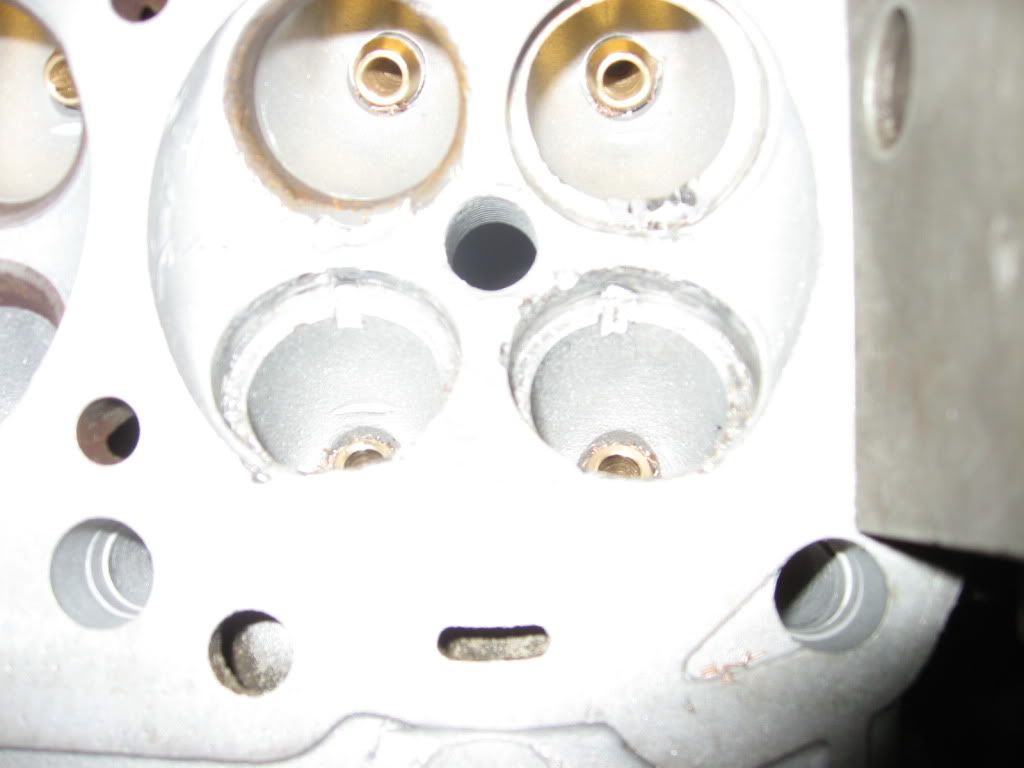
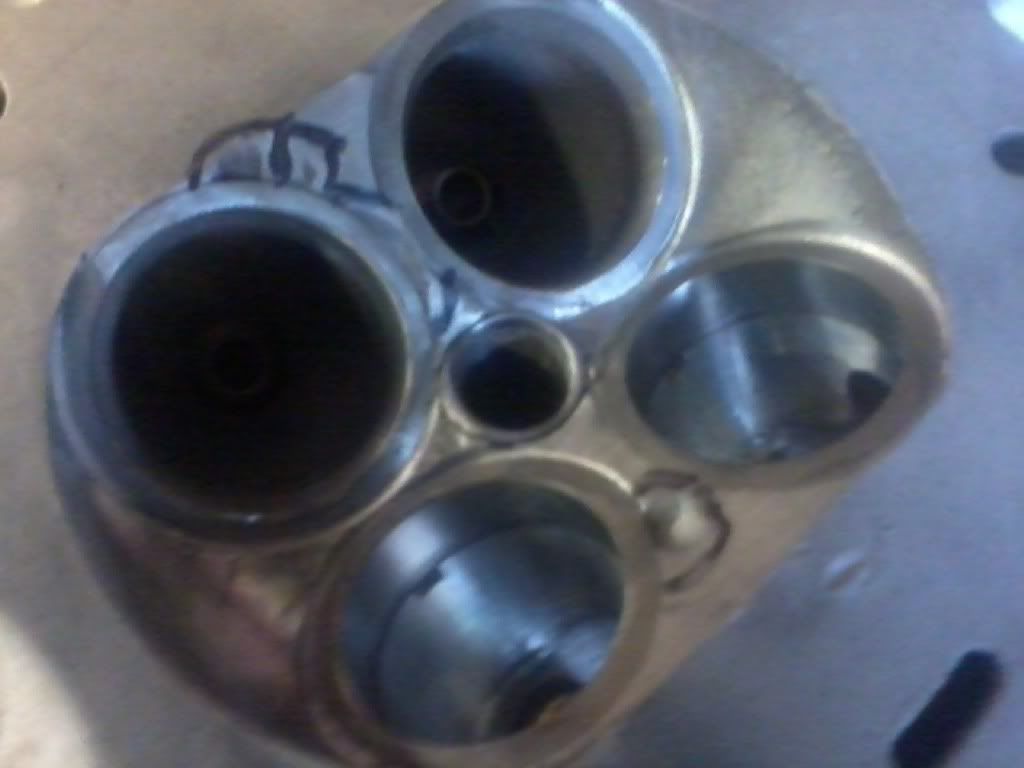
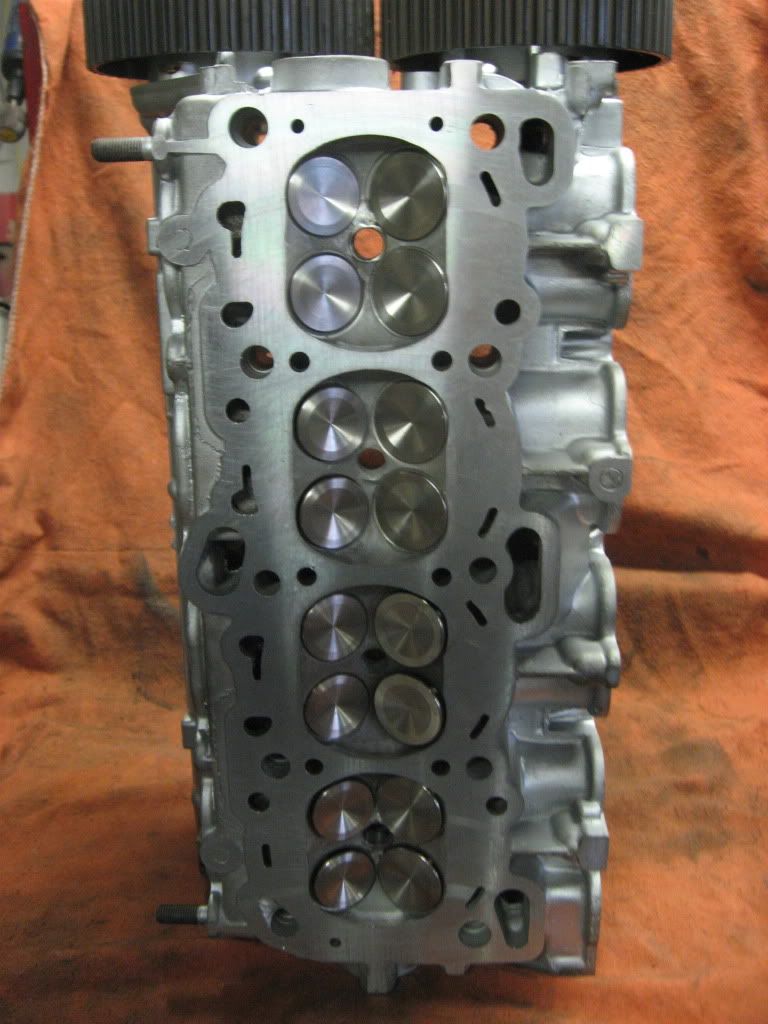
How the head looked when I received it.
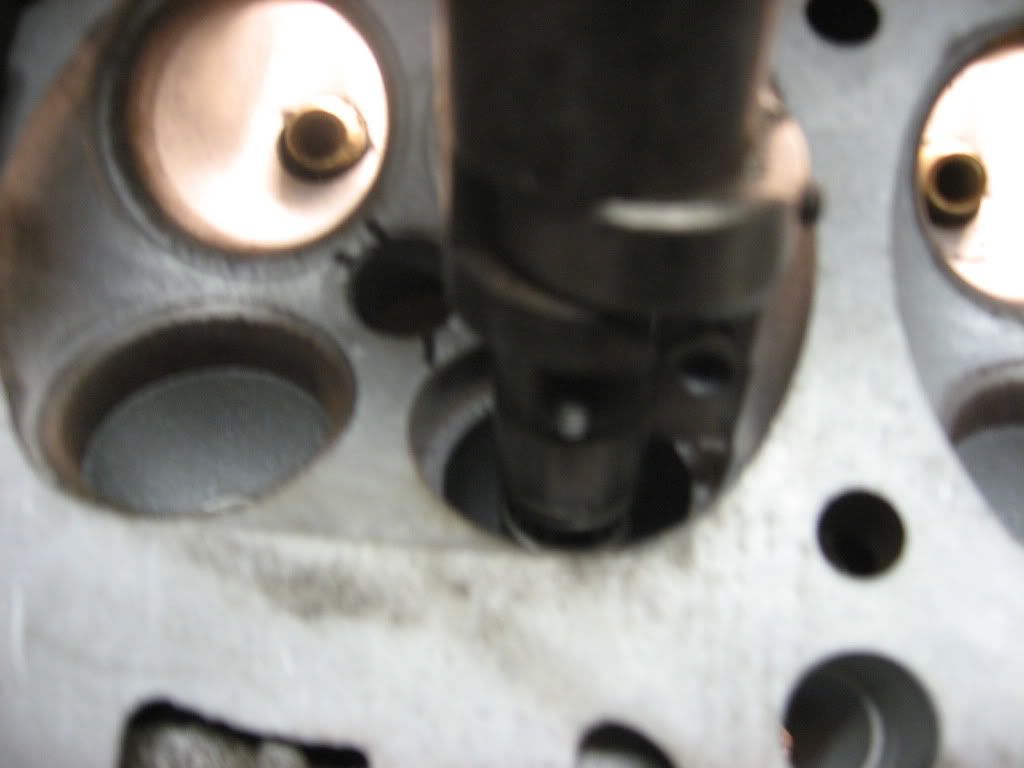
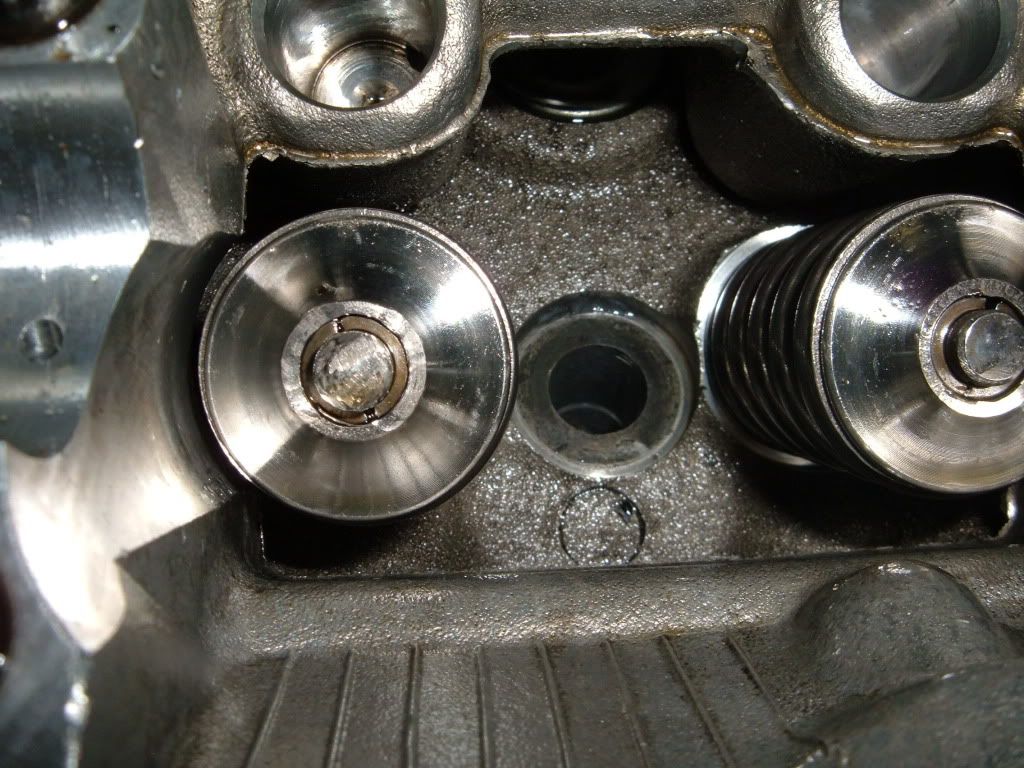
A closer look at #4 cylinder, the one that dropped the valve.
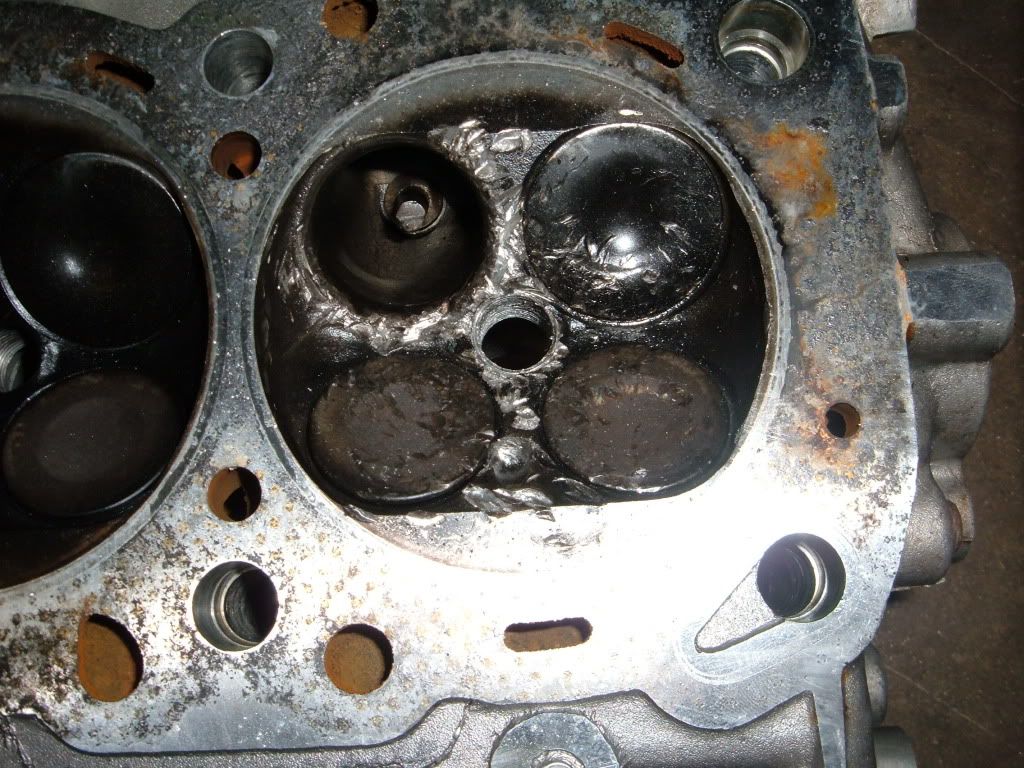
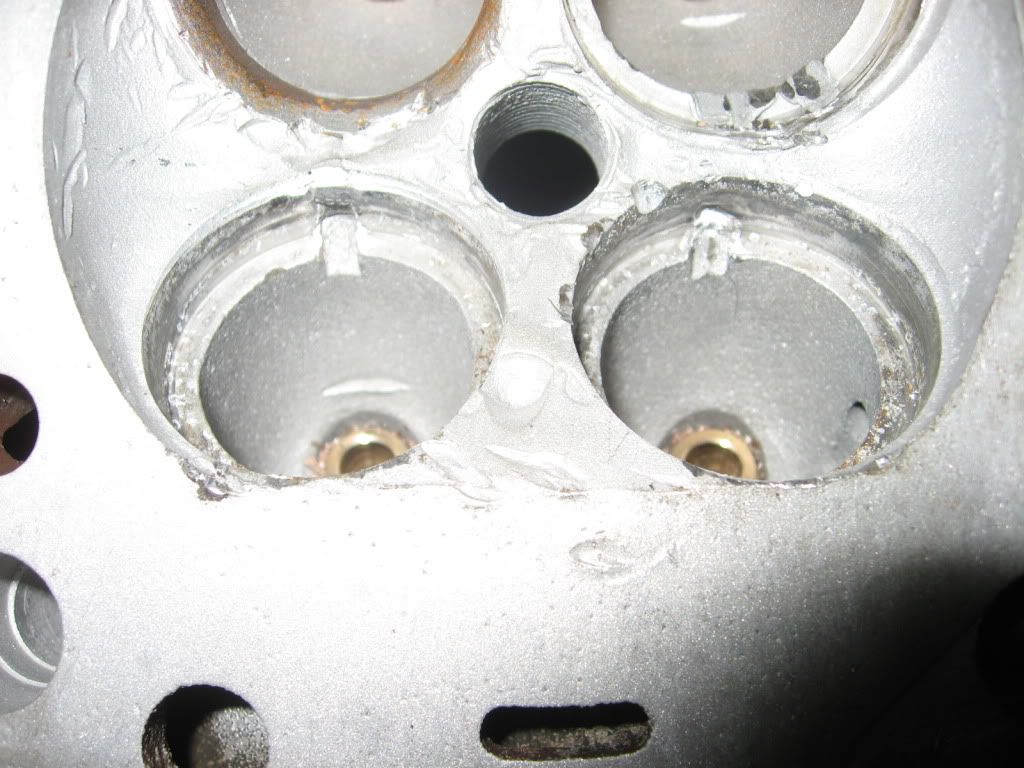
Yes it looks pretty beat. But it is fixable.
First thing to do is disassemble the head and get a parts list going.
At first look, I thought the 4 valves in the #4 cylinder would be the only ones needing replaced.
It turned out only 4 valves of the 16 could be used.

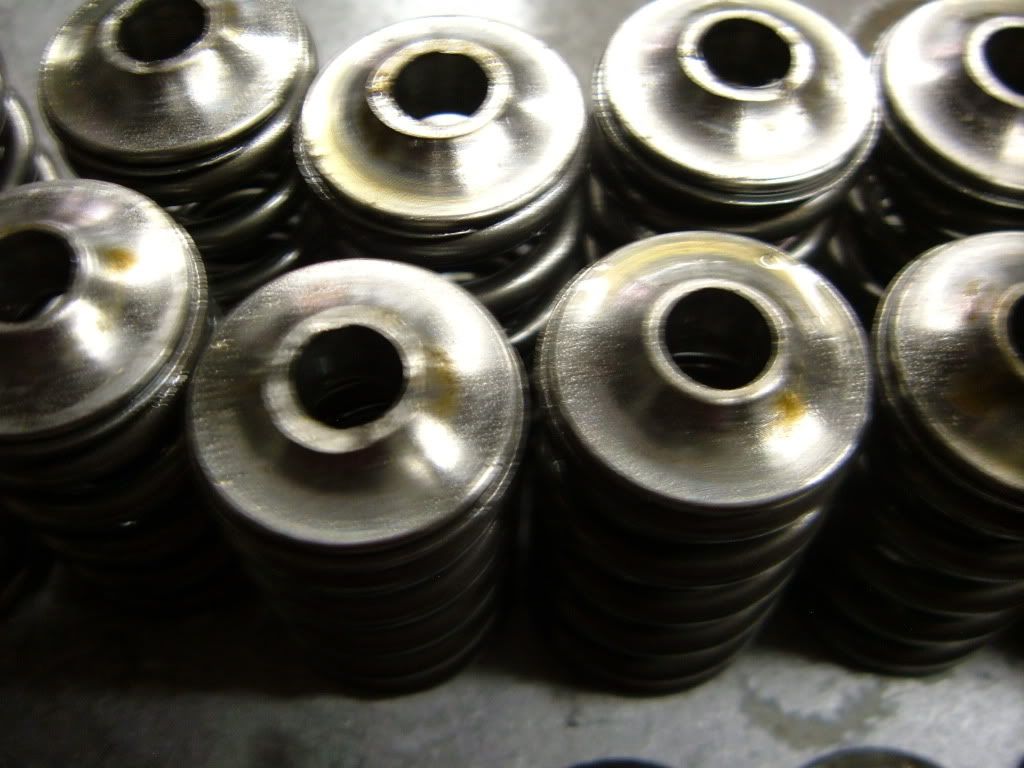
The SuperTech duel springs and Ti retainers tested fine and will be used. About half of the Ti retainers had be rubbed on.
At this time it was decided to install bronze guides, to replace the stock appearing cast iron guides.
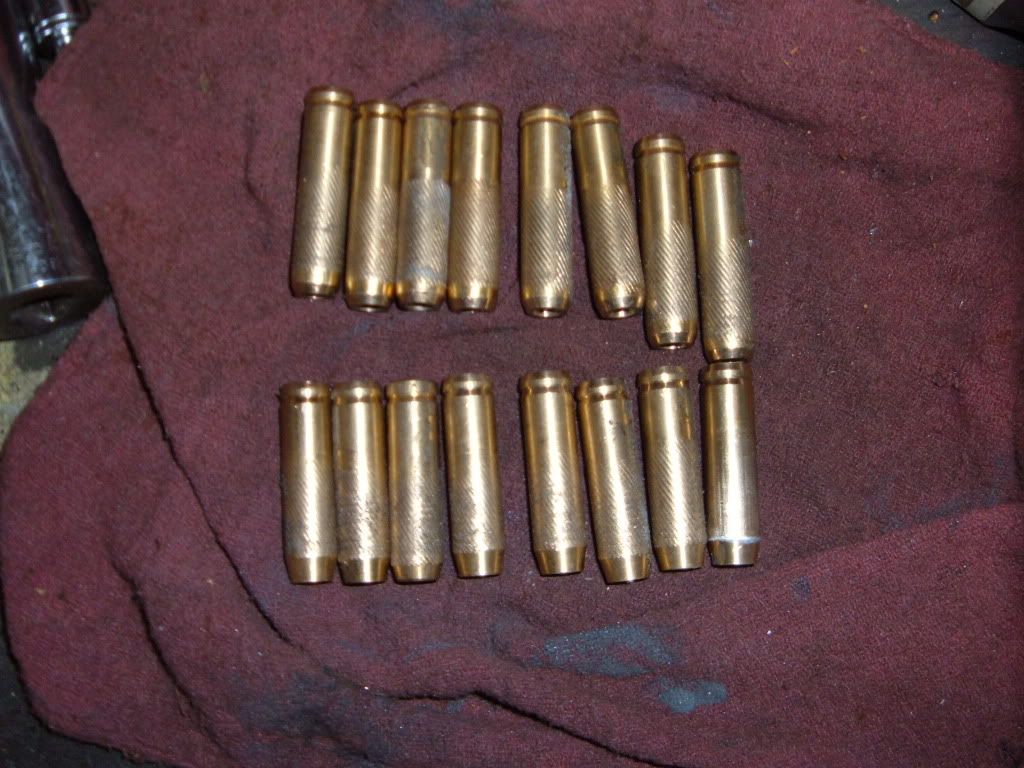
The bronze guides installed.
Once the head was cleaned, a couple small cracks were found in #1 cylinder.

The seats were cut out
Then the head was pressure tested, using 35psi in the water jacket.
The head did not leak.
So work progressed by removing the 4 seats in #4 cylinder.
New counter bores were cut, and oversized inserts were installed.
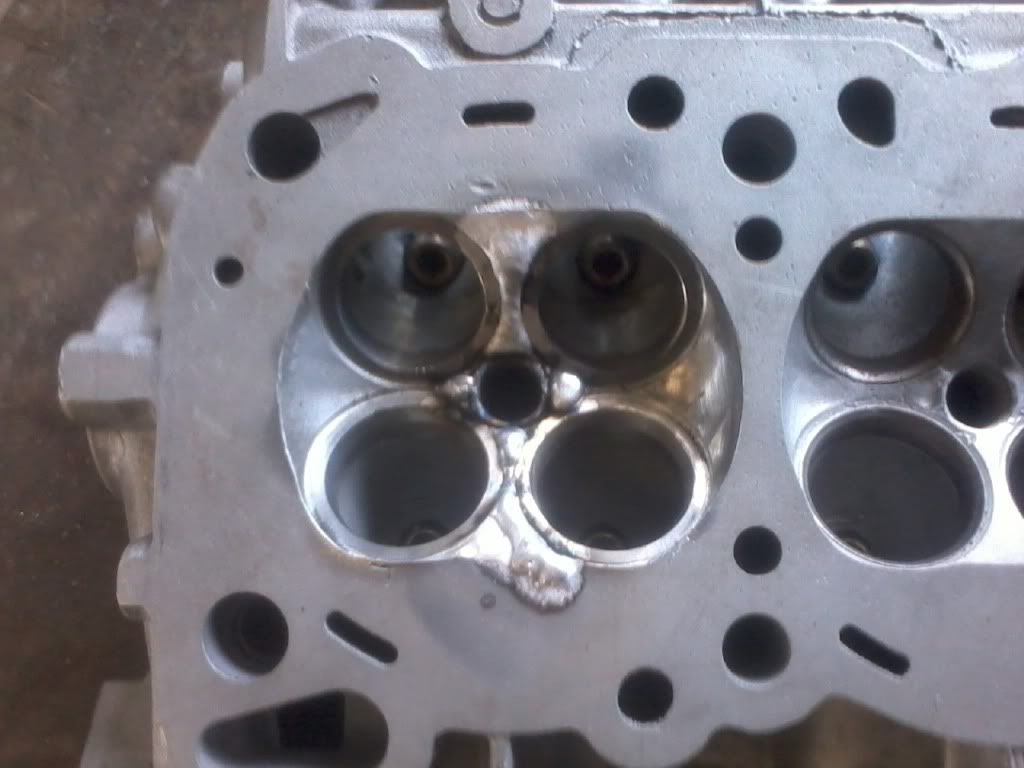
Some grinding, polishing and blending was done to smooth out some of the damaged area in the combustion chamber.
Next was to mark the spots to be welded.
What it looked like once back from the welder.
Also to note is the spark plug inserts were installed in cylinders #1 and #4 before welding.
From this point a bit more blending was done to smooth out the welds and a full valve job was performed.
As the seats were cut,
Valve tip height was checked and set to the proper specs.
Spring installed height was measured and set to 1.550 @ 85lbs
New 3g HLAs were installed, along with the followers and cams.
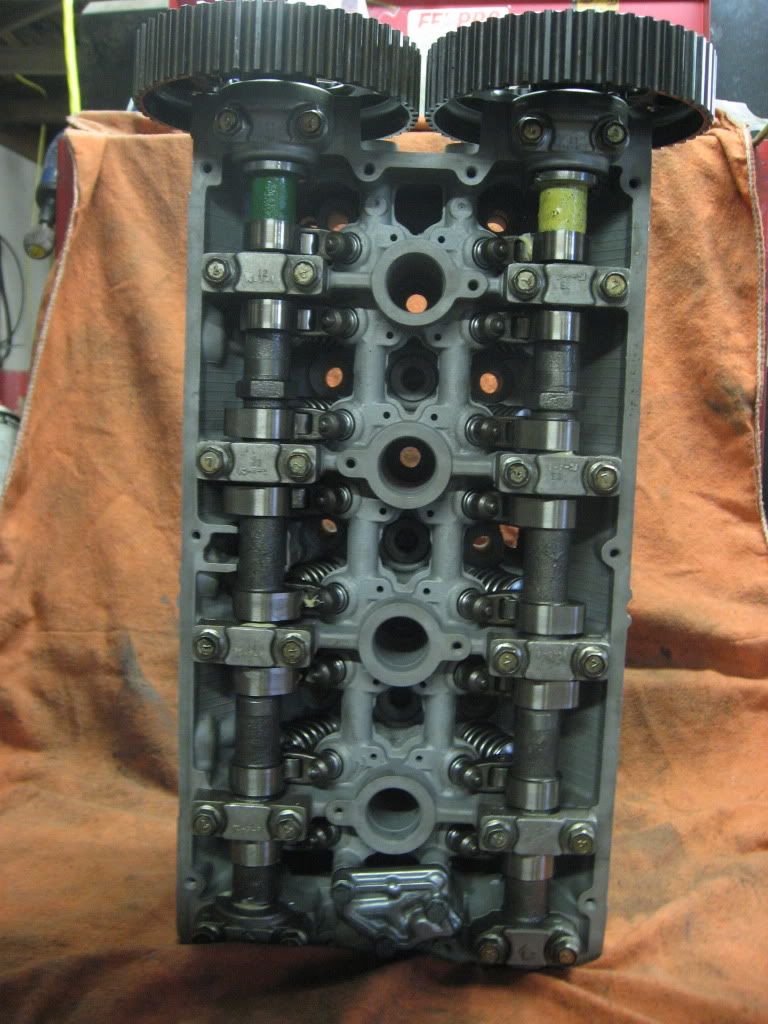
Bottom of the head.
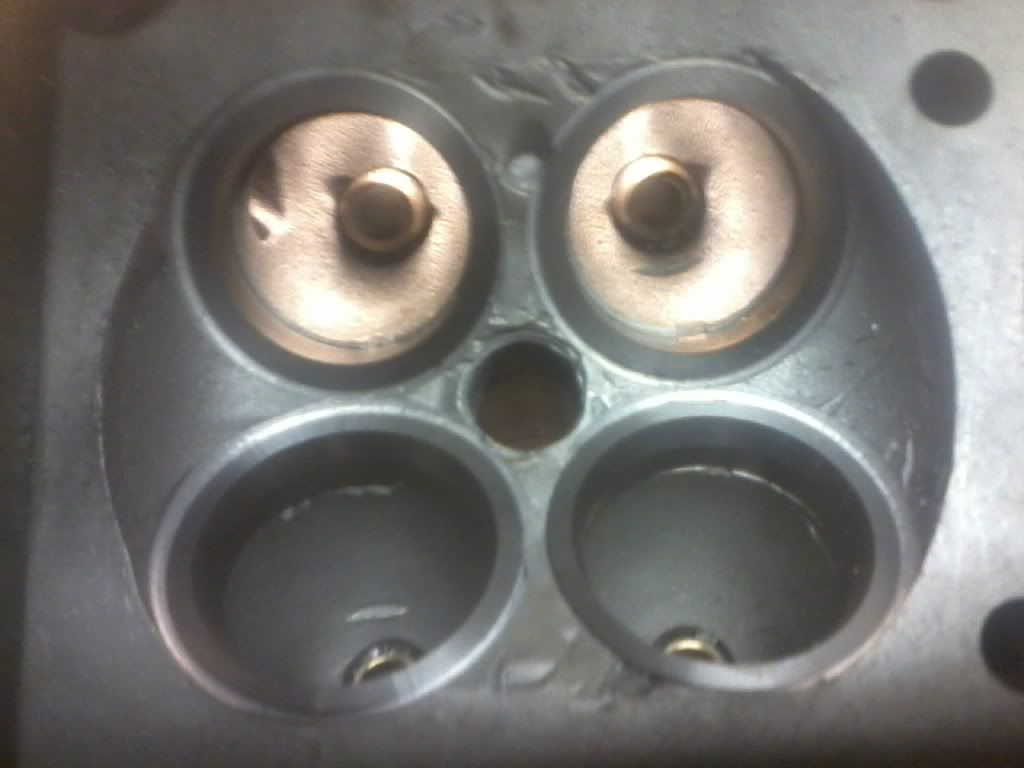
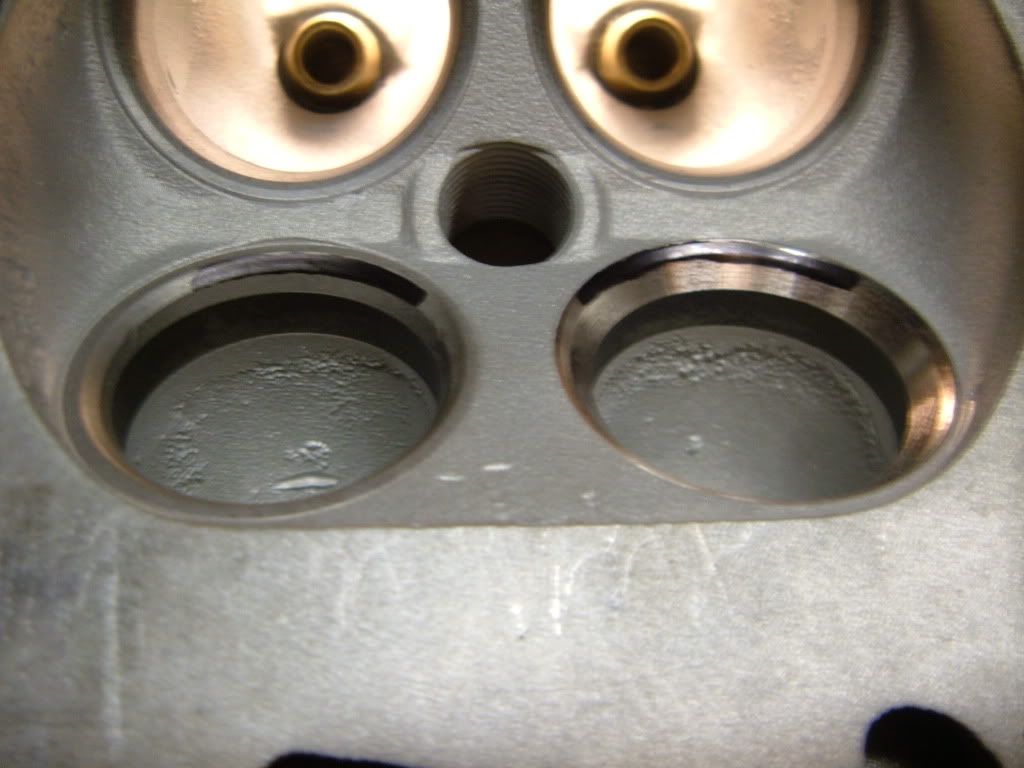
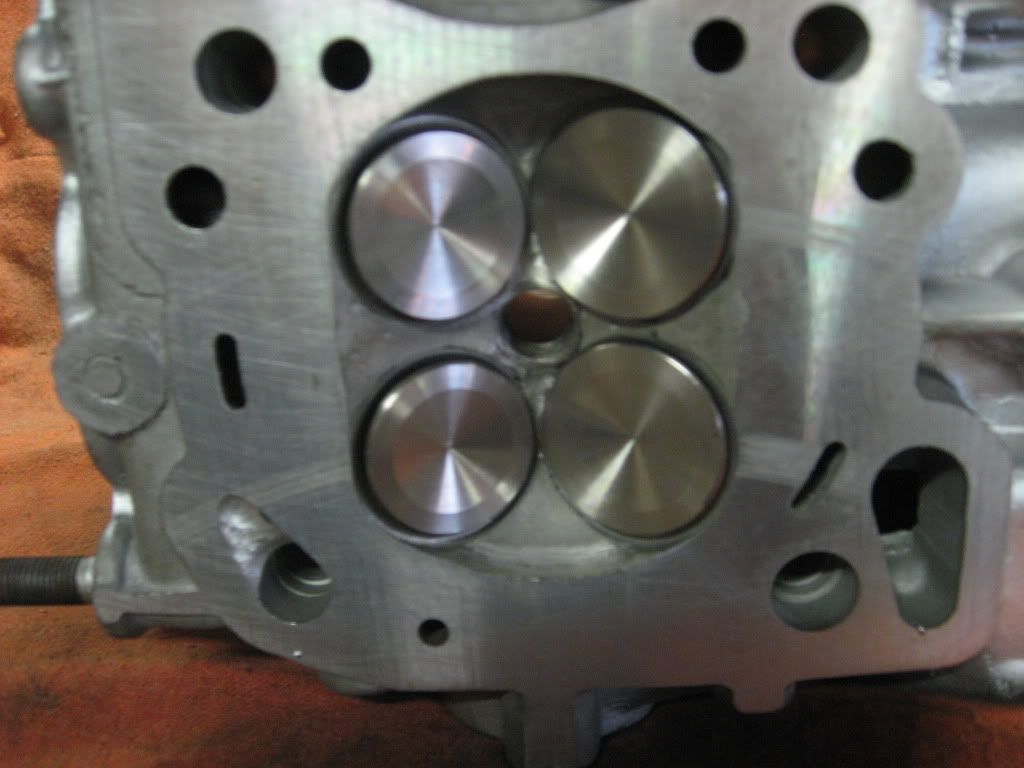
Close up of #4 cylinder after repair.
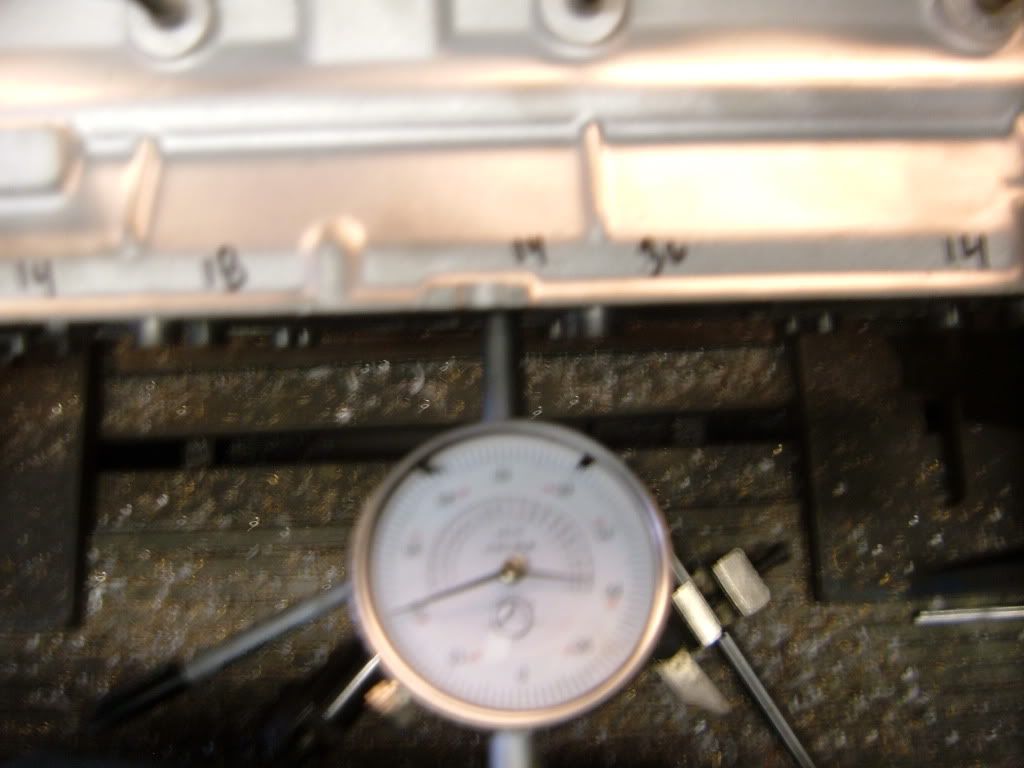
Head thickness after repair and rebuild. 5.159
Head build # BBB 744
The Subject head is a 1G 6 bolt head.
This head had extensive work done to it and would cost way more to replace than repair.
The head was loaded with SuperTech +1mm valves, and duel valve springs and Ti retainers.
How the head looked when I received it.
A closer look at #4 cylinder, the one that dropped the valve.
Yes it looks pretty beat. But it is fixable.
First thing to do is disassemble the head and get a parts list going.
At first look, I thought the 4 valves in the #4 cylinder would be the only ones needing replaced.
It turned out only 4 valves of the 16 could be used.
The SuperTech duel springs and Ti retainers tested fine and will be used. About half of the Ti retainers had be rubbed on.
At this time it was decided to install bronze guides, to replace the stock appearing cast iron guides.
The bronze guides installed.
Once the head was cleaned, a couple small cracks were found in #1 cylinder.
The seats were cut out
Then the head was pressure tested, using 35psi in the water jacket.
The head did not leak.
So work progressed by removing the 4 seats in #4 cylinder.
New counter bores were cut, and oversized inserts were installed.
Some grinding, polishing and blending was done to smooth out some of the damaged area in the combustion chamber.
Next was to mark the spots to be welded.
What it looked like once back from the welder.
Also to note is the spark plug inserts were installed in cylinders #1 and #4 before welding.
From this point a bit more blending was done to smooth out the welds and a full valve job was performed.
As the seats were cut,
Valve tip height was checked and set to the proper specs.
Spring installed height was measured and set to 1.550 @ 85lbs
New 3g HLAs were installed, along with the followers and cams.
Bottom of the head.
Close up of #4 cylinder after repair.
Head thickness after repair and rebuild. 5.159
Head build # BBB 744
