misterfixit
Well-known member
Hi Folks,
Another one of those lovely long, lazy, multi cup of tea sagas.. I have for literally years be waiting to do this.
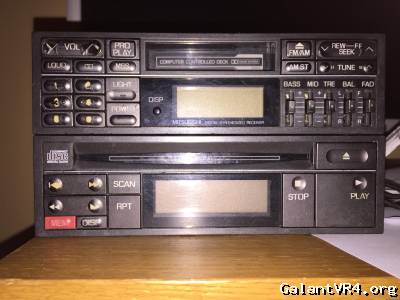
I finally found a 1991 head unit setup for PRU. It was sourced from the US, originally from a Dodge Stealth. I didn't pay alot (Happy me).
Those who know me, know I like taking stuff apart (and fettling things).
So stealth radio had some issues, and at least one key benefit!
Issues:
1. Won't play CDs
2. Lights up orange.
3. Filthy.
4. Has a clock I couldn't work out built in. (See Benefit)
5, All large caps made by rubycon!
Benefit's
1, UK compatible tuner. Gets all UK stations (No Band expander was needed)
2, Dimmable (Stock galant one is not I believe)
3, Clock built in once I'd worked it out /ubbthreads/images/graemlins/smile.gif
So To use these radio's you have to have the amp too. Luckily I'd had this a while:
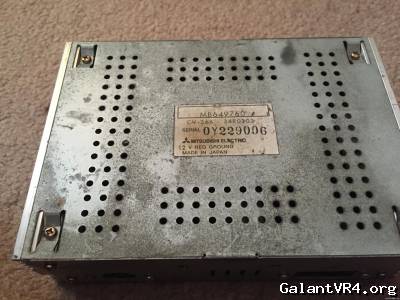
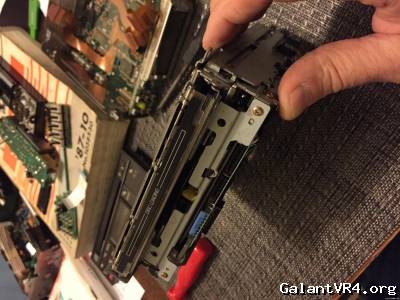
There's not so many pics, but here are the main ones with it in bits. I'll start with the CD Player. Mitsubishi make so many versions with so many laser combinations, but this one was suitably old school and built like a truck.
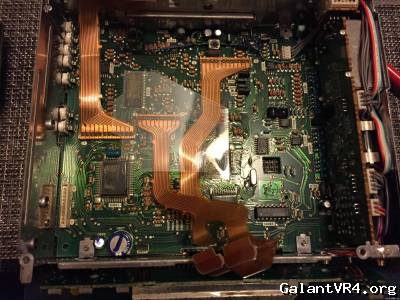
You need to be ultra careful taking these apart for two reasons. One the flexi cables are so fragile. 2 the plastic parts are very old and brittle.
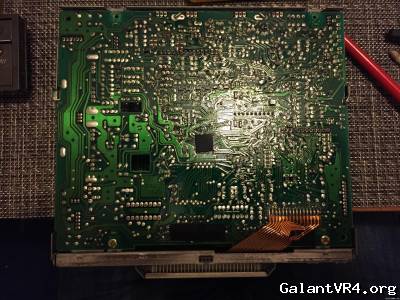
This monster flexi connects to the bottom of the CD assembly. I had a list of tasks as I took the old girl apart.
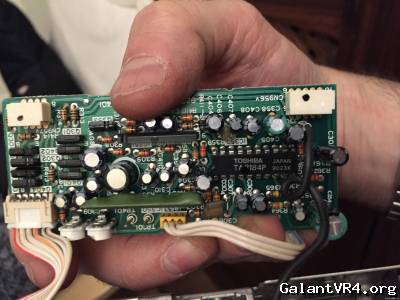
Here's the control board with the faceplate off.

This is a buttock clenching operation as you pull the screws out, then pry the board forward and unhook the bulb holders in the gap. Make sure you use PATIENCE here, you'll only get one go to get it right...
So as the unit was stripped I cleaned everything I could with cotton buds and ethyl alcahol (Make sure it's not the scented kind, that contains oils)
and looked over all the boards. I then changed all the bulbs as a few were blown. I then swapped the silicone covers on the lights to green (to match the car)
The CD module is an impressive piece of mechanical jewelery, so it got similar careful treatment, but I took time to work on the loading mechanism and the CD handling area to clean the filth off.
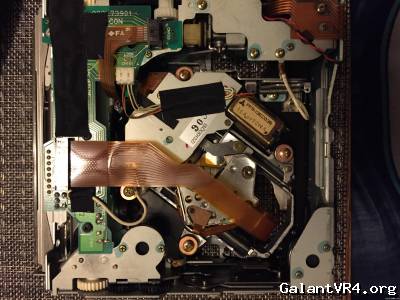
I don't know what had happened, but everything was very thinly veiled in a layer of blach particulate sludge.
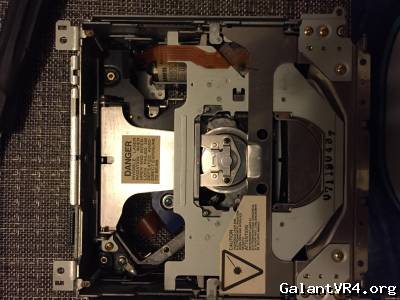
You can then very carefully use soaked cotton buds to polish the cd lens.. now I wasn't sure how this would come out.. but the lens as you can see has a twinkle again here.

Now just put it all back together again...
click
Allpar has a nice set of pages taking a similar headunit setup apart,so this was very helpful to have in the back of my mind.
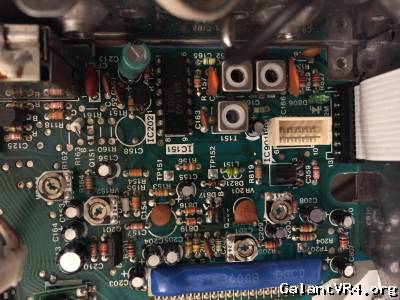
I took the headunit apart for the same treatment, but went a little further here:


Now when I put it all back together in the car I couldn't for the life of me work out why it was as dim as 1/2 candlepower bulb looked at through a winter sock.
I looked at the service manuals an nothing gave me any light until I sav the silk screen printing on the power board that said ILL-, then I traced out the circuit and got this:

The stealth had got a dimmable radio!
The galant dims the dash lights by varying the resistance to earth, so the feed is always 12v, but the earth connection goes off through the Rheostat. So I populated the spare earth connection, and connected him up in the car loom correctly.
Once this was done I was so happy to have the radio loom back to factory.
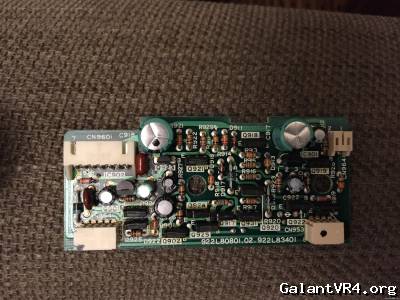
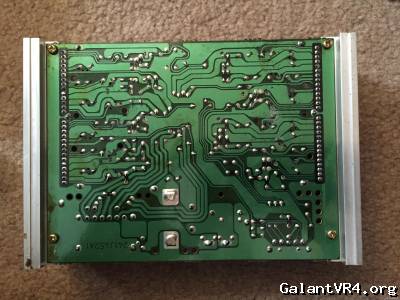
I took the amp apart and fixed the bad caps here too.. it smelt fishy.
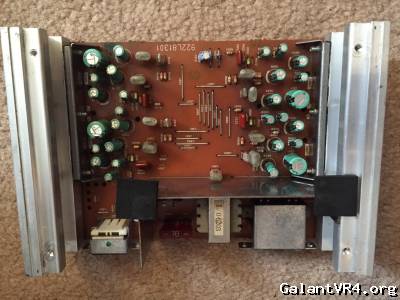
There's alot of cans in there.. but the board is simple, not as fragile as the ecu one.
Luckily when I stripped a complete JDM car many years ago I had the complete set of the slave cables for the amp, so i removed the interior and laid these correctly up to the trunk, at this point the amp is just loose in the main luggage bay as I don't have the two pressed steel brackets to mount the amp to the trunk trim support (") wink wink if anybody has a set to donate!).
wink wink if anybody has a set to donate!).
When it all went back together it looked like this..
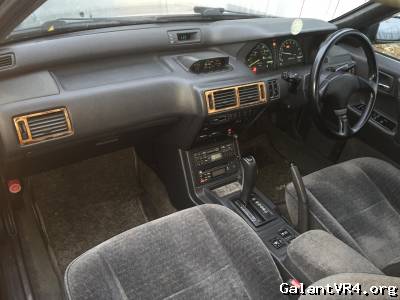
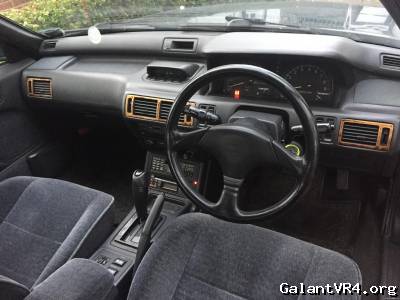
I like this head unit, it matches the climate control perfectly.
Now it's all back together it plays burned disks, provided they are burned slow enough, and it works well and sounds good, it tells the time too!
Sometime later I'd like to extract some line out signals to run the sub, but that's a project for another set of evenings...
Enjoy,
Rich
Another one of those lovely long, lazy, multi cup of tea sagas.. I have for literally years be waiting to do this.
I finally found a 1991 head unit setup for PRU. It was sourced from the US, originally from a Dodge Stealth. I didn't pay alot (Happy me).
Those who know me, know I like taking stuff apart (and fettling things).
So stealth radio had some issues, and at least one key benefit!
Issues:
1. Won't play CDs
2. Lights up orange.
3. Filthy.
4. Has a clock I couldn't work out built in. (See Benefit)
5, All large caps made by rubycon!
Benefit's
1, UK compatible tuner. Gets all UK stations (No Band expander was needed)
2, Dimmable (Stock galant one is not I believe)
3, Clock built in once I'd worked it out /ubbthreads/images/graemlins/smile.gif
So To use these radio's you have to have the amp too. Luckily I'd had this a while:
There's not so many pics, but here are the main ones with it in bits. I'll start with the CD Player. Mitsubishi make so many versions with so many laser combinations, but this one was suitably old school and built like a truck.
You need to be ultra careful taking these apart for two reasons. One the flexi cables are so fragile. 2 the plastic parts are very old and brittle.
This monster flexi connects to the bottom of the CD assembly. I had a list of tasks as I took the old girl apart.
Here's the control board with the faceplate off.
This is a buttock clenching operation as you pull the screws out, then pry the board forward and unhook the bulb holders in the gap. Make sure you use PATIENCE here, you'll only get one go to get it right...
So as the unit was stripped I cleaned everything I could with cotton buds and ethyl alcahol (Make sure it's not the scented kind, that contains oils)
and looked over all the boards. I then changed all the bulbs as a few were blown. I then swapped the silicone covers on the lights to green (to match the car)
The CD module is an impressive piece of mechanical jewelery, so it got similar careful treatment, but I took time to work on the loading mechanism and the CD handling area to clean the filth off.
I don't know what had happened, but everything was very thinly veiled in a layer of blach particulate sludge.
You can then very carefully use soaked cotton buds to polish the cd lens.. now I wasn't sure how this would come out.. but the lens as you can see has a twinkle again here.
Now just put it all back together again...
click
Allpar has a nice set of pages taking a similar headunit setup apart,so this was very helpful to have in the back of my mind.
I took the headunit apart for the same treatment, but went a little further here:
Now when I put it all back together in the car I couldn't for the life of me work out why it was as dim as 1/2 candlepower bulb looked at through a winter sock.
I looked at the service manuals an nothing gave me any light until I sav the silk screen printing on the power board that said ILL-, then I traced out the circuit and got this:
The stealth had got a dimmable radio!
The galant dims the dash lights by varying the resistance to earth, so the feed is always 12v, but the earth connection goes off through the Rheostat. So I populated the spare earth connection, and connected him up in the car loom correctly.
Once this was done I was so happy to have the radio loom back to factory.
I took the amp apart and fixed the bad caps here too.. it smelt fishy.
There's alot of cans in there.. but the board is simple, not as fragile as the ecu one.
Luckily when I stripped a complete JDM car many years ago I had the complete set of the slave cables for the amp, so i removed the interior and laid these correctly up to the trunk, at this point the amp is just loose in the main luggage bay as I don't have the two pressed steel brackets to mount the amp to the trunk trim support (
wink wink if anybody has a set to donate!).When it all went back together it looked like this..
I like this head unit, it matches the climate control perfectly.
Now it's all back together it plays burned disks, provided they are burned slow enough, and it works well and sounds good, it tells the time too!
Sometime later I'd like to extract some line out signals to run the sub, but that's a project for another set of evenings...
Enjoy,
Rich
