You are using an out of date browser. It may not display this or other websites correctly.
You should upgrade or use an alternative browser.
You should upgrade or use an alternative browser.
yubh8tn
Well-known member
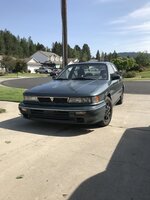
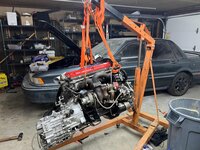
For those unindoctrinated, you can read the horrors this car has suffered by my hand here. Since then, I pulled the engine out again yesterday. Oil is full of metal dust and there are significantly large flakes that got picked up by a magnet. Today I will tear it down and inspect bearings and journals for damage. Hoping metal flakes are from the damage caused by the failed rocker and hoping that didnt cause more damage. I'm leaking oil from damn near every spot oil reaches so I will be inspecting everything very carefully, resealing everything, installing a proper catch can setup, and installing an oil pressure sensor. The thought is that with all of those measures I should be leak free or have the information I need to become leak free. As for the heavy metal oil, I hope I don't need to order new bearings (for the third time).
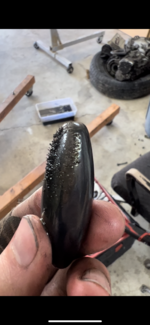
My machinist feels bad for me so he said he'd rehone my block and install my new cams/rocker/retainer/lash adjuster for me for free. After I pull everything apart tomorrow I will be taking it by there and seeing about getting the head thoroughly inspected as I suspect there is some unknown damage there that was causing my oil burning issues.
Unfortunately he is the guy who put my head together last time. I can't really put the blame on him for that rocker failing or for my oil burning issues, but it is a possibility both were caused by his mistakes. He did my machine work and replaced my valves both times they contacted the pistons. Even when the car ran its best it was 20psi lower in one cylinder than the rest. There are two common denominators on this failure of a build - me... and him. Whose fault all of this bullshit is? That's yet to be seen. (its probably me)
Last edited:
yubh8tn
Well-known member
Today I got the engine torn down. I was very wrong with my post yesterday.
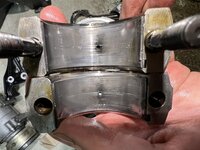
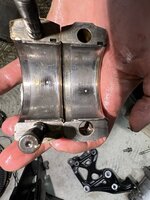
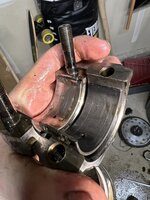
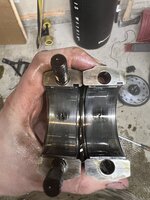
This bearing tried spinning ^
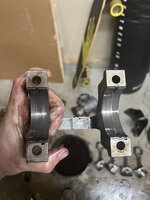
the right bearing is impregnated with metal and that groove looks like the grand canyon in real life^
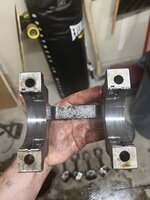
To prevent a fourth catastrophic engine failure I will be letting the professional assemble my shortblock this time . On the bright side, my engine should not blow up (knock on wood) and it will be better than ever with my new cams and the switch to speed density. I'm very happy I haven't sent a rod through the block as this is the second rod bearing that I've had try to spin on me.
for the record, all bearings were installed with the the little lips that stick out going into the respective groove on the rod/cap. If they are incorrectly installed in one of the photos its because i dropped them pulling the block apart and just shoved them back in for the photo.


This bearing tried spinning ^


the right bearing is impregnated with metal and that groove looks like the grand canyon in real life^

To prevent a fourth catastrophic engine failure I will be letting the professional assemble my shortblock this time
 . On the bright side, my engine should not blow up (knock on wood) and it will be better than ever with my new cams and the switch to speed density. I'm very happy I haven't sent a rod through the block as this is the second rod bearing that I've had try to spin on me.
for the record, all bearings were installed with the the little lips that stick out going into the respective groove on the rod/cap. If they are incorrectly installed in one of the photos its because i dropped them pulling the block apart and just shoved them back in for the photo.

Last edited:
yubh8tn
Well-known member
Been a while but I finally got my engine back from a local-ish shop, Gibson Performance in Spokane, WA. Total of about $4300 with the forged internals. Wiseco 1400HD's and Eagle rods. Hopefully it'll stay together this time.
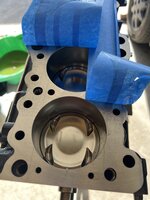
Hopefully buying some FP2x cams from @mitsuturbo and then I just need to buy a new oil pump and a few seals and I can put it together. Aside from that, I'm swapping from V3 to Link G4x and I need to put my transmission back together. Then she's ready to tune and hopefully last more than a few hundred miles.
I'll be back in town halfway through August and the (re)build can commence.
yubh8tn
Well-known member
faqinshiet
Well-known member
Any updates?
yubh8tn
Well-known member
Yes.Any updates?
I spent all of January and February buttoning up the build, teaching myself how to tig weld, and then building the turbo kit.
I had to fight a crazy oil leak, first things first. I replaced my rear main seal, its housing, its gasket, and resealed the oil pan with Hondabond 4. But it kept leaking. Worse. As a last ditch effort, I resealed the oil pan one last time with fast-set RTV. And it worked. It was leaking where the rear main seal housing and pan connect, just from poor craftsmanship of the RTV seal.
Then, I moved to fabrication. I used these Amazon special mishimoto-style clamps instead of silicone couplers. It was pretty fun to teach myself how to do all of this!
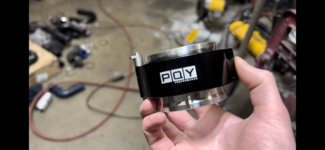
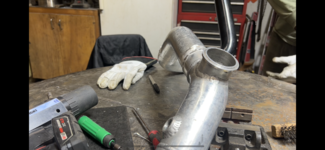
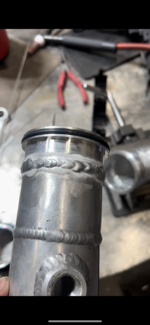
After that, we had to do the exhaust. The car came with a 3 inch straight pipe, and I was pretty fabbed out by this point, so I had my friend mig weld the muffler and exhaust cutout on for me. Here's a vid of it idling with no exhaust
After that, I had a local guy from Spokane come over and give me a calm 0 mile tune to get the break-in done with. I drove it for about 800 miles and deemed it broken in. I wanted to change some coolant hoses, the oil pan was leaking again, the trans had cheap walmart fluid in it, and I wanted to install an aftermarket oil pressure sensor, so I jacked it up and drained all those fluids. I decided to install the oil pressure sensor first, using this guide, but almost immediately did this:
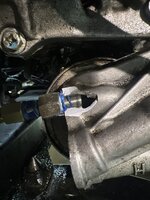
I ordered a new OFH, then moved onto resealing the pan. I immediately found this at the bottom of the pan:
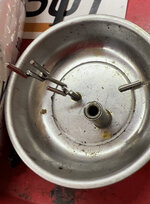
Since the pan was already off, and I had destroyed motors from losing rockers before, I decided to pop some rod caps and check the bearings. Luckily for me, there was no damage. I have no idea when in the 800 miles this rocker died. Unfortunately for me, it wiped the cam lobe on the FP2x @mitsuturbo sold me

The car has not been driven since it was put on stands on March 20th. Life did the whole "months go by in the blink of an eye" thing again. With this being my 3rd failed rocker, and the rest of them having heat marks, I decided to replace them all. I got a used set from Rixracing for $40, and none of them are heat marked. I still have some kelfords I found in the junkyard that are bigger than the FP2x's, so I will be running those and sending the FP2x's to Delta Cam to be repaired. I also messed up fabricating my intercooler piping a bit, it sticks out a little too far to get the bumper on. So I will be fixing that and switching to an older Magnus SMIM.
More updates to come.
faqinshiet
Well-known member
Wow! That’s crazy and disappointing! I wish I had the bandwidth to learn welding. Great work!!
nazagalant1993
Well-known member
Great work!! we look forward to seeing future updates
noglets
Active member
Seems like it will never run, you should give up 

yubh8tn
Well-known member
Update time.
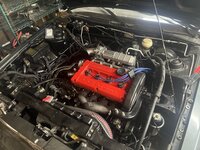
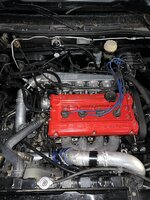
First off was the broken cams, spring, and retainer. Pulled the cams, whipped out my Euro Export valve spring compressor tool, and promptly broke it in half due to not reading the instructions. Apparently you're supposed to lube those things before using them. Luckily, a local guy had the same tool and let me borrow it. Got the spring out just to discover my engine builder used all intake valve stem seals! Yay! I ripped the seal removing the spring, so I replaced that one with the proper viton exhaust seal, but left the rest for another day. Put the newly repaired Kelford 264/264s in, retimed it, then installed the Magnus SMIM. The coil relocation bracket that you can buy is incompatible with AC, so I had to make a new bracket for the coils myself. You can see it on the right strut mount in the photo below.
We also relocated the battery to the trunk. With 0 gauge cable. Two 0 gauge chassis grounds, just to be safe. One 0 gauge power with a 100amp ANL fuse. I pulled the carpet up and everything to hide it well, found a bunch of marbles?? from previous owners stuck under there. Also quite a few ink pens for some reason. The cable is completely hidden in the interior, then runs through the fender well into the engine bay where the battery sits from factory. For now I just unbolted the power feed from the original battery terminal and stacked it onto a bolt with the new wire, then electrical taped the whole thing thoroughly to avoid shorts to ground.
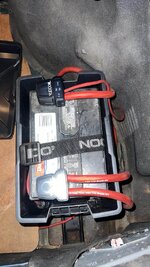
Here's the electrical tape abomination:
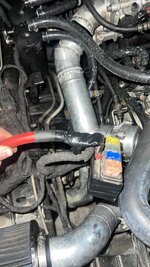
Sadly, when I made my intercooler piping before, I made way-too-shitty brackets to hold the intercooler that held it FAR too away from the radiator and blocked the bumper from going on. Similarly inconvenient, the Magnus SMIM moves the throttle body down quite a few inches. Unfortunately, this means practically ALL of my work on the intercooler piping needed to be redone. So I redid it. You can see in the photo below that the intercooler is much closer to the rad now, and with much better bracketry. You also get a very clear indication as to what the car did today.
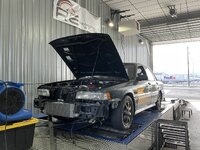
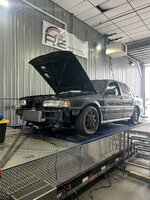
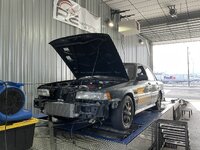
After many hours of boost leak testing, pinhole welding, and slavery, it was finally decent enough to get it tuned, despite the severe spark blowout and running rich as sh*t. Tuner found out it WASNT running rich as sh*t and, in reality, my wideband was dead. Great way to start dyno day. He ended up just using the dyno's wideband in a spare o2 bung on my downpipe and tuned the damn thing in open loop. Tuning started slow, as it was my tuner's first time using this type of dyno and he was learning its system WHILE also trying to tune my car without a wideband. But he resolved the spark blowout and slowly got the tune as dialed in as he could get with our janky ass tuning setup. Idle and cruise were pretty much impossible to get perfect without being in closed loop, but WOT went pretty damn well. It took quite a few pulls and a bunch of time (aka money!), but we eventually got it pretty dialed in UNTIL we faced knock issues. We suspect its phantom knock from the muffler rattling against the rear tow hook, but we played it safe and called it good. Here's the final result of today:
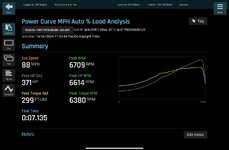
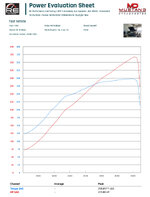
This is at 23psi. Obviously he let off before we actually hit peak power, so I suspect we could've crossed the 400whp barrier today just by continuing to accelerate. I have quite a few things to fix before we go back to finish the tune. Here's a short, but hopefully complete, list: pull the manifold to seal the exhaust manifold stud leaking oil, replace the dead the o2 sensor, bend/remove the towhook out of the way, get decent tires on it, get an alignment, find the ominously inapparent coolant leak, and add a fuse to the fuel pump power wire. Oh, and put the bumper on.
I'm happy with the extremely linear powerband. We're only at 60% duty cycle on the injectors, and only at 23psi. We are hoping to take it to 30psi and 8500rpm next go around, and blow 400whp out of the park. The car is extremely rough in basically every way, but it works. Still much much MUCH more to do. Will continue to update.
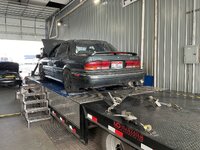
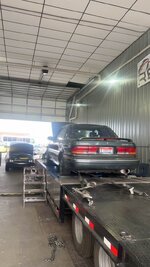
Here's a bunch of random photos.
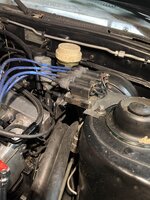
First off was the broken cams, spring, and retainer. Pulled the cams, whipped out my Euro Export valve spring compressor tool, and promptly broke it in half due to not reading the instructions. Apparently you're supposed to lube those things before using them. Luckily, a local guy had the same tool and let me borrow it. Got the spring out just to discover my engine builder used all intake valve stem seals! Yay! I ripped the seal removing the spring, so I replaced that one with the proper viton exhaust seal, but left the rest for another day. Put the newly repaired Kelford 264/264s in, retimed it, then installed the Magnus SMIM. The coil relocation bracket that you can buy is incompatible with AC, so I had to make a new bracket for the coils myself. You can see it on the right strut mount in the photo below.

We also relocated the battery to the trunk. With 0 gauge cable. Two 0 gauge chassis grounds, just to be safe. One 0 gauge power with a 100amp ANL fuse. I pulled the carpet up and everything to hide it well, found a bunch of marbles?? from previous owners stuck under there. Also quite a few ink pens for some reason. The cable is completely hidden in the interior, then runs through the fender well into the engine bay where the battery sits from factory. For now I just unbolted the power feed from the original battery terminal and stacked it onto a bolt with the new wire, then electrical taped the whole thing thoroughly to avoid shorts to ground.

Here's the electrical tape abomination:

Sadly, when I made my intercooler piping before, I made way-too-shitty brackets to hold the intercooler that held it FAR too away from the radiator and blocked the bumper from going on. Similarly inconvenient, the Magnus SMIM moves the throttle body down quite a few inches. Unfortunately, this means practically ALL of my work on the intercooler piping needed to be redone. So I redid it. You can see in the photo below that the intercooler is much closer to the rad now, and with much better bracketry. You also get a very clear indication as to what the car did today.

After many hours of boost leak testing, pinhole welding, and slavery, it was finally decent enough to get it tuned, despite the severe spark blowout and running rich as sh*t. Tuner found out it WASNT running rich as sh*t and, in reality, my wideband was dead. Great way to start dyno day. He ended up just using the dyno's wideband in a spare o2 bung on my downpipe and tuned the damn thing in open loop. Tuning started slow, as it was my tuner's first time using this type of dyno and he was learning its system WHILE also trying to tune my car without a wideband. But he resolved the spark blowout and slowly got the tune as dialed in as he could get with our janky ass tuning setup. Idle and cruise were pretty much impossible to get perfect without being in closed loop, but WOT went pretty damn well. It took quite a few pulls and a bunch of time (aka money!), but we eventually got it pretty dialed in UNTIL we faced knock issues. We suspect its phantom knock from the muffler rattling against the rear tow hook, but we played it safe and called it good. Here's the final result of today:


This is at 23psi. Obviously he let off before we actually hit peak power, so I suspect we could've crossed the 400whp barrier today just by continuing to accelerate. I have quite a few things to fix before we go back to finish the tune. Here's a short, but hopefully complete, list: pull the manifold to seal the exhaust manifold stud leaking oil, replace the dead the o2 sensor, bend/remove the towhook out of the way, get decent tires on it, get an alignment, find the ominously inapparent coolant leak, and add a fuse to the fuel pump power wire. Oh, and put the bumper on.
I'm happy with the extremely linear powerband. We're only at 60% duty cycle on the injectors, and only at 23psi. We are hoping to take it to 30psi and 8500rpm next go around, and blow 400whp out of the park. The car is extremely rough in basically every way, but it works. Still much much MUCH more to do. Will continue to update.
Here's a bunch of random photos.


Last edited:
yubh8tn
Well-known member
Update time 
I have accomplished basically none of the must-do list at the bottom of the last update because I've been busy doing other less necessary things
I did some exterior work. The front passenger fender's moulding has been sticking out at a 30 degree angle acting as an air brake that could self-destruct at any moment, so I took the time to remove the fender and get it fully reattached. It turns out it wasn't able to be attached because not only the fender was all bent up but also where it mounts to the body of the car along the pinchweld was all bent up. I spent some time with a hammer, a 2x4, and some punches and straightened everything out enough for it to reattach properly. Used fresh 3m double sided tape and reinforced the clips with zipties and wa la.
Before: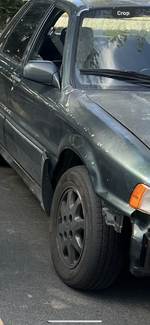
After: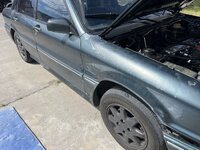
Then I reattached the front bumper and grill.
Before: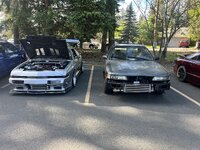
After: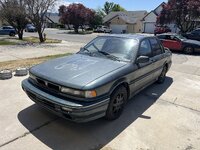
Then I gave the poor thing its first handwash its ever received under my ownership and followed it up with a complete clay bar. Most of the paint is too compromised to see a real difference but it definitely restored some shine and color depth, the metallic flakes are a lot more obvious now. Sort of made it appear more blue
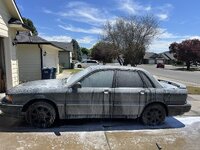
All done: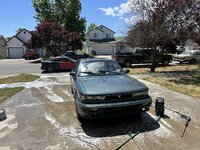
Then I followed Tyeler Anderson's COP Conversion guide. I used the antilag racing billet COP plate ($85 after shipping) and amazon coils, coil connectors, and amazon deustch 8 pin to replace the factory PTU 8 pin. All in all the conversion was like $105.
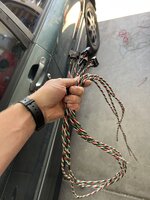
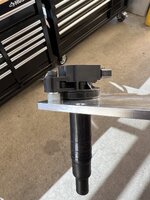
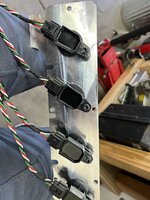
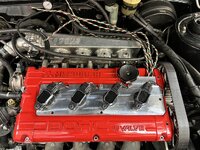
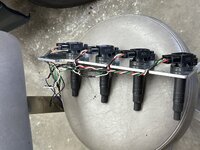
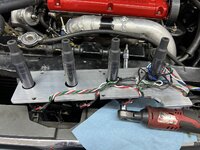
Finished product: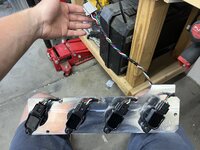
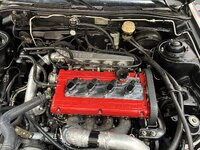
That was my first time making any sort of harness from scratch so I wasted a TON of wire making a 4 wire harness for each plug prior to planning out the harness. Two coils didnt even need all 4 wires and i only needed like 6 inches of wire from each oil, not 4 feet like I made
Anyway it runs great and I've been driving it a lot. I was blowing dipsticks left and right but we put a spring on it until I can manage my crankcase pressure a bit better. When I removed the original coil packs they were literally dripping with oil, so thats probably why there was a noticeable before and after of how the car ran. Lol.
Then we just enjoyed it.


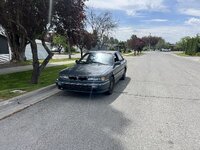

I have accomplished basically none of the must-do list at the bottom of the last update because I've been busy doing other less necessary things

I did some exterior work. The front passenger fender's moulding has been sticking out at a 30 degree angle acting as an air brake that could self-destruct at any moment, so I took the time to remove the fender and get it fully reattached. It turns out it wasn't able to be attached because not only the fender was all bent up but also where it mounts to the body of the car along the pinchweld was all bent up. I spent some time with a hammer, a 2x4, and some punches and straightened everything out enough for it to reattach properly. Used fresh 3m double sided tape and reinforced the clips with zipties and wa la.
Before:

After:

Then I reattached the front bumper and grill.
Before:

After:

Then I gave the poor thing its first handwash its ever received under my ownership and followed it up with a complete clay bar. Most of the paint is too compromised to see a real difference but it definitely restored some shine and color depth, the metallic flakes are a lot more obvious now. Sort of made it appear more blue


All done:

Then I followed Tyeler Anderson's COP Conversion guide. I used the antilag racing billet COP plate ($85 after shipping) and amazon coils, coil connectors, and amazon deustch 8 pin to replace the factory PTU 8 pin. All in all the conversion was like $105.


Finished product:


That was my first time making any sort of harness from scratch so I wasted a TON of wire making a 4 wire harness for each plug prior to planning out the harness. Two coils didnt even need all 4 wires and i only needed like 6 inches of wire from each oil, not 4 feet like I made

Anyway it runs great and I've been driving it a lot. I was blowing dipsticks left and right but we put a spring on it until I can manage my crankcase pressure a bit better. When I removed the original coil packs they were literally dripping with oil, so thats probably why there was a noticeable before and after of how the car ran. Lol.
Then we just enjoyed it.


Similar threads
- Replies
- 0
- Views
- 2K
- Replies
- 9
- Views
- 4K
- Replies
- 2
- Views
- 3K
- Replies
- 0
- Views
- 3K
