Luke
Well-known member
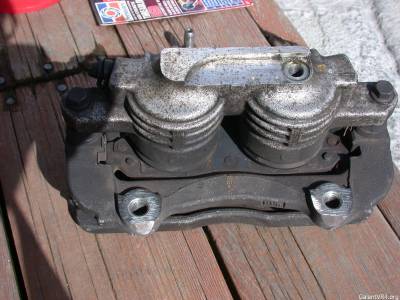
Puny stock 11" brake setup.

Note the routing of the stock brakeline setup, which we will follow with the new stainless steel brakeline.
Clean and PB blast the fittings before removal.
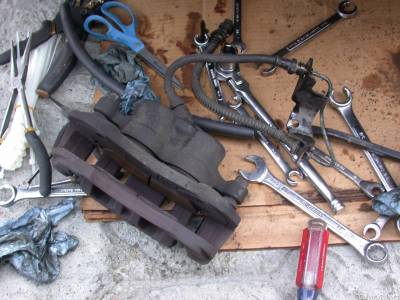
Remove the stock caliper and brakeline.
Then, separate out the brakeline bracket that bolts on to the strut. This bracket will be reused.
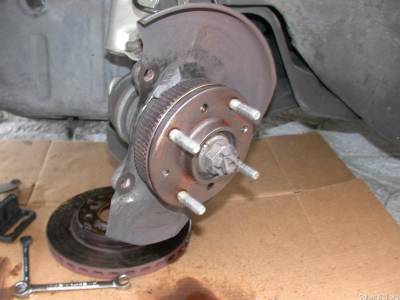
Remove the stock rotor
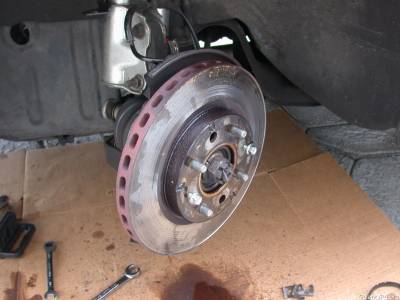
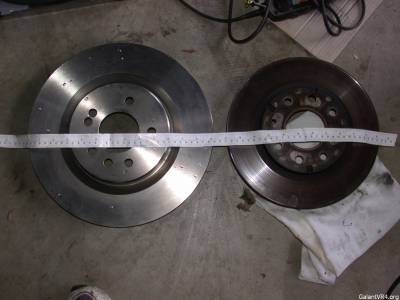
13" cobra rotor versus 11" stock rotor.
I redrilled the 13" rotor to 4-lug setup.
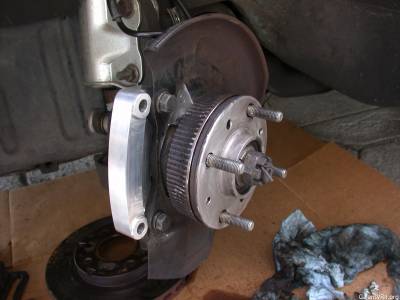
Put anti-seize on the rotor mating surface, and bolt on the bracket.
I used anti-seize on the bolts, and torqued to 55 lb.ft.
A slight amount of grinding on the bracket might be needed. ( Strangely, I didn't need to grind when installing the bracket on the passenger side knuckle, but grinding was needed on the driver side. )
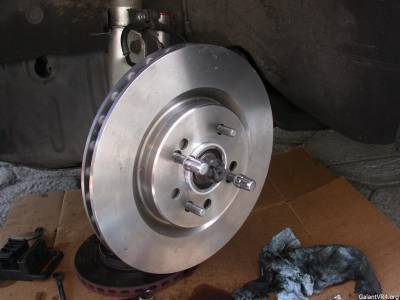
Attach the rotor with the centering ring.
You now have a choice of removing the splash shield. I chose to keep it.
If you keep the splash shield, slightly bend it out of the way to avoid rubbing on the larger diameter rotor.
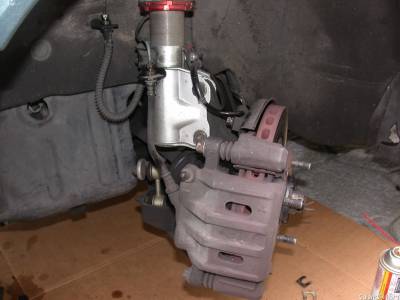
Clearance the caliper where it mounts to the bracket. Just try to bolt-on the caliper, and clearance as needed.
Also, the fins on the caliper is hitting my 17" wheels, so I had to unleash my die grinder on the offending fins.
You can say that I run a "ported" caliper setup /ubbthreads/images/graemlins/devil.gif
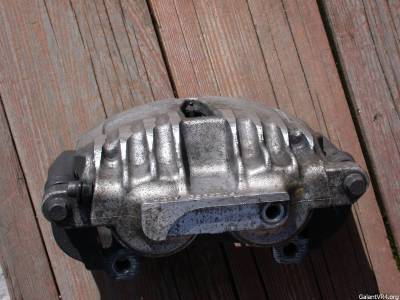
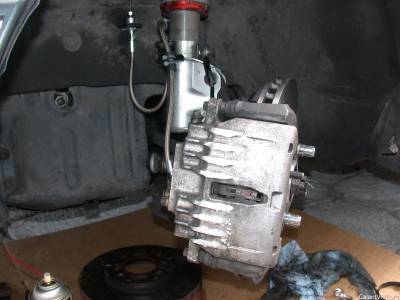
Finally, bolt the caliper onto the bracket.
I used loctite on it, and torqued to 65 lb.ft.
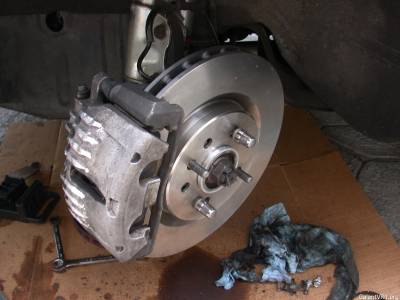
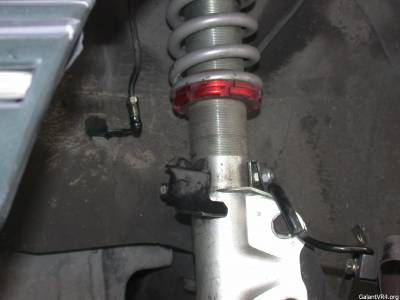
Use some hose and zip ties to secure the civic brake lines to the brakeline bracket, as such.
( Bonus point if you can line it up so that it says "Made in USA" as mine does /ubbthreads/images/graemlins/cool.gif )
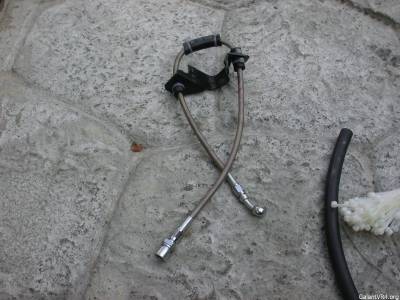
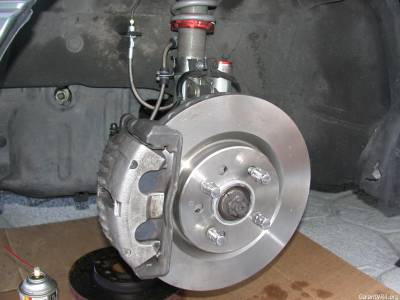
Attach the brakeline to the caliper and to the car as such.
I was able to reuse the stock U-clip to the bracket on the inner fender with very slight grinding of the new brakeline fitting. ( However, on the passenger side fitting, I didn't need to do any grinding to fit, so YMMV )
Closer look at the brakeline setup. Basically, it mimics the stock routing.
All done:

Note the routing of the stock brakeline setup, which we will follow with the new stainless steel brakeline.
Clean and PB blast the fittings before removal.
Remove the stock caliper and brakeline.
Then, separate out the brakeline bracket that bolts on to the strut. This bracket will be reused.
Remove the stock rotor
13" cobra rotor versus 11" stock rotor.
I redrilled the 13" rotor to 4-lug setup.
Put anti-seize on the rotor mating surface, and bolt on the bracket.
I used anti-seize on the bolts, and torqued to 55 lb.ft.
A slight amount of grinding on the bracket might be needed. ( Strangely, I didn't need to grind when installing the bracket on the passenger side knuckle, but grinding was needed on the driver side. )
Attach the rotor with the centering ring.
You now have a choice of removing the splash shield. I chose to keep it.
If you keep the splash shield, slightly bend it out of the way to avoid rubbing on the larger diameter rotor.
Clearance the caliper where it mounts to the bracket. Just try to bolt-on the caliper, and clearance as needed.
Also, the fins on the caliper is hitting my 17" wheels, so I had to unleash my die grinder on the offending fins.
You can say that I run a "ported" caliper setup /ubbthreads/images/graemlins/devil.gif
Finally, bolt the caliper onto the bracket.
I used loctite on it, and torqued to 65 lb.ft.
Use some hose and zip ties to secure the civic brake lines to the brakeline bracket, as such.
( Bonus point if you can line it up so that it says "Made in USA" as mine does /ubbthreads/images/graemlins/cool.gif )
Attach the brakeline to the caliper and to the car as such.
I was able to reuse the stock U-clip to the bracket on the inner fender with very slight grinding of the new brakeline fitting. ( However, on the passenger side fitting, I didn't need to do any grinding to fit, so YMMV )
Closer look at the brakeline setup. Basically, it mimics the stock routing.
All done:
Last edited:
