strokin4dr
Well-known member
I've had this car for almost 2 years now and have never even posted a picture of it. It has been a bit of a back burner project since I picked it up and still is! This car is not new to the board but I'll give you a little bit of backstory.
1280 was first posted up on the board when a guy from Florida purchased it from SC. He had it for a while, did a few questionable mods to it, and sold it to Dave (HHIVR4) who used to frequent the board. Dave drove it for a couple of years before the oil filter decided to back itself off while he was cruising down I-95 in heavy rain. It was too late for the engine before he realized what happened. Car sat for a couple of years in storage while he gathered parts for a new build. He has a new 2.0L built for it, and just about everything else needed to get it back on the road, except for time to put it in the car. He ended up putting the car up for sale and it sat for a couple more years.
Here are the pics from his for sale thread:

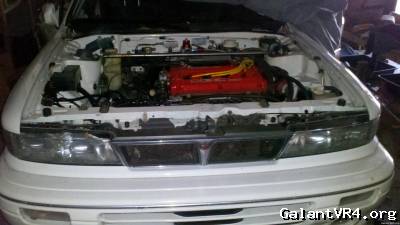
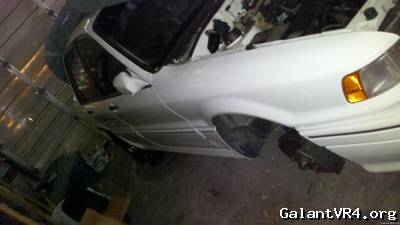
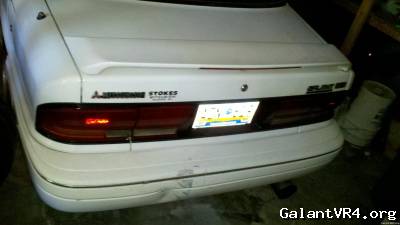
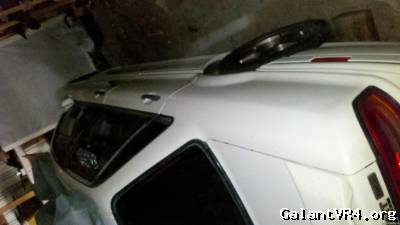
It was kind of hard to tell the real condition of 1280 from the pics. The facility where it was being stored was set to be demolished in a couple weeks and Dave had no way to move it and nowhere else to store it, so I took the hour drive from Savannah over to Hilton Head, SC to check it out.
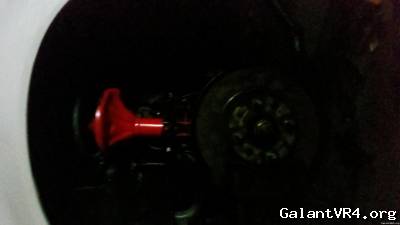
It needed more work that I thought it would. Out of desperation and thinking that he was going to lose the car with the building, he started stripping parts off the car and selling them. The fresh new timing belt was cut to yank the cams, '90 oil filter housing pulled, ecu and exhaust system were long gone, etc. This still didn't deter me though, because I have been hoarding GVR4 parts for years and had pretty much everything and more to put it back together. I came back the following week with a car dolly, pulled the drive shaft, installed the wheels and pulled the car off of the jackstands where it had been sleeping for the last few years.
It took some work to get it loaded up on the dolly. Dave and I couldn't quite do it alone. Luckily my girlfriend (now wife) was with me and with the extra 2 hands pushing we got it rolled in place. Wish I had pics of this! /ubbthreads/images/graemlins/rofl.gif
I was in the middle of moving at the time so I brought it over to a friend's place to store it for a couple of months.
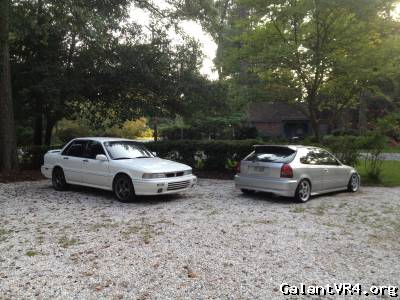
I think this was the first pic I took of her.
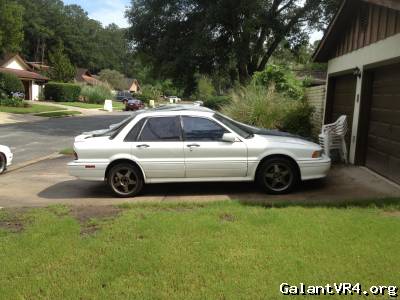
The body was in really good shape. Better than I expected. Had a dent in the driver's fender, but not a bit of rust anywhere that I could see. I have since dug deeper with cleaning and removing panels and this is by far the cleanest rust free example I have ever seen. Yes, even behind the front fenders! It has never been farther north than SC, has never seen salt. /ubbthreads/images/graemlins/wink.gif
1280 was purchased new in Beaufort, SC and spent the first 15ish years of it's life there. It was then in Florida for a year or so before returning to SC where it stayed until I picked her up in June 2012.
I got it running a few months after picking it up.
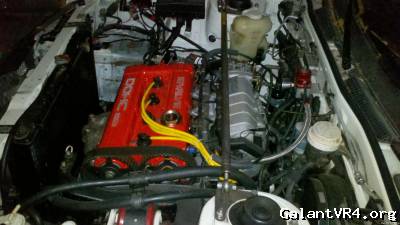
Parts that I added to get it back in running condition include:
Comp 272 cams
new seals and timing belt
'90 dsm oil filter housing
mhi evo3 16g turbo and supporting accessories
ETS FMIC kit
3" turbo back exhaust (used and not the prettiest thing)
walbro 255lph HP fuel pump
evo9 mas
dsmlink v3
evo9 560cc injectors
Aeromotive AFPR and gauge
Optima red top
Black top CAS
Dodge garage modded 1g bov
It fired right up and ran great.
Specs on the built engine are:
9:1 Wiseco pistons
Scat rods
ACL bearings
Micro polished crank
Balance shaft elimination
ARP head studs
Rebuilt head
3g lifters
MLS head gasket
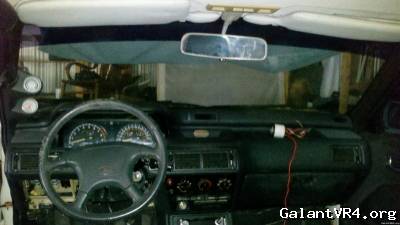
This is right after I took it for its maiden voyage.... and found some other issues that needed to be addressed such as shifter bushings and a clutch pedal rebuild. /ubbthreads/images/graemlins/rofl.gif
I will update this thread with all the repairs, mods, repairs, and changes I have already made and try to keep it more current and up to date with future progress. I'll also try to remember to take more pics. Lots of mods and progress has gone undocumented up until now. /ubbthreads/images/graemlins/bawling.gif /ubbthreads/images/graemlins/grin.gif
I start Pharmacy school in a few weeks so I'm not sure how often it will get updated though. We shall see! Thanks for the space.
-Ryan
1280 was first posted up on the board when a guy from Florida purchased it from SC. He had it for a while, did a few questionable mods to it, and sold it to Dave (HHIVR4) who used to frequent the board. Dave drove it for a couple of years before the oil filter decided to back itself off while he was cruising down I-95 in heavy rain. It was too late for the engine before he realized what happened. Car sat for a couple of years in storage while he gathered parts for a new build. He has a new 2.0L built for it, and just about everything else needed to get it back on the road, except for time to put it in the car. He ended up putting the car up for sale and it sat for a couple more years.
Here are the pics from his for sale thread:
It was kind of hard to tell the real condition of 1280 from the pics. The facility where it was being stored was set to be demolished in a couple weeks and Dave had no way to move it and nowhere else to store it, so I took the hour drive from Savannah over to Hilton Head, SC to check it out.
It needed more work that I thought it would. Out of desperation and thinking that he was going to lose the car with the building, he started stripping parts off the car and selling them. The fresh new timing belt was cut to yank the cams, '90 oil filter housing pulled, ecu and exhaust system were long gone, etc. This still didn't deter me though, because I have been hoarding GVR4 parts for years and had pretty much everything and more to put it back together. I came back the following week with a car dolly, pulled the drive shaft, installed the wheels and pulled the car off of the jackstands where it had been sleeping for the last few years.
It took some work to get it loaded up on the dolly. Dave and I couldn't quite do it alone. Luckily my girlfriend (now wife) was with me and with the extra 2 hands pushing we got it rolled in place. Wish I had pics of this! /ubbthreads/images/graemlins/rofl.gif
I was in the middle of moving at the time so I brought it over to a friend's place to store it for a couple of months.
I think this was the first pic I took of her.
The body was in really good shape. Better than I expected. Had a dent in the driver's fender, but not a bit of rust anywhere that I could see. I have since dug deeper with cleaning and removing panels and this is by far the cleanest rust free example I have ever seen. Yes, even behind the front fenders! It has never been farther north than SC, has never seen salt. /ubbthreads/images/graemlins/wink.gif
1280 was purchased new in Beaufort, SC and spent the first 15ish years of it's life there. It was then in Florida for a year or so before returning to SC where it stayed until I picked her up in June 2012.
I got it running a few months after picking it up.
Parts that I added to get it back in running condition include:
Comp 272 cams
new seals and timing belt
'90 dsm oil filter housing
mhi evo3 16g turbo and supporting accessories
ETS FMIC kit
3" turbo back exhaust (used and not the prettiest thing)
walbro 255lph HP fuel pump
evo9 mas
dsmlink v3
evo9 560cc injectors
Aeromotive AFPR and gauge
Optima red top
Black top CAS
Dodge garage modded 1g bov
It fired right up and ran great.
Specs on the built engine are:
9:1 Wiseco pistons
Scat rods
ACL bearings
Micro polished crank
Balance shaft elimination
ARP head studs
Rebuilt head
3g lifters
MLS head gasket
This is right after I took it for its maiden voyage.... and found some other issues that needed to be addressed such as shifter bushings and a clutch pedal rebuild. /ubbthreads/images/graemlins/rofl.gif
I will update this thread with all the repairs, mods, repairs, and changes I have already made and try to keep it more current and up to date with future progress. I'll also try to remember to take more pics. Lots of mods and progress has gone undocumented up until now. /ubbthreads/images/graemlins/bawling.gif /ubbthreads/images/graemlins/grin.gif
I start Pharmacy school in a few weeks so I'm not sure how often it will get updated though. We shall see! Thanks for the space.
-Ryan
