mjdarg
Active member
I got around to installing the Bilstein shocks with Swift springs I picked up from transparentdsm. He's a really nice guy to work with and was very communicative.
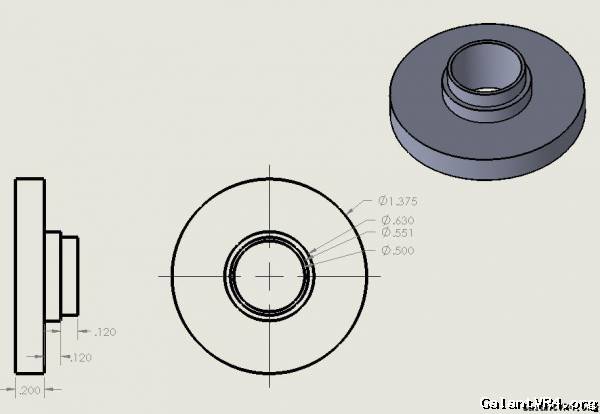
After reading lots of threads on how people installed the struts on the front, I decided I wasn't too keen on the idea of washers to take up the slack between the 14mm holes in the strut ears and the 12mm bolts for the front knuckle. On top of that, I had no idea the top hole was actually slotted a bit and has a sort of counterbore with a diameter of 16mm. No wonder people have issues with these struts moving around! I worked up a quick spacer/bushing that would fit into this slot better to minimize any unwanted camber changes. I used my struts to choose the dimensions accordingly. Yours may be slightly different.
Here is a picture with dimensions and an isometric view.
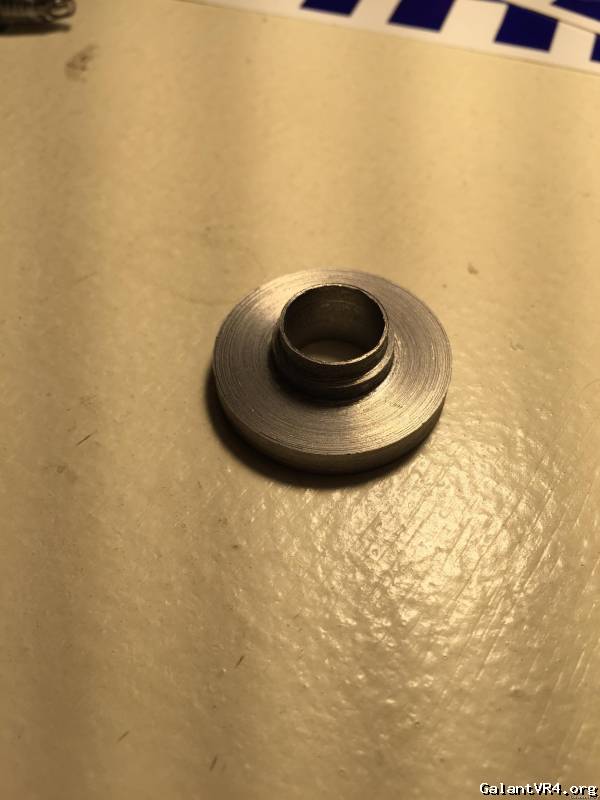
I used some steel stock that I had lying around. I turned the dimensions down on a lathe and then had to grind off one side a bit for a relief to a tab on the strut ear. Here is 1 of 4 that I machined.
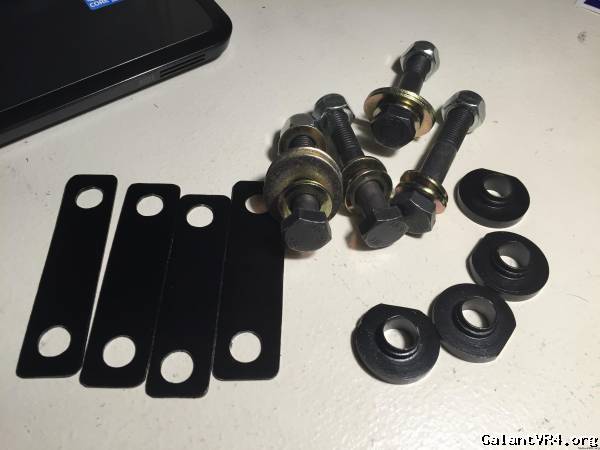
Here are the 4 shims, 4 bushings, and hardware I used to mount the front struts. I used 14ga (0.075") sheet metal with 1/2" holes 2.75" apart. Thanks to GVR4ZUM for the dimensions he posted in this thread. He mentioned using 16ga sheet metal, but I found 14ga to fill nicely. You might have to try a few sizes depending on the exact distance between the strut ears. After I machined the bushings and drilled the shims, I hit them with a nice semi gloss powdercoat to try and avoid any rusting issues in the future.
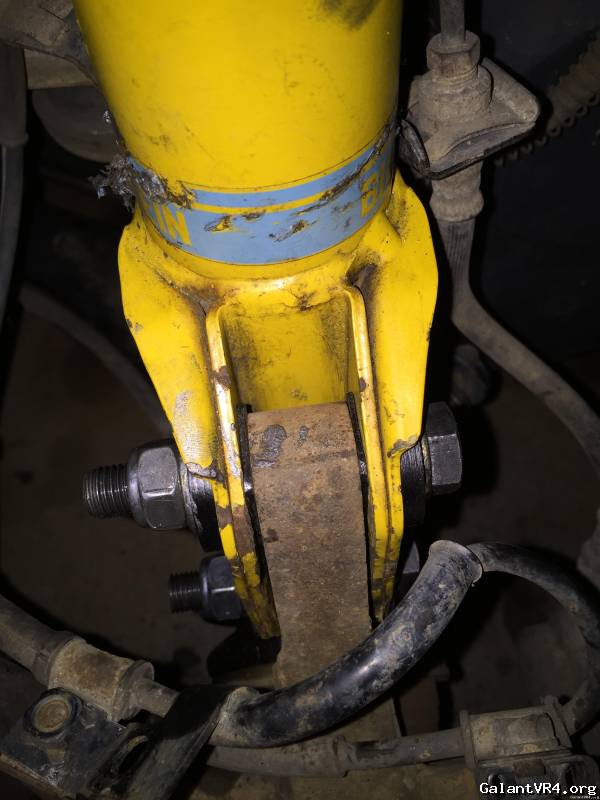
Here are some pictures of the front strut assembly with the bushings and spacers. Installation was pretty straight forward with a friend and jack to help support the LCA and knuckle while lining up the bolt holes of the shims and bushings. As you can see, I am using plain old hardened washers on the lower strut bolt. I've got 2 washers on each side, each about 0.090" thick, which should provide enough rigidity so the washers do not bend. This also gave me some room for camber adjustment. With the bushings in the top hole, I was able to reach my camber settings that I had with the stock struts and stock springs which was around -0.3°.
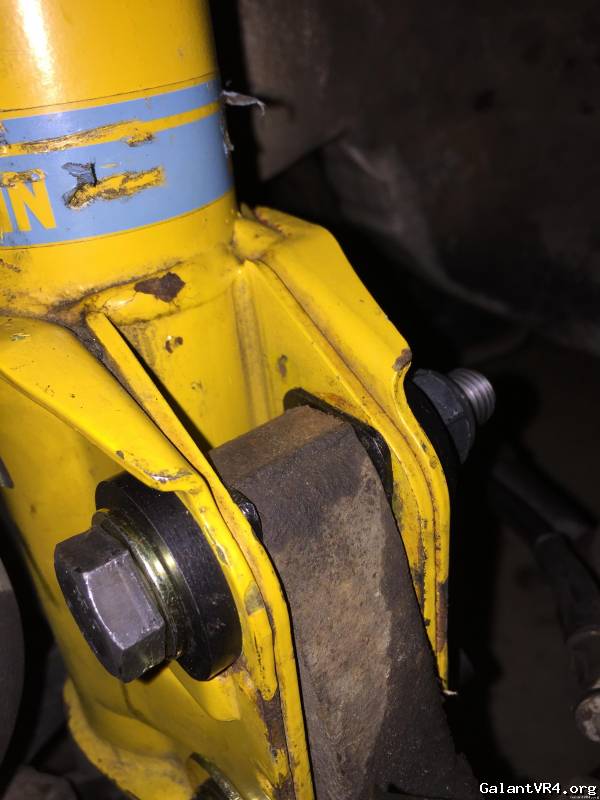

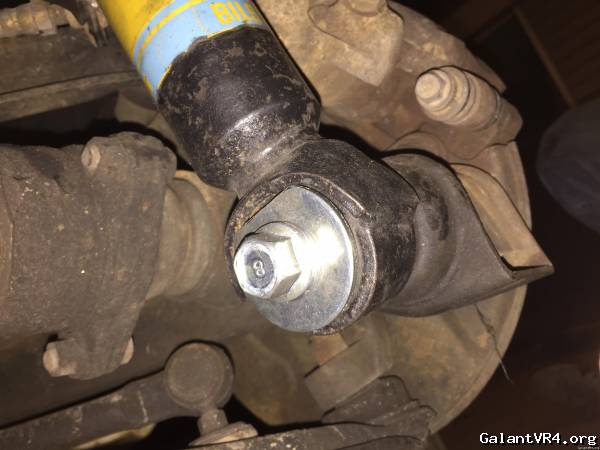
Something else that I haven't seen much of is the lower mount for the rear shock. I opted to use new OEM hardware here for several reasons. I wanted to use new bolts because my old ones had seen 228k and were pretty rusty and I wanted to retain the large washer. Since the lower mount is in single shear on the hub, this large washer is there to prevent the shock from coming off of the shaft if the rubber bushing gives out. As you can see below, the washer is larger than outer collar of the shock mount. I had to grind off part of the washer to clear the fork part of the lower mount. I know the chances of something failing here are low, but I wanted to be careful. I think all the hardware was around $25 from the dealer. They ended up having it in stock so no waiting for me. <img src="/ubbthreads/images/graemlins/grin.gif" alt="" />
Some other things I did that are also well documented on this website...
-I used the Galant tophats because I didn't want to drill into my chassis. An hour or two with a spring compressor and this is pretty straight forward. I ended up just using an impact on the top nut once the spring was compressed. It was way easier than my friend trying to hold the top spring perch while I break the nut free.
-I used some heavy duty metal zip ties for the brake and speed sensor lines. Other people have welded bolts onto hose clamps. Definitely a better solution, but zip ties are for race cars <img src="/ubbthreads/images/graemlins/grin.gif" alt="" />
-Make sure to soak all bolts with penetrating oil. I was able to hit all of the with the car on the ground the night before. When it was time to start the rear shocks, I was scared of those lower bolts, but the penetrating oil worked wonders. A slight twist of my pry bar pressed off both lower mounts. The suspension gods were in my favor on Friday night!
-When installing the new hardware, make sure to use some anti-seize, especially on the rear lower mounts. This will save headaches later on.
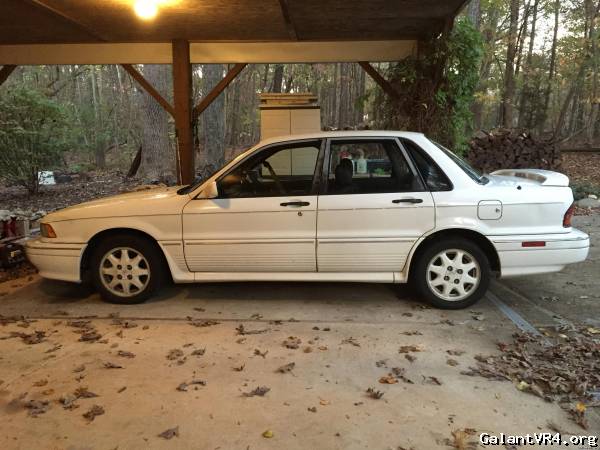
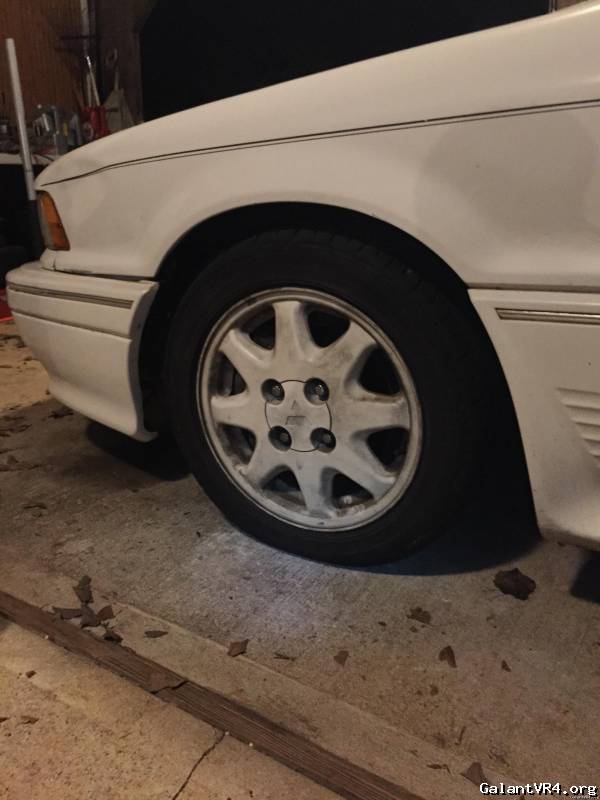
Here's a picture from before...
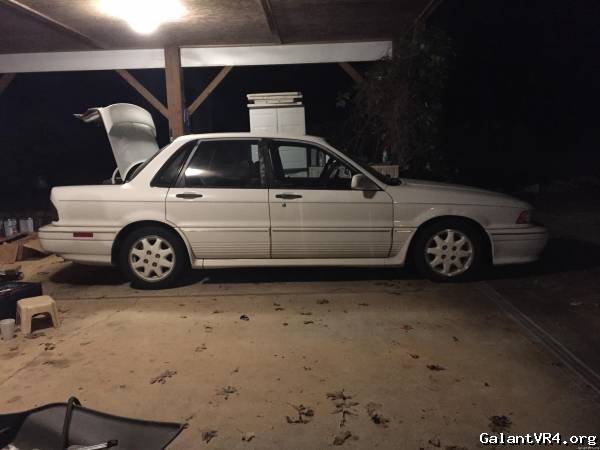
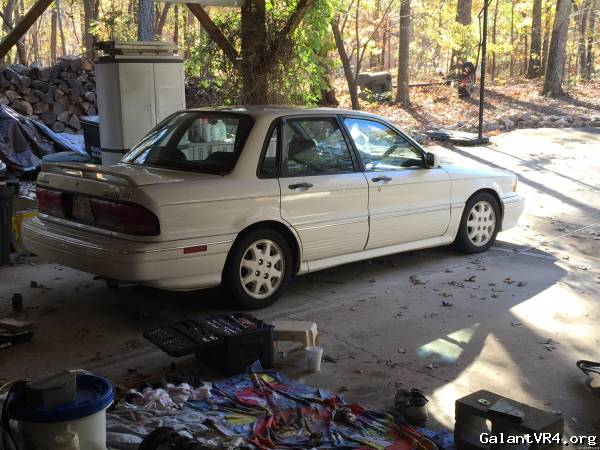
and after...tires are 205/50-15...so larger tires will have less gap.
After reading lots of threads on how people installed the struts on the front, I decided I wasn't too keen on the idea of washers to take up the slack between the 14mm holes in the strut ears and the 12mm bolts for the front knuckle. On top of that, I had no idea the top hole was actually slotted a bit and has a sort of counterbore with a diameter of 16mm. No wonder people have issues with these struts moving around! I worked up a quick spacer/bushing that would fit into this slot better to minimize any unwanted camber changes. I used my struts to choose the dimensions accordingly. Yours may be slightly different.
Here is a picture with dimensions and an isometric view.
I used some steel stock that I had lying around. I turned the dimensions down on a lathe and then had to grind off one side a bit for a relief to a tab on the strut ear. Here is 1 of 4 that I machined.
Here are the 4 shims, 4 bushings, and hardware I used to mount the front struts. I used 14ga (0.075") sheet metal with 1/2" holes 2.75" apart. Thanks to GVR4ZUM for the dimensions he posted in this thread. He mentioned using 16ga sheet metal, but I found 14ga to fill nicely. You might have to try a few sizes depending on the exact distance between the strut ears. After I machined the bushings and drilled the shims, I hit them with a nice semi gloss powdercoat to try and avoid any rusting issues in the future.
Here are some pictures of the front strut assembly with the bushings and spacers. Installation was pretty straight forward with a friend and jack to help support the LCA and knuckle while lining up the bolt holes of the shims and bushings. As you can see, I am using plain old hardened washers on the lower strut bolt. I've got 2 washers on each side, each about 0.090" thick, which should provide enough rigidity so the washers do not bend. This also gave me some room for camber adjustment. With the bushings in the top hole, I was able to reach my camber settings that I had with the stock struts and stock springs which was around -0.3°.
Something else that I haven't seen much of is the lower mount for the rear shock. I opted to use new OEM hardware here for several reasons. I wanted to use new bolts because my old ones had seen 228k and were pretty rusty and I wanted to retain the large washer. Since the lower mount is in single shear on the hub, this large washer is there to prevent the shock from coming off of the shaft if the rubber bushing gives out. As you can see below, the washer is larger than outer collar of the shock mount. I had to grind off part of the washer to clear the fork part of the lower mount. I know the chances of something failing here are low, but I wanted to be careful. I think all the hardware was around $25 from the dealer. They ended up having it in stock so no waiting for me. <img src="/ubbthreads/images/graemlins/grin.gif" alt="" />
Some other things I did that are also well documented on this website...
-I used the Galant tophats because I didn't want to drill into my chassis. An hour or two with a spring compressor and this is pretty straight forward. I ended up just using an impact on the top nut once the spring was compressed. It was way easier than my friend trying to hold the top spring perch while I break the nut free.
-I used some heavy duty metal zip ties for the brake and speed sensor lines. Other people have welded bolts onto hose clamps. Definitely a better solution, but zip ties are for race cars <img src="/ubbthreads/images/graemlins/grin.gif" alt="" />
-Make sure to soak all bolts with penetrating oil. I was able to hit all of the with the car on the ground the night before. When it was time to start the rear shocks, I was scared of those lower bolts, but the penetrating oil worked wonders. A slight twist of my pry bar pressed off both lower mounts. The suspension gods were in my favor on Friday night!
-When installing the new hardware, make sure to use some anti-seize, especially on the rear lower mounts. This will save headaches later on.
Here's a picture from before...
and after...tires are 205/50-15...so larger tires will have less gap.
