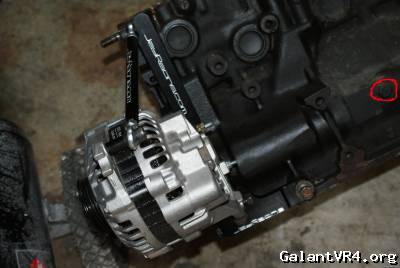
Hal shared with me the "instructions" for the breather oil cap.
Quoting Hal Landry:
This part is intended to vent excess crankcase pressure. Because of it’s location the baffle is exposed to a large amount of oil splash. Consequently the baffle can become saturated during periods of high crankcase pressure. For best results your catch can must drain back to the block. The most common location for this is the balance shaft inspection hole in the back of the block.
If you do not have this type of installation, you can use the following parts list to connect your catch can drain to the engine block using -4 hose. Because each can is different, the hose length and fittings used to connect it to the can will be different.
Earl's 977515ERL 10mmx1.25mm banjo bolt
Earl's 997641ERL -4 to 10mm banjo
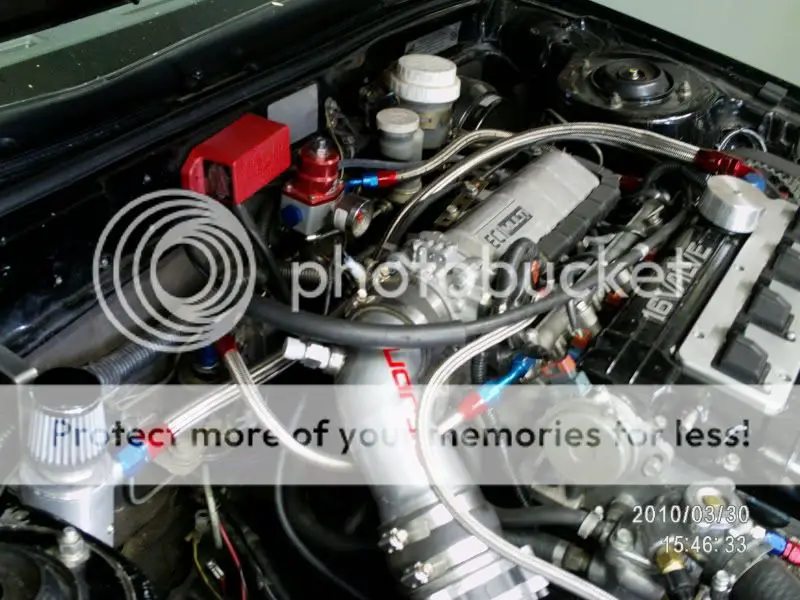
This part is intended to supplement the oem crankcase pressure ventilation system. It should be used in conjunction with the oem vent nipple found on the valve cover. If you intend to use this as your only source of pressure relief, you are wasting the excellent oem valve cover baffle design and putting more oil thru the catch can system than you need to.
This cap gets extremely hot. Failure to use proper safety precautions can result in severe burns! Never touch or grasp this part without using gloves or some other form of protection to prevent personal injury.
1) Verify that you have adequate clearance between the hood and this piece under ALL conditions. Aftermarket hoods, worn/broken roll stops, pneumatic hood supports, and host of other factors can influence the amount of space between the valve cover and the under side of the hood. Failure to properly verify clearance can lead to damage of the hood, your new cap, or even the valve cover itself. This is especially critical for those people with 2.4 liter conversions because the 2.4 block is 6mm taller than the 2.0 block. This puts the cap 6mm closer to the hood!
a. You can detect clearance issues before you install the cap by setting up a simple test. Create a tube out of tin foil. The foil should be doubled over so it has more rigidity. Tape the tube around the oem oil cap in such a manner that it will remain in place. Measure from the valve cover at the 9 o’clock position (1g/2g DSM with oem engine orientation). Trim the tube so that it is 1.5†tall when measured from the valve cover. Take the car to the track and have at it. Inspect the tin foil for indications that it is hitting something. If there are no observed clearance issues, then you should be good to go ahead with the installation. If there are issues, resolve them before installing the cap! After installation, occasionally inspect the top of the cap for signs that it has started to make contact with the hood. Roll stops wear over time and motor movement will gradually increase.
2) The cap is locked down with a spring clip and -10 hoses are stiff. They can act as a lever and force the cap to no longer sit flush with the valve cover. When this happens you’ll wind up with a nice coating of oil on your valve cover. To prevent this, -10 hoses must be properly supported so they do not impart unwanted force on the cap. You may have to tie the hoses off against some form of bracket and/or relocate your catch can.
3) You will notice that your new cap is not fully assembled. You will need to transfer the lock spring, gasket, and retaining nut from your old cap to the new one. To do so:
a. Using a Phillips screw driver and a 6mm wrench (or socket), remove the nut from the screw. The oem screw has been staked so it may take a bit of effort to remove the nut.
b. Lift the lock spring off and remove the gasket. If your gasket is hardened from age, it can be replaced with Mitsubishi part number MD103148.
c. These are all of the parts you need to re-use. Put the OEM cap and the screw you removed from it into a zip-loc bag and set it aside in case you wish to put the oem cap back on.
d. Your new cap comes with some foam type material inserted in it. DO NOT REMOVE it. This is the oil baffle!
e. The cap was supplied with a new stainless steel screw, splash shield, and washer which, when combined with the gasket, lock spring, and nut that you removed from your oem cap, will result in a fully assembled part.
f. Place the gasket from your oem cap onto the new cap. Note that one side is ribbed. Orient the gasket so that the ribbed side will contact the valve cover when the cap is installed.
g. Place the lock spring on the square shaped post in the center of the cap. The spring will lock the baffle support into place. If your cap has more than one hose fitting there will be a marking on the cap underside to aid you in the proper orientation of the lock spring.
h. Place the round splash shield above the square shaped post in the center of the cap.
i. Insert the screw thru the cap and install only the nut. As you tighten the nut the splash shield will form itself to the underside of the cap. Now remove the screw and nut then place the washer on the splash shield.
j. Place some thread locker on the threads of the supplied screw and insert it into the cap so that it protrudes thru the lock spring, washer, and splash shield.
k. Thread the nut onto the screw and tighten securely. Failure to properly secure the nut will result in the nut, splash shield and lock spring dropping into the valve train of your engine. The oem screw is staked. It is highly recommended that you stake the threads on the supplied screw!
l. Visually inspect the lock spring to ensure that it is fully seated on the mounting post.
m. Install the cap on to the valve cover. It should fit snugly just like the oem cap. If it does not, stop here and figure out why. If you determine the cap appears to be faulty, contact me.
n. Install the breather lines, making sure they are properly routed. For best results, the inlet fittings on the catch can should be higher than the fitting on the cap. Make sure the lines do not rub on anything. Prolonged abrasive action will damage the line and/or what ever it is rubbing against. Do not apply more than 5 foot pounds of torque to the hose fittings on the cap. They are bonded in place. These are breather lines and as such do not require more than a slight snug to achieve a reliable, leak free seal.
This cap is designed to be installed using an OEM oil cap gasket and lock spring. The use of non-oem parts may have on effect on how well this cap seals against the valve cover.
This piece is a custom made part. It is intended for vehicles which are never to be operated on public roadways. The use of this piece may be in violation of both state and federal vehicle emissions laws.
This piece is backed by a 100% money back guarantee. If you find that it is defective or flat out does not work like expected, the original purchaser can return it for a complete refund of the original purchase price. No questions asked. Shipping costs are not refundable.
I think i'll order one very soon. I need to get a good catch can, too.