The Top Mitsubishi Galant VR-4 Resource

Join the best E39A 1991-1992 Mitsubishi Galant VR-4 community and document your GVR4 journey.

  • Software Upgraded - Reset Your Password to Login
    In order to log in after the forum software change, you need to reset your password. If you don't have access to the email address you used to register your GVR4.org account, you won't be able to reset your password. In that case, follow the instructions here to regain access to the forum.

How to remove a broken bolt

BogusSVO

Well-known member
Joined
Aug 29, 2013
Messages
232
Location
Pensacola, Florida
How to remove a Broken Bolt

There are many different methods.

This is one of the more common methods using an EZ-Out


This method works best on bolts that broke due to being over tighten.
The EZ-out method has little success on cross threaded or rusted bolts.

The tools needed are few.
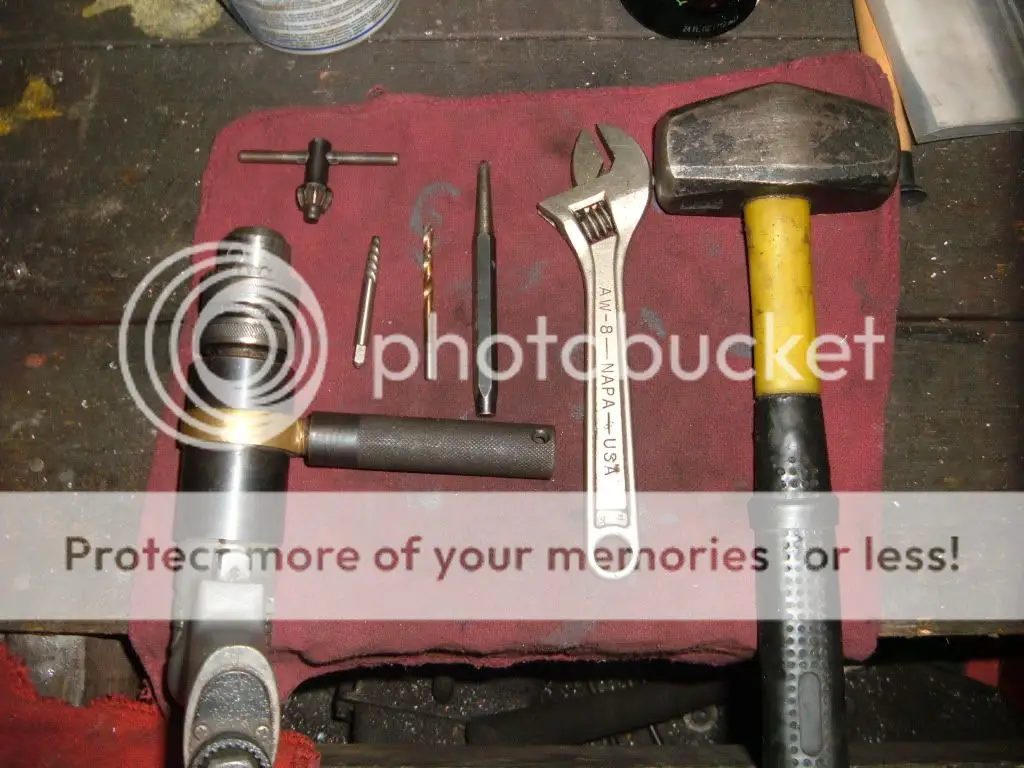
DSCF5547.jpg


Drill
Proper size drill bit
A good sharp center punch
Hammer
Crescent wrench
Proper size EZ-OUT

There is two different styles of EZ-out, A left handed spiral flute and a straight flute.

I will be using a spiral flute in this removal.
The spiral flute will screw down and get a firm “bite” on the inside of the broken bolt.
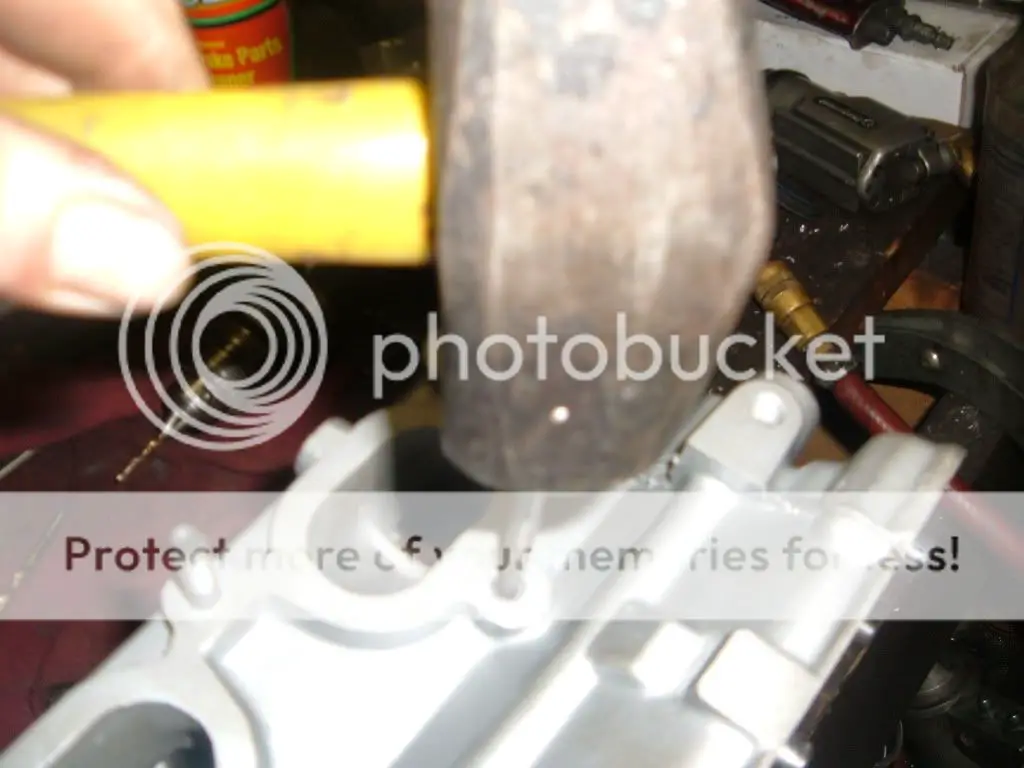
First with the hammer and center punch, knock a good divit as close as possible to the center of the bolt.
DSCF5548.jpg

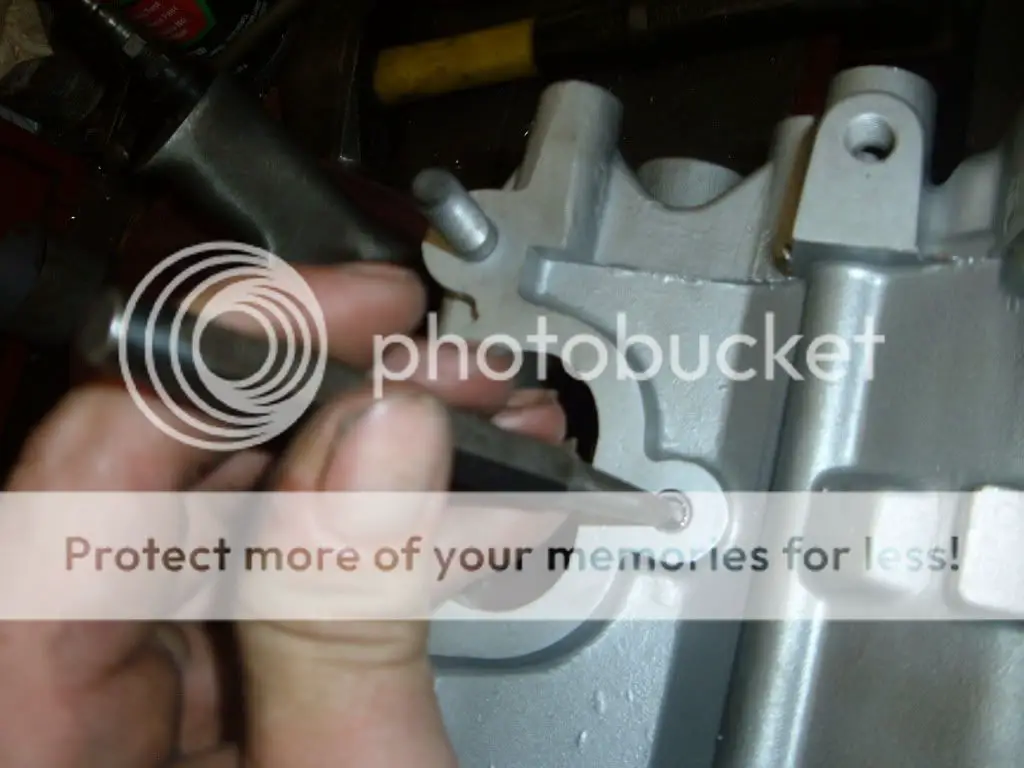
This is done so the drill bit will not walk around when you start to drill.
DSCF5549.jpg

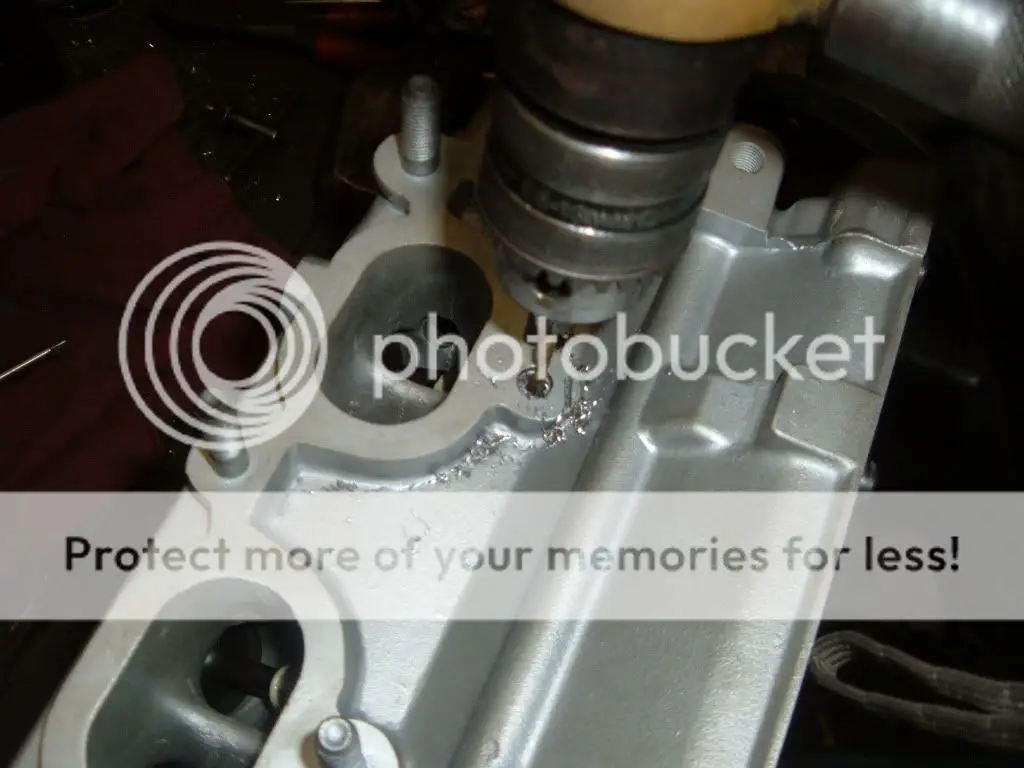
Now with the drill bit in the drill motor.
I am using a 1/8 inch drill bit, the broken bolt is a 8mm (5/16ths)
DSCF5550.jpg


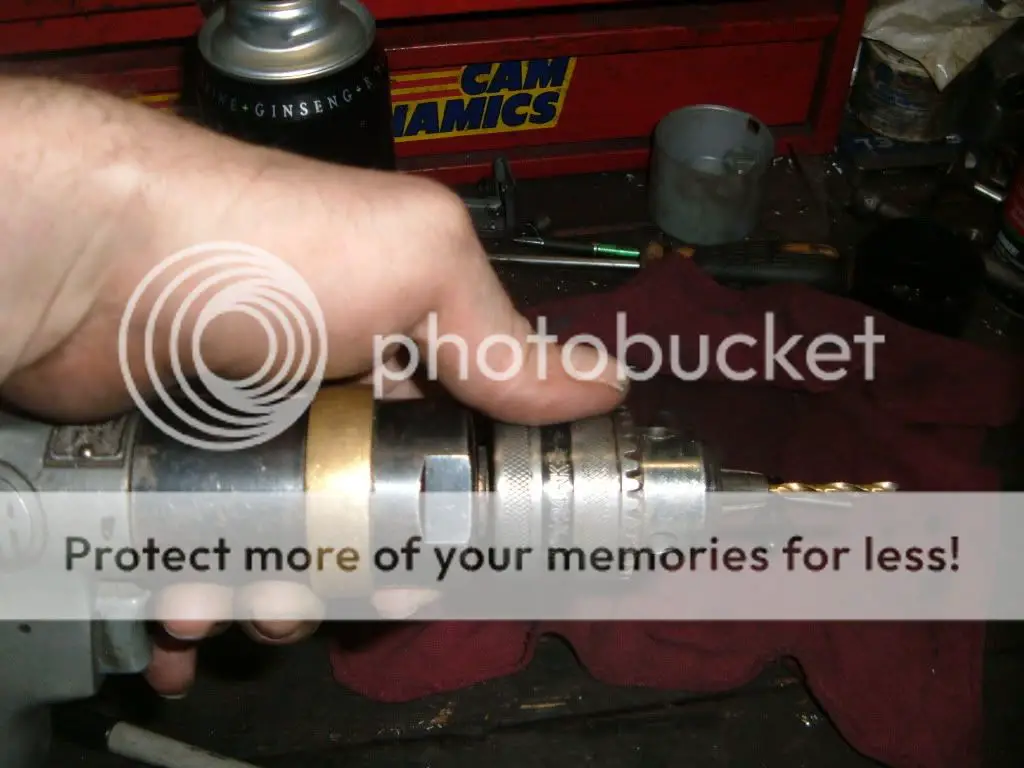
Drill appox. 1/8th to 1/4th inch down the center of the bolt.
Drill as straight as possible.
Some times it will be necessary to drill all the way through the bolt.
DSCF5551.jpg

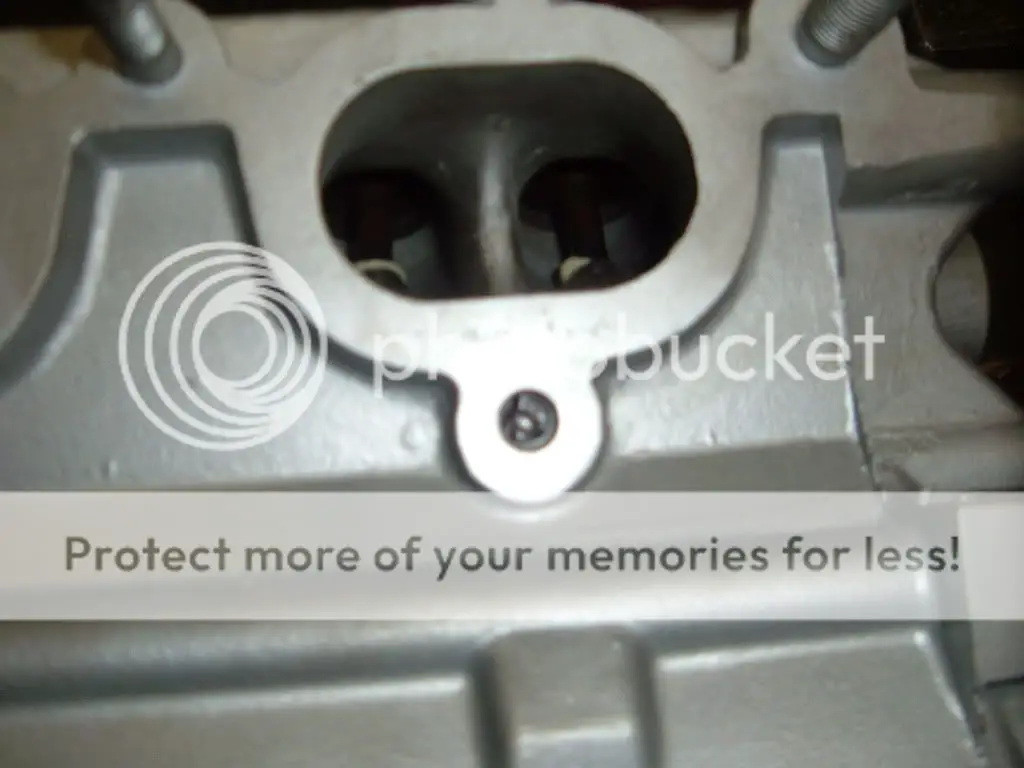
Blow all the metal chips out of the bolt hole.
DSCF5552.jpg

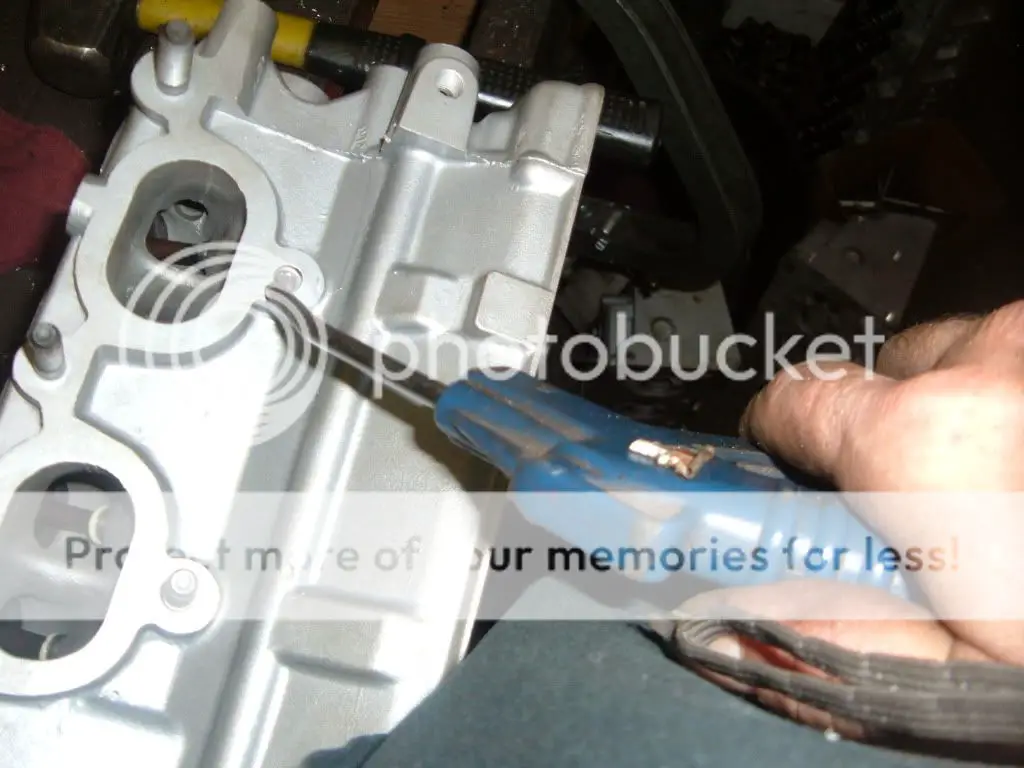
Now take the EZ-Out and tap in to the hole you just drilled.
DSCF5553.jpg

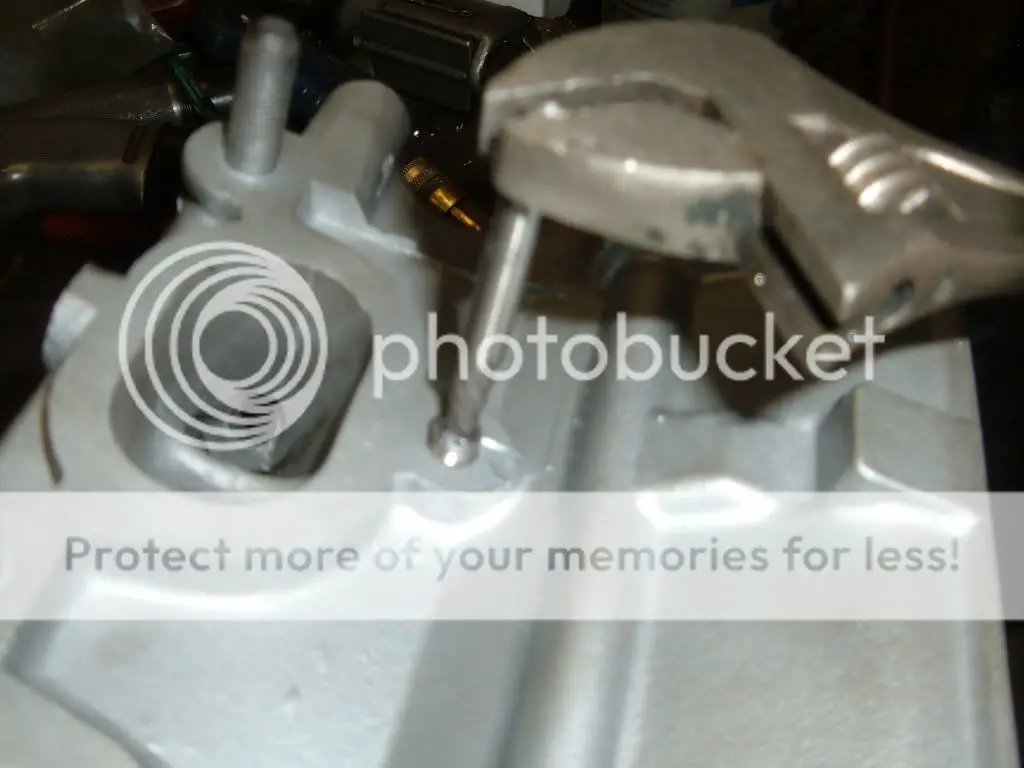
Now using the square on the back end of the EZ-out.
Gently apply pressure to the broken bolt, until you feel movement.
If you apply too much pressure, and snap the EZ-Out off in the hole, you will have more serious issues.
DSCF5554.jpg
 

slugsgomoo

Well-known member
Joined
Oct 16, 2003
Messages
3,776
Location
Tacoma, WA
Probably worth noting that while you can use a crescent wrench successfully (hell I do it) you're a lot less likely to break an ez-out due to lateral pressure if you use a proper tap handle, and I'd highly recommend using one instead of the wrench.
 

JNR

Well-known member
Joined
Apr 23, 2004
Messages
9,814
Location
ca
Good point, Slugs and always a good idea to use a t-handle whenever possible when it comes to things like this and especially tapping. I personally do not like using crescent wrenches for anything.

Was going to also suggest (if it wasn't mentioned) to use heat to help remove the broken screw. Especially when coming out of an aluminum head, since those threads will expand at a greater rate than the steel (or SS) screw and also helps to not gall out the aluminum threads.

Last note is this stuff is even harder with the engine (head) in the car, but can be doable, just more of a PITA.
 

BogusSVO

Well-known member
Joined
Aug 29, 2013
Messages
232
Location
Pensacola, Florida
Yes I will agree that a crescent wrench is not the best choice, I have the neato sockets for taps and EZ outs.

I show tools to use that the start up wrench turner is likely to have around to do the job.
 

CutlassJim

Well-known member
Joined
Jul 17, 2006
Messages
1,699
Location
Manchester, NH
Where's the OSHA tip on that blow gun?! Lol I just say this because our foreman had a kinipshit and took all of our blow guns and replaced them with ones that you can't remove the safety tip.

I actually have this exact broken stud in the head I'm porting right now.
 

toybreaker

iconoclast
Joined
Apr 30, 2006
Messages
3,581
Nice write up, Dale!

Pretty much the the exact way I do it /ubbthreads/images/graemlins/grin.gif


There is also another technique that uses a welder that also works very well.

In some cases this actually easier to do on the car then the whole drill routine.


As an interesting aside, I asked a saavy old cat why this technique works so well.

He explained it all, but I didn't really "get" it untill he showed me.

The heat you put in the stud does temporarily expand it, and yes, to some extent, it does "crush" the rust

... but the real "magic" happens when the stud cools down.

It actually shrinks, and will end up *slightly* smaller than an it's original diameter.

His explanation had all the fancy metalurgy terms, and went on for twenty minutes.

I understood about ten words /ubbthreads/images/graemlins/blush.gif


What did the job for me was to heat a stud dull cherry red and then let it cool.

Threading on a metal "elastomeric" style locknut (aka "k nut") then told the tale.

On a regular, unmolested stud it would thread on with some resistance for a few threads and then get too tight to go further by hand.

On the "kilt" stud, you could almost thread it all the way down to the locking section (and even a little ways into it) by hand.

A regular (non locking) nut also tells the same tale. Heating th stud a dull cherry red relaxes things almost a whole thread fitment class!

I played with this for a day, ruining a few studs along the way /ubbthreads/images/graemlins/devil.gif

... say Boss, we're all out of 6mm studs /ubbthreads/images/graemlins/rofl.gif


The correct use of heat is simply amazing


The same guy also taught me how to mix acetone and atf in a squeeze bottle.

It makes the best damn penetrant around.

A ketchup squeeze bottle (with lid!) from the dollar store, some 98% rubbing alcohol, and a little atf (50/50 ~ish~ ) and you're in business.

Shake well before each use!

Uses after you're heated a stud, it's magic

Let the stud cool down /lose it's color, wait a little longer, and then hit it with a slow, constant stream. It'll make a lil mess, but the results are well worth it. /ubbthreads/images/graemlins/smile.gif


Thanks again for the post, Dale!

Since you do such a good job getting everything centered up, you should try some left hand drill bits if you get a chance.

They work a treat!

(paint the shanks red to avoid confusion /ubbthreads/images/graemlins/wink.gif )


... not that I've ever tried to drill the next one backwords or anything

... it just "seems" like something that could happen

... makes funny chips /ubbthreads/images/graemlins/rofl.gif
 

curtis

Well-known member
Joined
May 4, 2003
Messages
11,892
Location
Clarksville TN
I'll add something as well broken off studs or bolts in turbine housings don't come out real easy. Besides being hardened bolts the heat cycles of years and years of being on a turbo turn them into unobtanium strenght. Yes you an still drill them but cobalt bits work better than HSS but if you can buy a carbide drill bit locally or online it makes life easier. Best way is find someone with a mill. I can put the housing in my mill and then just use the arrow down key super slow and blows right through it. After that I just run a tap through it to clean up the spiral thread from the old bolt. But have had them that even that was a pita.
 

slugsgomoo

Well-known member
Joined
Oct 16, 2003
Messages
3,776
Location
Tacoma, WA
Curtis, the one thing there is beware doing it sloppy. I got a housing from some retard that drilled out turbine bolts (evo3 hot side to manifold) and they chose a bit so large that there was no chance of drilling, tapping or helicoiling.
 

VR485

Well-known member
Joined
Sep 6, 2007
Messages
48
Location
Longmont,CO
I was always told to stuff cloth in the runners before drilling. Or fix studs prior to beadblasting,machining,assembly. Keeping metal shavings out is a good thing.
 

slugsgomoo

Well-known member
Joined
Oct 16, 2003
Messages
3,776
Location
Tacoma, WA
Quoting cheekychimp:
Curtis doesn't do sloppy Slugs. Quite a few do, but not that guy!


I'm well aware having seen his work for the better part of a decade, but this is the tech discussion forum and it seems like a point that needed to be made. It's amazing the minuscule difference between getting it done properly and turning a nice part into a paperweight. I use my paperweight hotside as a portable soldering platform most of the time, so it's not useless /ubbthreads/images/graemlins/rofl.gif
 

JNR

Well-known member
Joined
Apr 23, 2004
Messages
9,814
Location
ca
Yes, shavings are a big concern and it's not just the shavings, but a lot of dust is created and that stuff can be near impossible to get out completely.

Grease helps, but even so...a blind hole isn't as bad as a through hole but still.
 

curtis

Well-known member
Joined
May 4, 2003
Messages
11,892
Location
Clarksville TN
portable soldering platform /ubbthreads/images/graemlins/worthy.gif


I have some of those roach clip deals on the movable arms, Think its time I build a proper turbine soldering station that will catch the drips /ubbthreads/images/graemlins/worthy.gif
 

donniekak

Well-known member
Joined
Jan 1, 2009
Messages
748
Location
surprise az
Quoting slugsgomoo:
Curtis, the one thing there is beware doing it sloppy. I got a housing from some retard that drilled out turbine bolts (evo3 hot side to manifold) and they chose a bit so large that there was no chance of drilling, tapping or helicoiling.


I drilled and tapped so many turbine housings I decided to call it quits. Now I just drill a hole in the area of the old bolt, and use a smaller m8 bolt and nut to secure the housing to the manifold. Now when the nut seizes, as they always end up doing, I just use a breaker bar, and break the bolt.

For brand new turbos, I've found that using 6-bolt 4g63 main bolts with anti seize have the best chance of not causing an issue.
 
Support Vendors who Support the GVR-4 Community
Boosted Fabrication ECM Tuning ExtremePSI Fuel Injector Clinic Jacks Transmissions JNZ Tuning Kiggly Racing Morrison Fabrications RixRacing RockAuto RTM Racing STM Tuned
Top