The Top Mitsubishi Galant VR-4 Resource

Join the best E39A 1991-1992 Mitsubishi Galant VR-4 community and document your GVR4 journey.

  • Software Upgraded - Reset Your Password to Login
    In order to log in after the forum software change, you need to reset your password. If you don't have access to the email address you used to register your GVR4.org account, you won't be able to reset your password. In that case, follow the instructions here to regain access to the forum.

139/1000 Rebuild

NateCrisman

Well-known member
Joined
Nov 22, 2008
Messages
2,054
Location
Blairstown, NJ
Got some work done on the turbo system changed and the fmic setup fixed yesterday pulling an all-day/all-nighter with my buddy Brent from JMFabrications. /ubbthreads/images/graemlins/ooo.gif
Installed:
[*] T3 tube header & Tial MVS external wg.
[*] Turbonetics 60-1 stage 5 turbo
[*] Brent fabbed up a stainless o2 housing
[*] modified my existing fmic core: flipped the inlet end tank and welded on a 2.5" cast elbow.
[*] custom 2.5" polished aluminum upper and lower ic pipes
[*] knockoff tial bov. /ubbthreads/images/graemlins/tongue.gif
[/list]
538997768_fb726-X2.jpg


538996488_K2cBR-L.jpg


538995751_JDgpp-L.jpg
 
Last edited:

NateCrisman

Well-known member
Joined
Nov 22, 2008
Messages
2,054
Location
Blairstown, NJ
Planning to run #931 at Island on wednesday as a "last hurah", hopefully something in the 11's and 120mph.

I was planning to start removing everything from #931 this coming weekend to put into #139.

Sorry if it's confusing, but Im sorta working on two parallel projects at the same time:
Chassis & paint on #139
Engine/tuning mods on #931.

Very soon the two projects will come together and become just one car.
 
Last edited:

steve

Well-known member
Joined
Sep 11, 2003
Messages
18,897
Location
NJ
/ubbthreads/images/graemlins/applause.gif Looking good. When you gonna do that to mine? /ubbthreads/images/graemlins/rofl.gif
 

quasimondo

Well-known member
Joined
Jun 6, 2004
Messages
3,680
Location
Nairobi, Kenya
Glad to see 139's back in good hands. 931 was a trusty steed, I'll pour a bit of motor oil out for her.

True story: I bought the suspension from Tommy back when originally parted it out, that stuff should fit like a glove.

Good luck with restoring 139, I hope I get a chance to see it in person someday.

Are you taking a video of 931's final run?
 
Last edited:

NateCrisman

Well-known member
Joined
Nov 22, 2008
Messages
2,054
Location
Blairstown, NJ
GTluke shot video of two runs. Ill post tomorrow morning.

It was a very dissapointing night for #931. 12.30 @ 112.5 with a 1.738. 26psi and a pretty aggressive tune on racegas only made 112.5mph. The lag was pretty bad, I had to launch it over 6000rpm on a two step to make any boost on the line. All my other runs were bad: 13's with 2.1 and 2.0 60' times bogging. My last run was a 14.2 @ 108 at 28psi! then on the way home the turbo started making tons of noise and wouldn't spool up at all. Pretty sure the T3T4 died. sucks after all the work fabricating the o2 housing, external, ic pipes and such to install it on saturday.
 

NateCrisman

Well-known member
Joined
Nov 22, 2008
Messages
2,054
Location
Blairstown, NJ
Well, this is what 931 looks like now:
543365990_ueQeM-L.jpg


Pulled the complete engine/trans/suspension/steering in one shot out the bottom. Im intending to install it this way into 139 maybe next week after doing some work on the engine (BSE, Tbelt, Cams,head rebuild, non crunched oil pan, maybe aluminum flywheel)
543366213_VA56X-L.jpg

543366710_YpccG-L.jpg


This is all the bolts required to remove it in this manor. Took from 2pm till 5pm. pretty fast from running car to engine on the floor.
543366933_uC5sP-L.jpg


Pic of the turbo setup that went on last weekend.
543367294_4NrSX-L.jpg


tomorrow (saturday) Im going to get the engine on a stand and pull the head, front case, and oil pan off. Also need to snag the fuel tank, lines, and a bunch of engine compartment items from 931 before getting it off the lift.
 

turbowop

Well-known member
Joined
Apr 29, 2001
Messages
11,972
Location
Yakima, WA
If you want a belize green engine bay, just have a local automotive paint shop mix the factory color into some spray cans. Should be less than $75 to do the whole engine bay.
 

NateCrisman

Well-known member
Joined
Nov 22, 2008
Messages
2,054
Location
Blairstown, NJ
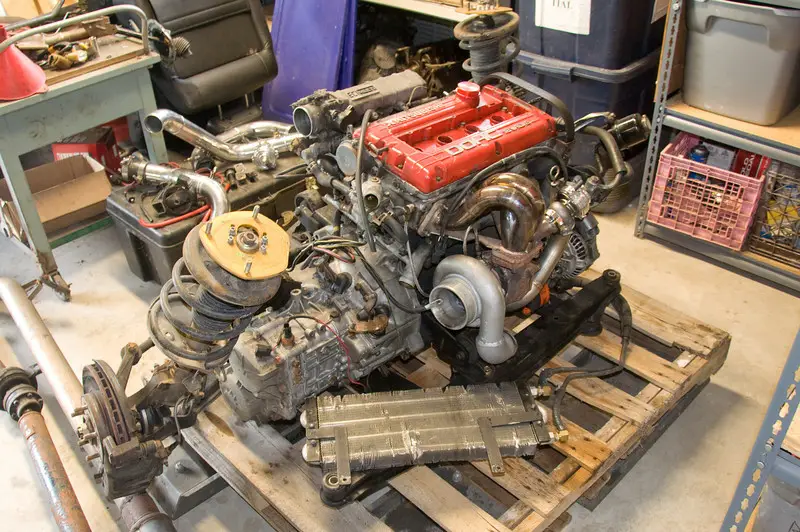
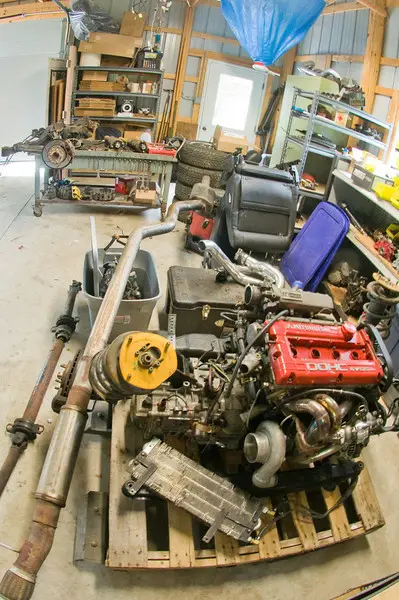
Tuesday I was able to finish up removing all the parts needed from #931 and get it outside off the lift. Here's pretty much everything needed to reassemble #139 into a running car, other than a good T3T4. /ubbthreads/images/graemlins/rofl.gif
548040187_BDB5C-L.jpg


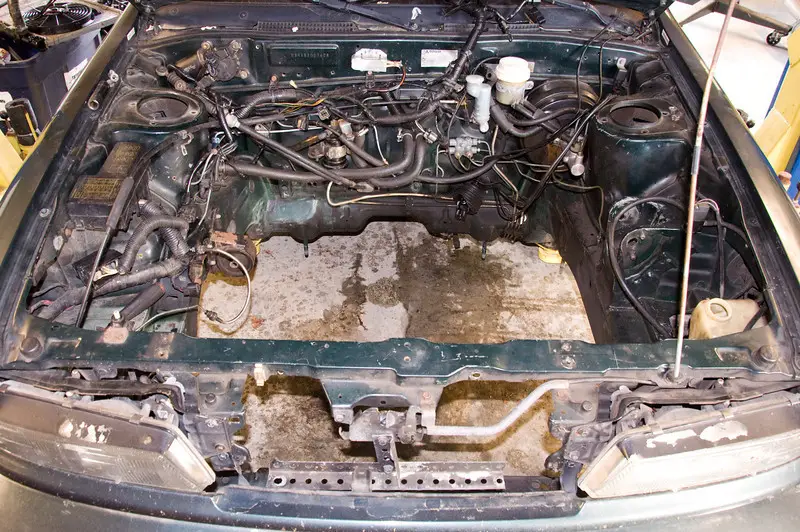
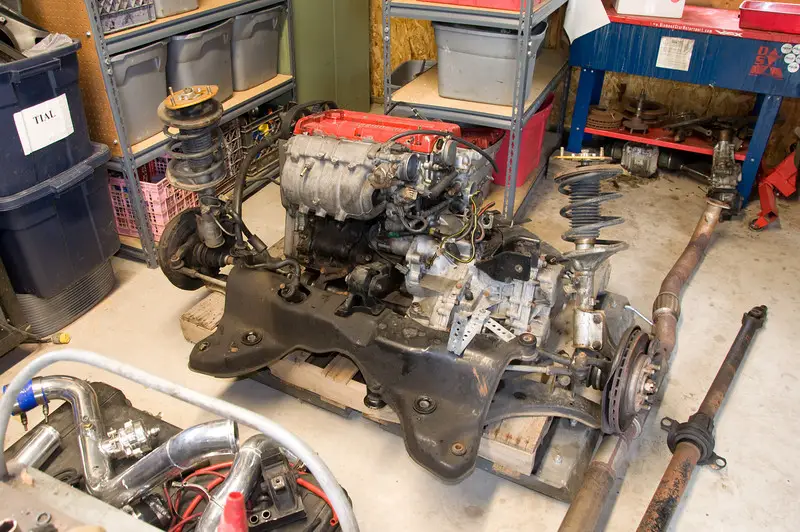
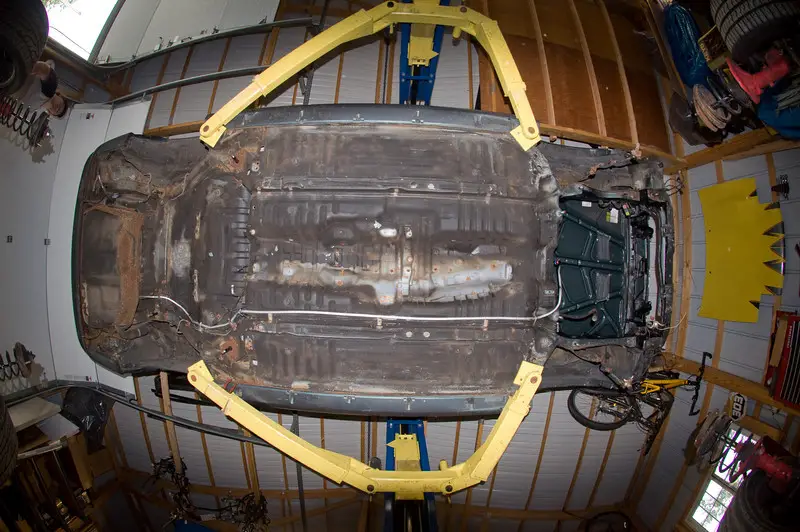
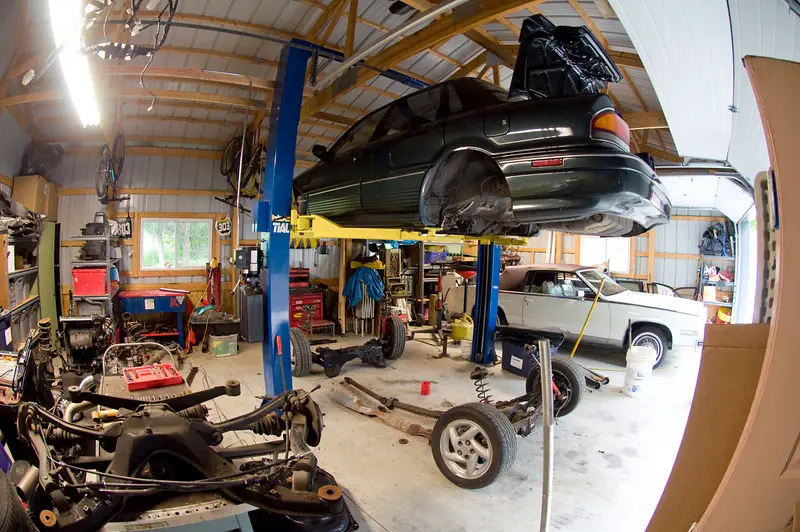
Then I rolled 139 onto the lift and started removing everything on the underside: driveshaft, rear subframe and diff/axles, heat shield, parking cables, steering rack subframe, rack, control arms, shocks, brakes, hubs. That put me to here:
548038119_Z3Xkj-L.jpg

548039324_ELiCH-L.jpg


I still need to pull the fuel tank, rear brake lines, that -8 line, and maybe the rear bumper support. Then I want to go at all the little rust spots with a wire wheel. most of the rust spots are just exposed ends of bolts for seats, belts, shifter..ect. Then Im planning to wash the bottom and go at it with a new layer of undercoating or paint.

Then need to start getting the rear subframe cleaned and painted, then reinstalled with the 4bolt diff.

Debating getting a rebuilt dsm steering rack now while it's apart since that is such a pita to change a year down the road. Also have to get going on the motor work and a new turbo before I can do much on the front end.

But anyway, progress is happening. Im hoping to have the car together and on the road by the end of June.
 

NateCrisman

Well-known member
Joined
Nov 22, 2008
Messages
2,054
Location
Blairstown, NJ
No pics from today. /ubbthreads/images/graemlins/idea.gif

Removed: fuel tank, fuel lines and rear brake hard lines, all the exhaust hangers, rear tow loops, and the rear bumper assembly.

DAMN the rear bumper was heavy:

39.5lb on my shipping scale for the rear support (went to the scrap steel pile behind the garage)
6lb for the pair of tow loops, also in the scrap
8lb of rear bumper foam! wtf that's heavier than it looks.
3.5lb exhaust heat shield

All that stuff isn't going back on for a nice 57lb of weight loss. Brackets to hold up the rear bumper cover shouldn't weight more than 3 or 4lb.

I'm thinking POR15 by GTLuke's recomendation for the undercoating. Thinking it might be good to go over the front hubs/caliper and all the rear suspension, maybe the engine block. Gotta order some of that stuff up, next week's project is going to be rust removal & undercoating and getting the gas tank, fuel lines, and rear subframe back in the car.
 

stealthtt24

Well-known member
Joined
May 24, 2005
Messages
2,746
Location
Orlando, FL
I respect you a lot for tearing this car down to near-nothing, but what kind of system have you worked out so you remember what bolt goes where?
 

NateCrisman

Well-known member
Joined
Nov 22, 2008
Messages
2,054
Location
Blairstown, NJ
Quoting stealthtt24:
I respect you a lot for tearing this car down to near-nothing, but what kind of system have you worked out so you remember what bolt goes where?


Bolts come off. If rusty they go in the garbage. If clean they go in a bucket which sits in the parts washer at the end of a day. Clean bolts then get organized into storage tubs the next day after drying by thread size and length. I have all the good hardware from the last 4 cars that I parted out this year, so I have more than enough hardware to replace any rusty bolts with better stuff.

These bins are now about twice as full.
519250822_62Gnz-M.jpg


I don't really need a system, as this will be about the 20th time I have torn a dsm down to bare chassis. (yeah yeah GVR4 not a dsm...but all the same bolts go in the same spots). Assembly of these cars is pretty much permanently mapped in my brain.
 
Last edited:

NateCrisman

Well-known member
Joined
Nov 22, 2008
Messages
2,054
Location
Blairstown, NJ
Quoting porcaro:
Mad props for going this in depth. Very nice work.


I had originally intended to just buy this shell and swap my mechanicals into it quickly and get it running asap. But as usual, things are never as nice as you hope. While the body on 139 is in excellent shape, the underside was starting to deteriorate from sitting on a lawn, mostly the original subframes and suspension.

These subframes, suspension arms, gas tank, fuel lines, brake lines on my old car were in better condition so they are going in after a throughout cleaning and rust prevention. I really intend to keep this car around for a long time and if Im going to basically build it from scratch, I don't want to be looking at rust, dirt, or corrosion after hundreds of hours of labor.

so now this project is becoming something of a restoration than a quick drivetrain swap.
 

NateCrisman

Well-known member
Joined
Nov 22, 2008
Messages
2,054
Location
Blairstown, NJ
Funny, I was all ready to order some POR15 to do the undercoat and all the exposed cast steel parts on the car (brake calipers, engine block, xcase, rear dif), and was talking to my grandfather about it. Seems he's used it on his ModelT ford before and my local Napa autoparts stocks it. AWESOME.

Looking like tuesday Ill have another full day to clean parts, start undercoating, and maybe start working on the wiring harnesses. I'm planning to strip out all the wiring for ABS, AC, emissions solenoids, and misc wiring that isn't hooked up.
 

bustedsm

Well-known member
Joined
Nov 30, 2006
Messages
844
Location
Ripley, Tennessee
I wish I had a lift so I could do that too, but my jackstands did me just fine /ubbthreads/images/graemlins/smile.gif
 

Wish I had the time and space to do such a nice job
looks pretty bad ass so far keep the pics coming.
 
Last edited by a moderator:
Support Vendors who Support the GVR-4 Community
Boosted Fabrication ECM Tuning ExtremePSI Fuel Injector Clinic Jacks Transmissions JNZ Tuning Kiggly Racing Morrison Fabrications RixRacing RockAuto RTM Racing STM Tuned
Top