The Top Mitsubishi Galant VR-4 Resource

Join the best E39A 1991-1992 Mitsubishi Galant VR-4 community and document your GVR4 journey.

  • Software Upgraded - Reset Your Password to Login
    In order to log in after the forum software change, you need to reset your password. If you don't have access to the email address you used to register your GVR4.org account, you won't be able to reset your password. In that case, follow the instructions here to regain access to the forum.

building of a ggsx

tektic

Well-known member
Joined
Dec 19, 2012
Messages
1,497
Location
ronkonkoma, ny
Hello,

I have been on this site here and there as I have had about 9 dsm cars over the years. Now I finally have a reason to join. After parting out a 93 6bolt 4bolt eclipse I was looking for a suitable rust free shell to swap into. I was originally looking for a starion, or a mirage but when I saw this car I knew it was the one.

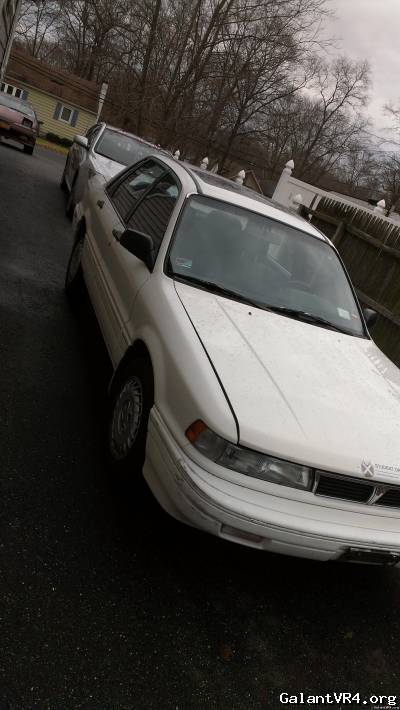
I found a 91 galant Gsx auto (FYI Rear Gear ratio stock is 3.307 J1a diff) with 87k miles, with Zero rust that was driven by an old lady in the bronx, who used it to teach drivers ed until a tps malfunction stopped the transmission from shifting properly. Body is a little rough but I'm going to overlook that for now.
(Anyone want parts for a full automatic conversion?)


I have a good bit of plans for it by the end of January
in no particular order:

•Power wash & wax
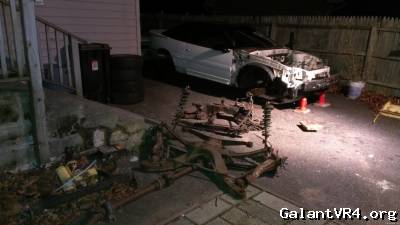
•Remove engine & trans
•Clean rust proof and or paint everything

Install The following:
•master clutch cylinder
•Shifter cables
•shifter w/aluminum bushings
•welded pedals w/brass bushings
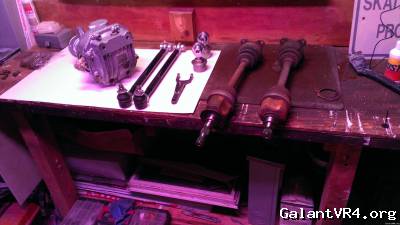
•4 bolt rear diff axles + cups
•New rear upper control arm
•Rear active toe Elimination from jay racing(GGSX doesn't have 4ws)
•Wire the harness for knock and the extra maf wire
•Install wide band o2 sensor
•Relocate Battery to trunk
•Disable auto dash lights and neutral test switch
•5 lug conversion
•Swap rear sway bar (The dsm is 20mm & ggsx is 19mm )
•Touch up the bottom with por 15 paint & rubber coating
•Swap Rack from DSM (Mine Is leaking bad)
•Spray some rubberized under coating

It's going to be a busy month. I have to spray the doors of my jeep first to get it out of my garage.

The Engine from this car:

Spun bearing in 0 mile motor

Engine is at a shop getting machined
It's going to be 2.1L
•86mm cylinder bore
•Eagle 94mm crank (on order)
•Eagle rods w/22mm wrist pins only part in lower end that was salvageable
•Manley 9.0:1 pistons (on order)
•Balance shaft elimination
•think I'm going with bi-metal bearings. maybe king ??

Head has to be cleaned but its in decent shape
(besides some imprints from debris in cylinder 4)
•1mm oversize valves
•SUPERTECH Dual Valve Springs
•new seals and titanium retainers
•bronze valve guides
•gsc power 268 cams
•Gates blue timing belt

I have a custom sheet metal intake I have never seen anywhere else that I will be connecting with either the stock throttle body or a 93 turbo DSM unit. I haven't decided yet. It doesn't have a throttle cable bracket ill have to have one welded on. I also need to figure out a more elegant solution for manifold pressure lines.

I have an eprom ecu socketed and ready to go but will probably keep the stock computer without a turbo for the first couple thousand miles. I can program chips and have a couple dozen blanks if anyone needs mods.

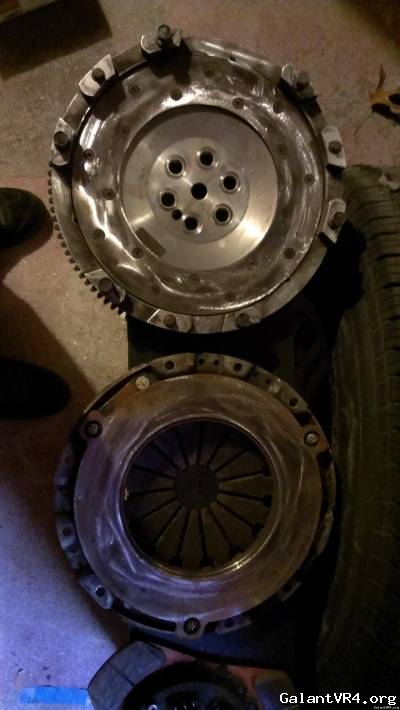
I have a three puck clutch and lightened flywheel from other car clutch looks new, but fly wheel and pressure plate look scuffed up on purpose. Kinda dumb but it should be fine.


Let The Build Begin
 
Last edited:

ade

Well-known member
Joined
Aug 16, 2011
Messages
303
Location
Paumanok NY
awe snap!!! another new new yorker, welcome. from your plans, you've got your work cut out for you. good luck, the forum is here if help is needed.

looks like someone took scotch brite and scoffed them up. perhaps to clear up surface rust.. maybe?
 
Last edited:

IncorpoRatedX

Well-known member
Joined
May 28, 2003
Messages
5,593
Location
Arizona
Don't ruin that car by stuffing a manual in it!!
 

tektic

Well-known member
Joined
Dec 19, 2012
Messages
1,497
Location
ronkonkoma, ny
I guess I can fix the auto trans but I have all the manual parts from the Gsx dsm. From what I understand this auto won't hold up to turbo duty though.
I can't drive an automatic. It makes me angry whendoesn't do what I want.

It seemed a little deeper than what scotchbright woud do.
Can anyone identify the flywheel?
Maybe I can just get a new surface to bolt on.

Today's progress:
Cleaned up spare rear trailing arms from ds
Removed broken abs speed sensor with a drill bit an a pliers (some of the tin case is still in there but I'm going to be welding them shut so whatever)
Coated whole thing with por 15 they instantly look awesome

next:
Going to figure out how to get active toe bushing out... Thinking big drill bit around the sides in a circular motion like I did with the subframe mounts
Decide if I'm going to do the bearings now or wait till I do the breaks or struts.
 

Vr4junkie

Well-known member
Joined
Jun 25, 2011
Messages
596
Location
Some wack town in CA
Yea man I know what you mean about the auto trannys pisses me off too especially when there breaking down its just not like a good old 5speed good luck with the build.
 

tektic

Well-known member
Joined
Dec 19, 2012
Messages
1,497
Location
ronkonkoma, ny
Here is the rear swing arms (trailing arms) before:

This is after extensive cleaning and metal ready:

Here's they are after first coat of por15.

Better than new, lighter too. lol. I have some seized bolts from brake dust shields to remove yet. Some broken ones to. Looks like there not going back on.

I have play in one of the bearings and the parts store by me wants to sell me a hub assembly for $65. I didn't go see it but it seemed like a front wheel drive part # NT512012. Can anyone tell me what this is for? I was looking on rock auto for the bearing set, searching for mb part numbers but I don't think they had everything I needed. Does anyone sell a complete kit?

I previously welded my a pedal assembly but it was a little off when I was done. The clutch pedal didn't come up high enough. I worked on that today to get it a longer through. I gained a half inch or more, but it might just be misaligned now. I have to see what happens when I bolt it in.

Up... It use to not touch the top now it goes all the way /ubbthreads/images/graemlins/smile.gif


Down... Touches here too.


I weakened the weld with a wiz wheel and hit it with a hammer till it was where I wanted it.

After a test fit on the fire wall I will weld it again. There are brass bushings in here to replace the stock plastic ones. In the dowel pin for clutch slave too.

after looking at this picture it looks like the bases don't line up evenly. When I bolt it to the fire wall the clutch peddle might not come all the way up again. /ubbthreads/images/graemlins/banghead.gif

edit: Did a little adjusting and painting pedals look good under dash.


Last edited:

tektic

Well-known member
Joined
Dec 19, 2012
Messages
1,497
Location
ronkonkoma, ny
At the current state of turbocharger prices I found this to be the the best option For my power and my budget goals.
Turbo-CHRA-Upgrade-Kit-Mitsubishi-TD05H-18G
I have a MHI e316g hot side or a ported eBay housing for this cartage to go into. This has a bigger waste-gate flapper. Going to keep internal gate.

The Goal is 345-380hp with my 2.2L build while trying to retain good spool time. I choose the td05 18g because as explained to me, the tdo5 20G is inefficient also more laggy, and 16g was too small for the 2.2l displacement and hp goal. I want something that bolts to the manifolds I have and doesn't break the bank.

I was also thinking of upgrading to there 3" anti-surge compressor housing. It would only be about $50 more. I'm Not sure if it's necessary but it will probably help smooth things out.

I've also seen some used tomioka racing td05-18g for a wrx sub $300, and was thinking about this as an option too.

Thoughts, experiences, Suggestions?

Edit: Found a used Hahn super 16g. Its the one with the 10cm t3 housing with a mbc for $80 shipped. It's in good shape. I will only be using the cartage in my ported Chinese e316g hot and cold housings. This turbo was not run with water in the past so it was probably on a 420a engine. I ordered a Kinugawa turbo install kit. Kit included ss braided oil line to ofh, ss braided water lines and banjo bolts, crush washers and It looks to be good quality. Hard to beat it for $65
 
Last edited:

tektic

Well-known member
Joined
Dec 19, 2012
Messages
1,497
Location
ronkonkoma, ny
welded my rear toe eliminator kit today.


I'm no welder but they seemed very solid when I was done. I left the bolts and sleeve in for added support, and to fill the holes. Will finish painting soon. Side note: Por 15 holds up well to heat.

Ever see an intake manifold like this?

Would you use it in your project?


Also cleaned up my trans case oil pan and thermostat housing. I don't think my pick up tube is useable. There's got to be bearing sludge in it. The oil pan was horrendous. I need to paint it.
I painted the doors to my jeep last Friday and there finally not sticky any more. I was going to move it out of my garage and move the Galant in to start dissembling it, but I'm reluctant.

It's a big project. I'm scared.

Plan Is Attack from all angles. Face it forward into the garage and put it on four 24" jack stands then Drop the rear sub frame and remove the engine and tranny. I only have the dsm rear sway bar and no upgraded sub frame bushings But I think I have everything else.
Next I have to wire for extra sensors and Install Clutch Line, master, pedal assembly, and swap shifters. If it sounds like I'm repeating myself its because I am. I'm trying to talk myself into it.


Questions:
Are the rear break calipers the same on the ggsx as a awd dsm? Should be right Yes they are the same.
Is there anything I should do to the tranny or the rear before installing besides changing fluids?
Are the engine or trans mounts in the Galant different than a dsm? I need to know what to paint.Yes they are different. I ended up filling my original ggsx mounts with window weld.


Last edited:

tektic

Well-known member
Joined
Dec 19, 2012
Messages
1,497
Location
ronkonkoma, ny
Rear Is Done.

DSM Manual 4bolt rear
DSM 20mm sway bar
5 Lug Cross drilled Slotted roters
3s Adjustable upper control arms
Jay racing rear toe eliminator kit
Everything is coated with por 15, Flat black Rustoleum, and then either waxed or rubber coated.


Started On the Interior Today.


I Got All the automatic Junk Out Without breaking it.( Its For sale )
The Welded manual pedal assembly is in and the DSM shifter with Aluminum bushings.

I'm going to wait till after the engine is out to install the clutch master and cut the hole for the cables. The hole for the clutch master was real easy to cut. I spent the most time looking for my shifter bushings.

It does seem I'm missing a piece. The DSM had a separate metal bracket for the steering wheel to bolt to. The auto pedal assembly has that piece welded to it. I may just cut it as I don't have the piece it left with the donor car. Also I need to fill the hole from the auto shifter cable in the floor.
 
Last edited:

tektic

Well-known member
Joined
Dec 19, 2012
Messages
1,497
Location
ronkonkoma, ny
Thank you! /ubbthreads/images/graemlins/smile.gif

Sunday is my day to rest, however I did get the engine hoist from my friends house this morning. I disconnected everything but the AC yesterday Tomorrow I will attempt to remove the ac compressor from the engine and remove the engine and trans in one piece. (sans transfer case, made that mistake before) Was planning on going away next week, but now it looks like I'm waiting till spring break. So more time to work on this project. Hopefully my block will be done next week.
 

tektic

Well-known member
Joined
Dec 19, 2012
Messages
1,497
Location
ronkonkoma, ny
This sucks! I broke the head off one of the long skinny for the ac compressor and i cant get the auto trans to clear the left frame rail. Been at it for 3 hours now.
 

tektic

Well-known member
Joined
Dec 19, 2012
Messages
1,497
Location
ronkonkoma, ny
Friday Update:
Motor is out, shifter cables are installed.
Front sub frame has been disassembled, por15ed, painted, and waxed.
New ES front control arm bushings, Fidanza flywheel friction plate, Southbend stage 3 endurance Kevlar clutch kit, Rebuilt dual piston front calipers, and used FWD DSM steering knuckles all on order.

Cleaned up the rack from my parts car and have installed new Deeza inner tie rods. I have Deeza outers on my dd, a 1991 nt DSM and like them. They are both high quality parts.

Sunday:
Today I thoroughly cleaned the engine compartment and exposed any rust spots and prepped with metal ready. The worst spot was under the rad support and under the battery tray. The rusty accessory brackets along with the spots in the car will be getting the same por15 Rustolium spray paint treatment. I may spray the whole bay Rustolium white. I haven't decided yet.

edit: Rustolium is not chemical resistant and not well suited for an engine bay.

 
Last edited:

tektic

Well-known member
Joined
Dec 19, 2012
Messages
1,497
Location
ronkonkoma, ny

The e39 Harness compared to the manual DSM harness. All the interior plugs are different.

DSM left auto GGSX on the right.

This whole branch is for the auto tans. Except for the one that connects to the fuse box, and the switch for the starter.

I striped it down to bare wires removed all lines pertaining to the auto trans, added a line for the knock sensor, resisters for the fuel injectors, provisions for my wide band, maf reset wire, and a 2g maf plug. I also fixed any and all broken pieces of wire or plugs. Solder and heat shrink tubing was used on every connection along with 3 rolls of electrical tape.

Finished product

Edit 10-26-13: added reverse plug to three prong connector starter harness. Added shielded knock sensor from turbo harness. Added fuel pressure oil pressure gauge lines. Added fpr line for cyclone control. Added ignition kill switch. Rerouted wires off firewall.
 
Last edited:

tektic

Well-known member
Joined
Dec 19, 2012
Messages
1,497
Location
ronkonkoma, ny
Finished a 2g dual piston front break upgrade and repaired broken brake lines.
stainless steel lines, cross drilled rotors and new pads were used front and back.

Front subframe was removed and and refinished with same metal ready, por-15, rustolium, and wax procedure I used on the rear.
A refurbished low mile manual 1g rack was used in the place of my leaking auto unit with new inner and outer tie-rods. I added 1g dsm fwd steering knuckles with new bearings. The ground control coil-overs will go on the car after the thing actually runs.

I cleaned engine bay and decided it can use a coat of paint. I have some white Imron 333 industrial paint leftover from my jeep project.
If you are unfamiliar with this paint it is super strong and highly scratch and chemical resistance. I have never brushed it on before but but plan to for this project. I took off the bumper and am going to modify the rad support for the fmic then paint everything all at once.
The next problem is fitting my big intercooler under a stock bumper.

A set of new GSC Power-Division's DSM S1 268/268 cams are on their way to my house.
I purchased a new Southbend Kevlar clutch kit and a new surface for my scuffed flywheel plate.
I also picked up a used set of FIC 950cc and a hahn race craft super 16g turbo.
The turbo case is kind of wacky and the 10cm exhaust housing is too large from what I gather.
I will swap out both with ported 14b compressor cover and MHI evo 3 hot side.

The rims are bent but look nice on the car while its in the garage.
 
Last edited:

G

Staff member
Joined
Feb 24, 2004
Messages
8,896
Location
zompton
Looks good, what's different about the 2g dual piston setup compared to the vr4 and 1gb dual piston setups?
 

tektic

Well-known member
Joined
Dec 19, 2012
Messages
1,497
Location
ronkonkoma, ny
2g needs a bajo bolt to install. also the pistons are 1mm bigger. I just ordered the wrong ones...
 

tektic

Well-known member
Joined
Dec 19, 2012
Messages
1,497
Location
ronkonkoma, ny
Finally found the time to paint my engine bay. I used Imron® 3.5 HG DuPont paint. It is very toxic, short exposure to the fumes will kill you. A fresh air respirator is required to use it. Like previously mentioned I brushed it on with a 1.5" natural hair brush. I have sprayed in the past and wasn't ready to do it again. Not much prep under the paint. 3 step por15 applied to anything brown, when dry everything was scuffed with red scotch bright then dusted and cleaned with a fast evaporating chemical cleaner.

Before:

Prep:

After:


Still no word on my motor...
I still need a fuel pump and a vr4 bumper cover. anyone selling?
 
Last edited:

tektic

Well-known member
Joined
Dec 19, 2012
Messages
1,497
Location
ronkonkoma, ny
Working on PCV System upgrades:
Saw Jack's pvc post about how catch cans are bad and that the multiple ports in the valve cover he made in the stock fashion was good. I'm not buying in but decided to do a little porting to help the stock system, then add a catch can.

First up was the Valve cover:

The holes were drilled out and taped to 1/4"-18 NPT. Modified 1/4" mip x 3/8" barb connectors were screwed in.

The inside of the 90 was drilled out in steps to accept the copper tube so it gets wedged in good when pressure is applied. I don't like the way the 90° faces so I ordered a 45° 3/8" barb 1/4" mip connector on eBay along with some check valves. They don't sell 45° anything at home depot.

Next, Intake Manifold:
Much the same treatment here, make the hole bigger and tap it for 1/4" npt. My original tap was way off center. I used a carbide porting bit to open up the whole top so the new tap would be in the center of the stem. I opened up the hole all the way to the channel at the bottom and taped her.

Lighting is bad but this shows the difference between the new whole and the old.


I modified a eBay Catch can(Design Idea found Here):
I taped the inside of the hose barbs for 1/4"npt and threaded the compression to npt adapter to install the copper tube.

the intake tube side has a 1/4" sintered brass filter threaded into the hose barb(not shown).

I fashioned a stainless steel barrier with a grommet in it to accept the copper tube. Below the barrier are stainless steel scowering pads wrapped around the copper tube which is now full of holes. I may fill the top half with something else like green abrasion pads. I don't know yet. Brass filter should be good enough.


Last edited:
Support Vendors who Support the GVR-4 Community
Boosted Fabrication ECM Tuning ExtremePSI Fuel Injector Clinic Jacks Transmissions JNZ Tuning Kiggly Racing Morrison Fabrications RixRacing RockAuto RTM Racing STM Tuned

Recent Classifieds Listings

Top