cheekychimp
Well-known member
A few weeks ago, I posted that I had done this and a number of board members PM'd me asking how it was done. Since I had another gauge cluster lying around, I decided to do the whole thing again and document the process.
For this you will need:-
A small flathead screwdriver,
A small and medium sized philips head screwdriver,
A razor blade,
A toothbrush,
A couple of small coins,
A couple of "Post-It" notes,
Some poster paint or nail polish.
About an hour and a half ... and some patience.
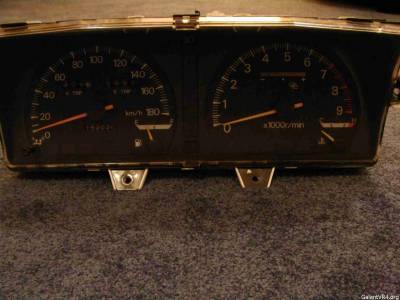
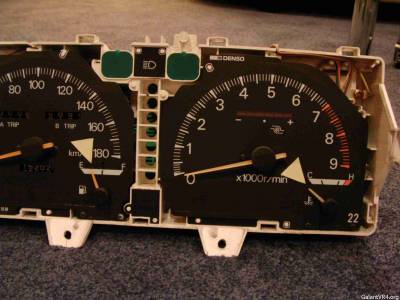
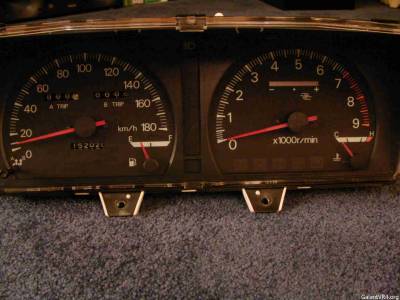
Okay once you get the gauge cluster out of the car, it should look something like this:-
To get the perspex cover off, look on the side of the cluster for the black plastic tabs holding it on, here:-
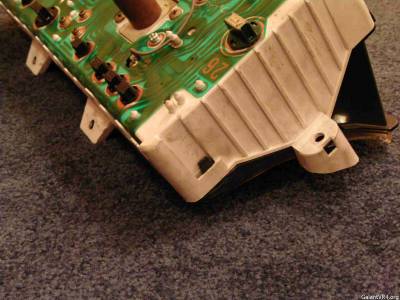
Whilst pushing the black tab against the white plastic casing, insert the small flathead screwdriver between the perpex cover and the white plastic casing and twist, so that the tab is forced down into it's locating hole:-

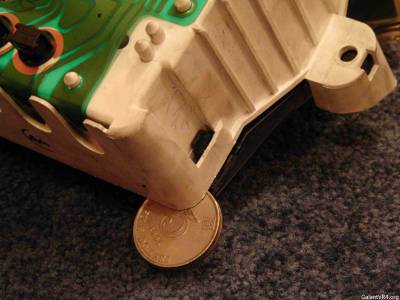
As this is the first tab, as soon as you remove the screwdriver, the tab will most likely click back into place. To prevent this you can insert a dollar coin or anything else small enough to fit in the gap to hold the perspex cover open:-
Then go round to the other side and repeat:-

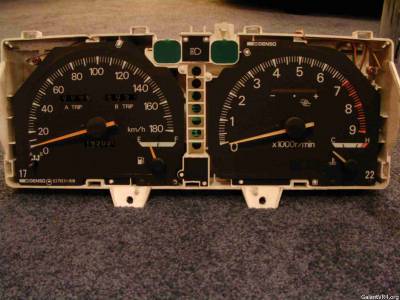
With the tabs on both sides unlatched, very very gently start to pull the perspex cover away from the rear white plastic casing, move your way around the casing, paying very careful attention to gently unlatch all the tabs around the edges until the cover comes off. You will then have the gauge cluster looking like this:-
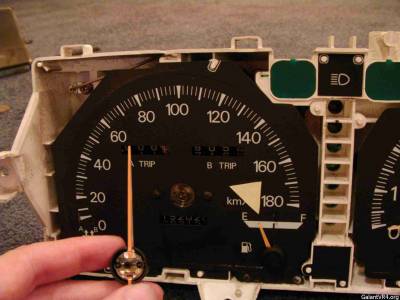
This is a good point to note the position of your needles. Speed and RPMs should be zeroed but you should note the position of your fuel and temperature needles and mark them with "Post-It" notes like this:-
Start with the large speedometer and RPM needles. Hold them at the base and gently but firmly pull them straight off the surface of the dials. You can wiggle them slightly in the process but try to avoid any side to side movement that might damage or bend the spindles on which they are mounted. You need to pull quite hard but with a little persuasion, they will come off:-
On each side of each of the spindles there is a small philips head screw holding the celluloid dial in place. Remove them. Then remove the two screws below the fuel gauge and temperature gauge needles. You will then be able to carefully remove the celluloid dials, revealing two transparent plastic backing spacers which look like this:-
These just pull out:-
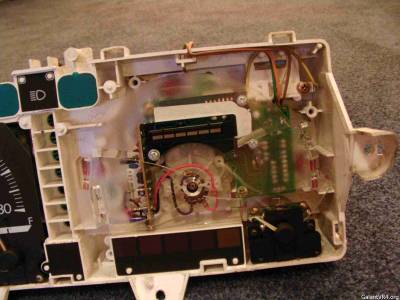
Turn the cluster over and starting with the temperature gauge assembly, remove the three philips head screws holding it in place:-
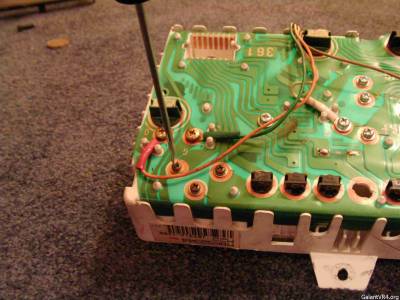
The assembly drops straight out:-
And it looks like this:-

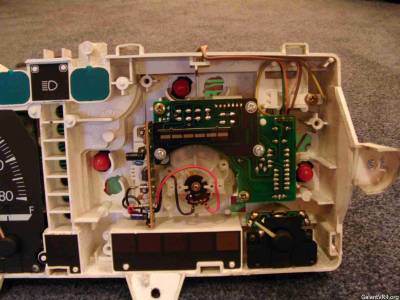
Turn the cluster back over and do the same with the fuel gauge assembly:-

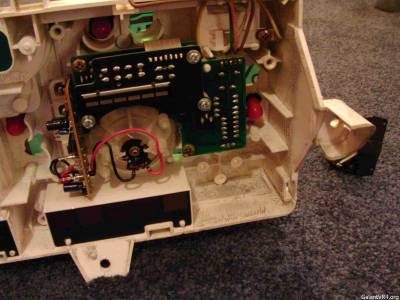
Don't worry about mixing up the two assemblies. If you look at the positions of the three screws holding each assembly on and the backs of the units, you will see they can only be installed one way:-

It isn't strictly necessary to remove the fuel and temperature gauge assemblies but it is much much easier to pull the needles off the spindles undamaged with the assemblies out. You can try it without removing them but in my opinion there is a serious risk of damaging the spindles due to the fact that it takes far more force to remove the smaller needles than the larger ones ... you have been warned !!!
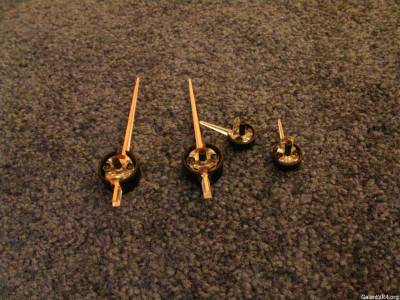
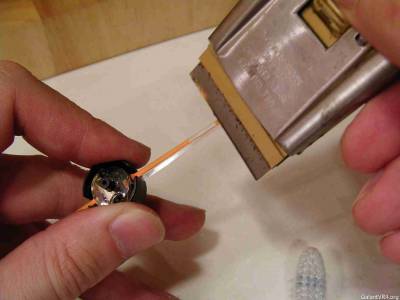
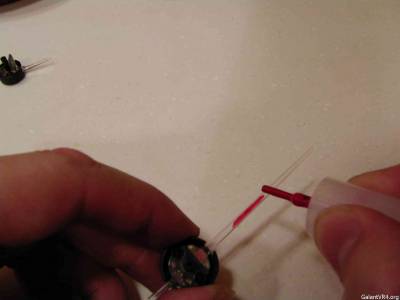
At this point you will have four transparent needles with a yellowish orange paint on the back of each one. The colour of the paint will probably be badly faded like these:-
In order to remedy this we need to scrape this backing paint off using the razor blade:-
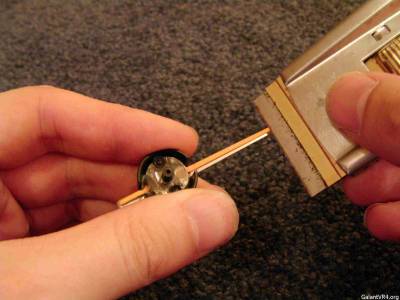
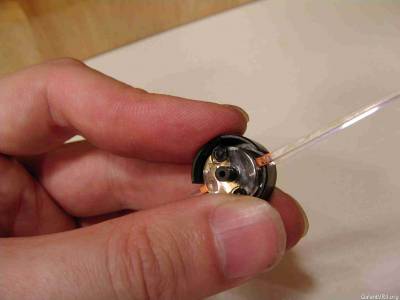
Don't be afraid, but just remember to scrape and not gouge !!! The paint comes off very easily, you can actually scrape it away with your fingernails but the razor blade will do it faster and cleaner:-
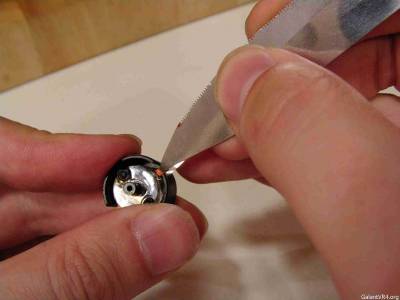
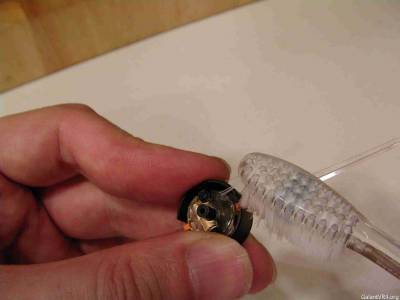
You may find a small knife useful for scraping away the paint from the confined area at the base of the needle, after loosening the paint you can clean the area with a toothbrush:-
You can then reapply fresh paint in the colour of your choice. I chose to use nail polish on this occasion as it can be removed easily if required.
The original paint shared an uncanny resemblance to kiddies' poster paint and if the needles don't illuminate well, I may well try poster paint in the future.
After this you can reassemble the gauge cluster whilst the paint is drying, reaffix the needles in the correct orientation and click the perspex cover back on ... voila !
For this you will need:-
A small flathead screwdriver,
A small and medium sized philips head screwdriver,
A razor blade,
A toothbrush,
A couple of small coins,
A couple of "Post-It" notes,
Some poster paint or nail polish.
About an hour and a half ... and some patience.
Okay once you get the gauge cluster out of the car, it should look something like this:-
To get the perspex cover off, look on the side of the cluster for the black plastic tabs holding it on, here:-
Whilst pushing the black tab against the white plastic casing, insert the small flathead screwdriver between the perpex cover and the white plastic casing and twist, so that the tab is forced down into it's locating hole:-
As this is the first tab, as soon as you remove the screwdriver, the tab will most likely click back into place. To prevent this you can insert a dollar coin or anything else small enough to fit in the gap to hold the perspex cover open:-
Then go round to the other side and repeat:-
With the tabs on both sides unlatched, very very gently start to pull the perspex cover away from the rear white plastic casing, move your way around the casing, paying very careful attention to gently unlatch all the tabs around the edges until the cover comes off. You will then have the gauge cluster looking like this:-
This is a good point to note the position of your needles. Speed and RPMs should be zeroed but you should note the position of your fuel and temperature needles and mark them with "Post-It" notes like this:-
Start with the large speedometer and RPM needles. Hold them at the base and gently but firmly pull them straight off the surface of the dials. You can wiggle them slightly in the process but try to avoid any side to side movement that might damage or bend the spindles on which they are mounted. You need to pull quite hard but with a little persuasion, they will come off:-
On each side of each of the spindles there is a small philips head screw holding the celluloid dial in place. Remove them. Then remove the two screws below the fuel gauge and temperature gauge needles. You will then be able to carefully remove the celluloid dials, revealing two transparent plastic backing spacers which look like this:-
These just pull out:-
Turn the cluster over and starting with the temperature gauge assembly, remove the three philips head screws holding it in place:-
The assembly drops straight out:-
And it looks like this:-
Turn the cluster back over and do the same with the fuel gauge assembly:-
Don't worry about mixing up the two assemblies. If you look at the positions of the three screws holding each assembly on and the backs of the units, you will see they can only be installed one way:-
It isn't strictly necessary to remove the fuel and temperature gauge assemblies but it is much much easier to pull the needles off the spindles undamaged with the assemblies out. You can try it without removing them but in my opinion there is a serious risk of damaging the spindles due to the fact that it takes far more force to remove the smaller needles than the larger ones ... you have been warned !!!
At this point you will have four transparent needles with a yellowish orange paint on the back of each one. The colour of the paint will probably be badly faded like these:-
In order to remedy this we need to scrape this backing paint off using the razor blade:-
Don't be afraid, but just remember to scrape and not gouge !!! The paint comes off very easily, you can actually scrape it away with your fingernails but the razor blade will do it faster and cleaner:-
You may find a small knife useful for scraping away the paint from the confined area at the base of the needle, after loosening the paint you can clean the area with a toothbrush:-
You can then reapply fresh paint in the colour of your choice. I chose to use nail polish on this occasion as it can be removed easily if required.
The original paint shared an uncanny resemblance to kiddies' poster paint and if the needles don't illuminate well, I may well try poster paint in the future.
After this you can reassemble the gauge cluster whilst the paint is drying, reaffix the needles in the correct orientation and click the perspex cover back on ... voila !
Last edited:
